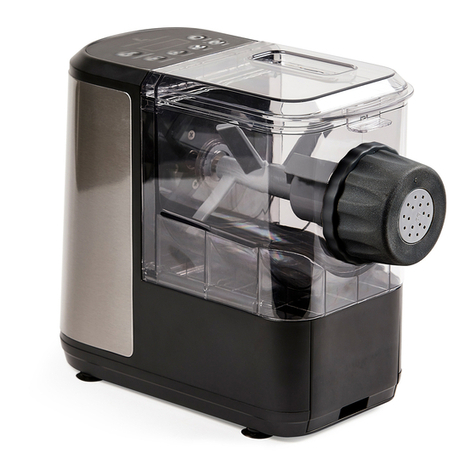
Zass ZPM 01 User manual

MODELS/MODELE/MODELLEK:
ZPM 01
Magyar Română English
INSTRUCŢIUNI DE UTILIZARE
HASZNÁLATI UTASÍTÁS
OPERATING INSTRUCTIONS
READ THESE INSTRUCTIONS CAREFULLY BEFORE USING THE MACHINE
CITIŢI CU ATENŢIE ACESTE INSTRUCŢIUNI DE FOLOSIRE ÎNAINTE DE A UTILIZA APARATUL
A GÉP HASZNÁLATA ELŐTT ALAPOSAN OLVASSA EL EZT A HASZNÁLATI UTASÍTÁST
ZASS Romania SRL (CUI RO15328988)
Ungheni nr. 40 A, cod 547605, Mureş
Telefon: 0265-262870, 0265-269209, Fax: 0265-307670
www.zassromania.ro, e-mail: o[email protected]
Unic importator în România:
Egyetlen importőr Romániában:
Sole importer in Romania:

1
1
6
2
7
3 4
5
10
A
B
9
8
7
6
3
2
4
5

English
3
Congratulations on purchasing this ZASS product. Like all ZASS products, this product was
designed on the basis of the latest technical knowledge and was manufactured using the most
reliable and modern electrical / electronic components.
Before putting the appliance into operation, please allow yourself a few minutes to read the
following instructions for use.
Thank you !
Carefully read the precautions
in this manual before operating
the unit!
WARNING: Do not touch the device,
cable or mains plug with wet hands!
1. GENERAL INFORMATION and SAFETY PRECAUTIONS
Always unplug the appliance before disassemble, assemble or
cleaning. There is a possibility of hand injury.
CAUTION!
• This device is intended for making and processing pasta dough.
• This appliance shall not be used by children. Keep the appliance and its cord out of reach of
children.
• This device should not be used by people with impaired sensory or mental faculties or who do
not have adequate experience and/or knowledge of such devices, unless they are supervised
by a person responsible for their safety, or have received instructions from such a person on
how to use the device.
• Children shall not play with the appliance.
• This device is for personal use only and is not intended for commercial applications.
• Please keep the device and packaging material out of the reach of children and pets.
• The device should not be used if it is damaged.
• There may still be some production residues on the device. To avoid harmful eects to your
health, clean the device and all accessories thoroughly before using them for the rst time (see
the “Cleaning and Storage” chapter).
• Only use fresh ingredients which have not passed their best-before date.
• Never immerse the device, the mains plug or the cable in water or other liquids.
• Do not place the device near to any sink or wash basin so that the device, the mains plug and
the cable cannot accidentally come into contact with water.
• Do not touch the device, cable or mains plug with wet hands.
• The device should only be used in closed rooms. Place the device on a stable, rm surface.
• Maintain a sucient distance from heat sources such as hobs or ovens in order not to damage
the device.
• The device should only be connected to a properly installed socket with earthing contacts.
The socket must also be readily accessible after connection. The mains voltage must match
the technical data for the device (see the “Technical Data” chapter). Only use suitable extension
cables whose technical data is the same as that of the device.
• Ensure that it is not possible to trip over the connected mains cable. Do not allow the cable to
hang over the edge of tables or kitchen counters.
• Position the cable in such a way that it does not become squashed or bent and does not come
into contact with hot surfaces.
• Do not expose the device to extreme temperatures, strong temperature uctuations, direct
sunlight or moisture.

2. KEY TO MACHINE PARTS (Page 2)
A
A
A
A
A
A
A
B
B
B
B
B
A
A
B
B
A
1
5
2
6
3
7
9
2
5
3
7
6
4
8
1
4
10
- Mixing container lid;
- Function switch (round) with the switch positions:
EXT (“Extruding”); MIX (“Mix”=Mixing/kneading)
- Motor unit;
- Mixing container;
- Kneading spiral and dough screw conveyor with drive shaft
(inside the mixing container);
- Pasta attachment (inside the locking ring);
- Connecting piece;
- Attachement for fettuccine;
- Attachement for Oriental noodles / Asian noodles;
- Attachement for linguine;
- Attachement for capellini (angel hair);
- Attachement for tagliatelle;
- On/O switch (square) with the switch positions:
EXT (“Extruding”); OFF (“O”); MIX (“Mix”=Mixing/kneading)
- Locking ring;
- Attachement for spaghetti;
- Attachment for rigatoni;
- Locking clip of the mixing container lid;
4
• Always check the device for damage before putting it into operation. If the device, cable or
plug shows visible signs of damage, the device must not be used until the damage has been
repaired. Do not use the device if it has malfunctioned or been dropped. In such cases, get the
device checked out by an authorised specialist.
• Do not insert any foreign bodies through into the housing, the slots or in the mixing container
in order to prevent damage to the device. Do not introduce any objects into the ventilation slots
of the device and make sure that no objects block the ventilation slots.
• Keep hair, body parts, jewellery and clothing away from rotating parts of the device in order to
prevent injuries.
• The device should be used only when it is fully assembled. Always make sure that the lid is
placed on correctly as the device will only work properly when the mixing container lid is placed
on correctly.
• Only use accessories which are recommended by the manufacturer in order to prevent damage
to the device.
• Never leave the device unsupervised during operation.
• Do not drop the device or allow it to be knocked violently.
• In the event of damage/faults, switch the device o immediately.
• Always unplug the appliance before disassembled, assembled or cleaning.
• Always pull the plug and never the cable.

3. ASSEMBLY
5
English
• Always assemble the device in full before you connect it to the mains power.
1. Place the mixing container on the motor unit.
2. Push the dough screw conveyor into the connecting piece.
3. Push the kneading spiral onto the drive shaft of the dough screw
conveyor.
The kneading spiral can only be pushed onto the drive shaft if the
feather key in the opening of the kneading spiral extends into the
groove on the drive shaft.
4. Now push the drive shaft of the dough screw conveyor with
the kneading spiral through the round dough outlet opening in the
mixing container.
5. Insert the drive shaft into the pentagonal opening of the motor
unit.
6. Push the connecting piece up to the limit stop into the round
dough outlet opening of the mixing container. On the connecting
piece there is a circular mark (shown in black on the picture). Make
sure when inserting the connecting piece that the circular mark on
the connecting piece is opposite the circular mark on the mixing
container.
IMPORTANT: BEFORE INITIAL USE!
Before you can use the device, you must:
• unpack the items supplied
• clean the device and accessories
UNPACKING
• Keep children and animals away from the packaging material. There is a danger of suocation!
• Unpack all parts and check the items supplied (see the “Items Supplied” chapter).
• There may still be some production residues on the device. To avoid harmful eects to your
health, clean the device and all accessories thoroughly before using them for the rst time
(see the “Cleaning and Storage” chapter).

7. Turn the connecting piece clockwise (in the direction of the
arrow marked on the mixing container) so that the circular mark
on the connecting piece is opposite the lower circular mark on the
mixing container. The bayonet closure is now locked shut.
8. Place a pasta attachment of your choice onto the dough outlet
opening on the connecting piece.
9. Place the locking ring onto the pasta attachment and screw it
clockwise to tighten it.
10. Place the mixing container lid onto the mixing container in such
a way that the tab on the back part of the lid ts into the recess on
the motor unit.
11. Turn down the lid so that the two pins on the rear edge of the
lid are guided through the slots in the mixing container into the
motor unit.
12. Press down the mixing container lid until it locks in place.
The device has a safety switch. This is located inside the motor unit and is activated by
a pin on the mixing container lid. The device can only be switched on using the On/O
switch if the mixing container lid is placed on correctly and the pin activates the safety
switch!
4. USING
• Make sure that the On/O switch is in the OFF position before you connect the device to the
mains power.
• Do not overll the mixing container! Excessively large quantities of ingredients may cause
damage to the device. Larger quantities should be spread between two or more kneading
operations. The ll level per operation should not be more than approx. 450 g.
• Do not operate the device for more than 15 minutes without interruption! Operating the device
continuously for too long may cause damage to the device. Switch the device o after 15 minutes
and let it cool down for a few minutes before you switch it back on again.
• If dough gets stuck during kneading or the kneading spiral does not rotate evenly, never
attempt to reach through the slot-shaped openings in the mixing container lid using your ngers
or an object to try to clear the reason for the blockage. Always pull the plug out and then open
the mixing container lid to nd out what the reason is for the blockage (e.g. dough too dry).
6

5. OPERATION
5.1. First of all, you should only pour dry ingredients such as our and herbs into the mixing
container (liquid will not be added until later).
5.2. Place the mixing container lid on the mixing container (see the “Assembly” chapter, steps 10-12).
5.3. Move the round function switch to the MIX (mixing/kneading) position.
5.4. Move the square On/O switch to the MIX (mixing/kneading)
position to start the kneading process.
5.5. Slowly pour liquid (water, vegetable juice or an egg-water mixture)
through the long slot on the left-hand side of the mixing container lid
to add it to the other ingredients. Make sure that the liquid does not
overow and mixes evenly with the other ingredients.
5.6. If you have added too much liquid, you may need to add a little bit
of our through the slots on the right-hand side of the mixing container
lid until the dough has the right consistency.
5.7. Depending on the quantity, the kneading of the dough may take around 5-10 minutes.
Switch o the device by moving the square On/O switch to the OFF position as soon as the
ingredients have been processed to form a smooth, malleable dough (see also the “Tips for
Optimum Pasta” chapter).
5.8. Allow the dough to rest for approx. 30 minutes.
5.9. Then move the round function switch to the EXT (extruding) position.
5.10. You should then move the square On/O switch to the EXT (extruding) position in order to
start the process of extruding the pasta dough.
• Make sure that the openings of the respective pasta attachment do not become blocked during
the extrusion of the pasta dough! In this case, use the On/O switch to switch the device to the
OFF position and then remove the blockage. Never insert objects into the openings of the pasta
attachments while the device is switched on.
• Always move the On/O switch rst to the OFF position before you move the function switch
to EXT or MIX. The function switches must not be switched over while the kneading spiral is
still rotating!
• Always assemble the device in full before you connect it to the mains power.
You will nd details about quantities of ingredients following the “Troubleshooting” chapter in the
“Basic Recipe for Pasta Dough” chapter.
7
English

5.11. Make sure that the dough emerges evenly from the pasta attachment.
5.12. Grip hold of the pasta emerging from the machine (do not pull or squeeze it!) and trim the
pasta to the length you want.
5.13. Lay the pasta out on a oured surface so that it can start to dry.
5.14. To get all of the pasta dough out of the mixing container, tilt the device forwards slightly so
that the pasta dough can be conveyed more easily from the screw conveyor through the pasta
attachment.
5.15. When the process of making pasta has nished, switch o the device by moving the On/
O switch to the OFF position.
5.16. Remove the mains plug from the mains socket.
5.17. Clean the device after each use in the manner described in the “Cleaning and Storage”
chapter.
6. TIPS FOR OPTIMUM PASTA
The dough should be evenly kneaded, slightly moist and granular. The
dough should have the consistency of pea-sized little lumps of dough
which are not too dry or too moist.
• The dough is too dry if it has a powdery consistency. Add more liquid (water or vegetable juice)
by the teaspoon until the dough has assumed a granular consistency of pea-sized little lumps
of dough.
• The dough is too moist if large lumps of dough remain stuck to the kneading spiral. Add our
by the teaspoon until the dough has assumed a granular consistency of pea-sized little lumps
of dough.
• For the pasta dough, you can use both normal household our as well as wholegrain our and
our made from durum wheat semolina.
• Vegetable juices made, for example, from spinach, carrots or tomatoes are ideal for adding
colour to your pasta or rening the avour.
• If you add a little bit of olive oil to the pasta dough, it will slide better through the outlet openings
of the pasta attachments.
• Sprinkle our on your pasta directly as it emerges from the outlet opening and place it down
separated on a smooth oured surface to dry. This will prevent the pasta from sticking together.
• Note that the cooking time for fresh pasta is generally shorter than for dried pasta from the
supermarket. A cooking time of approx. 3-4 minutes is usually sucient. There are of course
dierences in the cooking time depending on the type of pasta. The thin capellini, for example,
require an even shorter cooking time than 3 minutes. We recommend that after approx. 1 minute
you check at regular intervals whether the pasta is “al dente”.
• Fresh pasta can be kept for approx. 1-2 days in the fridge and frozen in the freezer for as long
as six months. To stop the pasta from sticking, you should lay the pasta out to dry for approx.
1-2 hours before you store it in the fridge or freeze it.
8

• Remove the plug from the mains socket before cleaning the device.
• Never immerse the motor unit in water or other liquids!
• Do not use corrosive or abrasive cleaning agents to clean the device. These could damage
the surface.
The plastic parts (mixing container or kneading spiral) may become discoloured as a result of
the addition of certain ingredients (e.g. vegetable juices containing a lot of colouring agent).
However, this is harmless and will not have any adverse impact on the avour of your pasta.
The discolouration of plastic parts by ingredients containing a lot of colouring agent does not
constitute grounds for a complaint.
7.1. Dismantling the Device
Dismantle the device each time before you clean it so that you can clean all accessories with
warm water. If necessary, allow stubborn remnants of dough to soften for a little while in warm
water:
7.1.1. Unscrew the locking ring.
7.1.2. Remove the pasta attachement.
7.1.3. Open the lid by pressing together the locking clip and pulling the lid up at the same time.
Remove the lid.
7.1.4. Disengage the connecting piece by turning it anticlockwise (in the opposite direction to the
arrow marked on the mixing container).
7.1.5. Pull the connecting piece together with the dough screw conveyor and the kneading spiral
out of the mixing container.
7.1.6. Remove the kneading spiral from the drive shaft of the dough screw conveyor.
7.1.7. Remove the connecting piece from the dough screw conveyor.
7.1.8. Take the mixing container o the motor unit.
7.2. Cleaning
• All accessories (apart from the motor unit!) are dishwasher-safe.
• Clean all accessories (apart from the motor unit) in the dishwasher or by hand using warm
water and mild detergent. If necessary, soften the individual parts in warm soapy water so that
even more stubborn remnants of dough can be removed.
• Clean the motor unit with a slightly damp cloth and, if necessary, a little detergent. Wipe the
device dry with a clean cloth.
7.3. Storage
• Reassemble the device after cleaning once all of the individual parts have dried completely
(see the “Assembly” chapter).
• Store the device in a dry, clean place that is not accessible to children.
7. CLEANING AND STORAGE
8. TROUBLESHOOTING
If the device should stop working properly, rst check whether you are able to correct the
problem yourself. If you are not, contact the customer service department.
Do not try to repair a faulty device yourself!
9
English

Problem
The device does not work.
Kneading spiral does not rotate evenly or
the pasta dough is expressed unevenly/
with interruptions from the pasta
attachment.
The locking cannot be undone.
The pasta dough only emerges very
slowly from the outlet openings of the
pasta attachment.
The connecting piece cannot be inserted.
The kneading spiral suddenly stops
during use.
• Is the On/O switch in the OFF position ? move the On/O switch to MIX or
EXT.
• Is the selection made on the function switch the same as that on the On/O
switch ? The switch positions of the two switches must match (MIX or EXT).
• The mixing container lid is not placed on correctly. Open the mixing container
lid again and insert the rear tab into the recess on the motor unit. Lower the lid
and close it so that the locking clip locks in place. The pin on the back edge of
the lid must activate the safety switch in the motor unit.
• Is the plug inserted in the mains socket correctly?
• Is the mains socket defective ? Try another mains socket.
• Check the fuse of your mains connection.
• Too much pasta dough. Switch the device o and pull the mains plug from
the mains socket. Remove some pasta dough from the mixing container and
then continue the kneading process.
• The pasta dough is too dry. Add some liquid, e.g. water or olive oil, to the
dough.
• Move the function switch and then the On/O switch to the MIX position and
then allow the device to run for a few seconds. Move the On/O switch to the
OFF position and then try to undo the locking ring again.
• Check the consistency of the dough. The dough must not be too moist or
too dry. The dough should have a granular consistency with roughly pea-
sized little lumps of dough. Add more water or more our to the dough if
necessary.
• Check whether any dough residues have become stuck to the connecting
piece or on the mixing container. If they have, remove them and then try
again.
• The connecting piece must be inserted in such a way that the circular mark
on the connecting piece is opposite the upper circular mark on the mixing
container. Only then can the connecting piece be inserted into the mixing
container up to the limit stop and then be locked by turning it clockwise.
• Is there too much pasta dough in the mixing container?
Switch o the device, take o the mixing container lid and remove some of
the pasta dough from the mixing container. Then switch the mixing container
and the device back on again. We recommend that you process larger
quantities of dough in several operations.
Possible cause / solution
9. BASIC RECIPE FOR PASTA DOUGH
Also follow the notes in the “Assembly” and “Use” chapters before you start making pasta.
For the pasta dough, you can use both normal household our as well as wholegrain our or
our made from durum wheat semolina. The pasta dough can be made both with and without
egg. In general, no limits are placed on you when it comes to making pasta. However, you
should always ensure when making pasta that the dough should be evenly kneaded, slightly
moist and granular before you extrude it. The dough should have the consistency of pea-sized
little lumps of dough which are not too dry or too moist.
10

10. TECHNICAL SPECIFICATIONS
Voltage supply: 220-240V~, 50/60 Hz
Output: 180 W
Protection class: II
ITEMS SUPPLIED
• 1 Pasta maker
• 7 pasta attachments: fettucine, spaghetti, tagliatelle, linguine, rigatoni, capellini (angel hair),
Oriental noodles/Asian noodles
• 1 measuring cup
• These operating instructions
• Warranty Certicate
INGREDIENTS
- 400g our
- 4 eggs
- 1 tsp salt
- s-2 tsp oil
PREPARATION IN THE PASTA PROFESSIONAL
1. Add our and salt to the mixing container.
2. Close the mixing container by putting the lid on.
3. Mix eggs and oil together.
4. First move the function switch to the MIX position, then move the On/O switch to the MIX
position.
5. Allow the dough to be kneaded for 5-10 minutes.
6. If the dough is too dry, add a little bit of water by the teaspoon through the slots in the mixing
container.
7. If the dough is too moist, add a little bit of our by the teaspoon through the slots in the mixing
container lid.
8. Move the On/O switch to the OFF position and allow the dough to rest for approx. 30
minutes.
9. First move the function switch to the EXT position and then move the On/O switch to the
EXT position.
10. Your pasta dough will now be extruded out of the outlet openings of the pasta attachment.
11. Sprinkle a little our on the pasta dough directly as it emerges, trim the pasta to the length
you want and place it down on a oured surface until your dough has been fully processed to
produce pasta.
12. Then cook your pasta in boiling salted water or lay it out for 1-2 hours to dry so that it can
then be stored in the fridge (max. 1-2 days) or frozen (max. 6 months).
11
English

Felicitări pentru cumpărarea acestui produs ZASS. Ca toate produsele ZASS, şi acest produs
a fost conceput pe baza cunoştinţelor tehnice cele mai noi şi s-a fabricat prin utilizarea
componentelor electrice/electronice cele mai abile şi moderne.
Înainte de a pune aparatul în funcţiune, vă rugăm să vă acordaţi câteva minute ca să citiţi
instrucţiunile de utilizare care urmează.
Vă mulţumim !
Vă rugăm citiţi cu atenţie aceste intrucţiuni
de utilizare înainte de utilizarea aparatului!
1. INFORMAȚII GENERALE şi MĂSURI DE PRECAUŢIE
Deconectați întotdeauna aparatul înainte de a-l demonta, monta
sau curăța. Există posibilitatea vătămării mâinilor.
ATENŢIE !
• Acest dispozitiv este proiectat pentru a face și procesa aluatul pentru paste.
• Acest aparat poate utilizat de către persoane cu aptitudini zice, senzoriale sau mentale
reduse sau cu experiență redusă numai sub strictă supraveghere și după ce li s-a făcut
instructajul referitor la modul sigur de utilizare a aparatului și la pericolele implicate.
• Copiii nu se pot juca cu acest aparat.
• Aparatul este proiectat numai pentru uz casnic și nu este destinat pentru utilizări profesionale.
• Vă rugăm să nu lăsați la îndemâna copiilor sau animalelor acest aparat sau ambalajele
acestuia.
• Acest dispozitiv nu trebuie utilizat dacă este deteriorat.
• Pot exista reziduuri de producție pe acest aparat. Pentru a evita efectele nocive asupra
sănătății, curățați aparatul și toate accesoriile acestuia cu mare atenție înainte de a-l folosi
pentru prima oară (citiți capitolul “Curățare și depozitare”).
• Folosiți numai ingrediente proaspete ce nu au depășit data expirării.
• Nu scufundați niciodată aparatul, cablul sau corpul principal în apă sau în alte lichide. Nu
așezați aparatul lângă chiuvete sau recipiente cu apă, pentru ca aparatul, corpul principal și
cablul să nu intre în mod accidental în contact cu apa.
• Nu atingeți aparatul cu mâinile ude.
• Nu utilizați aparatul în exterior și amplasați-l întotdeauna într-un mediu uscat.
• Așezați aparatul pe o suprafața plană, stabilă și dură.
• Pentru a evita deteriorarea aparatului, mențineți o distanță sucient de mare între acesta și
sursele de căldură cum ar plitele sau cuptoarele.
• Aparatul trebuie conectat la o priză cu împământare instalată în mod corespuzător. Priza
trebuie să e ușor accesibilă după ce aparatul a fost conectat. Tensiunea principală trebuie să
corespundă cu cea indicată pentru acest aparat (a se vedea capitolul „Specicații”). Utilizați
numai prelungitoare adecvate ale căror date tehnice corespund cu cele ale aparatului.
• Asigurați-vă că nu este posibilă agățarea sau împiedicarea de cablul principal. Nu permiteți
cablului să atârne de marginea mesei sau a blatului de bucătărie.
• Poziționați cablul în așa fel încât să nu e strivit sau îndoit și să nu intre în contact cu suprafețele
erbinți.
• Nu expuneți aparatul la temperaturi extreme, uctuații extreme de temperatura, la umezeală
sau în lumina directă a soarelui
• Întotdeauna deconectați aparatul de la sursa de energie dacă este lăsat nesupravegheat și
înainte de a asamblat, dezasamblat sau curățat.
• Nu inserați corpuri străine în carcasă, mufe sau recipientul pentru amestecare, pentru a evita
deteriorarea aparatului. Nu introduceți obiecte în oriciile de ventilare ale aparatului, pentru a vă
asigura că nu sunt blocate oriciile de ventilare.
• Nu lăsați aparatul nesupravegheat în timpul funcționării.
• Nu răsturnați aparatul și asigurați-vă că nu este lovit în mod violent.
ATENȚIE: Nu atingeți aparatul,
cordonul de alimentare sau ştecherul
cu mâinile ude!
12

Română
2. PREZENTARE (Pagina 2)
• Vericați întotdeauna ca aparatul să nu e deteriorat înainte de a-l pune în funcțiune. Dacă
aparatul, cablul sau priza prezintă semne vizibile de deteriorare, până când nu este reparat,
aparatul nu trebuie utilizat. Nu utilizați aparatul dacă funcționează defectuos sau dacă a fost
trântit. În acest caz, duceți aparatul pentru a vericat de un service autorizat ZASS.
• Mențineți părul, membrele corpului, bijuteriile și obiectele vestimentare departe de piesele
rotante ale aparatului pentru a preveni rănirea.
• Aparatul trebuie utilizat numai atunci când este asamblat complet. Întotdeauna asigurați-vă că
ați montat capacul în mod corect, deoarece aparatul va funcționa în mod corespunzător numai
atunci când capacul recipientului de amestecare este montat în mod corespunzător.
• Folosiți numai accesoriile recomandate de către producător pentru a preveni deteriorarea
aparatului.
• Dacă apar deteriorări sau funcționează în mod defectuos, opriți imediat aparatul.
• Întotdeauna trageți de ștecher, nu direct de cablu.
• Opriți aparatul și deconectați-l de la sursa de energie înainte de a schimba accesoriile sau de
a atinge piesele ce se mișcă în timpul utilizării.
• În cazul în care cablul de alimentare este deteriorat, trebuie înlocuit de către un service
autorizat ZASS sau de persoane calicate, pentru a evita pericolele.
• Este absolut necesar să mențineți în permanență aparatul curat deoarece acesta intră în
contact direct cu mâncarea. Vă rugăm să citiți secțiunea Curățare din manual pentru instrucțiuni
referitor la curățarea suprafețelor ce intră în contact cu alimentele sau cu uleiul.
• Există posibilitatea rănirii în cazul utilizării defectuoase.
• Trebuie avută grijă atunci când se manevrează lamele ascuțite, la golirea bolului precum și în
timpul curățării.
• Acest aparat este proiectat pentru utilizare casnică.
A
A
A
A
A
A
A
B
B
B
B
B
A
A
B
B
A
1
5
2
6
3
7
9
2
5
3
7
6
4
8
1
4
10
- Capac recipient amestecare;
- Buton mod de lucru (rotund) cu următoarele poziții:
EXT (“Extrudare”); MIX (“Mix”=Mixare/malaxare)
- Unitate motor;
- Recipient de amestecare;
- Spirale de amestecare și malaxor pentru aluat cu ax (în interiorul
recipientului de amestecare);
- Accesoriu pentru paste (în interiorul inelului de blocare);
- Piesă de conectare;
- Accesorii pentru fettuccine;
- Accesorii pentru tăiței orientali / Asian noodles;
- Accesorii pentru linguine;
- Accesorii pentru capellini (zulu de înger);
- Accesorii pentru tagliatelle;
- Buton de pornire/oprire (pătrat) cu următoarele poziții:
EXT (“Extrudare”); OFF (“Oprire”); MIX (“Mix”=Mixare/malaxare)
- Inel de blocare;
- Accesorii pentru spaghete;
- Accesorii pentru rigatoni;
- Slot blocare capac recipient de amestecare;
13

3. ASAMBLARE
• Montaţi complet aparatul înainte de a-l conecta la priza electrică.
1. Introduceți recipientul pentru amestecare pe unitatea motor.
2. Introduceți în piesa de conectare, până la capăt, șurubul alb
pentru aluat.
3. Introduceți ansamblul palete de malaxare pe axul șurubului alb.
Ansamblul de malaxare poate împins pe ax dacă slotul din
deschiderea sa se extinde în canelura de pe ax (aliniați canelurile
de pe șurub și malaxor).
4. Inserați ansamblu de mixare prin deschiderea rotundă din
recipientul de amestecare a aluatului.
5. Inserați axul în deschiderea pentagonală a unității motorului.
6. Împingeți piesa de conectare până la limită în deschizătura
rotundă a recipientului de amestecare. Pe piesa de conectare
se aă un semn rotund (se poate vedea cu negru pe imagine).
Asigurați-vă că atunci când inserați piesa de conectare, semnul
rotund de pe piesa de conectare se aă în opoziție cu semnul
rotund de pe recipientul de malaxare.
IMPORTANT: ÎNAINTE DE PRIMA UTILIZARE
Înainte de a utilizarea acestui aparat, trebuie să:
• Îndepărtați ambalajele
• Curățați aparatul și accesoriile
DESPACHETARE
• Țineți copiii și animalele departe de materialul de ambalare. Pericol de sufocare!
• Despachetați toate piesele și vericați articolele furnizate (consultați capitolul “Conținut cutie”).
• Pot exista reziduuri de producție pe acest aparat. Pentru a evita efectele nocive asupra
sănătății, curățați aparatul și toate accesoriile acestuia cu mare atenție înainte de a-l folosi
pentru prima oară (citiți capitolul “Curățare și depozitare”).
14

7. Rotiți piesa de conectare în sensul acelor de ceasornic (în
direcția săgeții marcate pe recipientul de amestecare) în așa fel
încât semnul circular de pe piesa de conectare să e în opoziție cu
semnul circular inferior de pe recipientul de conectare. Închiderea
de tip baionetă este acum asigurată.
8. Amplasați accesoriul dorit pentru paste în oriciul de pe piesa
de conectare.
9. Amplasați inelul de blocare pe accesoriul de paste și înșurubați-l
în direcția acelor de ceasornic pentru a-l strânge.
10. Așezați capacul recipientului de amestecare pe recipientul
de amestecare în așa fel încât piesa de pe partea din spatele
capacului să se potrivească în slotul de pe blocul motor.
11. Răsuciți capacul astfel încât cele două cleme de pe laterala din
spate a capacului să e inserate în sloturile de pe recipientul de
amestecare înspre blocul motor.
12. Apăsați recipientul de amestecare până când se blochează
pe poziție.
Aparatul are un întrerupător de siguranță. Acesta este localizat în interiorul blocului motor
și este activat de o clemă de pe capacul recipientului de amestecare. Aparatul poate
pornit folosind butonul Pornire/Oprire (On/O) dacă capacul recipientului de amestecare
este amplasat corect iar clemele activează întrerupătorul de siguranță!
4. UTILIZARE
• Asigurați-vă că butonul On/O este pe poziția OFF (Oprit) înainte de a conecta aparatul la priză.
• Nu umpleți excesiv recipientul de amestecare! Cantități excesive de ingrediente pot deteriora
aparatul. Cantitățile mai mari trebuie împărțite în două sau mai multe ture de malaxare. Nivelul
de umplere pentru ecare operațiune nu trebuie să e mai mare de aproximativ 450 grame.
• Nu permiteți funcționarea aparatului pentru mai mult de 15 minute fără întrerupere!
Funcționarea continuă a aparatului pentru perioade lungi va duce la deteriorarea
acestuia. Opriți aparatul după ecare 15 minute și lăsați-l să se răcească timp de minim
10 minute înainte de a-l porni din nou.
• Dacă aluatul se blochează în timpul operațiunii de malaxare și spirala nu se rotește, nu încercați
să introduceți degetele sau alte obiecte prin deschiderile capacului recipientului de amestecare
pentru a încerca să deblocați acest blocaj. Întotdeauna deconectați aparatul de la priză și apoi
deschideți capacul recipientului de amestecare pentru a descoperi motivul blocajului (ex. aluatul
este prea uscat).
15
Română

5. SUCCESIUNEA OPERAŢIUNILOR
5.1. Mai întâi, trebuie adăugate în recipientul de amestecare ingredientele
uscate, cum ar făina și ierburile aromatice (lichidele vor adăugate mai târziu).
5.2. Amplasați capacul recipientului de amestecare (a se vedea capitolul “Asamblare”, pașii 10-12).
5.3. Apăsați butonul rotund (mod de lucru) pe poziția MIX (amestecare/
malaxare).
5.4. Apăsați butonul pătrat On/O (Pornire/Oprire) pe poziția MIX
(amestecare/malaxare) pentru a începe procesul de malaxare.
5.5. Turnați încet lichidele (apă, suc vegetal sau orice amestec ou-
apă) prin oriciul lung de pe partea stângă a capacului recipientului de
amestecare, pentru a le adăuga celorlaltor ingrediente. Asigurați-vă
că lichidul nu este în cantitate prea mare și că se amestecă bine cu
celelalte ingrediente.
5.6. Dacă ați adăugat prea mult lichid, e posibil să e necesar să
adăugați mai multă făină prin oriciul din partea dreaptă a capacului
recipientului de amestecare până când aluatul are consistența corectă.
5.7. În funcție de cantitate, malaxarea aluatului poate dura aproximativ 5-10 minute. Opriți
aparatul mutând butonul pătrat On/O pe poziția OFF (Oprit) imediat ce ingredientele au fost
procesate să formeze un aluat moale, maleabil (a se vedea și capitolul “Idei pentru paste
optime”).
5.8. Lasați aluatul să stea timp de aproximativ 30 de minute.
5.9. Apoi apăsați butonul rotund pe poziția EXT (Extrudare).
5.10. Apăsați butonul On/O pe poziția EXT (extrudare) pentru a începe procesul de extragere
a aluatului de paste.
• Asigurați-vă că deschiderile accesoriului de paste folosit nu sunt blocate în timpul extragerii
aluatului de paste! În acest caz, folosiți butonul On/O pentru a trece aparatul pe poziția OFF
(oprit) și apoi îndepărtați blocajul. Nu inserați niciodată obiecte în deschiderile accesoriilor de
paste în timp ce aparatul este pornit.
• Întotdeauna aduceți butonul On/O pe poziția OFF (Oprit) înainte de a trece la funcția EXT sau
MIX. Butonul de funcție nu trebuie apăsat în timp ce ansamblul de malaxare se rotește încă!
• Întotdeauna asamblați în întregime aparatul înainte de a-l conecta la priză.
Veți găsi detalii despre cantitatea ingredientelor folosite după capitolul “Probleme de
funcționare!”, în capitolul “Rețete de bază pentru aluat de paste”.
16

5.11. Asigurați-vă că aluatul iese în mod constant prin accesoriul de paste.
5.12. Prindeți pasta ce iese din aparat (nu trageți și nu o striviți!) și tăiați pastele la lungimea la
care doriți.
5.13. Așezați pastele pe o suprafață plină de făină pentru a putea începe să se usuce.
5.14. Pentru a scoate tot aluatul de paste din recipientul de amestecare, înclinați ușor aparatul
în față astfel încât aluatul de paste poate împins mai ușor de șurubul convector prin accesoriul
de paste.
5.15. Atunci când s-a încheiat procesul de pregătire a pastelor, opriți aparatul aducând butonul
On/O în poziția OFF (Oprit).
5.16. Scoateți ștecherul din priză.
5.17. Curățați aparatul după ecare utilizare în modul descris în capitolul “Curățare și depozitare”.
6. RECOMANDĂRI PENTRU PASTE OPTIME
Aluatul trebuie malaxat în mod constant, să e ușor umed și granular.
Aluatul trebuie să aibă consistența unor bucăți de aluat mici de
dimensiunea bobului de mazăre, care să nu e nici prea uscat, nici prea
moale.
• Aluatul este prea uscat dacă are o consistență nisipoasă. Adăugați lichid suplimentar (apă sau
suc vegetal) cu lingurița, până când aluatul a ajuns la o consistență granulară cu bucăți de aluat
mici de dimensiunea bobului de mazăre.
• Aluatul este prea moale dacă bucăți mari de aluat rămân lipite de spirala malaxorului. Adăugați
făină cu lingurița, până când aluatul a ajuns la o consistență granulară cu bucăți de aluat mici
de dimensiunea bobului de mazăre.
• Pentru aluatul de paste, puteți folosi atât făină obișnuită cât și făină integrală sau făină dură.
• Sucurile vegetale sunt făcute, de exemplu, din spanac, morcov sau tomate, care sunt ideale
pentru a da culoare pastelor sau pentru un gust mai bun.
• Dacă adăugați puțin ulei de măsline în aluatul paste, va aluneca mai ușor prin deschiderile
accesoriile de paste.
• Puneți făină direct pe paste așa cum iese din deschideri, și puneți-le separat pe o suprafață cu
făină pentru a se usca. Acest lucru va împiedica pastele să se lipească una de cealaltă.
• Țineți cont că timpul de gătire pentru pastele proaspete e în general mai scurt decât pastele
uscate de la supermarket. De obicei un timp de gătire de 3-4 minute este sucient. Desigur
există diferențe la timpul de gătire în funcție de tipul de paste. Capellini subțiri, de exemplu,
necesită un timp de gătire mai mic de 3 minute. Recomandăm ca după aproximativ un minut să
vericați la intervale regulate de timp dacă pastele sunt “al dente”.
• Pastele proaspete pot ținute aproximativ 1-2 zile în frigider sau congelate în congelator
pentru o perioadă de maxim 6 luni. Pentru a împiedica pastele să se lipească, trebuie lăsate la
uscat pentru aproximativ 1-2 ore înainte de a le depozita în frigider sau înainte de a le congela.
17
Română

• Întotdeauna scoateți cablul de alimentare din priză înainte de a curăța aparatul.
• Nu scufundați niciodată blocul motor în apă sau în alte lichide!
• Nu utilizați agenți de curățare abrazivi sau corozivi pentru a curăța aparatul. Acest lucru poate
deteriora suprafața aparatului.
Piesele de plastic (recipientul de amestecare și spirala de malaxare) se pot decolora ca rezultat
al adăugării anumitor ingrediente (ex. sucuri vegetale ce conțin mulți agenți de colorare). Totuși,
acest lucru este inofensiv și nu va avea reacții adverse asupra aromei pastelor sau a funcționării
aparatului. Decolorarea pieselor de plastic datorată ingredientelor ce conțin mulți agenți de
colorare nu constituie motiv pentru înaintarea unei plângeri.
7.1. Demontarea aparatului
Demontați aparatul de ecare dată înainte de a-l curăța pentru a putea curăța toate accesoriile
cu apă caldă. Dacă este necesar, înmuiați în apă caldă bucățile de aluat uscat:
7.1.1. Deșurubați inelul de blocare.
7.1.2. Scoateți accesoriile de paste.
7.1.3. Deschideți capacul apăsând în același timp clemele de blocare și ridicați în același timp
capacul. Îndepărtați capacul.
7.1.4. Deconectați piesa de conectare întorcând-o în sens invers acelor de ceasornic (în direcția
opusă săgeții marcate pe recipientul de amestecare).
7.1.5. Tragețide piesa de conectare împreună cu șurubul convectorului (alb) și spirala de
malaxare în afara recipientului de amestecare.
7.1.6. Îndepărtați spirala de malaxare de pe axul șurubului convector.
7.1.7. Îndepărtați piesa de conectare din șurubul convectorului.
7.1.8. Scoateți recipientul de amestecare de pe blocul motor.
7.2. Curățare
• Toate accesoriile (mai puțin blocul motor!) pot spălate la mașina de spălat vase.
• Curățați toate accesoriile (mai puțin blocul motor) în mașina de spălat vase sau manual,
folosind apă caldă și detergent blând. Dacă este necesar, înmuiați piesele individuale în apă
caldă cu detergent, pentru a putea îndepărtate reziduurile de aluat uscat.
• Curățați blocul motor cu o lavetă umedă și, dacă este necesar, puțin detergent. Ștergeți
aparatul cu o lavetă curată pentru a-l usca.
7.3. Depozitare
• Reasamblați aparatul după ce l-ați curățat și după ce toate piesele individuale au fost curățate
complet (a se vedea capitolul Asamblare).
• Depozitați aparatul într-un loc uscat, curat, care nu este la îndemâna copiilor.
7. CURĂȚARE ȘI DEPOZITARE
8. PROBLEME DE FUNCȚIONARE
Dacă aparatul nu mai funcționează în mod corespunzător, întâi vericați dacă puteți rezolva
singuri această problemă. Dacă acest lucru nu este posibil, contactați departamentul service
al ZASS.
Nu încercați să reparați singuri un aparat deteriorat!
18

Problemă
Aparatul nu funcționează.
Spirala de malaxare nu se rotește în
mod egal sau aluatul este de consistență
neomogenă/vine cu întreruperi din
accesoriul de paste.
Nu poate desfăcută clema de blocare.
Aluatul de pastă iese foarte încet prin
deschizăturile accesoriului de paste.
Nu poate introdusă piesa de conectare.
Spirala de malaxare se oprește brusc în
timpul funcționării.
• Butonul On/O se aă pe poziția OFF (Oprit)? Mutați butonul de pe poziția
On/O pe poziția MIX sau EXT.
• Selecția făcută pe butonul mod de lucru este aceeași cu cea de pe butonul
On/O? Poziția de pe cele două butoane trebuie să e aceeași (MIX sau EXT).
• Capacul recipientului de amestecare nu este poziționat corect. Deschideți din
nou capacul recipientului de amestecare și inserați clema din spate
în spațiul de pe blocul motor. Coborâți capacul și închideți-l în așa fel încât să
rămână închis pe poziție. Pinul de pe partea din spate a capacului trebuie să
activeze întrerupătorul de siguranță de pe blocul motor.
• Cablul este introdus în mod corespunzător în priză?
• Priza este defectă? Încercați altă priză.
• Vericați siguranța de la panoul principal.
• Prea mult aluat. Opriți aparatul și scoateți ștecherul din priză. Scoateți o
parte din aluat din recipientul de amestecare și apoi continuați procesul de
malaxare.
• Aluatul de paste este prea uscat. Adăugați în aluat puțin lichid, cum ar apă
sau ulei de măsline.
• Mutați butonul mod de lucru și apoi butonul On/O pe poziția MIX și apoi
permiteți aparatului să funcționeze pentru câteva secunde. Mutați butonul On/
O pe poziția OFF și apoi încercați să desfaceți din nou clema de blocare.
• Vericați consistența aluatului. Aluatul nu trebuie să e prea moale sau prea
uscat. Aluatul trebuie să aibă consistență granulară cu bucățele de aluat de
dimensiunea bobului de mazăre. Adăugați apă sau făină în aluat dacă acest
lucru este necesar.
• Vericați dacă reziduuri de aluat s-au lipit de piesa de conectare sau de
recipientul de amestecare. Dacă este așa, îndepărtați-le și apoi încercați din nou.
• Piesa de conectare trebuie introdusă în așa fel încât semnul circular de pe
piesa de conectare să se ae în opoziție cu semnul circular de pe recipientul
de amestecare. Numai atunci poate introdusă piesa de conectare în
recipientul de amestecare până la semnul de limită, și apoi blocată prin
răsucirea în sensul acelor de ceasornic.
• Există prea mult aluat în recipientul de amestecare?
Opriți aparatul, scoateți capacul recipientului de amestecare și îndepărtați o
parte din aluatul din recipientul de amestecare. Apoi porniți din nou recipientul
de amestecare și aparatul. Recomandăm ca toate cantitățile mari de aluat să
e introduse în aparat în mai multe tranșe.
Soluții / cauze posibile
9. REȚETE DE BAZĂ PENTRU ALUAT DE PASTE
Citiți de asemenea notele din capitolele “Asamblare” și “Utilizare” înainte de a începe să faceți
pastele.
Pentru aluatul de paste, puteți utiliza atât făină normală de uz casnic, cât și făină integrală sau
făină obținută din semolă de grâu dur. Aluatul de paste se poate face atât cu sau fără ou. În
general, nu îți sunt puse limite atunci când vine vorba de prepararea pastelor. Cu toate acestea,
atunci când faceți paste, trebuie să vă asigurați că aluatul trebuie să e uniform frământat, ușor
umed și granular înainte de a-l extrage. Aluatul trebuie să aibă consistența bucățelelor de aluat
de dimensiuni mici, care nu sunt prea uscate sau prea umede.
19
Română

10. SPECIFICAȚII TEHNICE
Tensiune: 220-240V~, 50/60 Hz
Putere: 180 W
Clasa: II
CONȚINUT CUTIE
• 1 Mașină automată pentru paste
• 7 accesorii pentru paste: fettucine, spaghetti, tagliatelle, linguine, rigatoni, capellini (zulu de
înger), tăiței Orientali/Asian noodles
• 1 pahar de măsurare
• Instrucțiuni de utilizare
• Certicat de garanție
INGREDIENTE
- 400g făină
- 4 ouă
- 1 linguriță sare
- 1-2 lingurițe ulei
PREGĂTIREA PASTELOR
1. Adăugați făină și sare în recipientul de amestecare.
2. Închideți recipientul de amestecare punând capacul.
3. Amestecați ouăle cu uleiul.
4. Întâi aduceți butonul mod de lucru pe poziția MIX, apoi mutați butonul On/O pe poziția MIX.
5. Lăsați aluatul să e frământat timp de 5-10 minute.
6. Dacă aluatul este prea uscat, adăugați puțină apă cu lingurița prin oriciile recipientului de
amestecare.
7. Dacă aluatul este prea umed, adăugați puțină făină cu lingurița prin oriciile capacului
recipientului de amestecare.
8. Mutați butonul On/O pe poziția OFF și permiteți aluatului să se odihnească timp de
aproximativ 30 de minute.
9. Întâi aduceți butonul mod de lucru pe poziția EXT, apoi mutați butonul On/O pe poziția EXT.
10. Aluatul de paste va acum împins prin deschiderile din accesoriul de paste.
11. Puneți puțină făină peste aluatul de paste imediat ce iese din aparat, tăiați pastele la lungimea
dorită și puneți-le pe o suprafață dată cu făină până când a fost extrudat tot aluatul din aparat.
12. Apoi gătiți pastele prin erbere în apă sărată sau lăsați-le timp de 1-2 ore să se usuce ca să
poată depozitate în frigider (max 1-2 zile) sau în congelator (Max 6 luni).
20
Table of contents
Languages: