manuals.online logo
Brands
  1. Home
  2. •
  3. Brands
  4. •
  5. ZENEC
  6. •
  7. Dashcam
  8. •
  9. ZENEC ZE-RCE3701 User manual

ZENEC ZE-RCE3701 User manual

ZE-RCE3701
MONTAGE ANLEITUNG
DEVICE INSTALLATION MANUAL
DE
EN
DE
INSTALLATION
1. Die beiden Kreuzschlitz
Schrauben lösen
1
EN
INSTALLATION
1. Loosen the two Phillips
cross recess screws
2. Bremlicht-Reflektor-
gehäuse abziehen
Den weißen Systemstecker
abstecken
22. Remove the brake light
reflector housing
Un-connect the white
system plug of the vehicle
3. Die Montagebolzen aus
Edelstahl einschrauben
und unter Zugabe von
etwas Loctite handfest
anziehen (5Nm)
33. Screw in and tighten the
stainless steel mounting
bolts by hand (5Nm). Use a
dab of Loctite, if possible
EN
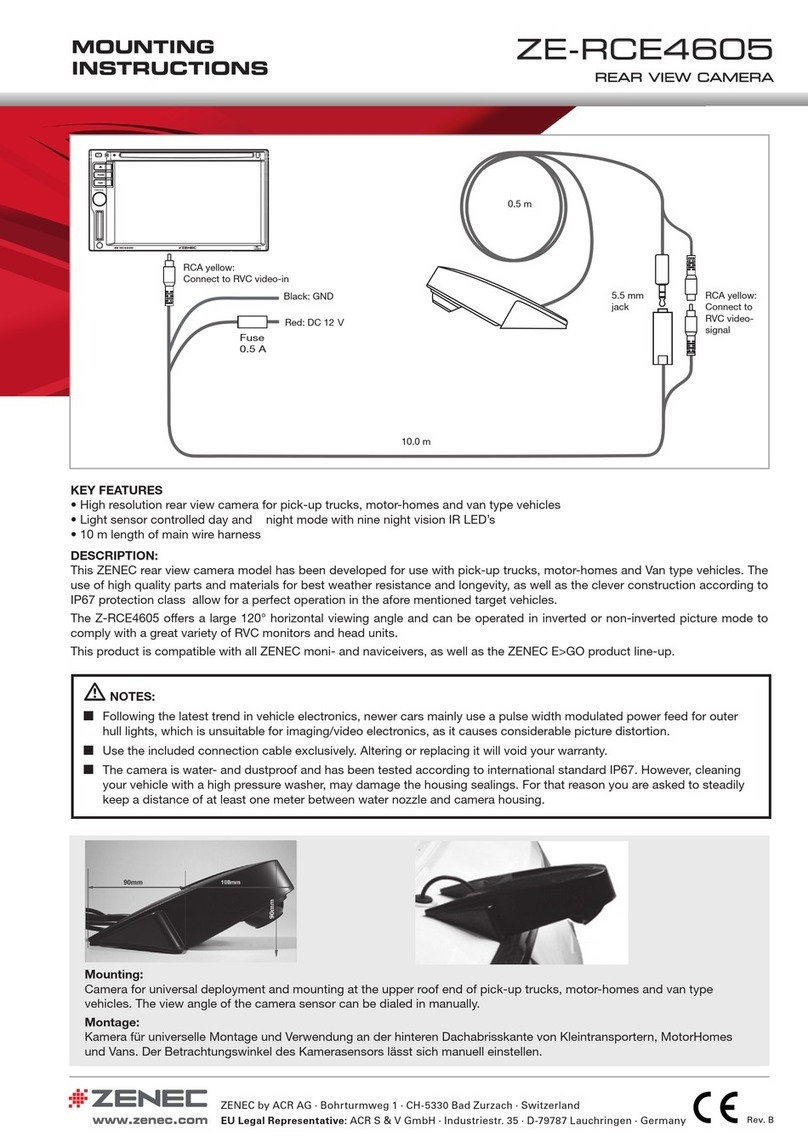
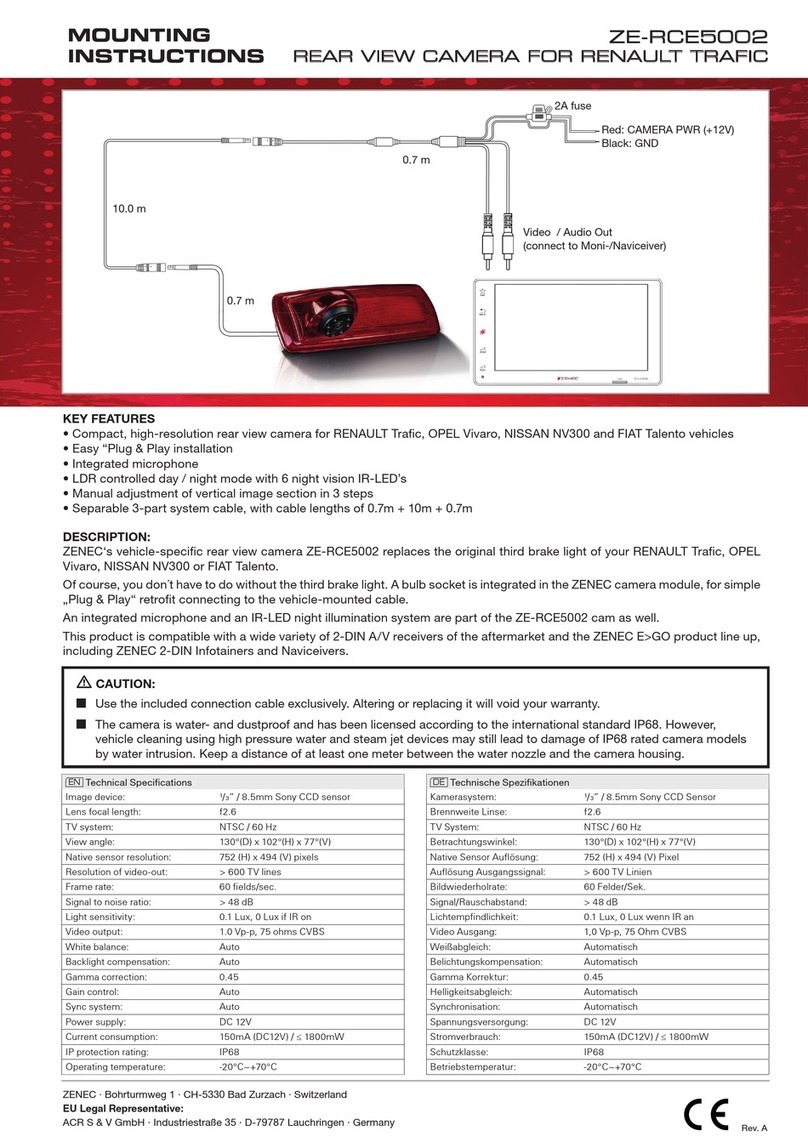
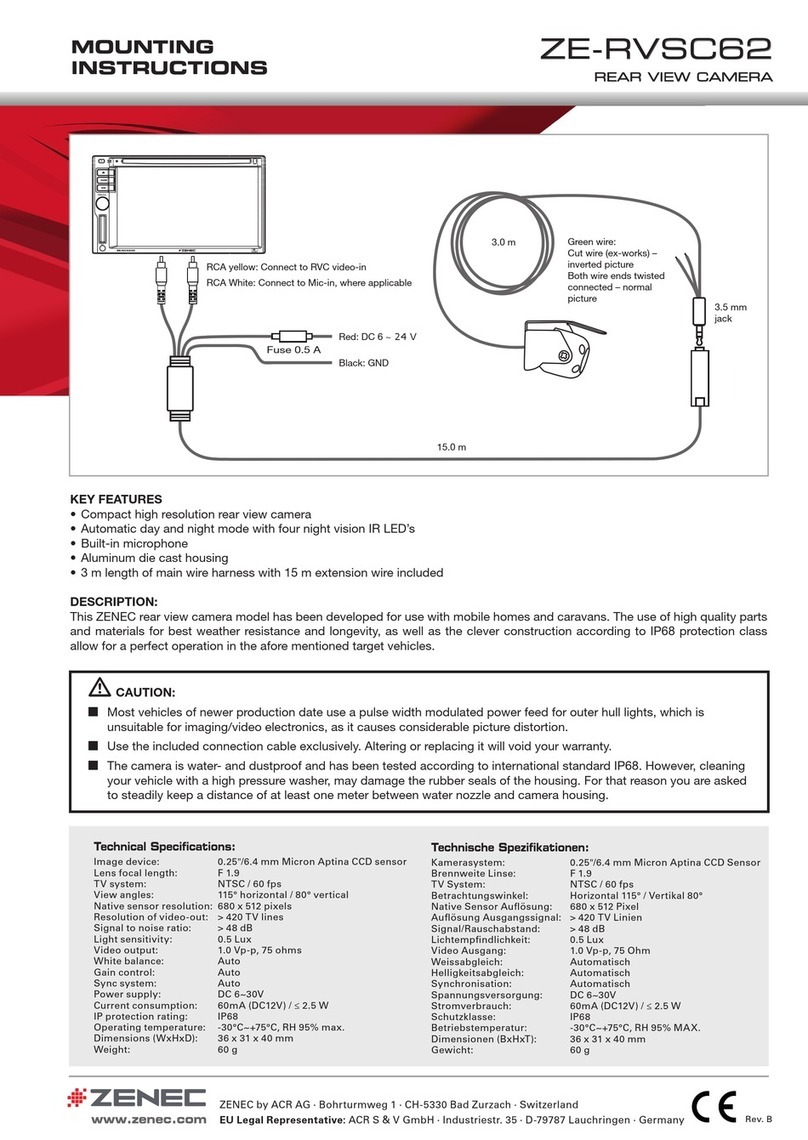
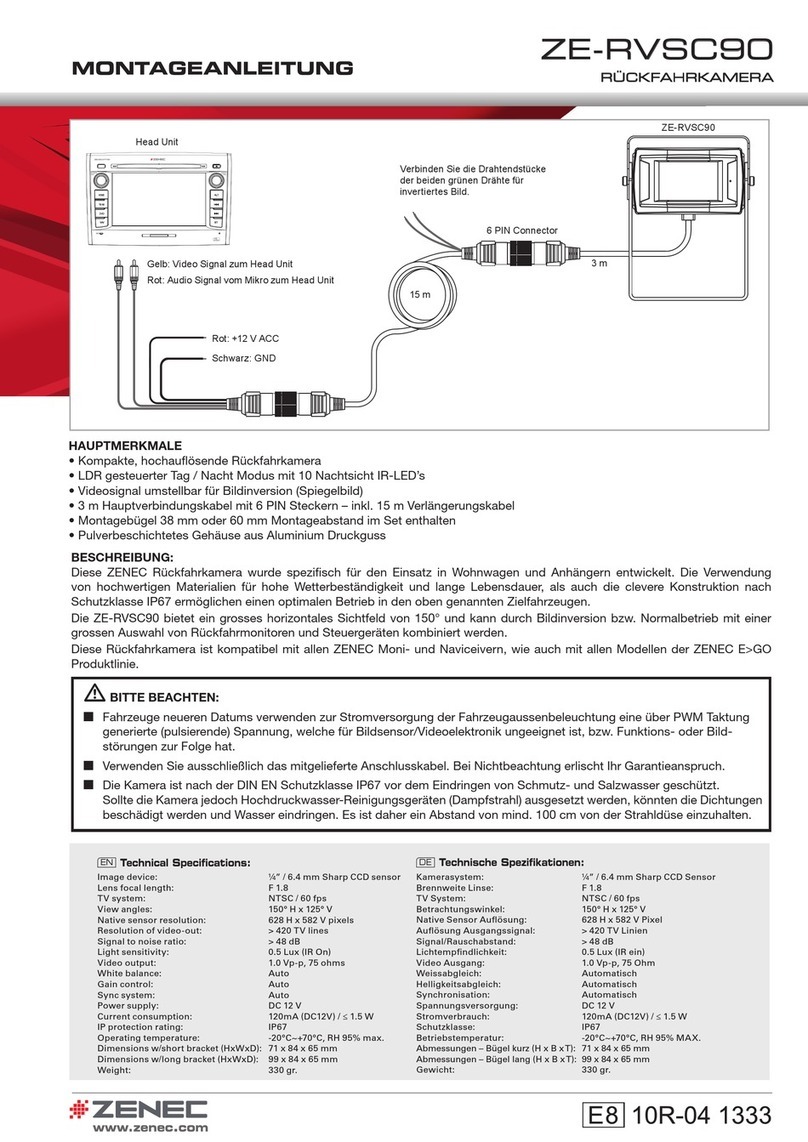
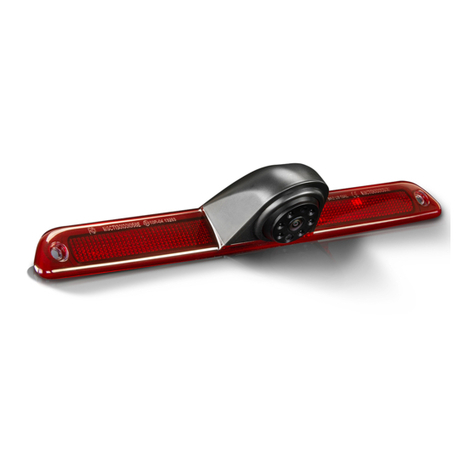
KEY FEATURES
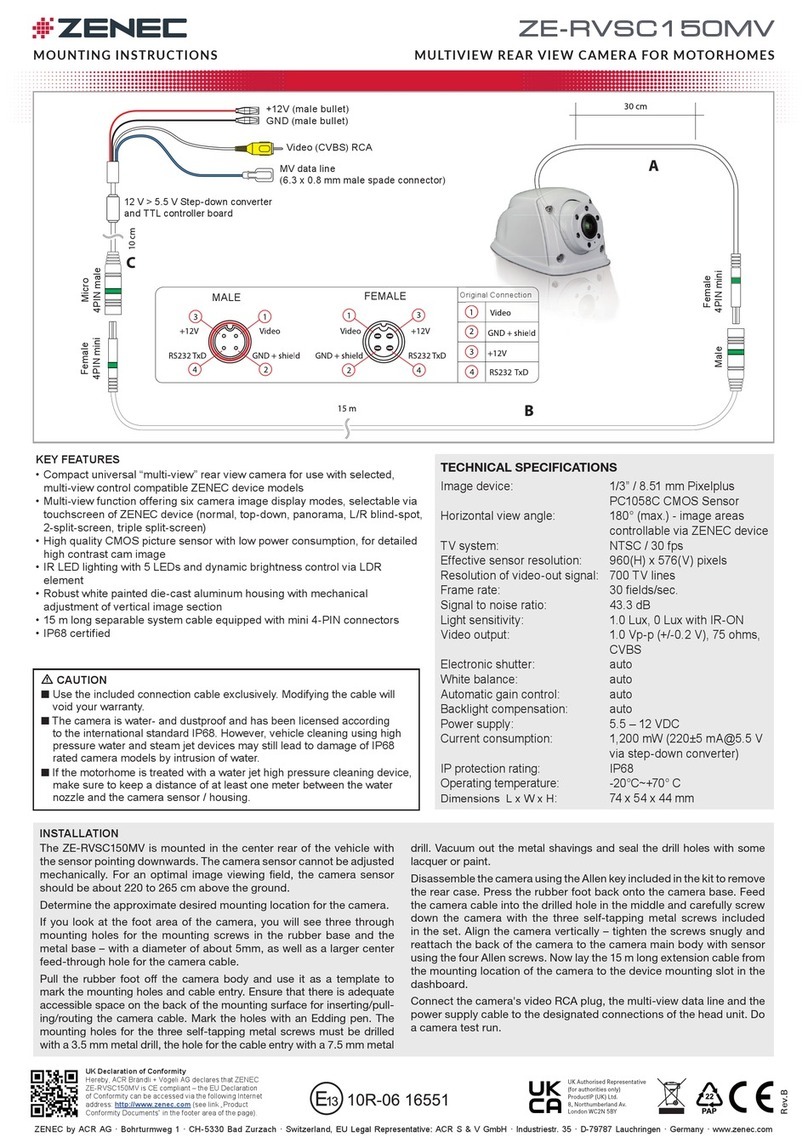
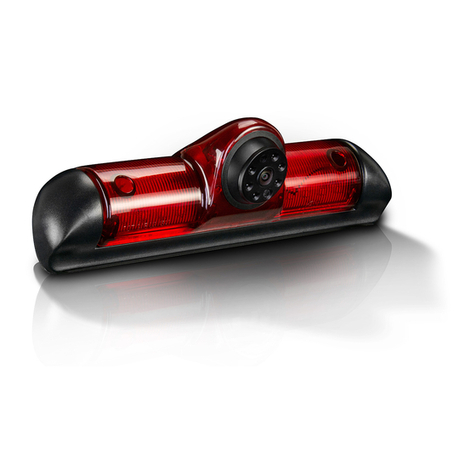
• Compact high resolution rear view camera for FIAT
Ducato III vehicles and type variants
• System design integrating the original Ducato brake
light retaining the road use homologation
• High quality Aptina CMOS picture sensor with low
power consumption
• Detailed high contrast picture under twilight
conditions
• 11 m main wire length
• Mechanically adjustable cam angle, allowing field of
view personalization
• Plastic injection main housing with stainless steel
fixation bolts
DESCRIPTION:
This ZENEC rear view camera model has been
developed for use with FIAT Ducato III based vehicle and
motor homes in particular. This camera product deploys
high quality parts and materials though out, to provide
reliable operation and appropriate longevity in the target
vehicles mentioned.
The ZE-RCE3701 offers a large 150° diagonal viewing
angle. The camera complies with a great variety of moni-
and naviceiver models made for CVBS rear view cam
signal input.
DE
HAUPTMERKMALE
• Kompakte hochauflösende Rückfahrkamera für FIAT
Ducato III Fahrzeuge und baugleiche Fahrzeugtypen
• Systemdesign mit Integration der Originalbrems-
leuchte (ABE/Fahrzeugzulassung bleibt bestehen)
• Hochqualitativer Aptina CMOS Bildsensor mit tiefem
Stromverbrauch
• Detaillierte Bildauflösung mit hohem Kontrast auch in
der Dämmerung
• 11 m Hauptkabel-Länge
• Mechanisch einstellbarer Kamerawinkel zur
Personalisierung des Sichtfelds
• Hauptgehäuse aus Kunststoffspritzguss mit
Befestigungsbolzen aus Edelstahl
BESCHREIBUNG:
Dieses ZENEC Rückfahrkamera Modell wurde für die
Verwendung mit FIAT Ducato III basierten Fahrzeugen
entwickelt.
Dieses Produkt setzt auf qualitativ hochwertige Bestand-
teile und Materialien um einen zuverlässigen und lang-
lebigen Betrieb in den genannten Zielfahrzeugen zu ga-
rantieren.
Die ZE-RCE3701 bietet einen großen 150° diagonalen
Blickwinkel. Die Kamera ist kompatibel mit vielen Moni-
und Naviceivern die über einen CVBS Rückfahrkamera
Eingang verfügen.
9. Ausrichten der
Kamera-Kugel unten am
Hauptgehäuse, mit dem
beiliegenden U-förmigen
Werkzeug, falls nötig
9. Alignment of the camera
ball at the bottom side of
the camera main body
if necessary, using the
supplied U-shaped tool
9
4. Hauptkabel vom Navicei-
ver im Armaturenbrett nach
hinten zur Bremslichtöffnung
einziehen. Für den Strom
und Video Direktanschluss
am ZENEC Z-E3726 gibt es
den „Anschlussblock E“ mit
geschalteten 300mA Strom-
ausgängen (man beachte
die Installationsanleitung der
ZENEC HU).
4. Route the main cable from
the naviceiver in the vehicle
cockpit / dashboard to the
brake light opening in the
upper rear section of the ve-
hicle. Fore power and RCA
video signal, the ZENEC
Z-E3726 offers a direct sys-
tem “connector block E”
which offers switched 300mA
power out’s (see installation
guide of ZENEC head unit).
5. 3.5 mm Klinkenstecker
Ausgang vom
Kamerasensor an das
grüne Gegenstück am
Hauptkabel anstecken
und mit Isolierband
dicht umwickeln um das
Eindringen von Wasser zu
verhindern
55. Connect the 3.5 mm jack
output of the camera sensor
to the green counterpart
on the main wire and wrap
around some isolating tape
around it to prevent water
entering the connector
6. Den Systemstecker
an den Gegenpart
des Bremslicht-
Reflektorgehäuses
anstecken.
66. Connect the system
plug with the connector
counterpart of the brake
light reflector housing.
7. Den Bremslicht-Reflektor
auf dem Hauptgehäuse der
Kamera mit den Original-
Kreuzschlitzschrauben
rückmontieren
7
7. Re-mount the brake light
reflector housing on top of
the main camera housing,
using the original Philips
cross-recess screws
8. (Ohne Abbildung)
Nach Anschluss des
Hauptkabels an das Steu-
ergerät im Armaturenbrett
> Durchführen von einem
Funktionstest
8. (no picture)
After connecting the main
cable to the control unit in
the dashboard > perform
function test
Camera
Reverse
Speed In
IR In
ext. Mic
Power 300mA
GND
Audio In
CVBS In
E
4
ANSCHLUSSSCHEMA / CONNECTION DIAGRAM
EN
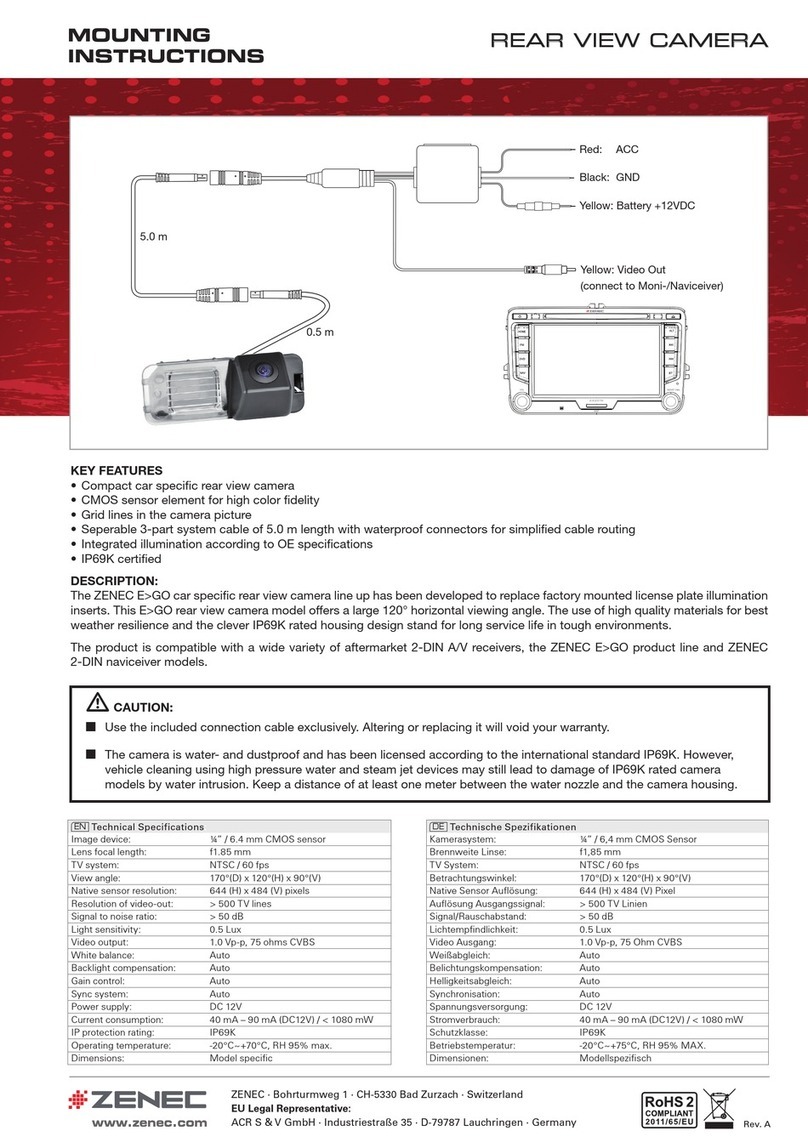
TECHNICAL SPECIFICATIONS:
Image device: ¼” / 6.4 mm Aptina
ASX340AT CMOS sensor
Lens focal length: f 1.9
TV system: NTSC / 60 fps
View angle: 150°(D) x 130°(H) x 85°(V)
Native sensor resolution: 720 (H) x 480 (V) pixels
Resolution of video-out: > 420 TV lines
Frame rate: 60 fields/sec.
Signal to noise ratio: > 48 dB
Light sensitivity: 0.3 Lux
Video output: 1.0 Vp-p, 75 ohms CVBS
White balance: Auto
Backlight compensation: Auto
Gamma correction: 0.45
Gain control: Auto
Sync system: Auto
Power supply: DC 6 - 24V
Current consumption: 40mA (DC12V) / ≤ 480mW
IP protection rating: IP69K
Operating temperature: - 30°C~+75°C, RH 95% max.
DE
TECHNISCHE SPEZIFIKATIONEN:
Kamerasystem: ¼” / 6,4 mm Aptina
ASX340AT CMOS Sensor
Brennweite Linse: f 1,9
TV System: NTSC / 60 fps
Betrachtungswinkel: 150°(D) x 130°(H) x 85°(V)
Native Sensor Auflösung: 720 (H) x 480 (V) Pixel
Auflösung Ausgangssignal: > 420 TV Linien
Bildwiederholrate: 60 Felder/Sek.
Signal/Rauschabstand: > 48 dB
Lichtempfindlichkeit: 0.3 Lux
Video Ausgang: 1,0 Vp-p, 75 Ohm CVBS
Weißabgleich: Automatisch
Belichtungskompensation: Auto
Gamma Korrektur: 0.45
Helligkeitsabgleich: Automatisch
Synchronisation: Automatisch
Spannungsversorgung: DC 6 - 24V
Stromverbrauch: 40mA (DC12V) / ≤ 480mW
Schutzklasse: IP69K
Betriebstemperatur: -30°C ~ +75°C, RH 95% MAX.
BITTE BEACHTEN:
Verwenden Sie ausschließlich das mitgelieferte Anschlusskabel. Bei
Nichtbeachtung erlischt Ihr Garantieanspruch.
Die Kamera ist nach der DIN EN Schutzklasse IP69K vor dem Eindrin-
gen von Schmutz- und Salzwasser geschützt. Sollte die Kamera jedoch
Hochdruckwasser-Reinigungsgeräten (Dampfstrahl) ausgesetzt werden,
können selbst IP69K spezifizierte Modelle durch eindringendes Wasser
beschädigt werden. Es ist daher ein Abstand von mind. 100 cm von der
Strahldüse einzuhalten.
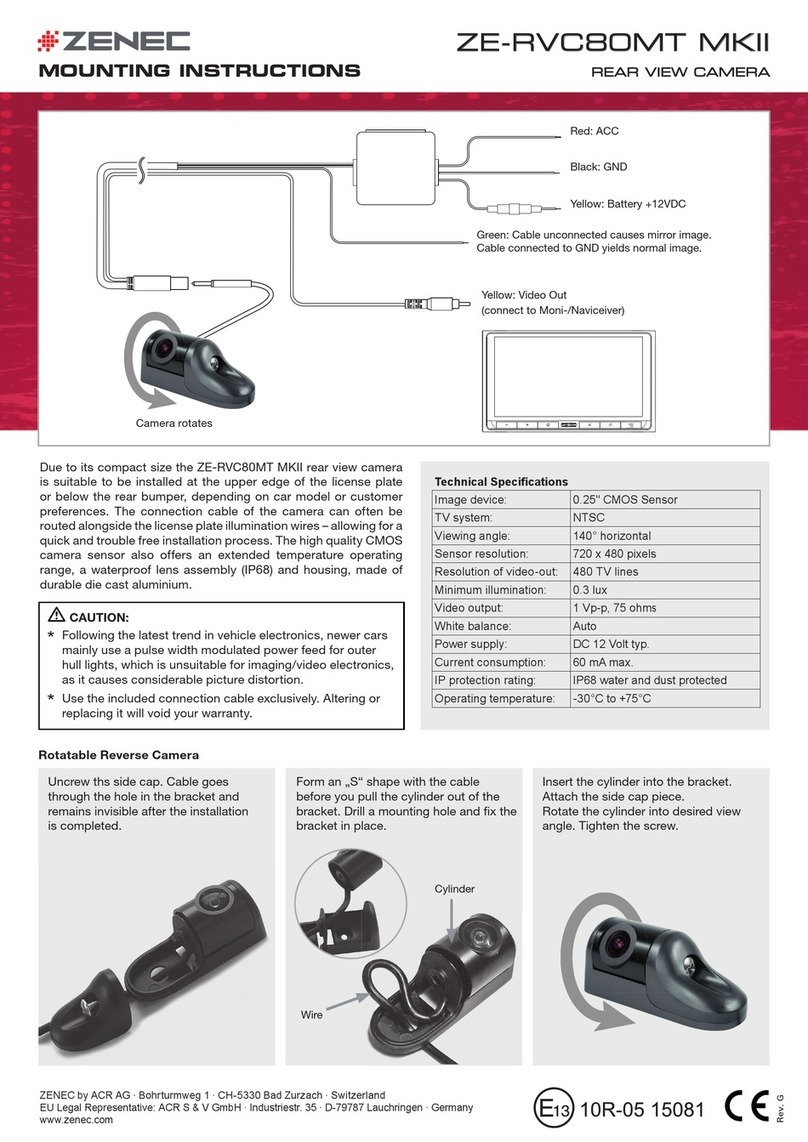
CAUTION:
Use the included connection cable exclusively. Altering or replacing it will
void your warranty.
The camera is water- and dustproof and has been licensed accord-
ing to the international standard IP69K. However, vehicle cleaning
using high pressure water and steam jet devices may still lead to
damage of IP69K rated camera models by water intrusion. Keep
a distance of at least one meter between the water nozzle and the
camera housing.
Rev.B
Manufacturer: ACR AG · Bohrturmweg 1 · CH-5330 Bad Zurzach · Switzerland
EU Legal Representative: ACR S & V GmbH · Industriestraße 35 · D-79787 Lauchringen · Germany
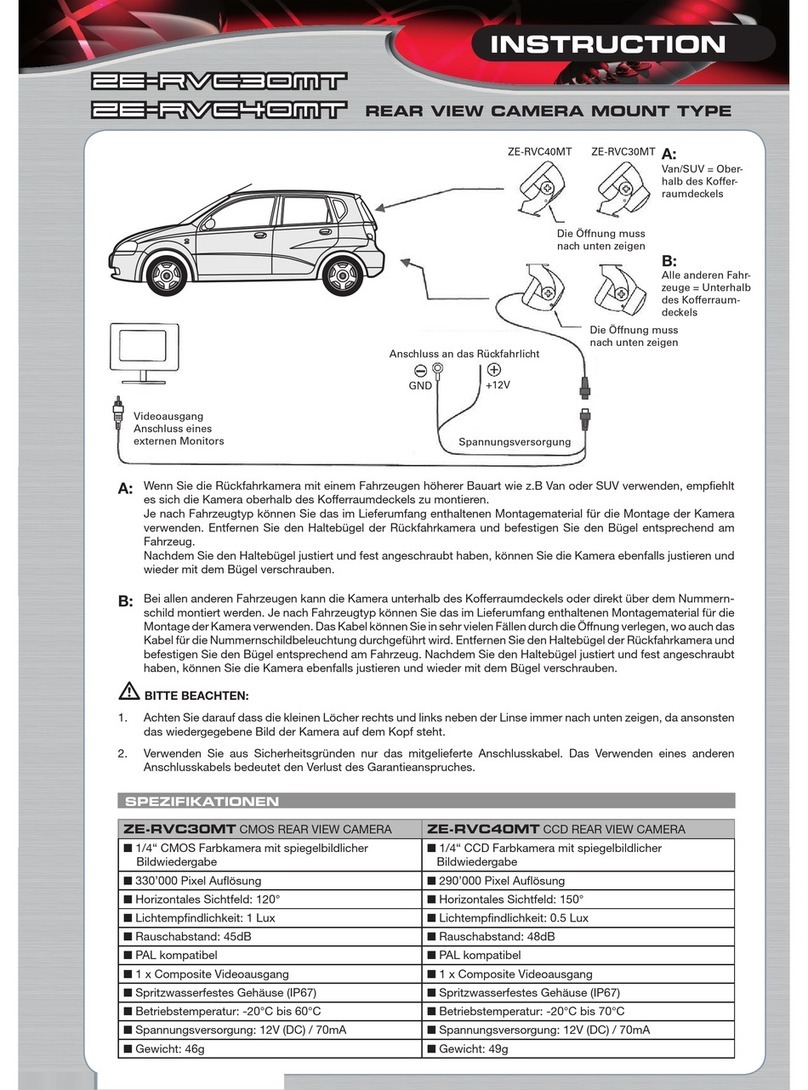
ZE-RCE3701 is a type variant of the ZE-RVC90MT
E9 10R-04.1122
30 cm
3.5 mm
jack
Red: DC 6 ~ 24 V
Black: GND
Fuse 0.5 A
11.0 m
ZE-RCE3701: E9 10R-04 1122
10R-04 1122
9
RCA / Cinch
Video Signal (CVBS)
Other ZENEC Dashcam manuals

ZENEC ZE-RVSC90 User manual

ZENEC

ZENEC ZE-RVSC90 User manual

ZENEC ZE-RVC80MT MKII User manual

ZENEC

ZENEC ZE-RVC80MT MKII User manual

ZENEC ZE-RCE4606 User manual

ZENEC

ZENEC ZE-RCE4606 User manual

ZENEC ZE-RVSC62 User manual

ZENEC

ZENEC ZE-RVSC62 User manual

ZENEC ZE-RVC30MT User manual

ZENEC

ZENEC ZE-RVC30MT User manual

ZENEC ZE-RCE3702 User manual

ZENEC

ZENEC ZE-RCE3702 User manual

ZENEC ZE-RVSC150MV User manual

ZENEC

ZENEC ZE-RVSC150MV User manual

ZENEC E GO - User manual

ZENEC

ZENEC E GO - User manual

ZENEC ZE-RVSC100 User manual

ZENEC

ZENEC ZE-RVSC100 User manual

ZENEC ZE-RCE4605 User manual

ZENEC

ZENEC ZE-RCE4605 User manual

ZENEC ZE-RCE5002 User manual

ZENEC

ZENEC ZE-RCE5002 User manual

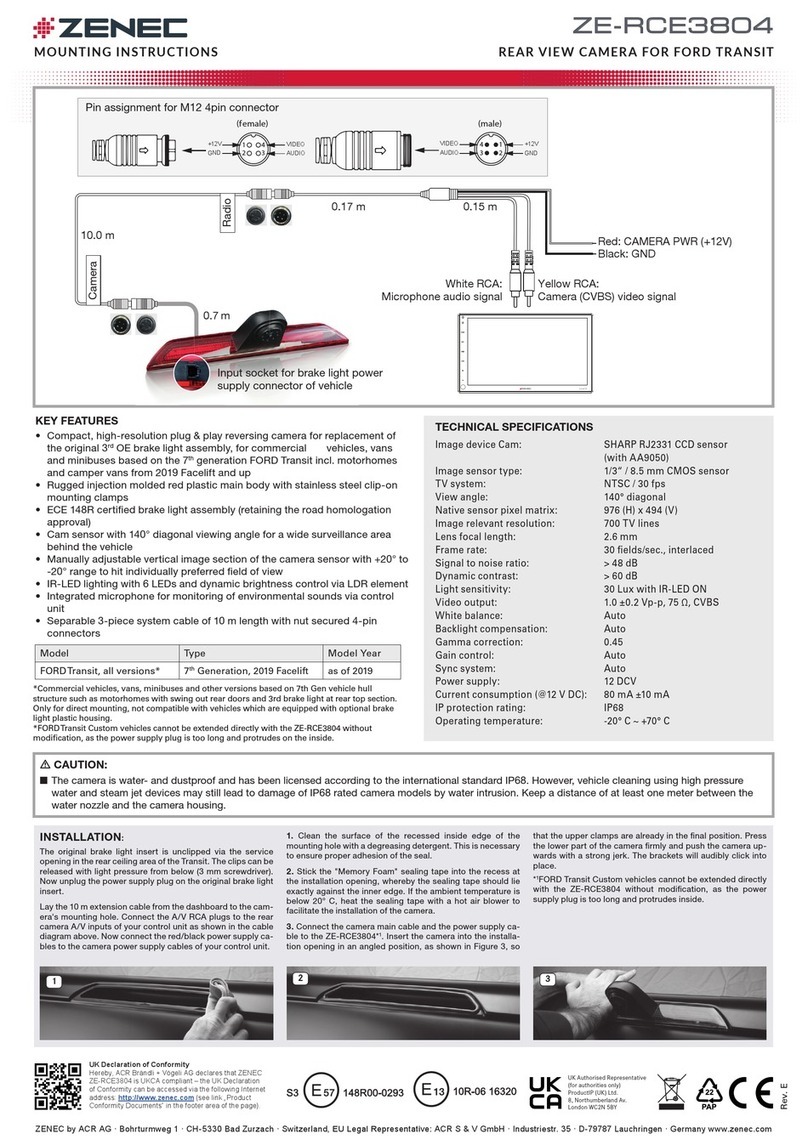
ZENEC ZE-RCE3804 User manual

ZENEC

ZENEC ZE-RCE3804 User manual

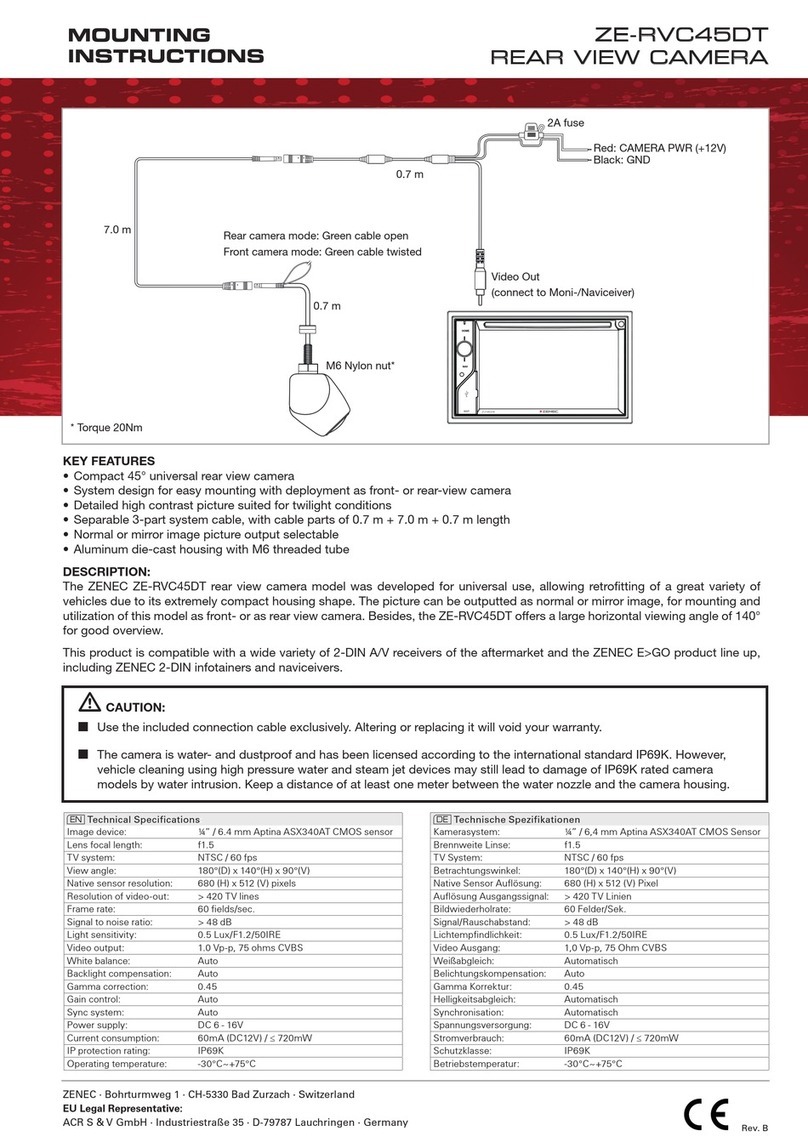
ZENEC ZE-RVC45DT User manual

ZENEC

ZENEC ZE-RVC45DT User manual

ZENEC ZE-RVC90MT User manual

ZENEC

ZENEC ZE-RVC90MT User manual

ZENEC ZE-RVSC90 User manual

ZENEC

ZENEC ZE-RVSC90 User manual

Popular Dashcam manuals by other brands

aguri PEED VISION DX20 user manual

aguri

aguri PEED VISION DX20 user manual

BlackVue DR770X Box Series quick start guide

BlackVue

BlackVue DR770X Box Series quick start guide

Acumen XR10 manual

Acumen

Acumen XR10 manual

Sylvania ROADSIGHT PLUS manual

Sylvania

Sylvania ROADSIGHT PLUS manual

ElectrIQ 500CAM user manual

ElectrIQ

ElectrIQ 500CAM user manual

Prestigio RoadRunner 140 user manual

Prestigio

Prestigio RoadRunner 140 user manual

THIEYE Safeel Zero user manual

THIEYE

THIEYE Safeel Zero user manual

Eoss DVR720E user manual

Eoss

Eoss DVR720E user manual

Wolfbox G900 instruction manual

Wolfbox

Wolfbox G900 instruction manual

chinavasion CVACT-C248 manual

chinavasion

chinavasion CVACT-C248 manual

OiTEZ DP-R03 user manual

OiTEZ

OiTEZ DP-R03 user manual

70mai M300 user manual

70mai

70mai M300 user manual

Lamax Electronics S9 DUAL user manual

Lamax Electronics

Lamax Electronics S9 DUAL user manual

Lukas LK-9500 Duo installation guide

Lukas

Lukas LK-9500 Duo installation guide

RVS systems RVS-450C product manual

RVS systems

RVS systems RVS-450C product manual

Brigade DC-204-AI quick start guide

Brigade

Brigade DC-204-AI quick start guide

HP f790 user manual

HP

HP f790 user manual

70mai Cam 1S user manual

70mai

70mai Cam 1S user manual

manuals.online logo
manuals.online logoBrands
  • About & Mission
  • Contact us
  • Privacy Policy
  • Terms and Conditions

Copyright 2025 Manuals.Online. All Rights Reserved.