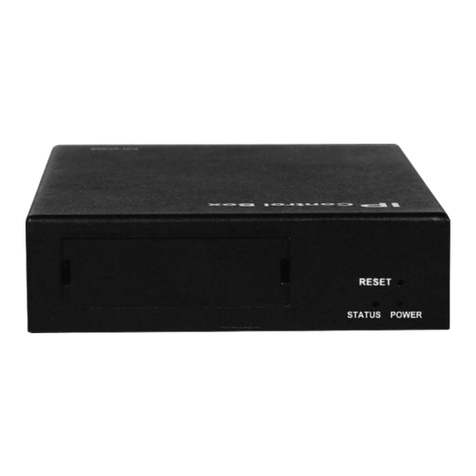
Zenty ZT-117 User manual

(844) 200-1945 | [email protected] Page 4of 50 Copyright © Zenty AV
The Zenty ZT-VWC4 is a 4-input, 4-output video wall controller, a seamless matrix switcher, and a
multiviewer, all rolled in to one device. While in matrix mode, seamless route any of your 4 available
sources to any 4 displays without delay or picture loss. Want to view more than one signal on your
single display at a time? No problem. Engage the multiviewer function on your output port and choose
from 5 different multiviewer layouts, including 2×2, 1x3L, 1x3U, 1×4 & 4×1.
Reinvent your interior space by taking advantage of the video wall function and have any source signal
stretched across all 4 output displays. Arrange your output displays in up to 10 different video wall
configurations, including 2×2, 1×4 and 4×1. 10 different video wall configurations mean the user gets
the exact style and creative expression they desire.
•Route any one of the 4 sources to any one of the 4 displays.
•Seamless switching ensures no switching delay and pictures loss during transitions. The
switching speed is less than 40 milliseconds.
•Supports video wall mode and output image mirror function.
•Any one of the four outputs can be turned off independently.
•Supports PCM 2CH audio.
•EDID management
•HDCP 2.2 and HDCP1.4 compliant.
•Supports high-definition resolutions, including: 4K30Hz, 1080p@60Hz@36 b/pixels, and
other standard video formats.
•Supports output downscale to 1080P/720P/2560*1440/1920*1200/1360*768
•With panel button, Remote Control, RS232 Control, TCP/IP Control to select the source and
support for third-party platform control.
•1U rack design. Easy installation.
•DC 12V 2A power supply.
•Unit Size [L x W x H]: 438mm x 205mm x 44mm | 17.2” x 8.07” x 1.73”
Operating Temperature Range
0°C ~ 40°C (32°F ~ 104°F)
Operating Humidity Range
5 –90% RH (No Condensation)
Input Video Signal
0.5 –1.0 volts p-p
Input DDC Signal
5 volts p-p (TTL)

(844) 200-1945 | [email protected] Page 5of 50 Copyright © Zenty AV
Video Format Support
DTV / HDTV: 1080P / 1080i / 720P / 576P /
480P / 4K
Audio Format Support
LPCM 2.0
Input Ports
4 x HDMI
Output Ports
4 x HDMI
Power Consumption
20W (Max)
Dimensions (L x W x H)
438mm x 205mm x 44mm
17.2” x 8.07” x 1.73”
Weight
5.97 lbs.
•(1) x Matrix Unit
•(1) x Remote Control
•(1) x User Manual
•(1) x DC 12V/2A Power Adapter
•(1) x Mounting Ears

(844) 200-1945 | [email protected] Page 7of 50 Copyright © Zenty AV
1. Connect source devices to input ports of the matrix.
2. Connect HDMI output port to TV or other HDMI sink devices.
3. Optional: connect RS232 cable from PC RS232 port.
4. Optional: connect an Ethernet cable from the TCP/IP port on the matrix to a local area
network.
5. Connect 12V/2A POWER supply to DC power socket.
6. Power on the matrix, HDMI sources and displays.
Signal switching includes 4 switching channels, which can be randomly configured as input/output
according to requirements to form a matrix of 1×4~4×1. It can switch any input signal to 1 channel
of output or all channels of output.
Operation format: "output channel" + "input channel"
Such as:
1. Switch output 1 to input 2 source.
Operation: press "1" in Output area + "2"in IN area to complete the switch.
2. Output 1,2,4 switch to input 3 source.
Operation: press "1", "3" and "4" in Output area + "2" in IN source area to complete the switch.
3. Switch all output port to input 4 source.
Operation: press any number in Output area + "4" in IN area to complete the switch.
4. Go directly into the video wall mode of input 2 signal source.
Operation: press the number "2" in the Input area to complete the switch.

(844) 200-1945 | [email protected] Page 8of 50 Copyright © Zenty AV
There are five submenus in the Video interface:
1). Video switching
Operation:
a. In the main menu, select "Video" to press the "OK".
b. Press “up and down” button to select "Output1" (The fifth ALL option means that all
outputs are selected)
c. Click on "OK" to enter the next submenu
d. Press the “up and down” button to select "Switching" to select the input signal source. The

(844) 200-1945 | [email protected] Page 9of 50 Copyright © Zenty AV
bottom color of the selected input is white
e. Click "OK" to enter the next submenu
f. Press the,” up and down” button to select the "Input”, and the color at the bottom of the
selected input port becomes white
g. Click on the "OK" button to complete switching
You can switch any output to any input, or all output to the same input.
2). Output Switching Control
You can open/close any of the output port, or open/close all output port.
Operation:
•In the main menu, select "Video" to press the "OK"
•Press “up and down” button to select "Output1". (The fifth ALL option means that all outputs
are selected)
•Click "OK" to enter the next submenu
•Press the “up and down” button to select the "On/Off"
•Click "OK" to enter the next submenu
•Press “up and down” button to select Off or On.
•Press the "OK" button to confirm that the output port is open/ closed

(844) 200-1945 | [email protected] Page 10 of 50 Copyright © Zenty AV
3). Output Resolution Selection
Operation:
•In the main menu, select "Video" to press the "OK"
•Press “up and down” button to select "Output1" (The fifth ALL option means that all outputs
are selected)
•Click "OK" to enter the next submenu
•press the “up and down” button to select "Resolution"
•Click "OK" to enter the next submenu
•Press the,” up and down” bottom to complete selection (There are 6 output resolution: 4K 30
Hz, 1080P 60 Hz, 720P 60 Hz,2560 X1440, 1920X1200,1360 X768 and AUTO, as shown in
the picture. The default is Auto). The color of the bottom of the selected output resolution
become white.
•Click the "OK" button to complete the output video resolution setting

(844) 200-1945 | [email protected] Page 11 of 50 Copyright © Zenty AV
You can choose any one of the output video resolutions, or choose all of the output video resolution,
the system default use Auto (this option is the product according to the displays judgment).
4). Offset
Operation:
•In the video wall mode, select the "Video" in the main menu to press the "OK" button.
•Press the “up and down” button to select the "Output1"(select the output you want to adjust)
or the 5th option "ALL “which means that all outputs are selected.
•Click "OK" to enter the next submenu.
•Press “up and down “button to select the "Offset".
•Click "OK" to enter the next submenu.
•Press the “up and down” button to select X and Y. X and Y have 301 sub-items, the minimum
is 0, the maximum is 600, the number adjustment interval is 2.
•Click the "OK" button to complete the offset setting.

(844) 200-1945 | [email protected] Page 12 of 50 Copyright © Zenty AV
You can select the offset (The margin of the display screen) of any one of the output videos, or select
the offset for all of the output video screens. (Offset apply to video wall mode).
5). Rotate
Operation:
•In the main menu, select "Video" to press the "OK"
•Press “up and down” button to select "Output1" (The fifth ALL option means that all outputs
are selected)
•Click "OK" to enter the next submenu.
•Press the “up and down “to select the "Rotate"
•Click "OK" to enter the next submenu.

(844) 200-1945 | [email protected] Page 13 of 50 Copyright © Zenty AV
•Press the “up and down” button to select the "Yes" to open or the "No" is closed
•Click the "OK" button to complete the setting.
You can select any key to select output1 rotations or all the output rotations. The rotation is 180°
clockwise
6). Color
Operation:
•In the main menu, select "Video" to press the "OK"
•Press “up and down” button to select "Output1" (The fifth ALL option means that all outputs
are selected)
•Click "OK" to enter the next submenu.
•Press the “up and down” button to select the "color"
•Click "OK" to enter the next submenu.
•Press the “up and down” button to select the "Yes" to open or the "No" is closed
•Click the "OK" button to complete the color setting.

(844) 200-1945 | [email protected] Page 14 of 50 Copyright © Zenty AV
You can choose any output (such as output1)’s color Settings or select all output the picture color
Settings, you can set the contrast, brightness, saturation, color, and R, G, B offset, etc. You also can
choose the “Reset” to restore all the default Settings. Each option can be set 0-100 (the system
default
parameters for 50), the color of the above parameters can be set according to your own preferences.
7). Top
Operation:
•In the main menu, select "Video" to press the "OK".
•Press “up and down” button to select "Output1" (The fifth ALL option means that all outputs

(844) 200-1945 | [email protected] Page 15 of 50 Copyright © Zenty AV
are selected).
•Click "OK" to enter the next submenu.
•Press the “up and down “button to select the "Top".
•Click "OK" to enter the next submenu.
•Press the “up and down” button to select the "CH0" to close or the "CH1" is open
•Click the "OK" button to complete the setting.
You can choose the Top area (one of the output port’s) to display CH0 or CH1.
8). CHO
Operation steps:
•In the main menu, select "Video" to press the "OK”.
•Press “up and down” button to select "Output1" (The fifth ALL option means that all outputs
are selected)
•Click "OK" to enter the next submenu.
•press the “up and down” button to select "CH0"
•Click "OK" to enter the next submenu and there are two submenus of CH0: Crop, Zoom
•Press the “up and down” button to select “Crop” to set Start x: 0, Start y: 0, End x :6000, End
y: 6000 (There are 61 subitems under each coordinate, minimum 0, maximum 6000, each
value interval 100, the defaults value of selected video:( the upper left corner Start (0, 0), the
lower right corner End (6000, 6000), midpoint (3000, 3000))

(844) 200-1945 | [email protected] Page 16 of 50 Copyright © Zenty AV
•Click on the "OK" button to complete the setting.
•Press the “up and down” button to select “Zoom”. There are four subitems under Zoom: Start
x: 0, start y :0, End x:3000, End y:3000;
•Click on the "OK" button to complete the setting.

(844) 200-1945 | [email protected] Page 17 of 50 Copyright © Zenty AV
You can choose one of CH0 output video screen size and the size of the cutting video screen, or
select all CH0 output video screen size and the size of cutting all output video image, the size of the
coordinates of the out displays in the upper left corner and the lower right corner, full screen
coordinates (0, 0, 6000600), adjust the picture size and cut size need to set the starting point and
end point.
Set the image size of CH0’s OU1 as 4/1, upper left corner, when the crop unchanged, CH1 does not
change. TOP is CH0.
Crop

(844) 200-1945 | [email protected] Page 18 of 50 Copyright © Zenty AV
9). CH1
CH1 has one more select Source function. Crop and Zoom are the same as the operation steps of
CH0 main channel. You can select one of the CH1 output video screen size and the size of the
cutting video screen, or select the size of all CH1 output video screen and the size of the all output
cutting video screen.
Operation:
•In the main menu, select "Video" to press the "OK".
•Press “up and down” button to select "Output1" (The fifth ALL option means that all outputs
are selected).
•Click "OK" to enter the next submenu.
•Press “up and down” button to select” CH1”.
•Click "OK" to enter the next submenu. There are 3 submenus: Crop, Zoom, Source.
•Crop, Zoom is the same as the CH0 operation.
•Click "OK" to enter the next submenu, and there are three subitems under Source: Matrix,
Next, Mute.
•When we click "Matrix”, the CH1 is the same as the CH0 signal source, and the image is the
same.
•When we click "Next", then the signal source of CH1 is the next signal source, and the output
screen is the image of the next signal source.
•When we click "Mute", then close the CH1 image. After we select “Mute”, the CH1 screen is
black screen.

(844) 200-1945 | [email protected] Page 19 of 50 Copyright © Zenty AV
•When we click "Next", then the signal source of CH1 is the next signal source, and the output
screen is the image of the next signal source.
•When we click "Mute", then close the CH1 image. After we select “Mute”, the CH1 screen is
black screen.
10). CH0, CH1 mirror Settings
You can set CH0 or CH1 to mirror the X-axis or Y-axis image.
Operation:
•In the main menu, select "Video" to press the "OK".
•Press “up and down” button to select "Output1" (The fifth ALL option means that all outputs
are selected).
•Click "OK" to enter the next submenu.
•Press the” up and down” button to select "CH0".

(844) 200-1945 | [email protected] Page 20 of 50 Copyright © Zenty AV
•Click "OK" to enter the next submenu, press the “up and down” button to select “Crop”.
•Set Start x:0, Start y:6000, End x:6000, End y:0.
•Click the "OK" button to confirm.
•Horizontal mirror screen setup complete.
The Mode control interface has 4 submenus:
This manual suits for next models
1
Other Zenty Controllers manuals
Popular Controllers manuals by other brands

Siemens
Siemens SKB32 Series Mounting instructions

FMC Technologies
FMC Technologies AccuLoad II Programming workbook

Tranquil-Easy
Tranquil-Easy HC 7360H operating instructions

Duomo
Duomo GS100M manual

Jobsite
Jobsite V-10-50IM datasheet

Technische Alternative
Technische Alternative UVR610 General programming information, User manual