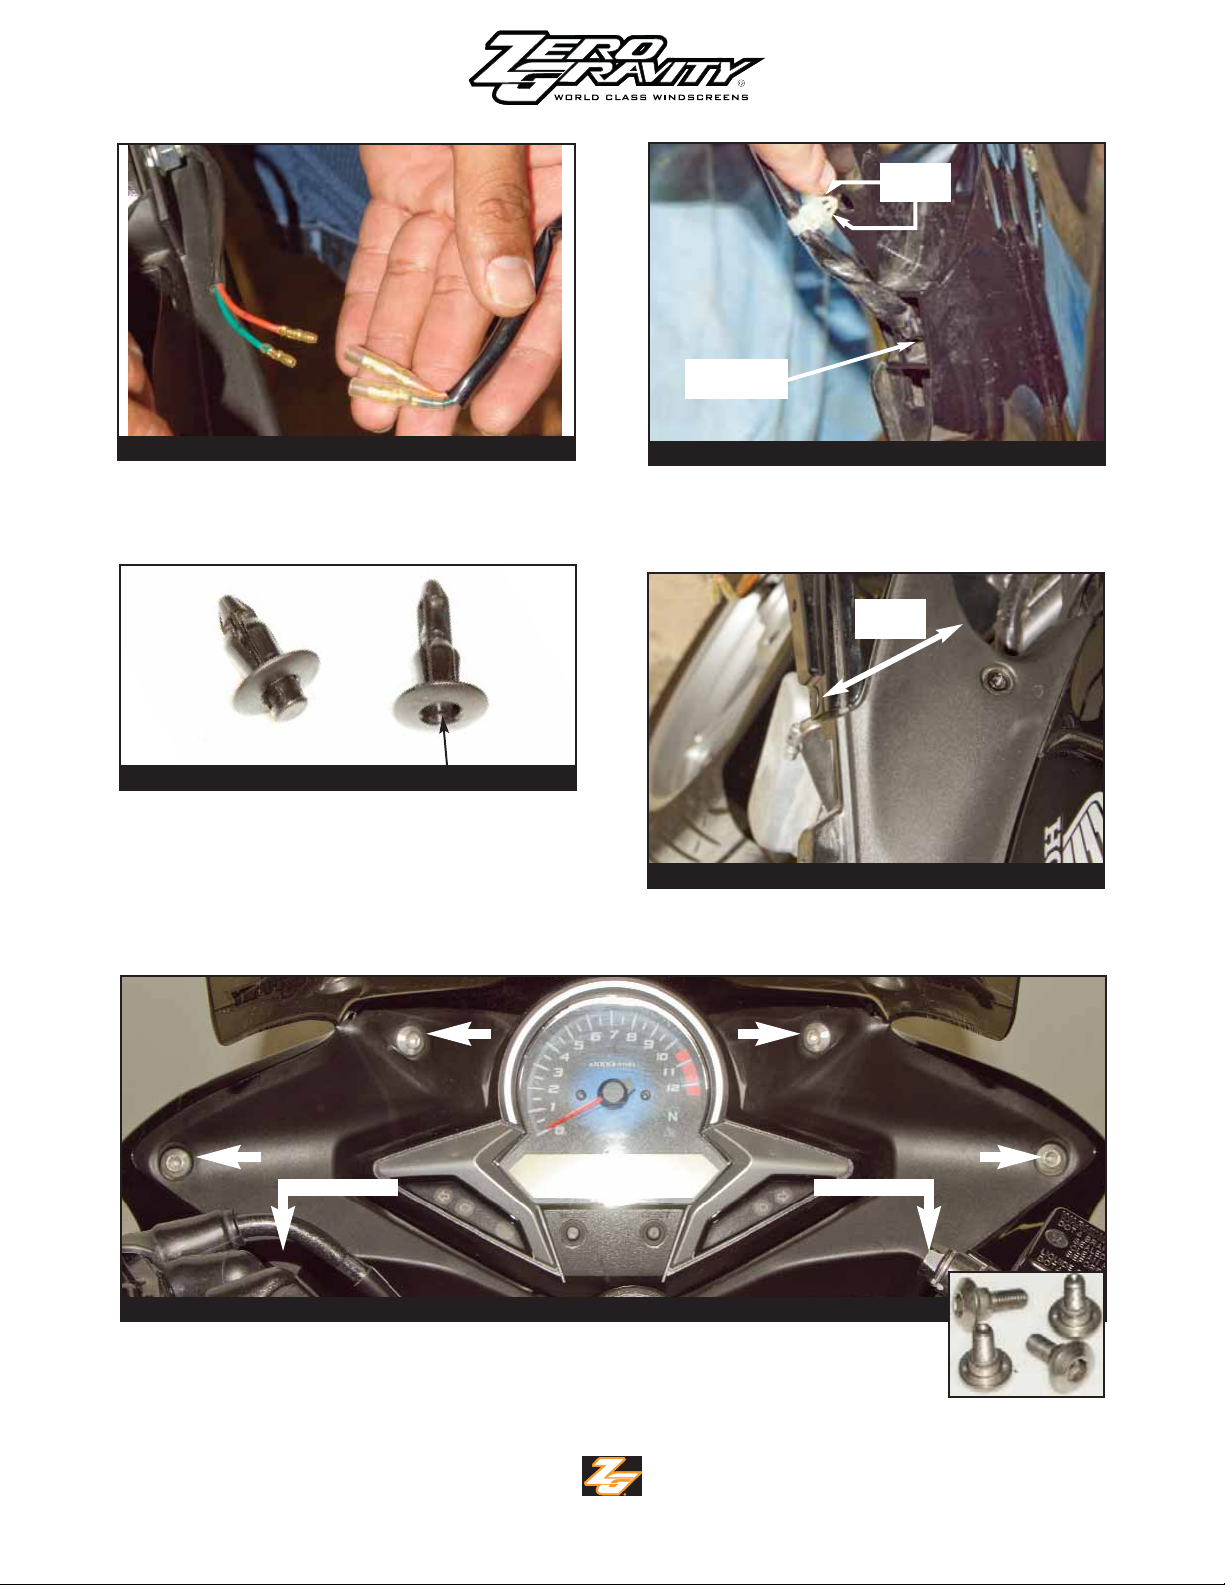
Remove 2 sets of allen screws
A & B
. Note:
One bolt
“A” is longer and has a step on the bottom shoulder.
1
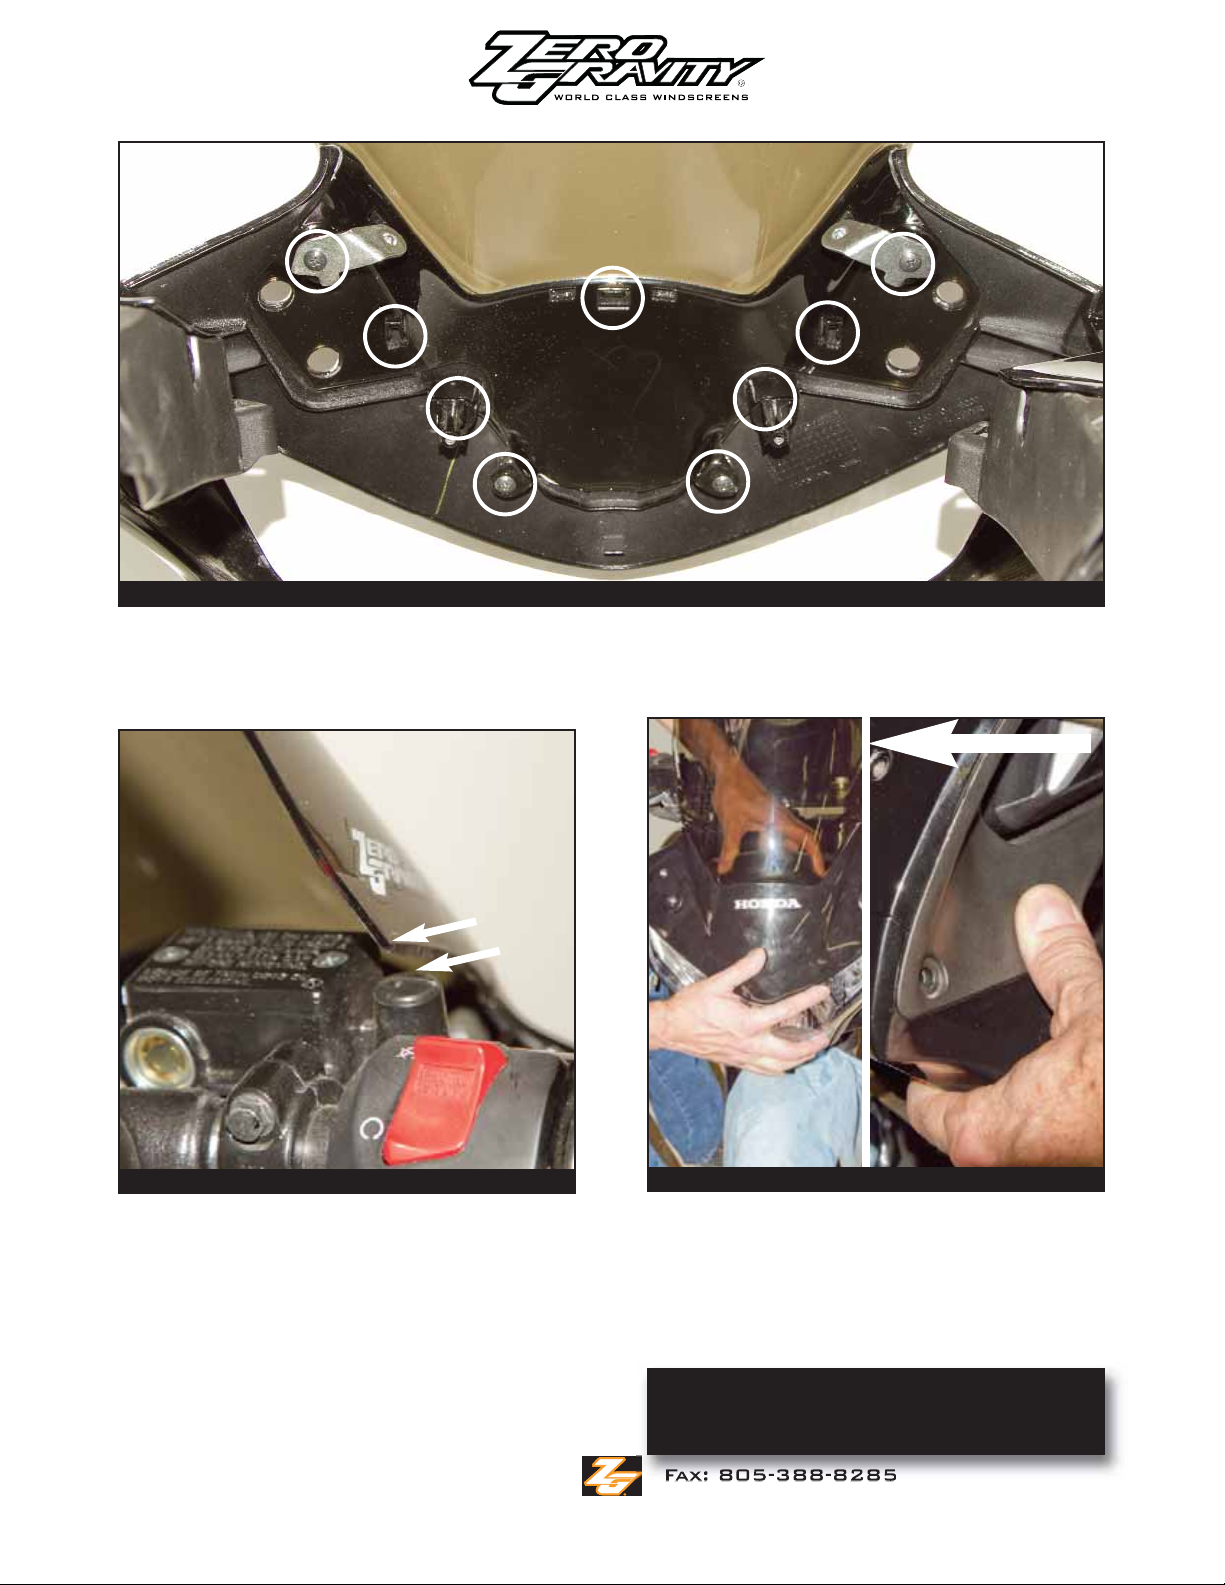
install 443-IS
912-A Pancho Road • Camarillo, CA 93012
Tel: 800-345-9791 Fax: 805-388-8285
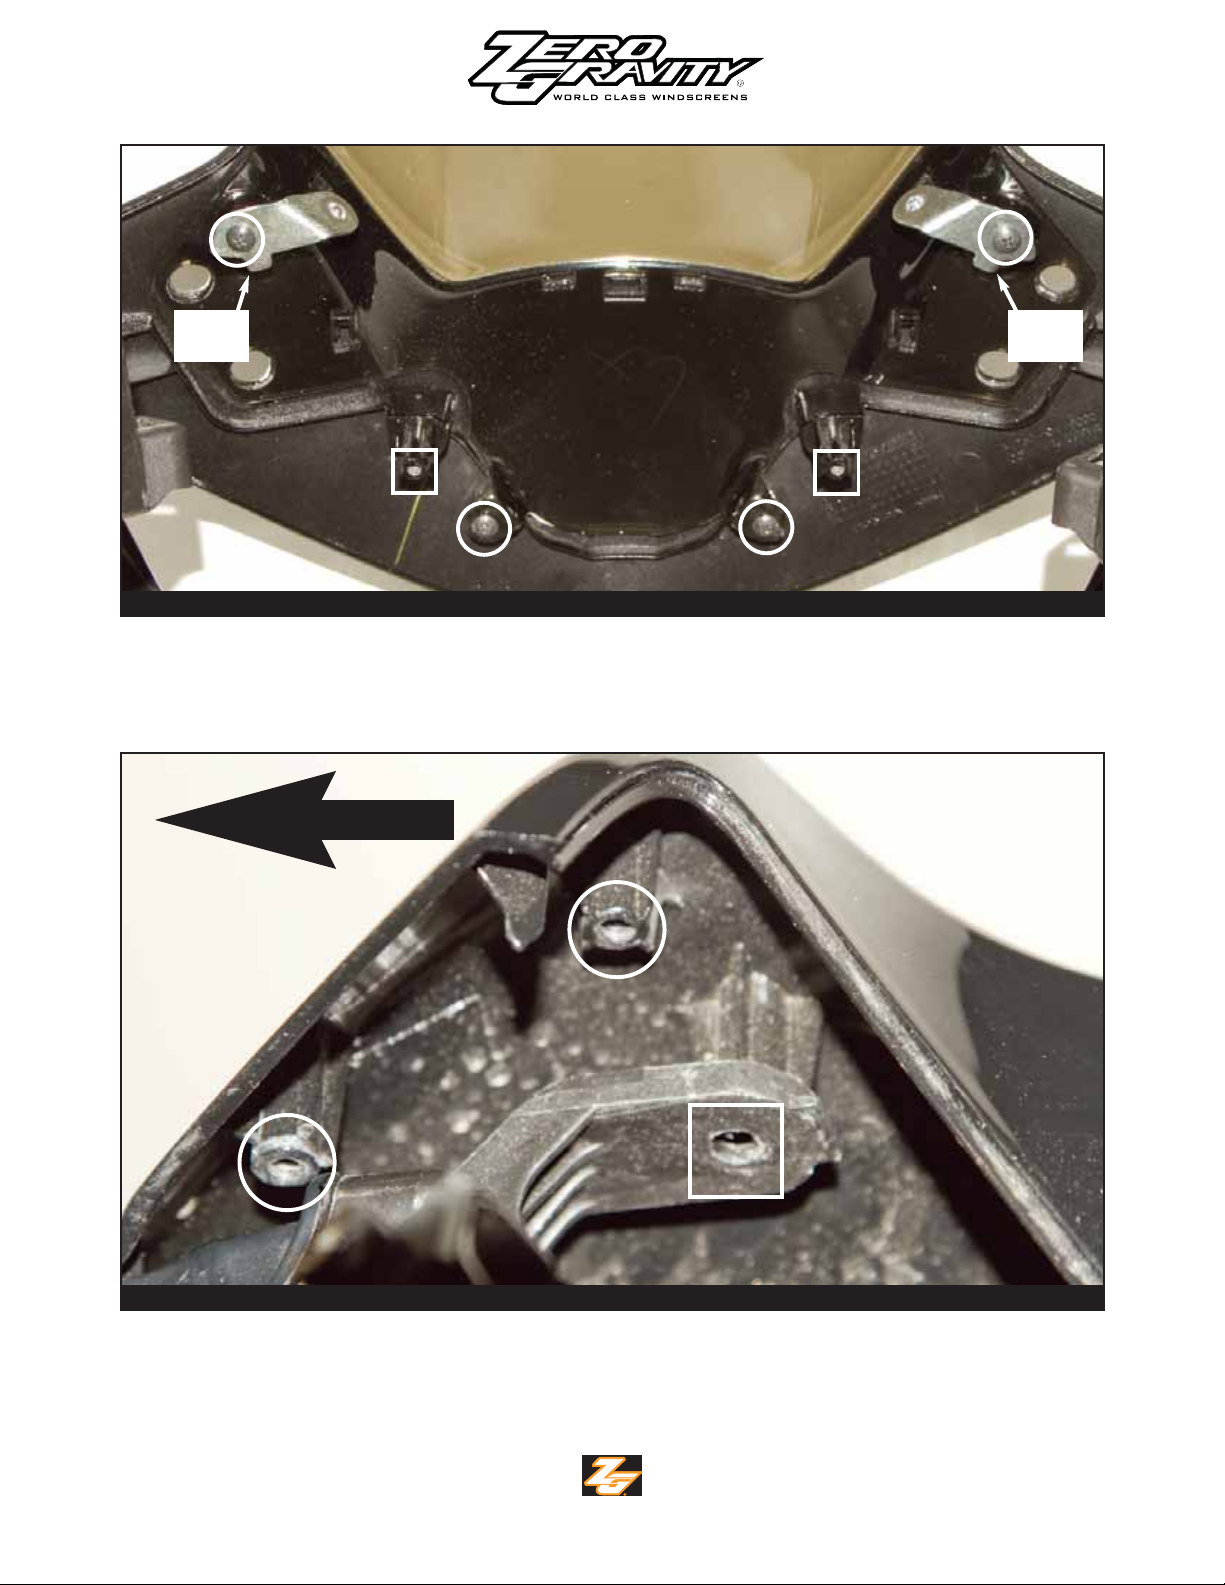
Here’s the retention clips location after pulling the side
fairing off. Outline in white boxes. Caution:
Electrical
wires are connected to the side fairing.
Helpful hints:
Use metric tools, clean hands, put the bike on a center stand. Do not pry on the screen excessively, as it will
break without much warning.
Honda CBR250R (11-12) DIY Windscreen Install
Installation Manual for Honda CBR250R
Thank you for purchasing Zero Gravity windscreen, which has
been designed and manufactured to give years of safe & fun rid-
ing.Theseinstructionsgiveyouanin-depthlookattheinstallation process.To receive further assistance or parts, please call Zero
PLEASE READ BEFORE
MOUNTING YOUR WINDSCREEN
RemoveSideFairing (For both sides)
PullingtheSide Fairing / Retention ClipLocations
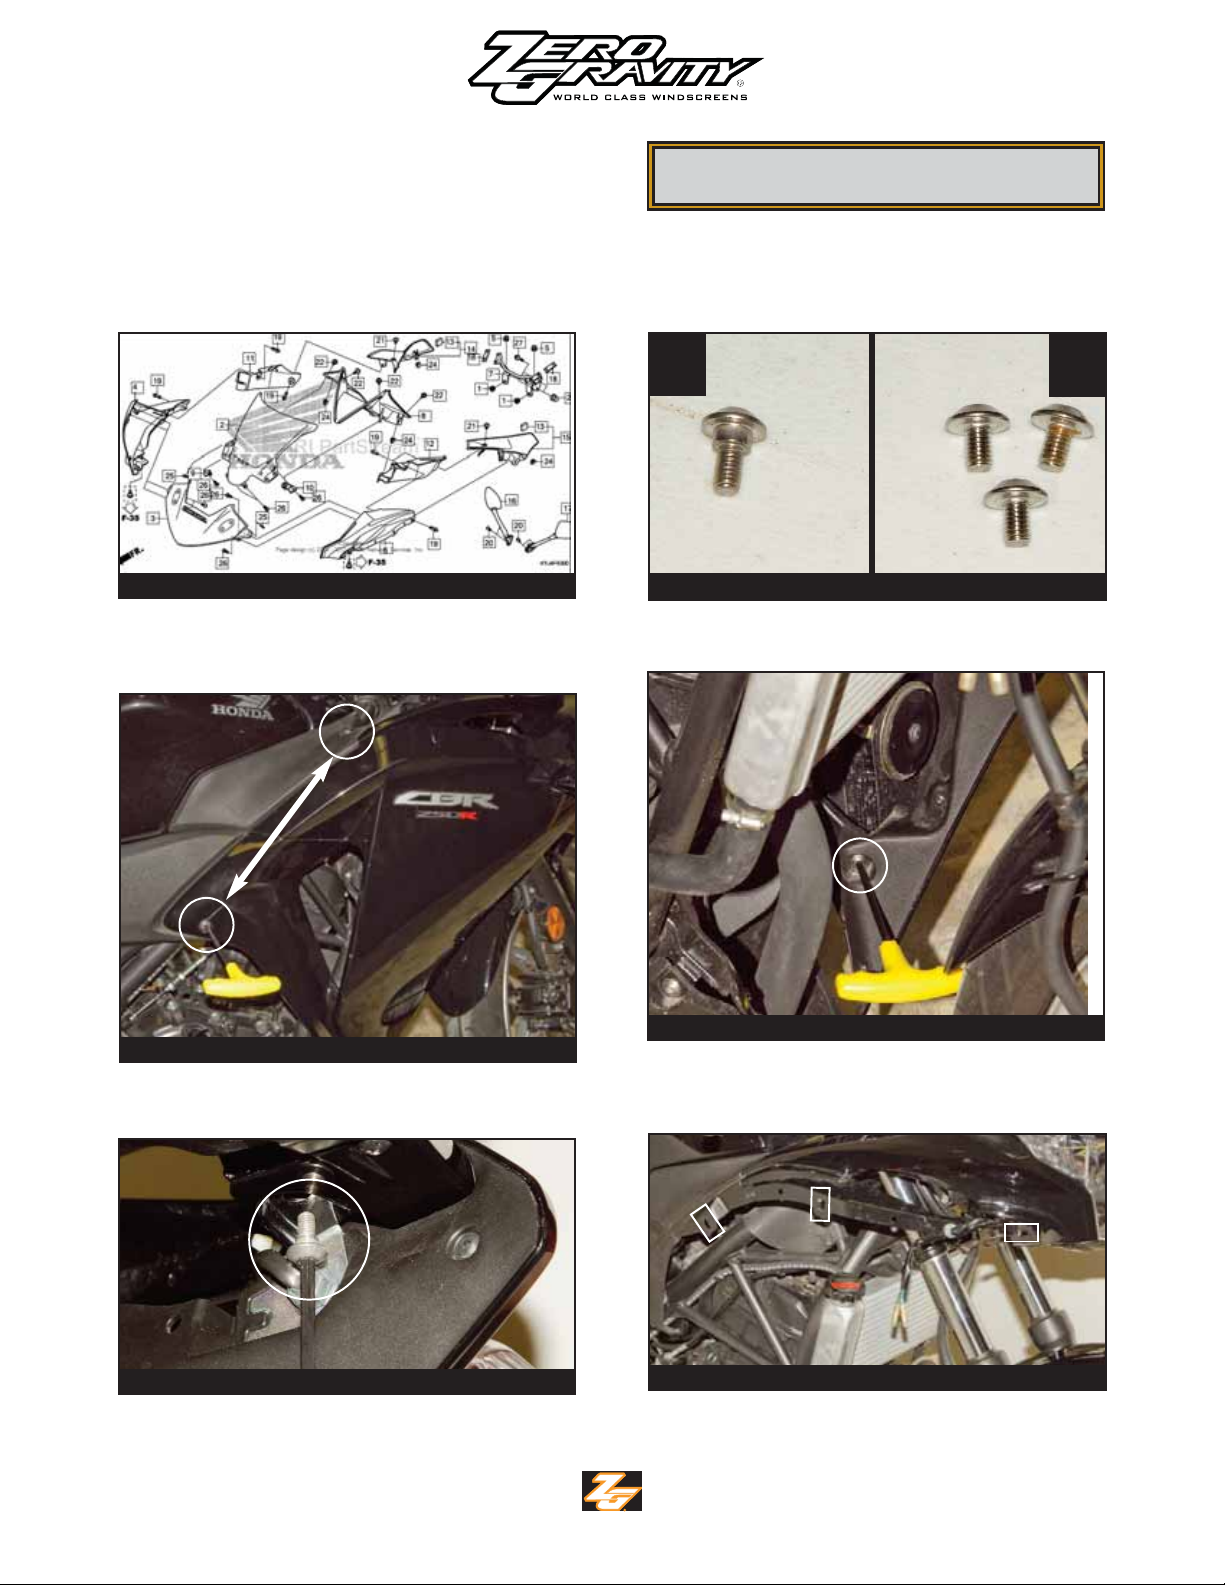
Overview of screen and exploded view of assembly. It
might be a good idea to go get a 2nd helper with the
install. Remove side mirrors, set aside.
RemovingFactory ScreenOverView / Remove side mirrors
AB
Here’s the side fairing screw location, there are two
more locations after this. Note: Bscrews are used.
SideFairingScrew Locations Part 1 of3
Here’s the bottom of the bike, side fairing screw loca-
tion. There is one more location after this.
Note: Bscrews are used.
SideFairingScrew Locations Part 2 of3
Here’s the inner front cowl of the bike, side fairing
screw location. Note: Ascrew is used.
SideFairingScrew Locations Part 3 of3