10
2 x Electrolyte Solution (Electroliquid Solution - ES)
1 x Electrode Cable
1 x User Manual
1 x Warranty
1 x Electro Dish Fastener (Dish Fastener - DF)*
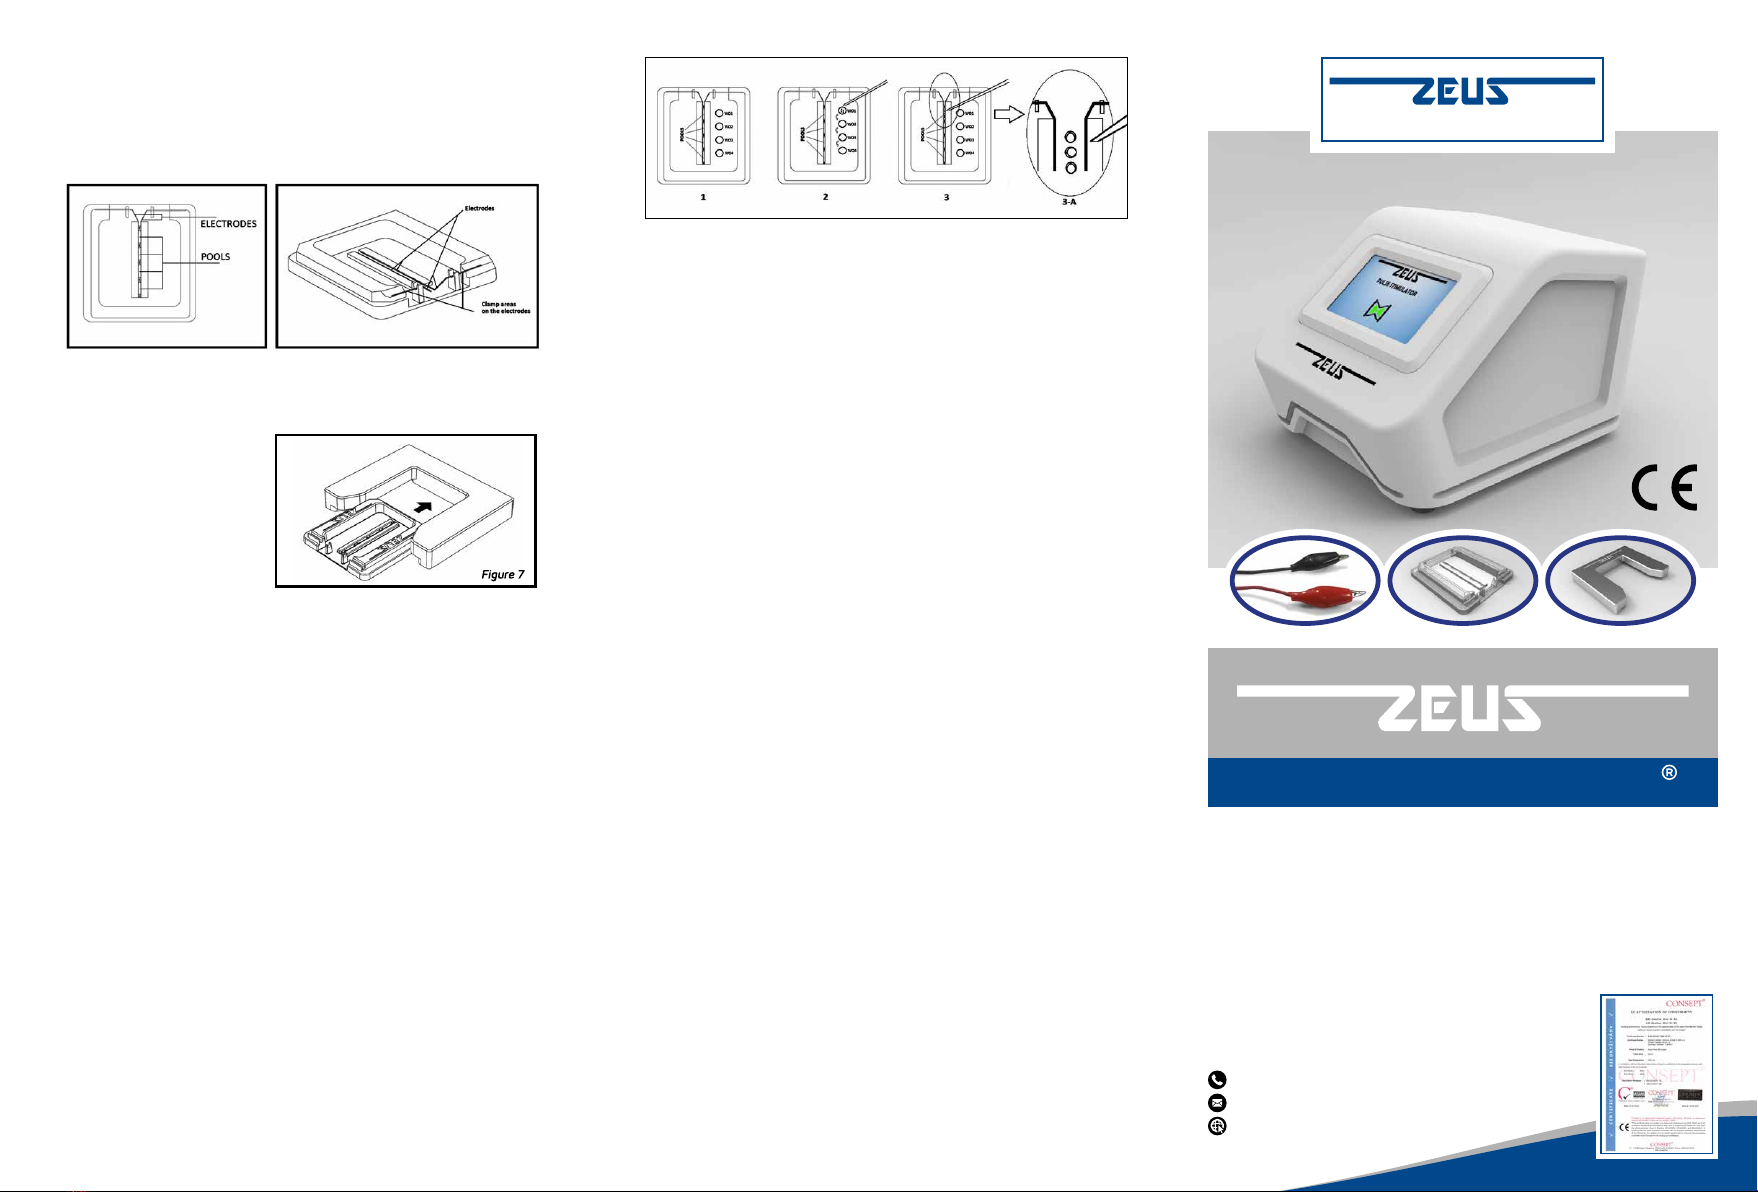
APPLICATION INSTRUCTION
a. ZEUS ZPS19 DEVICE INSTRUCTION MANUAL
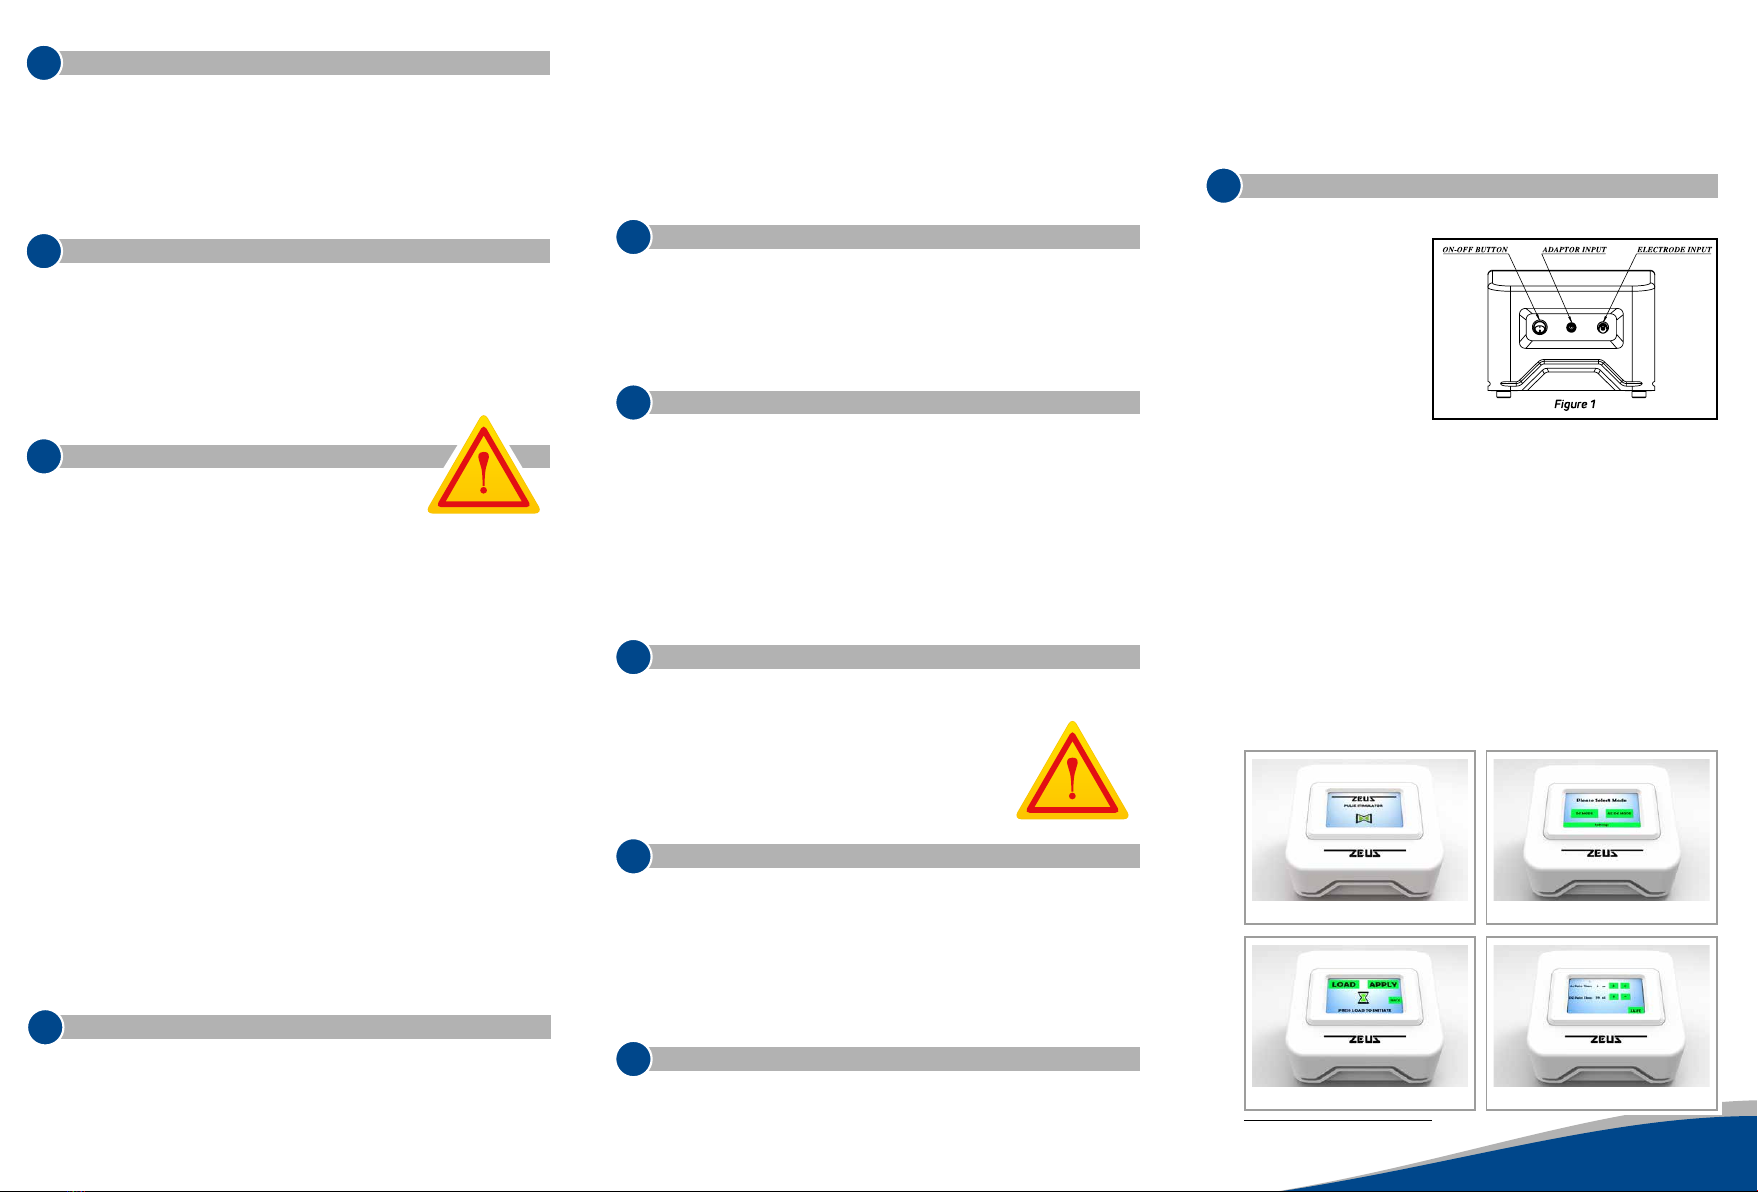
Connect the device to
a wall socket with the
“adapter input socket”
(adapter input) using the
provided adapter, and con-
nect the electrode cable to
the electrode input. After
the connections are made,
the device can be operat-
ed with the ON / OFF but-
ton. (Figure 1).
When the device is turned on by the ON / OFF button, first the opening
screen will appear (Figure 2), then the application screen with three touch
buttons will be displayed where the application mode can be selected
(Figure 3). On the screen there are “DC Mode” button that gives direct cur-
rent and “AC Mode” that gives alternative current, as well as “Settings”
button used to adjust the current time. When the preferred current type
is selected, the third screen will appear with “Load” and “Apply” and “Back”
buttons (Figure 4). To apply the selected current, it is sufficient to follow
the “Instruction” menu at the bottom of the screen. When the “Load” but-
ton is pressed, the device will be ready to give current and when the “Ap-
ply” button is pressed, the device will provide impulses to the electrodes
on the electro dish. Before the impulse is given, the electrode preparation
must be completed and the cells must be placed in the relevant section
(see ZEUS ELECTRO DISH / ZEUS ELECTROLIQUID PREPARATION). The
factory default setup settings of the device are set to 70 µs for the option
of DC Mode and 5 seconds for the AC / DC Mode option. When required,
the time can be set differently via “Settings” button (Figure 5).
1
3
5
6
7
8
9
4
2
DEVICE NAME & DESCRIPTION
Device Name : ZEUS Pulse Stimulator
Device Description : Manufacturer of cell specific constant direct
current (DC) and alternating current (AC).
a. Authorized Company : ZEUS Bioscience Biyomedikal A.Ş.
b. Producing Company : GenSa Genel Sağlık Hizmetleri A.Ş.
c. Brand – Model : ZEUS Pulse Stimulator - ZPS 19
GENERAL WARNINGS
Read the User Manual carefully before using the device and take into con-
sideration the indicated warnings.
This manual has been prepared for the safe, correct and productive use of
the device you have received. The information and explanations that you
will need to use the device are included in the manual. For the issues that
cannot be solved you can contact the authorized company.
Do not place or use your device on wet / damp surfaces. Use a grounded
outlet when using.
INTRODUCTION & GENERAL INFORMATION
a. INTENDED USE & PRINCIPLES OF OPERATION
ZEUS Pulse Stimulator provides electroporation and
fusion of the cell with suitable electrical current. The
device can offer alternating current (AC) and direct current (DC).
b. TECHNICAL SPECIFICATIONS
The device is controlled by touch-screen and designed to prevent the er-
rors that may arise from the user or the network by generating fixed and
standard stimulus at one time with the command, first storing the current
so that it is not affected by the city network and voltage fluctuations. ZEUS
Pulse Stimulator is designed for cell suspension and in vitro applications.
The device produces stable, standard and safe pulses at the cellular level
only with its specific apparatus (3-c.). Technical data of the device is as fol-
lows:
Voltage : 12 V
Stimulus Duration :
AC : Adjustable
DC : Adjustable
Device Dimensions : 142x245x190 mm
Weight : 2.362 g
Control Panel : 4.3 inch touchscreen
c. COMPONENTS & UNITS
ON / OFF (Power) button, digital touch screen, electrical input, electrode
outputs are located on the device. Power cable, electrode cable and tips,
disposable sterile dish (electro dish), dish fastener, sterile non-toxic electro-
lyte (electroliquid), main body, user manual, warranty certificate are includ-
ed with the device package.
INSTALLATION & USAGE
The device will be delivered to the user in a shielded original box. The device
and the accompanying apparatus should be compared with the list of box
contents in the user manual to check for any missing parts. The user man-
ual must be read carefully before installing and using the device. Device
installation and start-up is done by the user. The device must be placed on a
suitable worktop and never on wet or damp surfaces. The device should be
connected to a grounded outlet. The device is ready for usage after turning
ON / OFF button. The type of current (AC / DC) is selected from the options
on the touch screen and by following the commands on the screen the im-
pulse is given to the cell which was previously prepared between the elec-
trodes in the petri dish.The related details are provided in the section “10.
APPLICATION INSTRUCTION”. Direct technical assistance (English / Turkish
/ Russian) can be provided during installation if necessary.
SHIPPING
The device is shipped within 2 days after payment. Shipping costs are
paid by the user. Transport of the device will be done through licensed and
accredited cargo companies. Regarding the issues that may occur during
transportation the warranty and operation protocols of the transportation
company shall be valid. Upon the request the device can be collected di-
rectly by the receiver.
FAULT FINDING & REMOVAL
Authorization of sale of ZEUS Pulse Stimulator device is given by the let-
ter of 89252994-401.01.05 dated 17/09/2019 of Directorate General of
Consumer Protection and Market Surveillance of the Ministry of Trade. The
warranty certificate has been prepared in accordance with the “After Sales
Services” regulation prepared by the Ministry of Trade based on Article 58
of the Law No. 6502 on Consumer Protection and published in the Official
Gazette No. 29029 dated 13.06.2014. In case of malfunction of the device,
please contact the vendor. In the event of warranty coverage, the existing
defective device shall be replaced by a new device. The delivery of the new
device shall be carried out within 1 month following the delivery of the de-
fective device to the authorized company.
SECURITY RECOMMENDATIONS
The user manual should be read carefully before using the device.
The device should not be stored and used on wet and damp surfaces.
The device should be stored and used on a suitable table or
worktop.
Since the device has an electrically operated system, it
should be used only by authorized persons with the nec-
essary general safety precautions.
WARRANTY
The device is not covered by the warranty in case it was misused or used
for other purposes. The user must check that all apparatus and parts are
complete before installation. The user accepts that the manufacturer is not
responsible for any damages, accidents, etc. that may occur during the in-
stallation and usage of the device. The buyer accepts these warranty terms
when purchasing the product. Details of the warranty conditions are stated
in the warranty certificate which is delivered to the buyer after the device is
approved by the seller.
DEVICE CONTENT
1 x Pulse Stimulator - Main Body
1 x Adaptor
2 x Disposable Sterile Dish (Electro Dish - ED)
Figure 2 Figure 3
Figure 4 Figure 5
* Dish Fastener (DF) is optional.