manuals.online logo
Brands
  1. Home
  2. •
  3. Brands
  4. •
  5. ZHWCOMM
  6. •
  7. Test Equipment
  8. •
  9. ZHWCOMM SGOT04 User manual

ZHWCOMM SGOT04 User manual

1、Overview
SGOT04 is a portable optical fault searcher, using the principle of OTDR and integrating with
powerful analysis software, which can detect the location and type of optical fiber fault rapidly
and precisely.
Light weight appearance, small size, light weight and convenient to carry.
Reliable performance and good repeatability.
One-touch operation and simple settingswith clear result
Detect node length and fault location on link simply
Integrated visual fault location system, convenient for detecting fault location in dead zone
Silicone keypad, providing comfortable operation.
Use three 1.5V AA alkaline battery, supporting long working and convenient for changing,
especially suitable for long-time field operation
The device is suitable for the construction of access network based on FTTX, and fault location in
maintenance.
Main Function:
Measure optical fiber length and locate fault point.
Measure the distance between two node in fiber
Detect the restoration of fiber
2、Technical Indicator
Type
SGOT04
Operating Wavelength
1550nm(1310nm available)
Fiber Type
9/125um single mode fiber
Joint Type
FC/PC
Sensor Type
InGaAs
Laser Peak Power
≥60mW
Maximum Display
Distance
Reflective Event
60km(≥1dB)
Non-reflective Event
20km(≥2.5dB)
Measurement Unit
m
Reflection Event Dead Zone
15m
Distance Accuracy (Reflection Event)
±(2m+2*10-4 distance)
Visual Fault Locator Wavelength
650nm
Visual Fault Locator Power
≥1mW
Power Supply
Three 1.5V AA alkaline batteries
Battery Operating Time
≥5000 times measurement
Operating Temperature
-5-40℃
Storage Temperature
-10-60℃
Humidity
0-85%(no condensation)
Weight (without battery)
350g
3、Standard Configuration
Item
Name
Quality
mainframe
SGOT04
1
accessory
specification
1
desiccant
1
Oxford cloth bag
1
1.5V AA alkaline battery
(available)
3
4、Function Declaration
4.1
Power button: When the device is in shutdown, press the button to power on. When the device
is on, press the button to switch auto power-off. Press the button for three seconds to power off
the device. When the battery mark shows at the top-left corner of screen, the device will be shut
down after above 5 minutes without keys operation.
SCAN: In measurement pattern, press this button to start up OTDR to measure the optical fiber
and display the result on screen. Press the button for 5 seconds to enter loop test with mark A
at the top-left corner of screen. In automatic loop test , press the button once again to exit
automatic loop test.
Up Arrow: In measurement pattern, press the button to check the last measured value among
multiple values. In refractive index modification pattern, press the button to modify refractive
index, adding 0.0001 each press.
Down Arrow: In measurement pattern, press the button to check the next measured value
among multiple values. In refractive index modification pattern, press the button to modify
refractive index, reducing 0.0001 each press.
IOR: In measurement pattern, press the button to display the current refractive index, and modify
with up and down arrow. Press the button once more to save and go back to measurement
pattern.
GLINT: In measurement pattern, press the key to enter visible fault location test pattern, and
press once more to return to test pattern.
4.2 Operating Instructions
4.2.1 Power on and enter measurement mode
4.2.2 Clean measured fiber, and switch in OTDR port. Please give attention to fiber port type,
because if unmatched connector type switch in, the output fiber head may be damaged and you
may obtain wrong result.
4.2.3 Press SCAN button to start scanning with progress bar displayed on screen. The device
doesn’t need to set pulse width. The device will adjust automatically in the progress of scanning.
The powerful intelligent analysis software calculates the event points in the whole measurement
range.
4.2.4 After measurement, all measured values are displayed. 8 events can be displayed in total
event at a time, and you can check each event by operating up and down arrow. The error of
reflection event is very small and the error of attenuation is large.
4.2.5 If the measured value is in dead zone or beyond the measuring range, it is displayed as
empty event.
4.2.6 In optical fiber repair work, you can locate break points with the device. When welding
break point, servicemen can use automatic loop test, by pressing SCAN key for above 3 seconds
until SCAN mark shows.
4.2.7 After measurement, the current break point’s value is displayed.
4.2.8 The interval time between automatic tests isabout 5 seconds. When test value changes, it is
estimated that the current break point is recovered.
4.2.9 Press SCAN button once more to exit automatic loop test.
4.2.10 Press IOR key to enter the interface of refractive index modification.
4.2.11Refractive index can be modified between 1.0000-2.0000 by the operation of up and down
arrow. Then press IOR key to save refractive index and exit modification.
4.2.12 When checking high loss fault point or break point of short-distance optical fiber or pigtail,
visible fault location system is available. You need to exit automatic loop test pattern before using
the system. Please connect fiber with visible fault location port and press “GLINT” key, then you
will see red light in pigtail or break point of measured fiber. And press once more to exit visible
fault location system.
Notes: Please don’t look steadily at measured fiber or the end or break of pigtail to avoid damage
to eyes.
5、maintenance and preservation
The fiber port needs to keep clean, and the output port needs to be cleaned with absolute ethyl
alcohol at regular intervals.
Please cover dust cap after use and keep dust cap clean.
Please ensure power closed when cleaning. Please ensure laser source disabled when cleaning
any port, otherwise it’s possible to be inradiant danger.
Please connect device with matched optical fiber, otherwise unmatched connector may cause the
damage to output port.
Please take out the battery if you don’t use for long time.
Please put cotton swab with absolute ethyl alcohol in output port and gently spin, then change a
new one to clean once more.
6. Common Fault
Fault Form
Possible Cause
Solution
The device cannot start
The power supply is closed
Press power button
Electricity shortage
Change battery
Wrong fiber refractive index
setting
Clean end face of optical fiber
with absolute ethyl alcohol
Inaccurate
Fiber end face is contaminated.
Clean end face of optical fiber
with absolute ethyl alcohol
Connector is not matched.
Use matched optical fiber patch
cord, or convert with patch cord
If the problem cannot be solved, please do not hesitate to contact usin a timely manner.
7. Notes
There are laser and detecting sensor inside, please do not put the sensor under direct light,
otherwise the sensor will be in disorder, and even the sensor will be damaged.
The light key changes as the temperature changes, so please please do not place it under direct
sun.
The light pulse emitted by the device may damage your eyes. Please do not look into the light
source at any time to avoid damage!
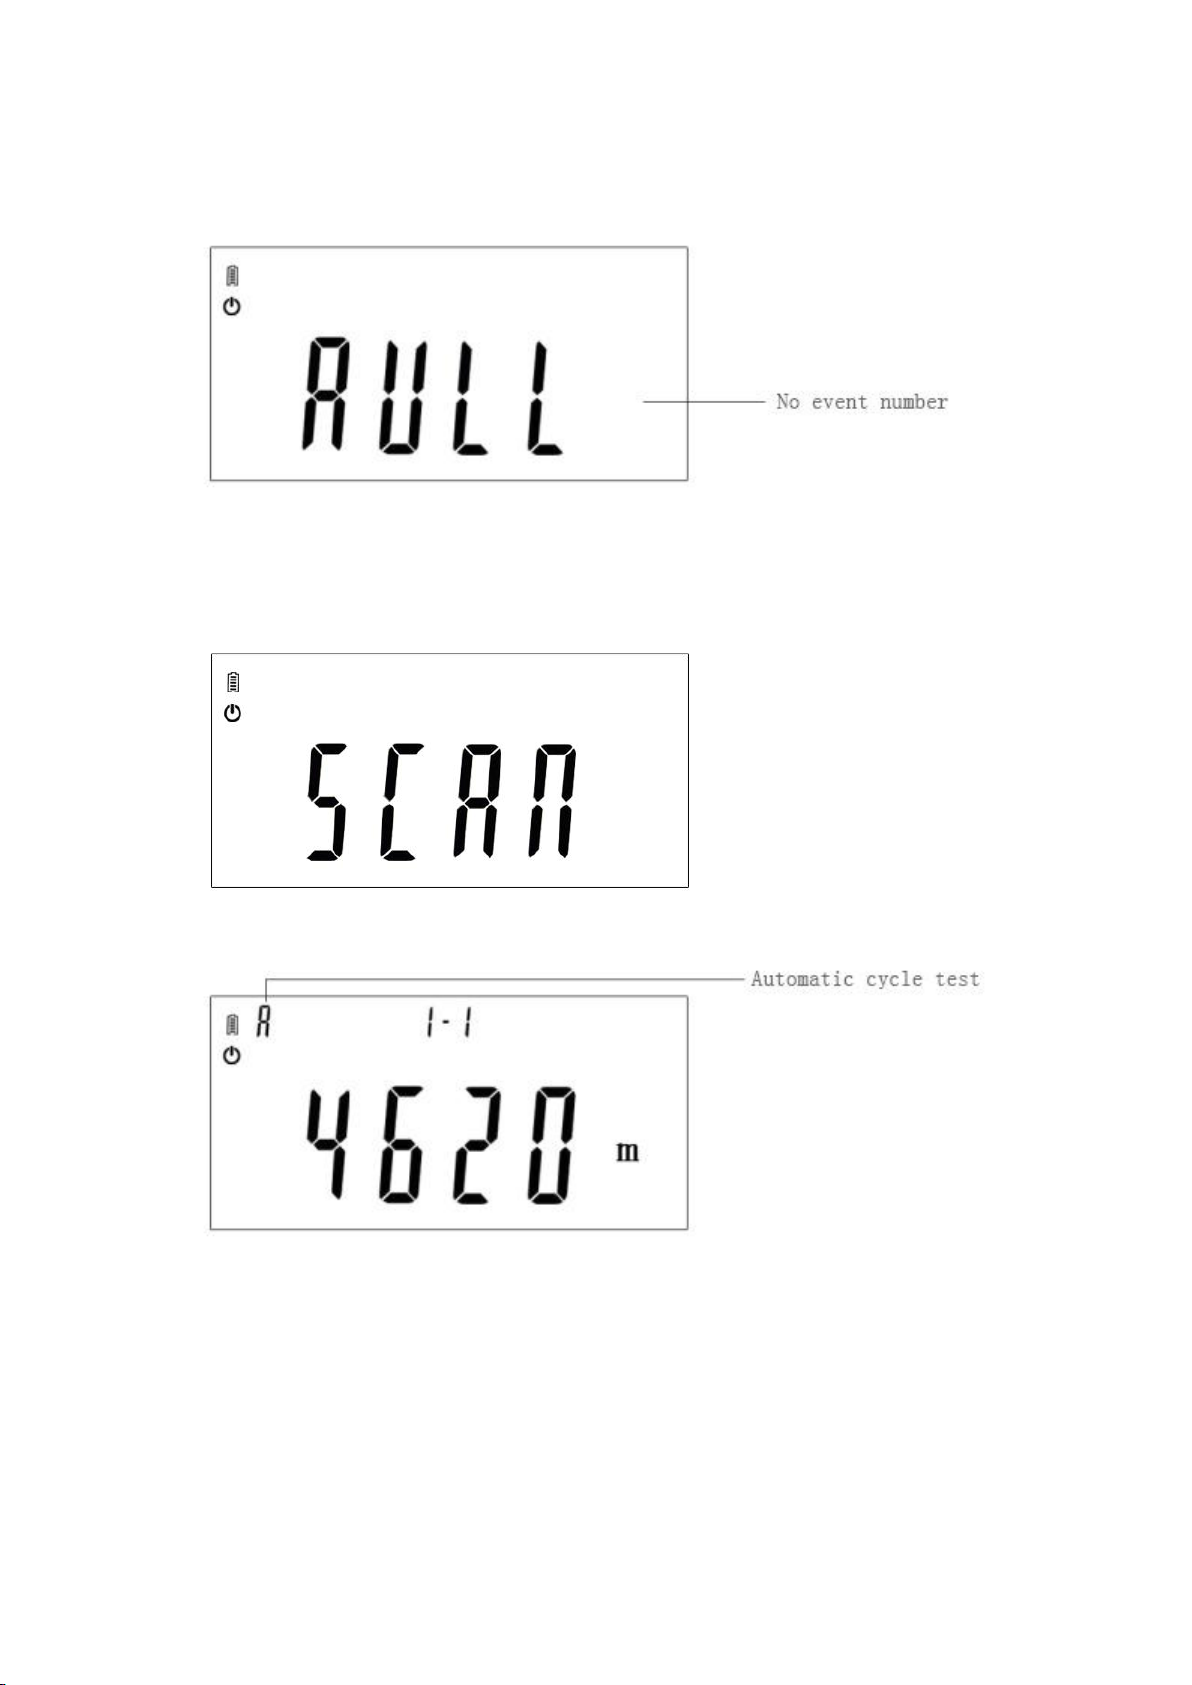
Before “SCAN”, please make sure that the optical fiber and port are connected firstly. Please do
not pull and insert optical fiber in the process of “SCAN” to avoid device damage because of
reflection.
8、
We suggest that please do not repair by yourself.
Our company give our promise tothe material and process of the products, warrantyperiodis
18months starting from the day when the products were received.If problems are found in
respect to the quality of our products that are still within the warranty period, our company will
perform correspondent management or will switch the product. But under all circumstance, the
responsibility will not surpass the purchase value of the product.
If there are any problems with the use of the instrument that cannot be resolved with
commonfaults and troubleshooting advice, users should not open the device’s case on their own,
but rather to contact our company.
As to the malfunction made by the disadvantage of the product, our company will be in
charge of repairing or changing product for free.
These following problems/faults are not included in warranty: 1. Repair or modify without
authorization; 2. inappropriate or negligent usage and accident, etc.

Popular Test Equipment manuals by other brands

Jinhan JDS6052S user manual

Jinhan

Jinhan JDS6052S user manual

Bosch SMT 300 Original instructions

Bosch

Bosch SMT 300 Original instructions

SIGLENT TECHNOLOGIES SDS1000 Series user manual

SIGLENT TECHNOLOGIES

SIGLENT TECHNOLOGIES SDS1000 Series user manual

Psiber CableMaster 600 quick start guide

Psiber

Psiber CableMaster 600 quick start guide

Berkeley Varitronics Systems Grasshopper user manual

Berkeley Varitronics Systems

Berkeley Varitronics Systems Grasshopper user manual

Gossen MetraWatt DUSPOL analog 1000 operating manual

Gossen MetraWatt

Gossen MetraWatt DUSPOL analog 1000 operating manual

ED&D LT-952 user manual

ED&D

ED&D LT-952 user manual

2B Technologies Model 408 Operation manual

2B Technologies

2B Technologies Model 408 Operation manual

Meatest M505D Operation manual

Meatest

Meatest M505D Operation manual

SPX Power Team HT50A operating instructions

SPX

SPX Power Team HT50A operating instructions

Uni-Trend UT4000 Series user manual

Uni-Trend

Uni-Trend UT4000 Series user manual

Hioki 3281 instruction manual

Hioki

Hioki 3281 instruction manual

REMS E-Push instruction manual

REMS

REMS E-Push instruction manual

ILLKO REVEXplus USB user manual

ILLKO

ILLKO REVEXplus USB user manual

PICO PicoScope 3204A Programmer's guide

PICO

PICO PicoScope 3204A Programmer's guide

Hameg HM304 manual

Hameg

Hameg HM304 manual

Varytec Blitz Bar 240 user manual

Varytec

Varytec Blitz Bar 240 user manual

Viavi T-BERD MTS 5800 Quick Card

Viavi

Viavi T-BERD MTS 5800 Quick Card

manuals.online logo
manuals.online logoBrands
  • About & Mission
  • Contact us
  • Privacy Policy
  • Terms and Conditions

Copyright 2025 Manuals.Online. All Rights Reserved.