manuals.online logo
Brands
  1. Home
  2. •
  3. Brands
  4. •
  5. Zircon
  6. •
  7. Security Sensor
  8. •
  9. Zircon Leak Alert+ User manual

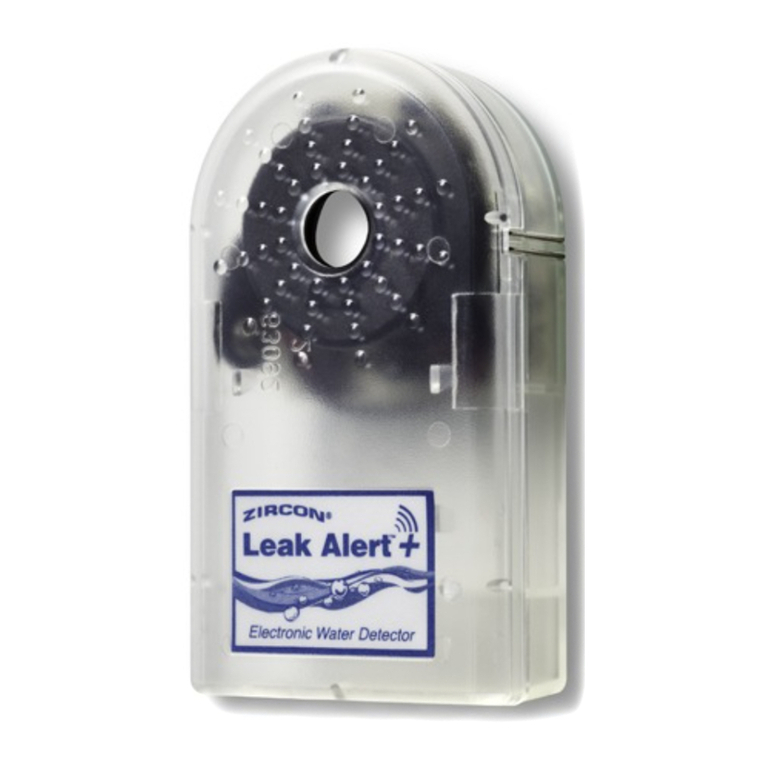
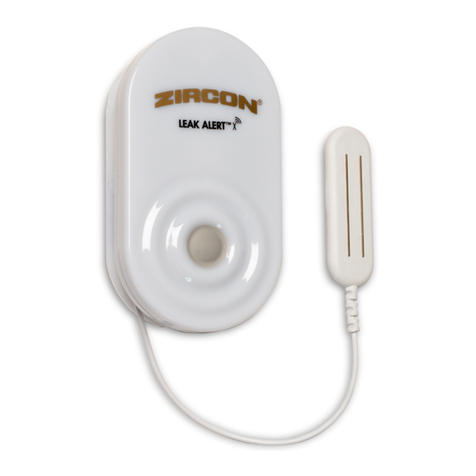
Zircon Leak Alert+ User manual

9V Battery
ZirconCorporation ZirconTV
ZirconTools
|
ZirconToolPro ZirconTools
ZirconCorporation ZirconTV
ZirconTools
|
ZirconToolPro ZirconTools
9V Battery
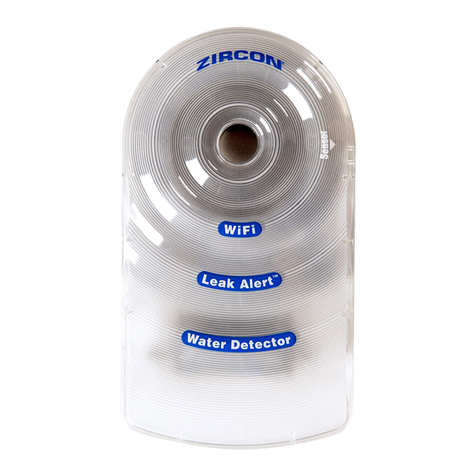
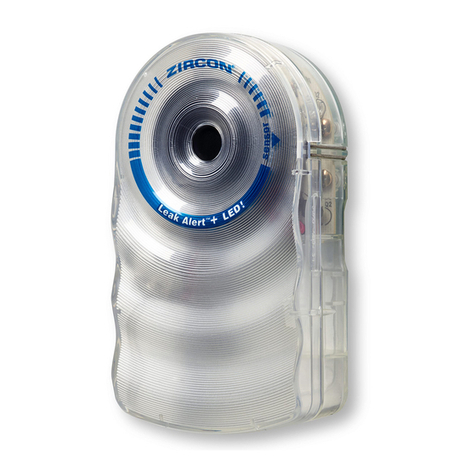
Leak Alert™
Electronic Water Detector
Undetected water can cause thousands of dollars in damage.
Protect your home from potential water damage by keeping a
Leak Alert™water detector anywhere flooding is a potential
danger—near aquariums, sump pumps, plumbing, washing
machines, water heaters, toilets, basements, and garages.
1. INSTALLING THE BATTERY
Insert a coin between top and
bottom halves of case. Turn coin
to separate.
Connect 9V battery to clip.
Position battery according to the diagram
on the right. Proper battery position will
allow the unit to float in the event of a flood.
Securely close case.
2. TESTING
Wet your finger and touch the two
sensing contacts.
A loud, repetitive series of
beeps will sound and the LEDs
will flash red. Dry the contacts
to stop the alarm.
In the event of low battery,
water detector will chirp
(short beep every 5 seconds).
Please replace with brand new
9V battery immediately.
3. PLACEMENT
Place Leak Alert™water detector facing
up and flat against the surface, with metal
sensing contacts down.
Leak Alert™water detector
will not function properly
with contacts up.
4. FLOODING
Leak Alert™water detector will float
(if battery is inserted according to
diagram inside battery compartment)
and alarm will sound for life of
battery, up to 72 hours.
5. HELPFUL HINTS
Alarm
Flashing LED
Battery Access
Sensing Contacts
Situation Probable Cause Solutions
False alarm
sounds.
Unit does not
sound alarm
even when
touching water.
Unit does
not float.
• Battery voltage is low.
• Water detector is on
a conductive surface
(i.e. metal).
• Ambient moisture
has collected on
metal contacts.
• Metal contacts are up,
not touching surface
with water.
• Battery is dead.
• Battery is not placed in
correct area of case.
• Change the battery.
• Place a piece of thin paper
or plastic between water
detector and metal surface.
• Wipe metal contacts dry.
• Make sure metal contacts
are flat on surface where
water is to be detected.
• Replace battery.
• Place unit in face-up
position, open battery
compartment, and position
battery per diagram.
REPLACE BATTERY AND RETEST UNIT ANNUALLY.
Leak Alert™
Elektronischer Wasserauslaufmelder
Wasser kann Tausende von Euros an Schaden anrichten,
wenn es nicht rechtzeitig entdeckt wird. Schützen Sie Ihr
Zuhause vor möglichem Wasserschaden, und verwenden Sie
einen Leak Alert™, wo auch immer das potentielle Risiko
einer Überflutung besteht: in der Nähe von Aquarien,
Sammelbehälterpumpen, wasserführenden Rohren,
Waschbecken, Kühlschränken, Geschirrspülern, Waschmaschinen,
Wassererhitzern, Toiletten, im Kellergeschoß sowie in der Garage.
1. EINLEGEN DER BATTERIE
Münze zwischen oberer und
unterer Hälfte des Gehäuses
einschieben. Münze drehen,
um das Fach zu öffnen.
Anschlußclip auf 9V-Batterie
aufdrücken. Batterie gemäß
dem Diagramm auf der
Innenseite des Faches einlegen.
Gehäuse schließen.
Platzieren Sie die Batterie wie in der
Abbildung rechts angezeigt. Die richtige
Position der Batterie im Gerät, ermöglicht
diesem im Falle eines Wasserschadens auf
der Wasseroberfläche zu schwimmen.
Klappen Sie das Gehäuse wieder fest zu.
2. FUNKTIONSTEST
Feuchten Sie Ihren Finger an, und berühren
Sie die zwei Kontakte.
Eine laute, sich wiederholende Serie
von Pieptönen ertönt und die LEDs
blinken rot. Trocknen Sie die Kontakte
ab, um den Alarm abzuschalten.
Bei schwachem Batteriestand
ertönt alle 5 Sekunden ein kurzer
Piepton. Bitte ersetzen Sie die
Batterie umgehend mit einer
fabrikneuen 9V Batterie.
3. POSITIONIERUNG
Legen Sie den Leak Alert™flach mit der
Vorderseite nach oben oder auf die Seite
mit den Metallsensorkontakten nach unten.
Der Leak Alert™kann nicht
ordnungsgemäß funktionieren,
wenn die Kontakte nach
oben weisen.
4. BEI EINEM WASSERLECK
Der Leak Alert™schwimmt (sofern die
Batterie gemäß dem Diagramm auf
der Innenseite des Batteriefaches
eingelegt wurde), und ein Alarmsignal
ertönt, bis das Gerät ausgeschaltet
wird oder die Batterie leer ist, bzw. bis
zu 72 Stunden.
5. HILFREICHE HINWEISE
Alarm
Blinkende LED
Batteriefachschlitz
Sensorkontakte
Mögliche
Situation Ursachen Lösungsvorschläge
Es ertönt ein
falscher Alarm.
Es ertönt kein
Alarmsignal,
obwohl das Gerät
Wasser berührt.
Das Gerät
schwimmt nicht.
• Batteriespannung ist niedrig.
• Der Leak Alert liegt auf
einer elektrisch leitenden
Oberfläche auf (d.h. Metall).
• Es hat sich Luftfeuchtigkeit
auf den Kontaktteilen aus
Metall angesammelt.
• Die Metallkontakte weisen
nach oben und berühren
nicht die Oberfläche, auf der
Wasser vorhanden ist.
• Die Batterie ist leer.
• Die Batterie ist nicht korrekt
in das Gehäuse eingelegt.
• Wechseln Sie die Batterie.
• Legen Sie ein dünnes Stück
Papier oder Plastik zwischen
den Leak Alert und die
metallische Oberfläche.
• Trocknen Sie mit einem Tuch
die Kontaktteile aus Metall.
• Stellen Sie sicher, daß die
Metallkontakte nach unten
weisen und auf der Oberfläche
aufliegen, wo sie Wasser
detektieren sollen.
• Die Batterie auswechseln.
• Legen Sie das Gerät mit der
Vorderseite nach oben, öffnen
Sie das Batteriefach, und
legen Sie die Batterie gemäß
dem Diagramm ein.
EINGESCHRÄNKTE 2-JÄHRIGE GARANTIE
Zircon Corporation, (“Zircon”) garantiert für 2 Jahre ab Kaufdatum, dass dieses
Produkt keine Material- und Verarbeitungsmängel aufweist. Jedes defekte Produkt
kann, mit dem entsprechenden beigefügten Nachweis zum Kaufdatum, innerhalb der
Garantiefrist beim Händler retourniert werden. Der Händler hat das Optionsrecht das
Gerät zu ersetzen. Diese Garantie beschränkt sich ausschließlich auf die elektronische
Schaltungstechnik und das Original-Gehäuse des Gerätes und schließt ausdrücklich
alle Schäden aus, die durch Missbrauch, falschen Gebrauch oder Nachlässigkeit
verursacht wurden. Diese Garantie tritt an Stelle von allen anderen Gewährleistungen,
ob direkt oder indirekt, dementsprechend bleibt Zircon frei von anderen Vertretungen
oder Forderungen jeglicher Art verbindlich oder verpflichtend. Jegliche indirekte
Gewährleistungen, die für dieses Produkt zutreffen, beschränken sich auf die 2-jährige
Garantiefrist nach dem Erwerb.
IN KEINEM FALLE IST ZIRCON HAFTBAR FÜR JEGLICHE SPEZIELLE, BEGLEITENDE ODER
FOLGESCHÄDEN, DIE DURCH DEN BESITZ, DIE VERWENDUNG ODER FEHLFUNKTION
DIESES PRODUKTS ENTSTEHEN.
www.ZirconEurope.com
E-mail: [email protected]
© 2016 Zircon Corporation • P/N 67894 • Rev A 02/16
Leak Alert und Zircon sind registrierte Warenzeichen oder Warenzeichen der Zircon Corporation.
Ersetzen Sie die Batterie und testen Sie das Gerät
ein Mal jählich.
Visit www.ZirconEurope.com for the most current instructions.
LIMITED 2 YEAR WARRANTY
Zircon Corporation, (“Zircon”) warrants this product to be free from defects in
materials and workmanship for two years from the date of purchase. Any in-warranty
defective product returned to the place of purchase with proof of purchase date will
be replaced at retailer’s option. This warranty is limited to the electronic circuitry
and original case of the product and specifically excludes damage caused by abuse,
unreasonable use or neglect. This warranty is in lieu of all other warranties, express
or implied, and no other representations or claims of any nature shall bind or obligate
Zircon. Any implied warranties applicable to this product are limited to the two year
period following its purchase.
IN NO EVENT WILL ZIRCON BE LIABLE FOR ANY SPECIAL, INCIDENTAL OR
CONSEQUENTIAL DAMAGES RESULTING FROM POSSESSION, USE OR MALFUNCTION
OF THIS PRODUCT.
www.ZirconEurope.com
E-mail Customer Service: [email protected]
© 2016 Zircon Corporation • P/N 67894 • Rev A 02/16
Leak Alert and Zircon are registered trademarks or trademarks of Zircon Corporation.
GB
DE
Besuchen Sie www.ZirconEurope.com, für die neueste Bedienungsanleitung.
ZirconCorporation ZirconTV
ZirconTools
|
ZirconToolPro ZirconTools
9V Battery
Leak Alert™
Détecteur d´eau Electronique
L´eau non détectée peut causer des milliers de dollars de
dommages. Protégez votre foyer des dommages possibles
causés par les débordements d´eau en conservant un
Leak Alert™à tout endroit où une inondation est un danger
possible – près des aquariums, des pompes de puisards,
de la plomberie, des réfrigérateurs, des lave-vaisselles, des
machines à laver, des éviers, des chauffe-eaux, des toilettes,
des sous-sols et des garages.
1. INSTALLATION DE LA PILE
Insérez et tournez une pièce de
monnaie pour séparer les moitiés
supérieure et inférieure du boîtier.
Connectez la pile de
9 volts à la pince.
Placez la pile comme indiqué par le
diagramme situé à droite. Un bonne mise
en place de la pila permettra à l´outil de
flotter même en cas d´inondation. Fermez
le boîtier avec soin.
2. TEST
Mouillez votre doigtet touchez les deux contact.
Une série répétitive de sons puissants
est émise et les LEDs clignotent en
rouge. Séchez les contacts pour
arrêter l`alarme.
Dans le cas de batterie faible,
le détecteur d´eau émettra un
court signal sonore toutes les 5 sec.
Veuillez remplacer immédiatement
par une pile 9V neuve.
3. PLACEMENT
Placez le Leak Alert™à plat, face vers le
haut ou sur le côté, contacts métalliques
vers le bas.
Le Leak Alert™ne fonctionnera
pas correctement avec les
contacts vers le haut.
4. INONDATION
Le Leak Alert™flottera (si la pile est
insérée selon le diagramme à l`interieur
du compartiment de pile) et l´alarme se
fera entendre pendant la vie de la pile,
jusquià 72 heures.
5. CONSEILS UTILES
Alarme
LED clignotante
Accès à la pile
Contacts de détecteur
Situation Causes Probables Solutions
Fausse alarme
se fait entendre.
L´appareil ne
fait pasent
endre l´alarme
même lorsqu´il
touche l´eau.
L´appareil ne
flotte pas.
• La tension de la pile
est faible.
• Le détecteur d´eau se trouve
sur une surface conductrice
(par ex.: métal).
• L´humidité ambiante s´est
condensée sur les contacts
métaliques.
• Les contacts métalliques
sont vers le haut et
ne touchent pas la
surface mouillée
• La pile est morte.
• La pile niestpas mise dans
le zone correct du boîtier.
• Changez la pile.
• Placez une fine feuille de
papier ou de plastique
entre le détecteur d´eau
et la surface métallique.
• Asséchez les contacts
métalliques.
• Assurez-vous que les
contacts métalliques sont
vers le bas sur la surface où
l´eau pourrait être détectée.
• Remplacez la pile.
• Placez l´appareil en
position ver le haut, ouvrez
le compartiment de pile et
mettez la pile en position
selon le diagramme.
Visiter www.ZirconEurope.com pour les instructions plus courantes.
GARANTIE LIMITÉE DE 2 ANS
Zircon Corporation, (“Zircon”) garantit ce produit contre tout défaut pendant deux
ans, pièces et main-d´oeuvre, à partir de la date d´achat. Tout produit sous garantie
retourné au lieu d´achat accompagné de sa preuve d´achat pourra être remplacé
au gré du vendeur. Cette garantie est limitée au circuit électronique et exclut
spécifiquement tout dommage causé par une utilisation fautive, ou négligence.
Cette garantie annule toute autre garantie, exprimée ou implicite, et aucune autre
démarche ou réclamation d´aucune nature ne pourra faire obligation ni contraindre
Zircon. Toute garantie tacite applicable à ce produit est limitée aux 2 ans suivant sa
date d´achat.
ZIRCON NE PEUT EN AUCUN CAS ETRE TENU POUR RESPONSABLE DE DOMMAGE
PARTICULIER, ACCIDENTEL OU CONSECUTIF A LA POSESSION, L´UTILISATION OU LE
DYSFONCTIONNEMENT DE CE PRODUIT.
www.ZirconEurope.com
E-mail Customer Service: [email protected]
© 2016 Zircon Corporation • P/N 67894 • Rev A 02/16
Leak Alert et Zircon sont des marques commerciales déposées ou des marques de Zircon Corporation.
Remplacez la pile et re-testez l´unité
chaque année.
PROTECTING THE ENVIRONMENT
Separate collection. This product must not be disposed with
normal household waste.
Should your Zircon product need replacement or is of no
further use to you, do not dispose of it with household waste.
Make this product available for separate collection.
Separate collection of used products and packaging
allows materials to be recycled and used again. Re-use
of recycled materials helps prevent environmental
pollution and reduces the demand for raw materials.
Local regulations may provide for separate collection of
electrical products from the household, at municipal waste
sites or by the retailer when you purchase a new product.
Attestations DEEE et CE
Tri sélectif. Ce produit ne doit pas être jeté avec les déchets
ménagers courants.
Si votre appareil Zircon doit être remplacé ou ne vous est plus
nécessaire, ne le jettez pas avec vos ordures ménagères. Il doit
faire partie d´une collecte sélective.
Le tri sélectif de produits et emballages usagés permet leur
recyclage et leur ré-utilisation. La ré-utilisation
de matériaux recyclés protège l´environnement de
pollutions et diminue la demande en matériau brut.
Les règlementations locales peuvent prévoir une collecte
particulière dans les déchetteries municipales ou chez votre
détaillant lorsque vous achetez un nouveau produit.
WEE und CE Zertifizierung
Dieses Produkt darf nicht mir normalem Haushaltsmüll entsorgt
werden und erfordert eine Mülltrennung.
Sollte Ihr Zircon Produkt ausgetauscht werden, oder es wird
nicht weiter von Ihnen benutzt, dann bitte werfen Sie es nicht in
den normalen Hausmüll, sondern stellen Sie das Produkt bereit
für eine separate Abholung.
Separate Abholung von gebrauchten Produkten und
Verpackungen, erlaubt das Recycling und die
Wiederverwendung von Materialien. Die Wiederverwendung
von Materialien verhindert Umweltverschmutzung und
reduziert den Bedarf an Rohstoffen.
Die lokalen Regulierungen können eine separate Sammlung von
elektrischen Produkten in Haushalten erlauben auf öffentlichen
Deponien oder beim Neukauf eines Gerätes beim Fachhändler.
FR

Other Zircon Security Sensor manuals

Zircon Leak Alert + LED! User manual

Zircon

Zircon Leak Alert + LED! User manual

Zircon StudSensor L70 OneStep User manual

Zircon

Zircon StudSensor L70 OneStep User manual

Zircon Leak Alert + User manual

Zircon

Zircon Leak Alert + User manual

Zircon Leak Alert + User manual

Zircon

Zircon Leak Alert + User manual

Zircon StudSensor Pro SL-AC User manual

Zircon

Zircon StudSensor Pro SL-AC User manual

Zircon LEAK ALERT X User manual

Zircon

Zircon LEAK ALERT X User manual

Zircon Leak Alert User manual

Zircon

Zircon Leak Alert User manual

Zircon Leak Alert User manual

Zircon

Zircon Leak Alert User manual

Zircon Leak Alert WiFi User manual

Zircon

Zircon Leak Alert WiFi User manual

Zircon Leak Alert + LED! User manual

Zircon

Zircon Leak Alert + LED! User manual

Popular Security Sensor manuals by other brands

Fieldpiece SCM4 Operator's manual

Fieldpiece

Fieldpiece SCM4 Operator's manual

Powerfix Profi 4-IN-1 MULTI-DETECTOR Operation and safety notes

Powerfix Profi

Powerfix Profi 4-IN-1 MULTI-DETECTOR Operation and safety notes

PCB Piezotronics ICP T356A32 Installation and operating manual

PCB Piezotronics

PCB Piezotronics ICP T356A32 Installation and operating manual

PCB Load & Torque 4115K-13A Installation and operating manual

PCB

PCB Load & Torque 4115K-13A Installation and operating manual

PCB Piezotronics 393C Installation and operating manual

PCB Piezotronics

PCB Piezotronics 393C Installation and operating manual

Saxby Lighting 90978 instruction manual

Saxby Lighting

Saxby Lighting 90978 instruction manual

RKI 35-3001A-01-03 Operator's manual

RKI

RKI 35-3001A-01-03 Operator's manual

Ferno XT User and maintenance manual

Ferno

Ferno XT User and maintenance manual

PCB Piezotronics IMI Sensors M641B12 Installation and operating manual

PCB Piezotronics

PCB Piezotronics IMI Sensors M641B12 Installation and operating manual

Prolon PL-RS quick start guide

Prolon

Prolon PL-RS quick start guide

jablotron JA-60V installation manual

jablotron

jablotron JA-60V installation manual

Pneumercator LLP203 instruction manual

Pneumercator

Pneumercator LLP203 instruction manual

Kusam-meco 2800B Operation manual

Kusam-meco

Kusam-meco 2800B Operation manual

Safety 1st Perfect Fit user guide

Safety 1st

Safety 1st Perfect Fit user guide

Varex Imaging PaxScan 1313DXT-I manual

Varex Imaging

Varex Imaging PaxScan 1313DXT-I manual

Advance acoustic PIR1 instructions

Advance acoustic

Advance acoustic PIR1 instructions

B.E.G. LUXOMAT PD4-S Series manual

B.E.G.

B.E.G. LUXOMAT PD4-S Series manual

RKI Instruments 65-2427RK-05 Operator's manual

RKI Instruments

RKI Instruments 65-2427RK-05 Operator's manual

manuals.online logo
manuals.online logoBrands
  • About & Mission
  • Contact us
  • Privacy Policy
  • Terms and Conditions

Copyright 2025 Manuals.Online. All Rights Reserved.