manuals.online logo
Brands
  1. Home
  2. •
  3. Brands
  4. •
  5. zogics
  6. •
  7. Dispenser
  8. •
  9. zogics ClearVu Parts list manual

zogics ClearVu Parts list manual

This manual suits for next models

3

Popular Dispenser manuals by other brands

BOWMAN CL003-0111 manual

BOWMAN

BOWMAN CL003-0111 manual

SIKA Power Cure operating instructions

SIKA

SIKA Power Cure operating instructions

Silver King Majestic SK12MAJ Technical manual and replacement parts list

Silver King

Silver King Majestic SK12MAJ Technical manual and replacement parts list

Franke F3Dn Twin Service manual

Franke

Franke F3Dn Twin Service manual

HURAKAN HKN-MT1 manual

HURAKAN

HURAKAN HKN-MT1 manual

STIEBEL ELTRON UltraHot Plus Operation and installation instructions

STIEBEL ELTRON

STIEBEL ELTRON UltraHot Plus Operation and installation instructions

Bobrick B-828 troubleshooting guide

Bobrick

Bobrick B-828 troubleshooting guide

DAN DRYER 282 installation guide

DAN DRYER

DAN DRYER 282 installation guide

Essity Tork 473208 manual

Essity

Essity Tork 473208 manual

CBS SD300BU-88 COMPONENT MAINTENANCE MANUAL WITH ILLUSTRATED PARTS LIST

CBS

CBS SD300BU-88 COMPONENT MAINTENANCE MANUAL WITH ILLUSTRATED PARTS LIST

Sealey MK77 manual

Sealey

Sealey MK77 manual

Fluid Management Accutinter 1600 End user guide

Fluid Management

Fluid Management Accutinter 1600 End user guide

Franke DVS SD99-010 Installation and operating instructions

Franke

Franke DVS SD99-010 Installation and operating instructions

Graco Dispensit 1053-10C operation & maintenance

Graco

Graco Dispensit 1053-10C operation & maintenance

DPR SED02 user manual

DPR

DPR SED02 user manual

ITALTINTO i50 user manual

ITALTINTO

ITALTINTO i50 user manual

Coca-Cola FREESTYLE 9000 user guide

Coca-Cola

Coca-Cola FREESTYLE 9000 user guide

Hewi 805.06.150 Mounting instructions

Hewi

Hewi 805.06.150 Mounting instructions

manuals.online logo
manuals.online logoBrands
  • About & Mission
  • Contact us
  • Privacy Policy
  • Terms and Conditions

Copyright 2025 Manuals.Online. All Rights Reserved.

ClearVu/Encore Dispenser (9330/9331)
Assembly & Operation Instructions
ClearVu (46oz tank)
To open the dispenser lid, insert key into slot at back, right side of lid
and push in on key (Figure 1). Back of lid will pop off.
ClearVu Encore (30oz tank)
Hold dispenser with thumbs near front of lid and pop lid up using tabs
near the back of the dispenser (Figure 2). No key is necessary.
NOTE: For dispenser to work properly, use foam soap only for foaming
dispenser models. Handles most foam soaps from 0–14 centipose (cps).
1. Remove lid.
2. Fill with appropriate soap and replace lid.
3. Priming the dispenser will take 6–10 pumps.
Zogics ClearVu/Encore Dispenser includes the following components:
1 x Dispenser
1 x Double-sided tape (attached to dispenser)
1 x Key (ClearVu 46oz. only)
Questions? We’ve got answers!
888.623.0088 • [email protected]
Opening the Dispenser
Filling Instructions
What’s Included
It is important to clean and maintain dispenser and check battery on a
regular, scheduled basis. Failure to do so can result in malfunction.
• Open dispenser. Flush tank and pump mechanism with warm water to
remove residue and contaminates. Refill with new soap and replace lid.
(Figure 5.a)
• Cleaning all touch-points on dispenser with a disinfectant should be
part of a regular cleaning schedule. (Figure 5.b)
• Periodically give the dispenser an overall cleaning. All internal and
external parts should be cleaned thoroughly.
CAUTION: Never use abrasive cleansers when soap dispensers.
Maintenance
Page 1 of 2
ClearVu/Encore Dispenser (9330/9331)
Assembly & Operation Instructions
1. Thoroughly clean wall surface and let dry completely. For silicone
build-up, use a pumice-type cleaner or grout cleaner to clean the
surface.
2. Peel off paper from back of tape (supplied). Press dispenser firmly to
the wall and hold for at least 30 seconds to make sure tape has
completely adhered to the wall. (Figure 3)
3. Wait 24 hours before filling with soap to ensure that the tape has
completely adhered to the wall before adding weight.
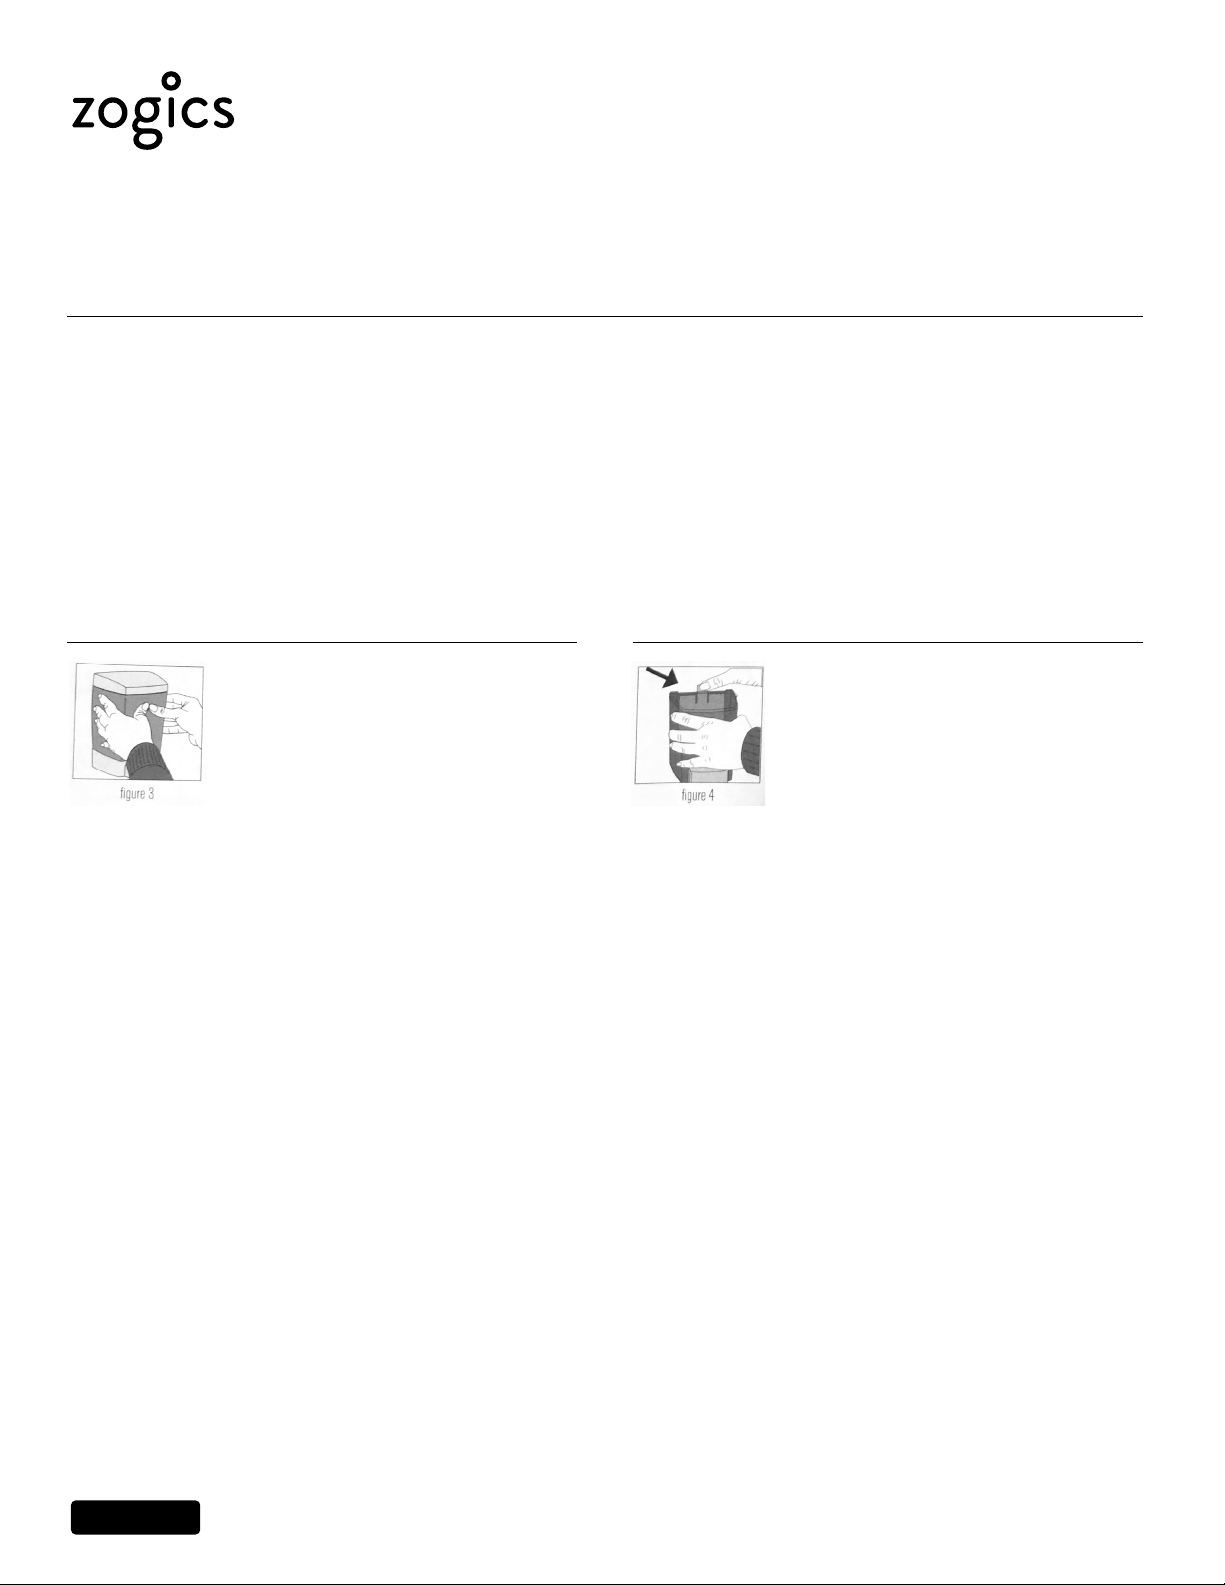
1. Remove lid. Push latch out and detach dispenser from backplate. (Figure 4)
2. Using the backplate as a template, mark hole locations on wall.
3. Drill 3/16” diameter holes for anchors and screws or other hardware.
Attach dispenser to backplate and replace lid.
• Use included tape on glazed tile, painted metal, or unpainted metal
walls. Tape should not be used on porous surfaces like brick or wood.
• On all other wall surfaces, use screws and anchors (not included) or
other appropriate hardware based on surface type.
• Locate dispenser above a sink or counter. We recommend you never
locate the dispenser where spillage can fall on the floor, creating a
hazardous condition.
• Installer will be held responsible for proper installation.
• To be in compliance with ADA regulations, the dispenser should be
mounted no more than 48” from the ground.
Questions? We’ve got answers!
888.623.0088 • [email protected]
Mounting with tape Mounting with screws and anchors
Mounting Instructions
Page 2 of 2