The default settings for your RT-1000 are as follows:
Socket 1: ‘Day Set’ 86F, ‘Night Set’ 70F, Alarm ‘30’
Socket 2: ‘Day Set’ 86F, ‘Night Set’ 70F, Diff 3F, Alarm ‘30’
Socket 3: ‘Day Set’ 60% RH, ‘Night Set’ 50% RH, Diff 3% RH, Alarm ‘30’
Socket 4: ‘4 1 ON’ 6pm, ‘4 1 OFF’ 11pm. ‘4 2 ON’ 4am, ‘4 2 OFF’ 8am
Socket 5: 'ON' at 8am, 'OFF' at 5pm
Socket 6: 'ON' at 5pm, 'OFF' at 8am
PROGRAMMING:
DEFAULT SETTINGS:
Upon plugging in your new Environmental Control Center for the first time, the digital display will illuminate and show all of the symbols briefly before reverting to
the default factory settings. After programming the control unit, the new settings will be stored in the controller's memory. In the event of a power failure or if the
unit becomes unplugged, the programmed settings will resume once power is restored, however the time of day will need to be re-programmed. Wait until after
the unit has been programmed before plugging in heating devices, cooling devices, or humidifiers.
NOTE: To change from °F to °C, hold ‘ ’ and ‘ ’ at the same time for 6 seconds.
A. Programming Temperature:
Socket 1 Dimming Heat: The Thermostat function on socket 1 will gradually dim a heating source to maintain the programmed temperature in your terrarium.
Place the temperature probe for socket 1 near your animal’s basking site. Perform the following steps to program the temperature setting of your controller:
1. Press the ‘socket’ button until ‘socket 1’ is blinking, the ‘day set’ field will also start to blink. Use the up ‘ ‘ or down ’ ‘ arrow to select your
daytime temperature.
2. When you are done setting the daytime temperature, press the ‘row’ button until ‘night set’ is blinking. Use the up ‘ ’ or down ‘ ’ arrow to set
the nighttime temperature.
3. Press the ‘row’ button again to program the alarm, use the up ‘ ’ or down ‘ ’ arrow to set the alarm value. When alarm value is set to ‘20’, then
the alarm will sound when your set temperature drops by 20 degrees. For example, with ‘daytime’ temp set to 80F and ‘alarm’ value set to ‘20’, then the
alarm will sound when temperature drops to 60F or lower. To disable the alarm, set alarm value to ‘00’.
‘Power Meter’ indicates what percentage of power the heating device is receiving. When socket 1 is receiving power, the flame icon will light up.
Socket 2 Heat/Cool Mode: In HEAT mode, the controller will turn on heating devices (e.g., heat lamps, under tank heaters, ceramic heat emitters) when the
temperature in your terrarium drops below the programmed temperature setting. In COOL mode, the controller will turn on a cooling device (e.g., fan) when
the temperature in your terrarium rises above the programmed temperature setting.
1. To switch between HEAT and COOL mode, press the ‘socket’ button until ‘socket 2’ is blinking, press the 'row' button , then press the up ‘ ’
or down ‘ ’ arrow.
2. Once HEAT or COOL mode is chosen, press the ‘row’ button until ‘Day Set’ is blinking. Use the up ‘ ’ or down ‘ ’ arrow to program your
daytime temperature.
3. After setting the daytime temperature, press the ‘row’ button again until ‘Night Set’ is blinking; use the up ‘ ’ or down ‘ ’ arrow to program
your desired nighttime temperature. A nighttime temperature drop can be used to simulate natural day/night temperature changes, stimulate breeding
behavior, and save energy.
4. Press the ‘row’ button again to program the ‘Diff’ value; this is the difference in temperature that can be programmed to allow for natural
temperature fluctuations in your animal’s enclosure. For example, if your ‘Day Set’ value is 80°F and your ‘Diff’ value is ‘05’, then your heating/cooling
device will be allowed to change by ±5°F before turning on again. If your ‘Day Set’ value is 80°F and your ‘Diff’ value is ‘15’, then your heating/cooling
device will be allowed to change by ±15°F before turning on again.
5. Pressing the ‘row’ button once more will allow you to program the alarm. For example, in HEAT mode, if your alarm setting is ‘30’ and ‘Day Set’ is
80F, then the alarm will alert you when the temperature drops by 30 degrees and reaches 50F. In HEAT mode, the alarm will alert you when the
temperature drops by the number of degrees you have in your ‘alarm’ value. In COOL mode, the alarm will alert you when the actual temperature exceeds
the programmed temperature by the number of degrees in the ‘alarm’ field.
6. When socket 2 is receiving power, the flame or snowflake icon will light up. If the flame or snowflake icons are not lit, then the heating/cooling
source is not currently on.
B. Programming the Humidity Setting:
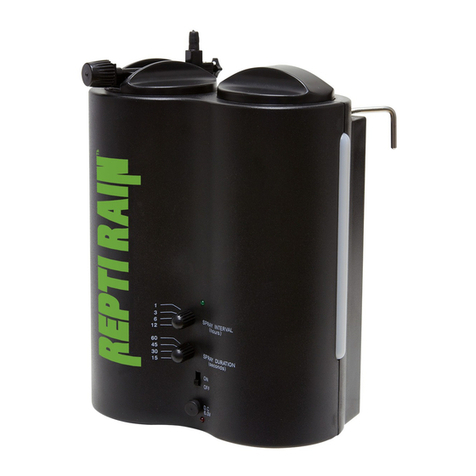
Socket 3 HUMI/DEHUMI Mode: The Hygrostat function of your Environmental Control Center will turn humidifiers on and off to maintain the optimum
humidity level in your terrarium. Zoo Med's ReptiRain® Automatic Misting Machine (Item# HM-10) and Zoo Med's Repti Fogger™ (Item# RF-10) are ideal
humidifiers for terrariums. Alternatively, a fan can be used to lower the humidity when set in ‘Dehumidify’ mode. Perform the following steps to program the
humidity setting of your controller:
1. Press the ‘socket’ button until ‘socket 3’ is blinking, press the 'row' button , then press the up ‘ ’ or down ‘ ’ arrow to select between
‘HUMI’ (humidify) or ‘DEHUMI’ (de-humidify) mode.
2. Press the ‘row’ button until ‘Day Set’ is blinking, then press the up ‘ ’or down ‘ ’ arrow to set the daytime humidity.
3. When you are done setting the daytime humidity, press the ‘row’ button again to set the nighttime humidity, indicated by a flashing ‘Night Set’; use
the up ‘ ’ or down ‘ ’ arrow to choose your desired humidity.
4. Press the ‘row’ button again to program the ‘Diff’ value; this is the difference that can be programmed to allow for natural humidity fluctuations in
your animal’s enclosure. For example, if your ‘Day Set’ value is 80% and your ‘Diff’ value is ‘05’, then your relative humidity will be allowed to change by
±5% before turning back on again.
5. After programming the ‘Diff’ value, pressing the ‘row’ button once more will allow you to program the alarm. In HUMI mode, the alarm will alert you when
the humidity drops below your alarm set point. For example, in HUMI mode, if your ‘Day Set’ value is 70% and your alarm value is ‘20’, then the alarm will
alert you when the relative humidity drops by 20% and reaches 50% relative humidity. In DEHUMI mode, the alarm will alert you when the humidity rises
above your alarm set point. For example, in DEHUMI mode, if your ‘Day Set’ value is 70% and your alarm value is ‘10’, then the alarm will alert when the
relative humidity exceeds your ‘Day Set’ by 10% and reaches 80% relative humidity. When the alarm is triggered, the LCD display will flash and beep. To
turn off the alarm function, set alarm value to ‘00’.
C. Programming the Timers (Sockets 4, 5, 6)
Sockets 4, 5, and 6 are digital timers to operate any type of equipment that you want controlled during a set time period (UVB lights,
supplemental LED lighting, Under Tank Heaters, misting machines, etc.).
Socket 4 Timer: Socket 4 has two separate on/off periods that you can program throughout the day or night (e.g., if you want your
misting/fogging system to run for 5 minutes at 7am and for 5 minutes at 7pm). These separate on and off periods are indicated on the
LCD screen by ‘4 1 ON/OFF’ and ‘4 2 ON/OFF’ (see figure 4).
1. Press the ‘socket’ button until ‘socket 4’ is blinking, then press the up ‘ ’ or down ‘ ’ button to set the hour when your device will turn on,
press the ‘row’ button to set the minutes. AM or PM will be indicated right above ‘4 1 ON’. Pressing the ‘row’ button again will light up ‘4 1 OFF’
to program when you want the timer to turn off.
2. To program the second on/off period for socket 4, press the ‘socket’ button until ‘socket 4’ is blinking and ‘4 2 ON’ appears.
3. Press the up ‘ ’ or down ‘ ’ button to set the hour when your device will turn on, press the ‘row’ button to set the minutes. AM or PM will be
indicated right above ‘4 2 ON’. Pressing the ‘row’ button again will light up ‘4 2 OFF’ to program when you want the timer to turn off.
NOTE: If you want only one on/off period for socket 4, set ‘4 1 ON’ and ‘4 2 ON’ as the same values, program ‘4 1 OFF’ and ‘4 2 OFF’ as the same values as
well, now only one on/off period will occur in a 24hr period. (ex. ‘4 1 ON’ and ‘4 2 ON’ set for 8am, ‘4 1 OFF’ and ‘4 2 OFF’ set for 5pm will give you one on/off
event that will begin at 8am and turn off at 5pm).
Socket 5 & 6 Timer: Sockets 5 & 6 are alternating day and night timers which means that only one at a time will be on and the other will be off. To program
these, you will only need to program the "ON" time as the element will turn off when the other socket turns on. for example: If you want a daytime heat lamp
to run from 8:00 AM until 9:00 PM, you will program Socket 5 to come "ON" at 8:00 am, and socket 6 to come "ON" at 9:00 pm. Plugging a daytime heat
lamp into socket 5 and a night time lamp into Socket 6 will turn the daytime lamp on at 8:00 am and off at 9:00 pm, AND turn on a nighttime heat lamp at
9:00pm and off at 8:00 am. To program, press the 'socket' button until socket 5 is blinking, then press the up ‘ ’ or down ‘ ’ button to set the
hour when your device will turn on, press the 'row' button to set the minutes. AM or PM will be indicated right below Socket 5. To program socket 6, the
nighttime timer, press the 'socket' button until socket 6 is blinking, then follow the same instructions above for programming socket 5.
Setting the Clock: Pressing the clock button will allow you to set when your ‘daytime’ period starts (indicated by ‘day from’ on the LCD) and when your
‘nighttime’ period starts (indicated by ‘night from’). For example, setting your ‘daytime’ period to begin at 7am and your ‘nighttime’ period to begin at 6pm will
tell the Environmental Control Unit to allow your heating device’s nighttime temperature drop to occur after 6pm, if you have them programmed. AM/PM will
be indicated on the left side of the LCD when setting your Day/Night schedule, press the up ‘ ’ or down ‘ ’ button to set the hours and minutes. Press the
clock button again to set the current time of day, using the up ‘ ’ or down ‘ ’ button to set the hours and minutes.
(Front Side) (Reverse Side)
Socket Button
Row Button
Up Button
Clock Button
Power Button
Down Button
Remote
Input
Humidity
Probe
Temperature
Probe 1
Temperature
Probe 2
Humidity Probe
Temperature Probe
Temperature Probe
1
Dimming Heat
2
Heating / Cooling
3
Humidify / Dehumidify
4
Digital Timer
5
Day Timer
6
Night Timer
(Monitored by
Temperature Probe 1)
(Monitored by
Temperature Probe 2)
(Monitored by the
Humidity Probe)
On-Screen Display
Figure 4
Figure 1 Figure 2
Figure 3

