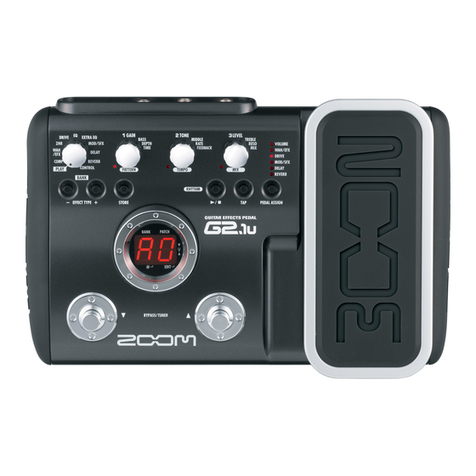
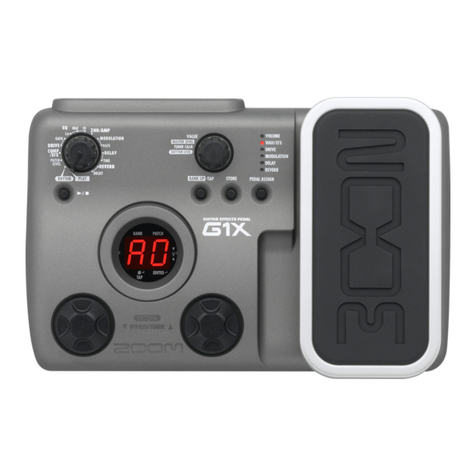
Zoom G1U User manual

Operation Manual
© ZOOM Corporation
Reproduction of this manual, in whole or in part,
by any means, is prohibited.
Thank you for selecting the ZOOM G1u (hereafter simply called the "G1u").
Please take the time to read this manual carefully to get the most out of the
unit and to ensure optimum performance and reliability.
Keep this manual at hand for future reference.
SAFETY PRECAUTIONS / Usage Precautions · · · · · 2
Terms Used in This Manual ··················3
Controls and Functions / Connections · · · · · · · · · 4
Selecting a Patch for Playing · · · · · · · · · · · · · · · · 6
Using the Tuner ····························8
Using the Rhythm Function · · · · · · · · · · · · · · · · · 10
Using the Looping Function · · · · · · · · · · · · · · · · · 12
EditingaPatch···························14
Storing/Copying Patches · · · · · · · · · · · · · · · · · · · 16
Restoring Factory Defaults ·················17
Changing the Way Patches Are Called Up ······18
Using a Foot Switch or Pedal ················18
Using a foot switch ·······················18
Using an expression pedal · · · · · · · · · · · · · · · · ·19
Using the G1u as an Audio Interface · · · · · · · · · · 20
AboutZFXTools ·························20
Effect Types and Parameters · · · · · · · · · · · · · · · · 21
Explanation of symbols ····················21
PATCH LEVEL··························21
COMP/EFX module ·····················21
DRIVE module ·························22
EQ module ····························23
ZNR/AMPmodule ······················23
MODULATION module ··················24
DELAYmodule·························25
REVERB module ·······················26
Rhythm Function Preset Patterns ············27
Checking the G1u Version · · · · · · · · · · · · · · · · · · 27
Troubleshooting ·························· 27
Specifications · · · · · · · · · · · · · · · · · · · · Rear cover
Contents

2ZOOM G1u
3
ZOOM G1u
Terms Used in This Manual
3
SAFETY PRECAUTIONS
In this manual, symbols are used to highlight warnings and
cautions for you to read so that accidents can be prevented.
The meanings of these symbols are as follows:
This symbol indicates explanations about
extremely dangerous matters. If users
ignore this symbol and handle the device
incorrectly, serious injury or death could
result.
This symbol indicates explanations about
dangerous matters. If users ignore this
symbol and handle the device incorrectly,
bodily injury and damage to the equip-
ment could result.
Please observe the following safety tips and precau-
tions to ensure hazard-free use of the G1u.
Power requirements
Since power consumption of this unit is fairly high,
we recommend the use of an AC adapter whenever
possible. When powering the unit from batteries, use
only alkaline types.
[AC adapter operation]
• BesuretouseonlyanACadapterwhichsupplies9
V DC, 300 mA and is equipped with a "center
minus" plug (Zoom AD-0006). The use of an
adapter other than the specified type may damage
the unit and pose a safety hazard.
• ConnecttheAC adapteronlyto anACoutlet that
supplies the rated voltage required by the adapter.
• When disconnecting theAC adapter from the AC
outlet, always grasp the adapter itself and do not
pull at the cable.
• Duringlightningorwhennotusingtheunitforan
extended period, disconnect the AC adapter from
the AC outlet.
[Battery operation]
• Usefour conventionalIECR6 (sizeAA)batteries
(alkaline).
• TheG1ucannotbeusedforrecharging.
• Paycloseattentiontothelabellingofthebatteryto
make sure you choose the correct type.
• Whennot using the unitfor an extendedperiod,
remove the batteries from the unit.
• Ifbattery leakagehas occurred,wipethebattery
compartment and the battery terminals carefully to
remove all remnants of battery fluid.
• Whileusingtheunit,thebatterycompartment
cover should be closed.
Environment
To prevent the risk of fire, electric shock or malfunc-
tion, avoid using your G1u in environments where it
will be exposed to:
• Extremetemperatures
• Heatsourcessuchasradiatorsorstoves
• Highhumidityormoisture
• Excessivedustorsand
• Excessivevibrationorshock
Handling
• Never placeobjectsfilledwithliquids,suchas
vases, on the G1u since this can cause electric
shock.
• Donotplacenaked flame sources, such aslighted
candles, on the G1u since this can cause fire.
• The G1uisaprecisioninstrument.Donotexert
undue pressure on the keys and other controls. Also
takecarenottodroptheunit,anddonotsubjectit
to shock or excessive pressure.
• Takecarethatnoforeignobjects(coinsorpins
etc.) or liquids can enter the unit.
Connecting cables and input and output jacks
You should always turn off the power to the G1u and
all other equipment before connecting or disconnect-
ing any cables. Also make sure to disconnect all con-
nection cables and the power cord before moving the
G1u.
Alterations
NeveropenthecaseoftheG1uorattempttomodify
the product in any way since this can result in dam-
age to the unit.
Volume
Do not use the G1u at a loud volume for a long time
since this can cause hearing impairment.
Usage Precautions
Electrical interference
For safety considerations, the G1u has been designed to pro-
vide maximum protection against the emission of electro-
magnetic radiation from inside the device, and protection
fromexternalinterference.However,equipmentthatisvery
susceptible to interference or that emits powerful electro-
magnetic waves should not be placed near the G1u, as the
possibility of interference cannot be ruled out entirely.
With any type of digital control device, the G1u included,
electromagnetic interference can cause malfunctioning and
can corrupt or destroy data. Care should be taken to mini-
mize the risk of damage.
Cleaning
Useasoft,dryclothtocleantheG1u.Ifnecessary,slightly
moisten the cloth. Do not use abrasive cleanser, wax, or sol-
vents (such as paint thinner or cleaning alcohol), since these
may dull the finish or damage the surface.
Please keep this manual in a convenient place for
future reference.
2
SAFETY PRECAUTIONS / Usage Precautions Terms Used in This Manual
This section explains some important terms that are used throughout the G1u manual.
• Effectmodule
As shown in the illustration above, a patch in the
G1u can be thought of as a combination of up to
eightsingleeffects.Eachsucheffectisreferredto
as an effect module.
• Effecttype
Some effect modules have several different effects
which are referred to as effect types. For example,
the MODULATION module is comprised of
chorus, flanger, pitch shifter, and other effect
types. Only one of these can be selected at a time.
• Effectparameter
All effect modules have various parameters that
canbeadjusted.Thesearecalledeffectparameters
or simply parameters. When thinking of an effect
module as a compact effect, the parameters change
the tone and effect intensity similar to the knobs
on the device.
• Patch
In the G1u, effect module combinations are stored
and called up in units referred to as patches. A patch
is comprised of information about the on/off status
and effect parameter settings used in each module.
•Bank
A group of ten patches is called a bank.
The memory of the G1u is comprised of a total of
20 banks, labeled with letters A to J (user-editable
banks)andnumbers0to9(read-onlypreset
banks), as shown in the illustration at top right.
• Mode
The internal status of the G1u is referred to as the
operation mode. The function of keys and controls
differs, depending on the respective mode. Modes
of the G1u include play mode for selecting and
playing patches, rhythm mode for playing a
rhythm pattern, edit mode for modifying effects,
and store mode for saving patches.
When the batteries are
getting low, the indication
"bt" appears on the display.
When operating the G1u on
batteries, it is advisable to
disconnect the guitar cable
plug from the [INPUT] jack
when not using the unit, to
conserve battery power.
3. Close the cover of the
battery compartment.
Latch
1. Turn the G1u over and open
the cover of the battery
compartment on the bottom.
Press latch to release
and then lift cover.
Operating the G1u on batteries
Four IEC R6
(size AA) batteries
2. Insert four fresh IEC
R6 (size AA) batteries.
Compressor
Auto Wah
Booster
Tremolo
FD COMBO
VX COMBO
US BLUES
BG CRUNCH
Hall
Room
Spring
Arena
Delay
Tape Echo
Analog
Delay
Amp Sim.ZNR Chorus
Ensemble
Flanger
Step
COMP/EFX DRIVE EQ
MODULATION
REVERBDELAYAMPZNR
Effect modules
Effect
types
BANK 9
PATCH 0
PATCH 1
PATCH 9
BANK 0
PATCH 0
PATCH 1
PATCH 9
BANK J
PATCH 0
PATCH 1
PATCH 9
BANK C
PATCH 0
PATCH 1
PATCH 9
BANK b
PATCH 0
PATCH 1
PATCH9
BANK A
PATCH 0
PATCH 1
PATCH 9

4ZOOM G1u
5
ZOOM G1u
Controls and Functions / Connections
[VALUE] knob
[BANK UP·TAP] key
RHYTHM [R/P] key
Module selector
[W]/[Q] foot switches
[INPUT] jack
[CONTROL IN] jack
AC adapter
Guitar
Computer
Guitar amplifier
Headphones
FP01/FP02
FS01
Serves for connecting the guitar. When operating
the G1u on batteries, inserting the guitar cable
plug into this jack will turn the unit on.
[USB] port
Serves for connecting the G1u to a computer.
This allows using the G1u as an audio
interface for the computer, and to edit and
manage G1u settings using the computer.
Serves for connection of the optional foot switch (FS01)
or expression pedal (FP01/FP02).
[DC IN] jack
An AC adapter (ZOOM AD-0006) with a rated output
of 9 volts DC, 300 mA (center minus plug) can be
plugged into this jack.
[OUTPUT/PHONES] jack
This stereo phone jack serves for connection to
the guitar amplifier. It is also possible to use a Y
cable for sending the output to two amplifiers, or
to plug a pair of stereo headphones into this jack.
In play mode, the key switches to the next higher bank. In other
modes, the key serves for manual adjustment of rhythm pattern
tempo as well as parameters related to timing and cycle.
[STORE] key
Display
Serves for storing edited patches in memory and for copying
patches to another location.
Shows bank and patch numbers, setting
values, and other information for operating
the G1u.
This knob serves for changing parameter values and setting the
level of the overall patch.
These switches are used for selecting patches, controlling the tuner,
or the looping function.
Serves to start and stop the rhythm pattern in
play mode and rhythm mode.
Switches between play mode, rhythm mode,
and edit mode. In edit mode, the knob
selects the module/parameter for operation.
Top Panel
Rear Panel
When operating the G1u on batteries, it is
advisable to disconnect the guitar cable plug
from the [INPUT] jack when not using the
unit, to conserve battery power.
Controls and Functions / Connections

6ZOOM G1u
7
ZOOM G1u
Selecting a Patch for Playing (Play Mode)
Bank
name
Patch
number
MN
MN
The volume control on the connected amplifier
should be turned down.
When using the unit on batteries
Plugashieldedcableintothe[INPUT]jack.
When using the unit with an AC adapter
Plugthecablefromtheadapterintothe[DCIN]
jack.
Turntheguitaramplifieronandadjustthevolumeto
a suitable position.
If the G1u is connected to a computer via a USB cable,
and the AC adapter is not connected, power will be
supplied via the USB port.
Set the Module selector to "PLAY".
The bank and patch number are shown on the display.
Immediately after turning the G1u on, the unit will be in
play mode, regardless of the position of the Module
selector.
Turn power on
1
Set the G1u to play mode
2
Directly switch a bank
4
Adjust the master level
5
Press the [BANK UP·TAP] key.
The unit cycles through banks in the order A ... J,
0...9,A.
You can also use an external foot switch (FS01) to
switch banks (gp. 18).
Operate the [VALUE] knob.
The master level setting appears on the display.
The master level setting applies to all patches. The
settingrangeis0–98,1.0.Itwillberesetto80when
power is turned off and then on again.
When using headphones, this knob adjusts the listening
volume.
Select a patch
3
Use the foot switches.
Press the [Q]footswitchtocallupthenexthigher
patch.
Press the [W]footswitchtocallupthenextlower
patch.
The unit cycles through patches in the order
A0–A9...J0–J9g00–09...90–99gA0.
This section explains basic functions of the play mode.
HINT
HINT
HINT
HINT
80
A0 B0
A0 A1
A0 99

8ZOOM G1u
9
ZOOM G1u
Using the Tuner
Using the Tuner
•SettingtheG1utothebypasscondition
In play mode or rhythm mode (gp. 10), press both
[W]/[Q]footswitchestogether.Whenthe
indication "bP" appears on the display, release the
switches within 1 second.
•SettingtheG1utothemutecondition
In play mode or rhythm mode (gp. 10), press both
[W]/[Q]footswitchestogether.Waituntilthe
indication "bP" on the display changes to "Mt" and
then release the switches within 1 second.
· If you keep pressing the foot switches for more than 1
second after the indication "Mt" has appeared, the
looping function (gp. 12) will be activated.
· The bypass or mute condition cannot be activated
when the unit is in edit mode (gp. 14).
Switch to bypass or mute
1
To use the tuner function of the G1u, the built-in effects must be bypassed (temporarily turned off)
or muted (original sound and effect sound turned off). Play the open string to tune, and adjust the pitch.
To fine-adjust the reference pitch of the G1u tuner,
turn the [VALUE] knob in the bypass/mute
condition.
When you turn the knob, the current reference pitch
is shown for a time on the display. The default setting
is40(centerA=440Hz).
While the reference pitch is shown, turn the
[VALUE]knobtoadjustthevalueintherangefrom
35–45(centerA=435to445Hz).
When power is turned off and on again, the reference
pitch setting will be reset to 40 (center A = 440 Hz).
Press one of the [W]/[Q] foot switches.
Tune your instrument
2
Adjusting the reference pitch of the tuner
3
Return to play mode
4
BP
BP MT
B P
M T
NOTE
NOTE
A 8
Pitch is high Pitch is correct Pitch is low
Indication turns faster the more the pitch is off
The left side of the display shows the note
which is closest to the current pitch.
The right side of the display shows a symbol that
indicates by how much the tuning is off.
40
40
42
40
40
42
Patch change at bypass/mute
When you press both [W]/[Q] foot switches
together while playing your instrument, the
sound may change momentarily just before
the bypass/mute condition is activated.
This is because the G1u switches to the
next higher or lower patch when one of the
foot switches is pressed slightly earlier.
(When you cancel the bypass/mute
condition, the original patch number will be
active again.)
This behavior is not a defect. It is due to the
very high speed at which the G1u responds
to patch switching. To prevent the sound
change caused by the above condition, do
not produce sound with your instrument
until the bypass/mute condition is fully
established.
Table of contents
Other Zoom Music Pedal manuals

Zoom
Zoom G1on User manual

Zoom
Zoom ACOUSTIC 504 II User manual

Zoom
Zoom G5n User manual

Zoom
Zoom Multistomp MS-70CDR Mounting instructions

Zoom
Zoom 505II Guitar User manual

Zoom
Zoom G2 User manual

Zoom
Zoom ADSL X3 User manual

Zoom
Zoom 508 User manual

Zoom
Zoom G1 X Four User manual

Zoom
Zoom MultiStomp MS-50G User manual