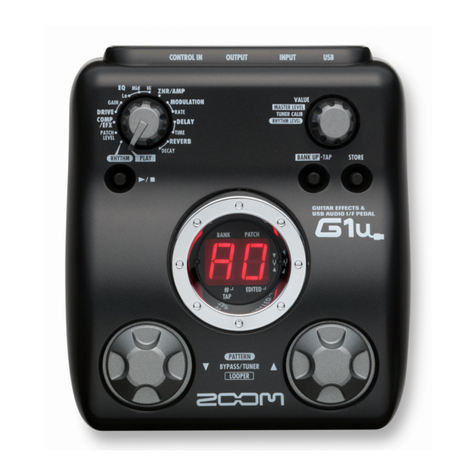
Zoom G2.1u User manual

Operation Manual
© ZOOM Corporation
Reproduction of this manual, in whole or in part,
by any means, is prohibited.

ZOOM G2.1u
2
SAFETY PRECAUTIONS
In this manual, symbols are used to highlight warnings and
cautions for you to read so that accidents can be prevented. The
meanings of these symbols are as follows:
This symbol indicates explanations about extremely
dangerous matters. If users ignore this symbol and
handle the device the wrong way, serious injury or
death could result.
This symbol indicates explanations about dangerous
matters. If users ignore this symbol and handle the
device the wrong way, bodily injury and damage to
the equipment could result.
Please observe the following safety tips and precautions to
ensure hazard-free use of the G2.1u.
Power requirements
Since power consumption of this unit is fairly high, we
recommend the use of an AC adapter whenever
possible. When powering the unit from batteries, use
only alkaline types.
[AC adapter operation]
•Be sure to use only an AC adapter which supplies 9 V DC,
300 mA and is equipped with a "center minus" plug
(Zoom AD-0006). The use of an adapter other than the
specified type may damage the unit and pose a safety
hazard.
•Connect the AC adapter only to an AC outlet that supplies
the rated voltage required by the adapter.
•When disconnecting the AC adapter from the AC outlet,
always grasp the adapter itself and do not pull at the cable.
• During lightning or when not using the unit for an
extended period, disconnect the AC adapter from the AC
outlet.
[Battery operation]
• Use four conventional IEC R6 (size AA) batteries
(alkaline).
• The G2.1u cannot be used for recharging.
•Pay close attention to the labelling of the battery to make
sure you choose the correct type.
•When not using the unit for an extended period, remove
the batteries from the unit.
• If battery leakage has occurred, wipe the battery
compartment and the battery terminals carefully to
remove all remnants of battery fluid.
•While using the unit, the battery compartment cover
should be closed.
Environment
To prevent the risk of fire, electric shock or
malfunction, avoid using your G2.1u in environments
where it will be exposed to:
• Extreme temperatures
• Heat sources such as radiators or stoves
•High humidity or moisture
• Excessive dust or sand
• Excessive vibration or shock
Handling
•Never place objects filled with liquids, such as vases, on
the G2.1u since this can cause electric shock.
•Do not place naked flame sources, such as lighted candles,
on the G2.1u since this can cause fire.
• The G2.1u is a precision instrument. Do not exert undue
pressure on the keys and other controls.Also take care not
to drop the unit, and do not subject it to shock or excessive
pressure.
•Take care that no foreign objects (coins or pins etc.) or
liquids can enter the unit.
Connecting cables and input and output
jacks
You should always turn off the power to the G2.1u and
all other equipment before connecting or disconnecting
any cables. Also make sure to disconnect all connection
cables and the power cord before moving the G2.1u.
Alterations
Never open the case of the G2.1u or attempt to modify
the product in any way since this can result in damage
to the unit.
Volume
Do not use the G2.1u at a loud volume for a long time
since this can cause hearing impairment.
Usage Precautions
Electrical interference
For safety considerations, the G2.1u has been designed to
provide maximum protection against the emission of
electromagnetic radiation from inside the device, and protection
from external interference. However, equipment that is very
susceptible to interference or that emits powerful
electromagnetic waves should not be placed near the G2.1u, as
the possibility of interference cannot be ruled out entirely.
With any type of digital control device, the G2.1u included,
electromagnetic interference can cause malfunctioning and can
corrupt or destroy data. Care should be taken to minimize the
risk of damage.
Cleaning
Use a soft, dry cloth to clean the G2.1u. If necessary, slightly
moisten the cloth. Do not use abrasive cleanser, wax, or solvents
(such as paint thinner or cleaning alcohol), since these may dull
the finish or damage the surface.
Please keep this manual in a convenient place for
future reference.
W
arning
Caution
W
arning
W
arning
W
arning
Caution
W
arning
Caution
SAFETY PRECAUTIONS Usage Precautions
ZOOM G2.1u
3
Contents
SAFETY PRECAUTIONS Usage Precautions................................... 2
SAFETY PRECAUTIONS .................................................................... 2
Usage Precautions .............................................................................. 2
Features .............................................................................................. 4
Terms Used in This Manual .............................................................. 5
Controls and Functions / Connections ........................................... 6
Selecting a Patch ............................................................................... 8
Using the Tuner ............................................................................... 10
Using the Rhythm Function ............................................................ 12
Editing a Patch ................................................................................. 14
Storing/Copying Patches ............................................................... 16
Using the Built-in Expression Pedal............................................... 18
Use of Expression Pedal/Foot Switch............................................ 20
Using the built-in expression pedal.................................................. 20
Adjusting the sensitivity of the built-in expression pedal ............... 21
Using an external expression pedal (FP01/FP02)............................ 21
Using a foot switch (FS01) ................................................................ 21
Using the G2.1u as audio interface for a computer......................... 22
Restoring Factory Defaults ............................................................ 24
Linking Effects.................................................................................. 25
Switching between live sound and direct recording sound ........... 25
Effect Types and Parameters.......................................................... 26
How to read the parameter table ..................................................... 26
COMP ........................................................................................... 27
WAH/EFX ...................................................................................... 27
ZNR ............................................................................................... 28
DRIVE ............................................................................................ 29
EQ ................................................................................................. 30
EXTRA EQ/CABI&MIC .................................................................. 30
MOD/SFX ...................................................................................... 30
DELAY ........................................................................................... 33
REVERB ........................................................................................ 33
CONTROL..................................................................................... 34
Specifications .................................................................................. 35
Troubleshooting .............................................................................. 35
G2.1u Preset Pattern ............................................................
Back cover
The FCC regulation warning (for U.S.A.)
This equipment has been tested and found to comply with the limits for a Class B digital device, pursuant to Part
15 of the FCC Rules. These limits are designed to provide reasonable protection against harmful interference in a
residential installation. This equipment generates, uses, and can radiate radio frequency energy and, if not
installed and used in accordance with the instructions, may cause harmful interference to radio communications.
However, there is no guarantee that interference will not occur in a particular installation. If this equipment does
cause harmful interference to radio or television reception, which can be determined by turning the equipment
off and on, the user is encouraged to try to correct the interference by one or more of the following measures:
•Reorient or relocate the receiving antenna.
• Increase the separation between the equipment and receiver.
• Connect the equipment into an outlet on a circuit different from that to which the receiver is
connected.
• Consult the dealer or an experienced radio/TV technician for help.
ZOOM G2.1u
4
Features
Thank you for selecting the ZOOM G2.1u (hereafter simply called the "G2.1u"). The G2.1u is a multi
effect processor with the following features and functions.
●
Latest processing technology for outstanding performance
96 kHz / 24 bit sampling (with 32 bit internal processing) assures excellent sound quality. Frequency
response remains flat up to 40 kHz, and input-converted signal-to-noise ratio is an amazing 120 dB,
demonstrating the high level of performance achieved by the G2.1u. The G2.1u also has a USB
connection and can be used as a direct guitar/computer interface.
●
Versatile palette of effects including new creations
Out of a total of 54 effects, up to nine (including ZNR) can be used simultaneously. The high-quality
choices provided by the G2.1u include distortion effects that simulate the tones of famous amps and
effects pedals, 6-band guitar EQ and delay effects with "hold" controloperated by foot switch.
●
Great for live performances and direct recording
The distortion effect module provides two different algorithms for each of its 17 effect types, one for live
performance and one for direct recording. Depending on the on/off setting of the CABINET & MIC
effect which simulates amp cabinet sound and mic characteristics, the most suitable algorithm is
automatically selected, giving you the best sound for any application.
●
Integrated rhythm functions and auto-chromatic tuner
A number of rhythm patterns using realistic PCM drum sounds are provided. This is convenient for use
as a metronome during individual practice or to provide a simple rhythm part for a quick session. An
auto-chromatic tuner for guitar is also built right into the unit, allowing you to easily tune your
instrument also at home or on stage.
●
Sophisticated user interface
The combination of a rotary type selector and three parameter knobs make the effect editing process
intuitive and quick. The mute interval when switching patches has been reduced to less than 5
milliseconds. Seamless patch changing is now a reality.
●
Dual power supply principle allows use anywhere
The G2.1u can be powered from four IEC R6 (size AA) batteries or an AC adapter. Continuous
operating time on batteries is approximately 7.5 hours with alkaline batteries.
●
Easy operation with expression pedal and foot switch
The expression pedal on the top panel lets you adjust the tonal quality of an effect or the volume in real
time.
An optional expression pedal (FP01/FP02) or foot switch (FS01) can be connected to the CONTROL IN
jack. The external expression pedal is used for controlling the volume. The foot switch is convenient for
quickly toggling effect programs or for setting the tempo of the rhythm function.
Please take the time to read this manual carefully so as to get the most out of the unit and to ensure
optimum performance and reliability.
ZOOM G2.1u
5
Operating the G2.1u on batteries
Turn the G2.1u over and open the cover
of the battery compartment on the bottom.
G2.1u
bottom view
Latch
Latch
Cover Press the latch to release
it and then raise the cover.
1.
Insert four fresh IEC
R6 (size AA) batteries.
2.
Close the cover of
the battery compartment.
3.
Four IEC R6
(size AA) batteries
Insert batteries facing
in alternate directions.
Use four IEC R6 (size AA) batteries.
When the batteries are getting low, the
indication "bt" appears on the display.
Push the cover in until the
latch audibly snaps into
place.
EQDRIVEZNRCOMP WAH/EFX MOD/SFX
EXTRA EQ/CABI&MIC
DELAY REVERB
IN OUT
Terms Used in This Manual
This section explains some important terms that are used throughout the G2.1u documentation.
■
Effect module
As shown in the illustration above, the G2.1u can be
thought of as a combination of several single effects.
Each such effect is referred to as an effect module. In
addition to modules comprising compressor effects
(COMP), amp simulator/distortion effects (DRIVE),
and modulation/special effects (MOD/SFX), the
G2.1u also provides a module for ZNR (ZOOM
Noise Reduction). Parameters such as effect intensity
can be adjusted for each module individually, and
modules can be switched on and off as desired.
■
Effect type
Within some effect modules, there are several
different effects which are referred to as effect types.
For example, the modulation/SFX effect module
(MOD/SFX) comprises chorus, flanger, pitch shifter,
delay, and other effect types. Only one of these can
be selected at a time.
■
Effect parameter
All effect modules have various parameters that can
be adjusted. These are called effect parameters.
In the G2.1u, effect parameters are adjusted with the
parameter knobs 1 – 3. Similar to the knobs on a
compact effect, these change aspects such as tonal
character and effect intensity. Which parameter is
assigned to each knob depends on the currently
selected effect module and effect type.
■
Patch
In the G2.1u, effect module combinations are stored
and called up in units referred to as patches. A patch
comprises information about the on/off status of each
effect module, about the effect type used in each
module, and about effect parameter settings. The
internal memory of the G2.1u holds up to 80 patches
(including 40 patches which allow read/write).
■
Bank and area
A group of ten patches is called a bank. The memory
of the G2.1u comprises a total of eight banks,
labelled A to d and 0 to 3. Banks A – d form the user
area which allows read/write. Banks 0 to 3 are the
preset area containing read-only patches.
The patches within each bank are numbered 0
through 9. To specify a patch of the G2.1u, you use
the format "A1" (patch number 1 from bank A), "06"
(patch number 6 from bank 0), etc.
■
Play mode/edit mode
The internal status of the G2.1u is referred to as the
operation mode. The two major modes are "play
mode" in which you can select patches and use them
for playing your instrument, and "edit mode" in
which you can modify the effects. The module
selector serves for switching between the play mode
and edit mode.

ZOOM G2.1u
6
Controls and Functions / Connections
Module selector Top Panel
Rear Panel
Switches between play mode and edit mode. In
edit mode, the knob selects the module for
operation.
[W]/[Q] foot switches
These switches are used for selecting patches,
switching effect modules on and off, controlling
the tuner, and other functions.
[USB] connector
Allows you to connect the G2.1u. to a computer,
for exchanging audio data. When you plug a cable
from this connector into the USB port of the
computer, you can use the G2.1u. as an audio
interface for the computer.
[STORE] key
Serves for storing edited patches in memory.
[OUTPUT/PHONES] jack
Guitar
MTR
(multitrack recorder)
Guitar amplifiers
Computer
Headphones
This stereo phone jack serves for
connection to a guitar amplifier or
recorder. It is also possible to use a
Y cable for sending the output to
two amplifiers, or to plug a pair of
stereo headphones into this jack.
BANK [-]/[+] keys
In play mode, the keys serve for directly
switching to the next lower or higher bank.
In edit mode, the keys switch the effect type for
the currently selected module.
Controls and Functions / Connections
ZOOM G2.1u
7
Parameter knobs 1 - 3
These knobs allow changing the level of effect parameters or of
the overall patch. During rhythm playback, the knobs let you
select a pattern, set the tempo, and adjust the rhythm volume.
[TAP] key
Allows manual input of time related effect parameter values
such as delay time, and rhythm pattern tempo.
Display
Shows patch numbers, setting values, and other information
about operating the G2.1u.
[PEDAL ASSIGN] key
This key lets you select the function of the built-in expression
pedal. The currently selected function is shown by a lit LED.
Expression pedal
Lets you adjust the volume or various effect parameters in real
time during play.
[CONTROL IN] jack
Serves for connection of the optional foot switch (FS01)
or expression pedal (FP01/FP02).
[DC IN] jack
An AC adapter (ZOOM
AD-0006) with a rated
output of 9 volts DC, 300
mA (center minus plug) can
be plugged into this jack.
[POWER] switch
Turns the unit on and off.
RHYTHM [R/P] key
Serves to start/stop rhythm playback.
[INPUT] jack
Serves for connecting the guitar.
AC adapter
FP01/FP02
FS01

ZOOM G2.1u
8
Selecting a Patch
A 1
HINT
Turn power on
Set the G2.1u to play mode
Use a monaural shielded cable to connect
the guitar to the [INPUT] jack of the G2.1u.
When using the G2.1u with the AC
adapter, plug the adapter into the outlet
and plug the cable from the adapter into
the [DC IN] jack on the G2.1u.
Turn the guitar amplifier on and adjust
the volume to a suitable position.
If the Module selector is set to a position
other than "PLAY", set it to "PLAY".
The bank and patch
that were selected
when the power was
last turned off will
appear on the display.
Select a patch
To switch the patch, press one of the [W]/[Q] foot switches.
Pressing the [W] foot switch calls up the next lower patch, and pressing the [Q] foot
switch calls up the next higher patch.
Repeatedly pressing one foot switch cycles through patches in the order A0 – A9 ... d0 – d9
→00 – 09 ... 30 – 39 →A0, or the reverse order.
Immediately after turning the G2.1u on,
the unit will be in play mode, even if the
Module selector is set to a position other
than "PLAY".
Set the [POWER] switch on the rear
panel of the G2.1u to ON.
Bank name Patch number
To try out the various effects of the G2.1u, we recommend that you simply play your instrument while
switching patches.
Selecting a Patch
ZOOM G2.1u
9
NOTE
Adjust tone and volume
To adjust the effect sound and volume
levels in play mode, the Parameter
knobs 1 – 3 can be used. Each knob
controls a specific parameter.
When you turn a Parameter knob, the
corresponding LED lights up and the display
briefly shows the current value of the respective
parameter.
• If the DRIVE module is set to OFF for the
currently selected module (display shows
"oF"), Parameter knobs 1 and 2 have no effect.
• Changes made here are temporary and will be
lost when you select another patch. To retain
the changes, store the patch in the user area.
• The master level in common to all patches is
set in edit mode (→p. 34).
Parameter knob 2
Parameter knob 1 Parameter knob 3
Adjusts the GAIN
parameter of the
DRIVE module (mainly
distortion depth).
Adjusts the PATCH
LEVEL parameter
(output level of the
entire patch).
Adjusts the TONE parameter of the DRIVE
module (mainly distortion sound character).
Directly selecting a bank
To select the banks A – d, 0 – 3 directly, use
the BANK [-]/[+] keys.
Pressing the BANK [-] key calls up the next lower bank, and
pressing the BANK [+] key calls up the next higher bank.

ZOOM G2.1u
10
Using the Tuner
A8
B P
MT
Switch to bypass or mute
Setting the G2.1u to the bypass
In play mode, press both [W]/[Q] foot
switches together briefly and release.
Setting the G2.1u to the mute state
In play mode, press both [W]/[Q] foot
switches together and hold for at least 1
second.
When you press both [W]/[Q] foot switches together while
playing your instrument, the bypass/mute condition is
activated. However, the sound may change momentarily
just before the condition is activated. This is because the
G2.1u switches to the next higher or lower patch when one
of the foot switches is pressed slightly earlier. (When you
cancel the bypass/mute condition, the original patch
number will be active again.)
This kind of behavior is not a defect. It is due to the very
high speed at which the G2.1u responds to patch
switching. To prevent the sound change caused by the
above condition, do not produce sound with your
instrument until the bypass/mute condition is fully
established.
Play the string to tune
Play the open string to tune,
and adjust the pitch.
The left side of the display shows the
note which is closest to the current pitch.
Patch change at bypass/mute
The G2.1u incorporates an auto-chromatic tuner. To use the tuner function, the built-in effects must be
bypassed (temporarily turned off) or muted (original sound and effect sound turned off).
Using the Tuner
ZOOM G2.1u
11
A8
4 0
42
NOTE
Pitch is high Pitch is correct
Indication turns faster the more
the pitch is off
Pitch is low
Tune other strings in the
same way.
The right side of the display shows a
symbol that indicates by how much
the tuning is off.
When you turn the G2.1u off and on
again, the reference pitch setting will be
reset to 40 (center A = 440 Hz).
Adjusting the reference pitch of the tuner
Return to play mode
Turn Parameter knob 1.
While the reference pitch value is shown, turn
Parameter knob 1 to adjust it.
Press one of the [W]/[Q] foot
switches.
If required, you can fine-adjust the reference pitch of the G2.1u tuner.
The default setting after power-on is center A = 440 Hz.
The current reference pitch is shown.
The adjustment range is 35 – 45 (center A = 435 to 445 Hz).
When you release the Parameter knob, the
display indication will return to the
previous condition after a while.

ZOOM G2.1u
12
NOTE
Set the G2.1u to play mode
If the Module selector is set to a position
other than "PLAY", set it to "PLAY".
Start the rhythm
function
Select a rhythm
pattern
To start the rhythm function, press
the RHYTHM [R/P] key.
To continuously switch rhythm
patterns, turn Parameter knob 1.
To select the next higher or next
lower rhythm pattern, press one of
the BANK [-]/[+] keys.
During rhythm playback, the
REVERB module is OFF.
The G2.1u has 40 built-in rhythm patterns.
For more information on the pattern contents,
see the back cover of this manual.
When the above steps are carried out, the
current rhythm pattern number (01 – 40) is
briefly shown on the display.
Using the Rhythm Function
The G2.1u has a built-in rhythm function that plays realistic drum sounds in various patterns. The rhythm
function is available in play mode or in the bypass/mute condition.
Using the Rhythm Function
ZOOM G2.1u
13
2 5
2040
Dot is shown
Tempo = 120 BPM Tempo =240 BPM
Dots are shown
Adjust the rhythm volume
To adjust the rhythm volume, turn
Parameter knob 3.
Adjust the tempo
To continuously change the rhythm
tempo, turn Parameter knob 2.
To manually specify the rhythm tempo,
hit the [TAP] key at least three times in
the desired interval. .
When you turn the Parameter knob, the current
setting (0 – 30) is shown on the display.
The rhythm pattern tempo can be adjusted in the
range of 40 – 250 BPM (beats per minute).
At the first push of the [TAP] key, the current
tempo value is shown on the display. The G2.1u
then automatically detects the interval for the
second and subsequent keypresses and sets the
tempo accordingly.
While the above steps are carried out, the current
tempo value (40 – 250) is shown on the display.
For values in the range from 100 to 199, a dot is
shown after the first digit. For values of 200 and
above, dots are shown after the first and second
digits.
Stop the rhythm
To stop the rhythm, press the RHYTHM [R/P] key.
The G2.1u returns to the previous condition.

ZOOM G2.1u
14
Editing a Patch
The patches of the G2.1u can be freely edited by changing the effect parameter settings. Try editing the
currently selected patch to create your own sound.
F C
OF
Select the effect module
Turn the Module selector to select the
effect module to edit. The following
settings are available.
To switch an effect
module on and off
To switch the selected module
between ON and OFF, press one
of the [W]/[Q] foot switches.
(1) COMP module
(2) WAH/EFX module
(3) ZNR module
(4) DRIVE module
(5) EQ module
(6) EXTRA EQ/CABI&MIC module
(7) MOD/SFX module
(8) DELAY module
(9) REVERB module
(10) Pedal/foot switch related parameters
When you switch to a different module, the effect
type currently selected for that module is shown on
the display. While the G2.1u is in edit mode, a dot
appears in the bottom right of the display.
Dot shows that unit
is in edit mode
Effect type
(1)
(2)
(3)
(4)
(5)
(6)
(7)
(8)
(9)
(10)
The indication "oF" appears on the display.
When you press one of the foot switches again,
the indication returns to the previous condition.
Editing a Patch
ZOOM G2.1u
15
B L
5 5
NOTE
NOTE
NOTE
Terminate the edit mode
To terminate the edit mode and
return to the play mode, set the
Module selector to the "PLAY"
position.
Select the effect type
To switch the effect type of the selected module,
use the BANK [-]/[+] keys.
Change the parameter
value
To change the setting value of effect
parameters, use the Parameter knobs
1 – 3.
When you return to play mode
and select another patch, the
changes you have made in edit
mode will be lost unless you
store the patch first. To retain the
changes, store the patch as
described on page 16.
When a module that is set to OFF is
selected, the display will show "oF".
If you press the BANK [-]/[+] keys for a module that is set to OFF, the module
will be turned ON.
For modules that have only one effect type, pressing the BANK [-]/[+] keys
has no effect.
Which parameter is assigned to a knob depends on
which effect module/effect type is selected. For
information on parameters for effect
modules/effect types, see page 27 – 34.
When you turn a Parameter knob, the
corresponding LED lights up and the display
briefly shows the current value of the respective
parameter.

ZOOM G2.1u
16
Storing/Copying Patches
An edited patch can be stored in a bank of the user area (A – d). It is also possible to store an existing patch
in another location to create a copy.
A 0
D 0
NOTE
NOTE
In play mode or edit
mode, press the [STORE]
key.
The bank and patch number are shown
on the display as a flashing indication.
Patches of banks in the preset area (0 –
3) are read-only. No patches can be
stored or copied into these locations. If
you press the [STORE] key while a patch
from the preset area is selected, the
patch "A0" (bank A, patch number 0) will
be selected automatically as default
store/copy target.
Select the store/copy
target bank
To select the store/copy target bank,
use the BANK [-]/[+] keys.
Only a bank of the user area (A – d) can
be selected as store/copy target bank.
Storing/Copying Patches
ZOOM G2.1u 17
D 4
D4
To cancel the store process
To cancel the store process, operate the
Module selector before pressing the [STORE]
key again ( ).
Press the [STORE]
key once more
When the store/copy process is
completed, the G2.1u returns to
the previous mode, with the target
patch being selected.
Specify the store/copy target
patch number
To specify the store/copy target patch number, use
the [W]/[Q] foot switches.

ZOOM G2.1u
18
Using the Built-in Expression Pedal
The expression pedal on the top panel of the G2.1u lets you adjust the effect sound or the volume in real
time during play. Which element is controlled by the pedal can be selected for each patch individually.
HINT
Select the patch for which the expression
pedal is to be used
The respective selection is indicated as follows.
• All LEDs are out
The expression pedal has no effect.
• VOLUME
The expression pedal controls the volume for the entire patch.
• WAH/EFX, DRIVE, MOD/SFX, DELAY, REVERB
The expression pedal controls a parameter from the respective module.
Select the element to be
controlled by the
expression pedal
Press the [PEDAL ASSIGN] key to select
the element to be controlled by the
expression pedal. The row of LEDs above
the key shows which element is currently
selected.
• Which parameter will be changed by the expression pedal depends on the
effect type selected for the respective module. For details, see pages 27 - 33.
• The pattern in which the parameter changes when the expression pedal is
operated can be selected in edit mode from four choices. For details, see page
34.
• If the module to which the expression pedal was assigned is set to OFF in the
patch, the LED flashes. In this case, operating the expression pedal has no
effect.
Using the Built-in Expression Pedal
ZOOM G2.1u 19
NOTE
If you select another patch in play mode without storing the
patch, any changes that you have made to the settings will
be lost.
Operate the pedal
While playing your
instrument, move the
expression pedal up or down.
To switch a module
on or off
Store the patch as necessary
When you push the
expression pedal fully down,
the module selected with
the [PEDAL ASSIGN] key is
switched on or off.
The expression pedal setting can be stored for
each patch individually.
Move up or down
Push fully down

ZOOM G2.1u
20
Use of Expression Pedal/Foot Switch
The G2.1u lets you use the built-in expression pedal or an external expression pedal (FP01/FP02)
connected to the [CONTROL IN] jack to adjust the effect sound or the volume in real time during play.
Connecting an optional foot switch (FS01) to the [CONTROL IN] jack allows changing patches or setting
the tempo for the rhythm function.
Using the built-in
expression pedal
The built-in expression pedal on the top panel of
the G2.1u can function as a volume pedal or it can
be used to control an effect parameter in real time.
Which function is selected for the expression
pedal is stored for each patch individually.
For details on parameters that can be modified
with the expression pedal, see pages 27 – 33.
1. Select the patch for which you want
to use the expression pedal.
2. Set the Module selector to the
"CONTROL" position.
The G2.1u goes into edit mode.
3. Turn Parameter knob 1 to select one
of the following modulation targets
for the expression pedal (→p. 34).
●oF
Pedal is inactive.
●VL
Volume
●WU, Wd, WH, WL
WAH/EFX module
●GU, Gd, GH, GL
DRIVE module
●MU, Md, MH, ML
MOD/SFX module
●dU, dd, dH, dL
DELAY module
●rU, rd, rH, rL
REVERB module
HINT
•The modulation target can also be selected by
using the [PEDAL ASSIGN] key (→p. 18). This
method is available both in edit mode and in play
mode.
•Which parameter changes when the expression
pedal is operated depends on the effect type
selected for the module. For details, see pages 27 –
33.
•The pattern in which the parameter changes when
the expression pedal is operated can be selected in
edit mode from four choices. For details, see page
34.
4. If necessary, store the patch.
The expression pedal setting is stored as part of
the patch.
5. Select the patch in play mode and
operate the expression pedal.
The selected function will be activated.
When the G2.1u is in the bypass condition, the
expression pedal always functions as a volume
pedal, regardless of the setting made in step 3.
Use of Expression Pedal/Foot Switch
ZOOM G2.1u 21
Adjusting the sensitivity of
the built-in expression pedal
The expression pedal of the G2.1u is adjusted for
optimum operation at the factory, but sometimes,
readjustment may be necessary. If the sound does
not change when the pedal is fully pushed down,
or if it changes excessively even if the pedal is
only lightly pushed, adjust the pedal as follows.
1. Turn power to the G2.1u on while
keeping the [PEDAL ASSIGN] key
depressed.
The indication "dn" appears on the display.
2. With the expression pedal fully raised,
press the [STORE] key.
The display indication changes to "UP".
3. Push the expression pedal fully down
and then lift your foot off the pedal.
4. Press the [STORE] key once more.
The expression pedal adjustment is completed,
and the unit returns to the play mode.
HINT
•The point where the module is switched on or off
when the pedal is depressed is always the same,
regardless of the action taken in step 3.
•If "Er" appears on the display, repeat the procedure
from step 2.
Using an external
expression pedal (FP01/
FP02)
When you connect an optional expression pedal
(FP01/FP02) to the [CONTROL IN] jack of the
G2.1u, you can use that pedal as a volume pedal,
separately from the built-in expression pedal.
1. Plug the cable from the external
expression pedal into the [CONTROL
IN] jack, and then turn the G2.1u on.
2. Operate the external expression
pedal in play mode or edit mode.
The volume changes.
HINT
The external expression pedal always functions as a
volume pedal.
Using a foot switch (FS01)
Connecting an optional foot switch (FS01) to the
[CONTROL IN] jack of the G2.1u allows bank
switching in play mode. It is also possible to
switch bypass/mute on and off, control the tap
tempo function, or perform other functions with
the foot switch.
1. Plug the cable from the FS01 into the
[CONTROL IN] jack, and then turn the
G2.1u on.
DN
Push strongly,
so that pedal touches
here.
When foot is lifted,
pedal returns slightly.

Use of Expression Pedal/Foot Switch
ZOOM G2.1u
22
2. Set the Module selector to the
"CONTROL" position.
The G2.1u goes into edit mode. You can now
make settings for the expression pedal or foot
switch.
3. Turn Parameter knob 2 to select one
of the following functions for the foot
switch.
●bP (bypass/mute)
The foot switch controls bypass or mute on/off.
This has the same effect as pressing both [W]/
[Q] foot switches at the same time in play
mode.
●tP (tap tempo)
Pressing the foot switch repeatedly can be used
to set the interval for the rhythm function or to
make settings for effect parameters supporting
the tap function. This has the same effect as
pressing the [TAP] key.
●bU (bank up)
Each push of the foot switch switches to the
next higher bank. This has the same effect as
pressing the BANK [+] key.
●rH (rhythm on/off)
The foot switch controls start/stop of the
rhythm function. This has the same effect as
pressing the RHYTHM [R/P] key.
●dH (delay hold)
The foot switch controls on/off of the delay
hold function. When a patch using the hold
function is selected, pressing the foot switch
will activate hold, causing the current delay
sound to be repeated (see illustration at the
bottom of this page). Pressing the foot switch
once more cancels the hold condition, and the
delay sound will decay normally.
●dM (delay input mute)
The foot switch controls muting on/off for the
delay module input signal.
HINT
•For information on effect parameters supporting the
tap function, see pages 27 – 33.
•To use the hold function, an effect type that
supports the hold function must be selected in the
patch. For details, see page 34.
•While the delay module is set to hold or mute, the
dot in the center of the display flashes.
4. Select the patch in play mode and
operate the foot switch.
The selected function will be activated.
This function applies to all patches.
Using the G2.1u as audio
interface for a computer
By connecting the [USB] connector of the G2.1u
to a computer, the G2.1u can be used as an audio
interface with integrated AD/DA converter and
Foot switch pressed
Pressed again
Original sound
Delay sound
Hold
Use of Expression Pedal/Foot Switch
ZOOM G2.1u 23
[USB]
[USB]
[INPUT] USB
USB
DAW
application
DAW
application
Effects
Effects
G2.1u
Record
G2.1u
[INPUT]
[OUTPUT]
[OUTPUT]
Playback
effects. The operating environment conditions
for this type of use are as follows.
■Compatible operating system
• Windows XP
• MacOS X (10.2 or later)
■Quantization
16-bit quantization
■Sampling frequency
32 kHz / 44.1 kHz / 48 kHz
HINT
With each of the operating systems listed above, the
G2.1u will function as an audio interface simply by
connecting the USB cable. There is no need to install
any special driver software.
To use the G2.1u as an audio interface for the
computer, connect the [USB] connector of the
G2.1u to a USB port on the computer. The G2.1u
will be recognized as an audio interface.
HINT
•If the [POWER] switch of the G2.1u is set to OFF,
power will be supplied via the USB connection.
•If the [POWER] switch of the G2.1u is set to ON,
power will be supplied from the batteries in the
G2.1u or the AC adapter. Care should be taken
especially when running on battery power,
because setting the switch to ON may result in
faster depletion of the batteries.
In this condition, the sound of a guitar connected
to the [INPUT] jack of the G2.1u can be
processed with the effects of the G2.1u and then
recorded on the audio tracks of a DAW (Digital
Audio Workstation) software application on the
computer.
At the same time, the [OUTPUT] jack of the
G2.1u carries the playback sound from the audio
tracks of the DAW application, mixed with the
guitar sound processed by the effects of the
G2.1u.
For details on recording and playback, refer to
the documentation of the DAW application.
NOTE
•Also when using the G2.1u as an audio interface,
the signal after effect processing is always
available directly at the [OUTPUT] jack.
•If the DAW application has an echo back function
(input signal during recording is supplied directly to
an output), this must be disabled when using the
G2.1u. If recording is carried out with this function
enabled, the output signal will sound as if
processed by a flanger effect.
•Use a high-quality USB cable and keep the
connection as short as possible. If power is
supplied to the G2.1u via a USB cable that is more
than 3 meters in length, the low voltage warning
indication may appear.

ZOOM G2.1u
24
Restoring Factory Defaults
In the factory default condition, the patches of the user area (A0 – d9) contain the same settings as the
patches of the preset area (00 – 39). Even after overwriting the user patches, their original content can be
restored in a single operation ("All Initialize" function).
1. Turn the G2.1u on while holding down
the [STORE] key.
The indication "AL" appears on the display.
2. To carry out the All Initialize function,
press the [STORE] key once more.
All patch settings are returned to the factory
default condition, and the unit switches to play
mode. To cancel All Initialize, press the
RHYTHM [R/P] key instead of the [STORE]
key.
NOTE
When you carry out All Initialize, any newly created
patches that were stored in the user area will be
deleted (overwritten). Perform this operation with care
to prevent losing any patches that you want to keep.
A L
ZOOM G2.1u 25
AUTO WAH
AUTO
RESONANCE
BOOSTER
TREMOLO
PHASER
RING
MODULATOR
SLOW
ATTACK
PEDAL VX
PEDAL
BABY
ZNR
GATE
DIRTY GATE
HALL
ROOM
SPRING
EARLY
REFLECTION
MULTI TAP
DELAY
DELAY
PINGPONG-
DELAY
ECHO
EXTRA EQ
CABINET&MIC
Effect module
Effect type
FD CLEAN
CLASS A
CLEAN
JC CLEAN
MS CRUNCH
US BLUES
BG CRUNCH
MS DRIVE
BG DRIVE
PV DRIVE
OVERDRIVE
GUV'NOR
HOT BOX
FUZZ FACE
METAL ZONE
EXTREME
DISTORTION
DIGI FUZZ
ACOUSTIC
CHORUS
STEREO
CHORUS
FLANGER
PITCH
SHIFTER
PEDAL
PITCH
VIBRATO
STEP
DELAY
ECHO
DYNAMIC
DELAY
DYNAMIC
FLANGER
MONO
PITCH
SHIFTER
HARMONIZED
PITCH
SHIFTER
COMP WAH/EFX ZNR DRIVE EQ MOD/SFX REVERBDELAY
EXTRA EQ/CABI&MIC
EXTRA EQ
CABINET&MIC
Algorithm for
live performance
Algorithm for
direct recording
DRIVE EQ EXTRA EQ/CABI&MIC
Linking Effects
The patches of the G2.1u consist of nine serially linked effect modules, as shown in the illustration below.
You can use all effect modules together or selectively use certain modules by setting them to on or off.
For some effect modules, you can select an effect type from several possible choices. For example, the
MOD/SFX module comprises CHORUS, FLANGER, and other effect types. The REVERB module
comprises HALL, ROOM, and other effect types from which you can choose one.
*Manufacturer names and product names mentioned in this table are
trademarks or registered trademarks of their respective owners. The
names are used only to illustrate sonic characteristics and do not
indicate any affiliation with ZOOM CORPORATION.
Switching between live sound
and direct recording sound
In the above illustration, the DRIVE module is
shown as having 17 effect types. But each effect
type has two algorithms (one for live performance
and one for direct recording) for each of its 17
effect types, so that there are actually 34 effect
types that can be used.
The two algorithms are switched according to the
effect type selected for the EXTRA EQ/CABI &
MIC module, as follows.
●EXTRA EQ is selected
The algorithm for live performance is selected at
the DRIVE module. This is recommended when
using the G2.1u for playing via a guitar amplifier.
●CABINET & MIC is selected
The algorithm for direct recording is selected at
the DRIVE module. This is recommended when
the G2.1u is directly connected to a recorder, or to
a hifi system or other audio device.

ZOOM G2.1u
26
Effect Types and Parameters
DELAY
DELAY module
This is a delay module which allows long delay times and use of the hold function.
dL
DELAY
This is a delay with a maximum setting of 5000 ms.
Pd
PINGPONG DELAY
This is a ping-pong type delay where the delay sound alternates between left and right.
EC
ECHO
This effect simulates a tape echo with a long delay time of up to 5000 ms.
These three effect types have the same parameters.
TIME 1 – 99,
1.0 – 5.0 FEEDBACK 0 – 98, 1.0 MIX 0 – 98, 1.0
Adjusts the delay time. In the
range from 10 – 990 ms, the
adjustment is made in 10-ms
steps (1 – 99). For 1 second and
above, the adjustment is made in
100-ms steps (1.0 – 2.0).
Adjusts the feedback amount. Adjusts the mixing ratio of
original sound and effect sound.
HOLD
HOLD
HOLD
TAP
DL
PD
EC
Effect parameters 1 – 3
Effect type
These are the parameters that can be adjusted with Parameter knobs 1 – 3 when
the effect type is selected. The setting range for each parameter is shown.
Three-digit setting values are shown with a dot between the two numerals.
Example: 1 – 98, 1.0 = 1 – 98, 100
Expression pedal
A pedal icon ( ) in the listing indicates a parameter that can be controlled with the expression
pedal (FP01/FP02).
Specify the respective module as modulation target for the expression pedal (→p. 20), and then
select the respective effect type of the module. The parameter can then be controlled in real time
with a connected expression pedal.
Tap
A [TAP] key icon ( ) in the listing indicates a parameter that can be set by hitting the [TAP]
key.
In edit mode, when the respective module/effect type is selected, repeatedly hitting the [TAP] key
will set the parameter according to the key press interval (modulation cycle, delay time, etc.).
In play mode, if the DELAY module is ON for the currently selected patch, repeatedly hitting the
[TAP] key will temporarily change the parameter.
Hold
A foot switch icon ( ) in the listing indicates an effect type for which hold can be turned
on and off with the foot switch (FS01).
Set the foot switch function to "dH" (delay hold) (→p. 22) for the respective patch. When this patch
is then selected in play mode, the hold function can be switched on and off by pressing the foot
switch.
Module selector
The Module selector
symbol shows the
position of the knob at
which this
module/parameter is
called up.
Effect module
TAP
HOLD
How to read the parameter table
Effect Types and Parameters
ZOOM G2.1u 27
COMP
COMP (Compressor) module
Attenuates high-level signal components and boosts low-level signal components,
thereby keeping the overall signal level within a certain range.
SENSE 0 – 10 ATTACK FS, SL LEVEL 2 – 98, 1.0
Adjusts the compressor sensitivity.
Higher setting values result in higher
sensitivity.
Selects compressor attack speed in two
levels. Available settings are "FS" (fast)
and "SL" (slow).
Adjusts the signal level after passing the
module.
WAH/EFX
WAH/EFX (Wah/Effects) module
Comprises wah and filter effects as well as VCA type effects.
AW
AUTO WAH
This effect varies wah in accordance with playing intensity.
Ar
AUTO RESONANCE
This effect varies the frequency band of the resonance filter according to the picking intensity.
The two effect types above have the same parameters.
POSITION bF, AF SENSE -10 – -1, 1 – 10
RESONANCE
0 – 10
Selects the connection position of the
WAH/EFX module. Available settings
are "bF" (before DRIVE module) and
"AF" (after EQ/EXTRA EQ module).
Adjusts the effect sensitivity. Adjusts the resonance of the sound.
bS
BOOSTER
Raises signal gain and creates a dynamic sound.
RANGE 1 – 5 TONE 0 – 10 LEVEL 2 – 98, 1.0
Selects the frequency band that is
boosted. Adjusts the sound quality. Adjusts the signal level after
passing the module.
tr
TREMOLO
This effect periodically varies the volume.
DEPTH 0 – 98, 1.0 RATE 0 – 50 WAVE u0 – u9, d0 –
d9, t0 – t9
Adjusts the modulation depth. Adjusts the effect rate.
Allows selection of the modulation
waveform. Available settings are "u"
(rising sawtooth), "d" (falling sawtooth),
and "t" (triangular). Higher setting
values result in more clipping of wave
peaks, which reinforces the effect.
PH
PHASER
This effect produces sound with a pulsating character.
POSITION bF, AF RATE 0 – 50 COLOR 1 – 4
Selects the connection position of the
WAH/EFX module. Available settings
are "bF" (before DRIVE module) and
"AF" (after EQ/EXTRA EQ module).
Adjusts the modulation rate. Adjusts the type of sound.
TAP
TAP
AW
AR
BS
TR
PH

Effect Types and Parameters
ZOOM G2.1u
28
rG
RING MODULATOR
This effect produces a metallic ringing sound. Adjusting the FREQUENCY parameter results in a drastic
change of sound character.
POSITION bF, AF
FREQUENCY
1 – 50 MIX 0 – 98, 1.0
Selects the connection position of the
WAH/EFX module. Available settings
are "bF" (before DRIVE module) and
"AF" (after EQ/EXTRA EQ module).
Adjusts the frequency that is used
for modulation. Adjusts the level of the effect sound
mixed to the original sound.
SL
SLOW ATTACK
This effect reduces the attack rate of the sound, resulting in a violin playing style sound.
POSITION bF, AF TIME 1 – 50 CURVE 0 – 10
Selects the connection position of the
WAH/EFX module. Available settings
are "bF" (before DRIVE module) and
"AF" (after EQ/EXTRA EQ module).
Adjusts the attack time. Adjusts the attack volume change curve.
PV
PEDAL VX
Simulates a vintage pedal wah sound.
POSITION bF, AF
FREQUENCY
1 – 50 LEVEL 2 – 98, 1.0
Selects the connection position of the
WAH/EFX module. Available settings
are "bF" (before DRIVE module) and
"AF" (after EQ/EXTRA EQ module).
Adjusts the frequency that is
emphasized. When no expression
pedal is used, the effect is the
same as with a half-raised pedal.
Adjusts the signal level after passing the
module.
Pb
PEDAL BABY
Simulates a vintage pedal wah sound.
POSITION bF, AF
FREQUENCY
1 – 50 LEVEL 2 – 98, 1.0
Selects the connection position of the
WAH/EFX module. Available settings
are "bF" (before DRIVE module) and
"AF" (after EQ/EXTRA EQ module).
Adjusts the frequency that is
emphasized. When no expression
pedal is used, the effect is the
same as with a half-raised pedal.
Adjusts the signal level after passing the
module.
ZNR
ZNR (ZOOM Noise Reduction) module
This module serves for reducing noise during playing pauses. It offers a choice between
noise reduction (reduction of noise components) and noise gate (muting during pauses).
nr
ZNR (ZOOM Noise Reduction)
ZOOM original noise reduction which reduces noise in playing pauses without affecting the overall tone.
Gt
GATE
This is a noise gate which cuts off the sound during playing pauses.
dG
DIRTY GATE
This is a vintage type gate with special closing characteristics.
All above effect types have the same parameters.
THRESHOLD 1 – 16
Adjusts the sensitivity. For maximum noise reduction, set the value as high as possible without causing the sound to decay
unnaturally.
RG
SL
PV
PB
NR
GT
DG
Effect Types and Parameters
ZOOM G2.1u 29
DRIVE
DRIVE module
This module provides 16 types of distortion and an acoustic simulator. Each effect type of
the module has two modeling algorithms (for live performance and direct recording).
These algorithms are switched automatically according to the on/off condition of the
CABINET & MIC effect (
→
p. 25).
FC
FD CLEAN
CA
CLASS A CLEAN
The rich, clean sound of a classic 1965 Fender Twin
Reverb
Clean sound of the Vox AC-30 combo amp,
operating in Class-A
JC
JC CLEAN
MC
MS CRUNCH
Clean sound of Roland JC series with built-in chorus
which gives a wide, clear tone.
Big sound of a Marshall stack running between
clean and crunch
bL
US BLUES
bC
BG CRUNCH
Crunch sound of a Fender Tweed Deluxe '53 Fat sound of the Mesa Boogie MkIII combo amp
Md
MS DRIVE
bG
BG DRIVE
The High gain sound of a Marshall JCM2000-driven
stack
High gain sound of Mesa Boogie Dual Rectifier amp
channel 2 (vintage mode).
PV
PV DRIVE
Od
OVERDRIVE
The high gain sound of the classic Peavey 5150 Simulation of the classic Boss OD-1 overdrive
pedal
GV
GUV'NOR distortion
Hb
HOT BOX
Simulation of the Guv'nor distortion effect from
Marshall.
Simulation of the drive channel of a Hot Box tube
amp.
FF
FUZZ FACE
Mt
METAL ZONE
Simulation of the original classic British fuzz pedal Simulation of the classic Boss Metal Zone pedal
famous for long sustain and midrange
Ed
EXTREME DISTORTION
dF
DIGI FUZZ (digital fuzz)
Intense super-high gain distortion High gain fuzz attack
All above effect types have the same parameters.
GAIN 0 – 98, 1.0 TONE 0 – 10 LEVEL 2 – 98, 1.0
Adjusts the distortion intensity. Adjusts the sound quality. Adjusts the signal level after passing the
module.
*Manufacturer names and product names mentioned in this table are trademarks or registered trademarks of their respective
owners. The names are used only to illustrate sonic characteristics and do not indicate any affiliation with ZOOM CORPORATION.
AC
ACOUSTIC
This effect makes an electric guitar sound like an acoustic guitar.
TOP 0 – 10 BODY 0 – 10 LEVEL 2 – 98, 1.0
Adjusts the special string tone
that is characteristic for an
acoustic guitar.
Adjusts the degree of body resonance. Adjusts the signal level after passing the
module.
FC
JC
BL
MD
PV
GV
FF
ED
AC
CA
MC
BC
BG
OD
HB
MT
DF

Effect Types and Parameters
ZOOM G2.1u
30
EQ
EQ (Equalizer) module
Allows adjusting the three main bands (BASS, MIDDLE, TREBLE) of the six-band equalizer.
BASS ±12 160Hz MIDDLE ±12 800Hz TREBLE ±12 3.2kHz
Adjusts the low frequency range level. Adjusts the mid frequency range level. Adjusts the high frequency range level.
EXTRA EQ/CABI&MIC
EXTRA EQ/CABINET & MIC module
This module allows adjusting the three remaining bands of the six-band equalizer. In
addition, the module contains a cabinet simulator that produces sound suitable for direct
recording on a MTR or for reproduction via headphones or a studio monitor.
Et
EXTRA EQ
Adjusts the three remaining bands of the six-band equalizer. The HARMONICS control allows adjustment of
the harmonics frequency range level.
LO MID ±12 400Hz PRESENCE ±12 6.4kHz HARMONICS ±12 12kHz
Adjusts the mid-low frequency range
level.
Adjusts the extremely high frequency
range level.
Adjusts the harmonics frequency range
level.
Cb
CABINET & MIC
This effect type simulates amplifier cabinet sound and mic directional characteristics, suitable for direct
recording on a multi-track recorder. The cabinet characteristics are automatically set either to Combo (12" x
1, 12" x 2) or to Stack (12" x 4), depending on the selected drive type. The on/off condition of this effect in
turn automatically switches the modeling algorithm of the DRIVE module (→p. 25).
MIC TYPE
dy, Co
MIC POSITION
0 – 2
Selects the mic type. "dy" simulates the
frequency response of a dynamic mic
and "Co" simulates the frequency
response of a condenser mic.
Lets you select different microphone
characteristics according to sound
pickup position. The following settings
are available.
0: Mic pointed at speaker center
1: Mic pointed halfway between speaker
edge and center
2: Mic pointed at speaker edge
MOD/SFX
MOD/SFX(Modulation/SFX) module
Comprises modulation and delay effects such as chorus, pitch shifter, delay, and echo.
CH
CHORUS
This effect mixes a variable pitch-shifted component to the original signal, resulting in full-bodied resonating sound.
DEPTH 0 – 98, 1.0 RATE 1 – 50 MIX 0 – 98, 1.0
Adjusts the modulation depth. Adjusts the modulation rate. Adjusts the level of the effect sound
mixed to the original sound.
SC
STEREO CHORUS
This is a stereo chorus with clear sound.
DEPTH 0 – 98, 1.0 RATE 1 – 50 MIX 0 – 98, 1.0
Adjusts the modulation depth. Adjusts the modulation rate.
Adjusts the level of the effect
sound mixed to the original
sound.
CH
SC
CB
ET
Effect Types and Parameters
ZOOM G2.1u 31
FL
FLANGER
This effect produces a resonating and strongly undulating sound.
DEPTH 0 – 98, 1.0 RATE 0 – 50 RESONANCE -10 – -1, 0,
1 – 10
Adjusts the modulation depth. Adjusts the modulation rate. Adjusts the modulation resonance
intensity.
Pt
PITCH SHIFTER
This effect shifts the pitch of the original sound up or down.
SHIFT -12 – -1, dt,
1 – 12, 24 TONE 0 – 10 MIX 0 – 98, 1.0
Adjusts the pitch shift amount in
semitones. Selecting "dt" gives a
detuning effect.
Adjusts the sound quality.
Adjusts the level of the effect
sound mixed to the original sound.
PP
PEDAL PITCH
This effect allows using a pedal to shift the pitch in real time.
COLOR See Table 1 MODE UP, dn TONE 0 – 10
Selects the type pitch change type
effected by the pedal. Selects the direction of the pitch change. Adjusts the sound quality.
Table 1
Vb
VIBRATO
Effect with automatic vibrato.
DEPTH 0 – 98, 1.0 RATE 0 – 50 MIX 0 – 98, 1.0
Adjusts the modulation depth. Adjusts the modulation rate. Adjusts the level of the effect sound
mixed to the original sound.
St
STEP
Special effect that changes the sound in a staircase pattern.
DEPTH 0 – 98, 1.0 RATE 0 – 50 RESONANCE 0 – 10
Adjusts the modulation depth. Adjusts the modulation rate. Adjusts the modulation resonance
intensity.
dL
DELAY
This is a delay with a maximum setting of 2000 ms.
TIME 1 – 99,
1.0 – 2.0 FEEDBACK 0 – 98, 1.0 MIX 0 – 98, 1.0
Adjusts the delay time. In the
range from 10 – 990 ms, the
adjustment is made in 10-ms
steps (1 – 99). For 1 second and
above, the adjustment is made in
100-ms steps (1.0 – 2.0).
Adjusts the feedback amount.
Adjusts the level of the effect
sound mixed to the original
sound.
TAP
Pedal minimum value Pedal maximum value Pedal minimum value Pedal maximum value
UP
dn
UP
dn
UP
dn
UP
dn
1
2
3
4
-100 cent
Original sound only
DOUBLING
Detune + DRY
0 cent
+1 octave
0 cent
-2 octaves
Original sound only
-100 cent
Detune + DRY
DOUBLING
+1 octave
0 cent
-2 octaves
0 cent
COLOR MODE
UP
dn
UP
dn
UP
dn
UP
dn
5
6
7
8
-1 octave + DRY
+1 octave + DRY
-700 cent + DRY
500 cent + DRY
-∞(0 Hz) + DRY
+1 octave
-∞(0 Hz) + DRY
+1 octave + DRY
+1 octave + DRY
-1 octave + DRY
500 cent + DRY
-700 cent + DRY
+1 octave
-∞(0 Hz) + DRY
+1 octave + DRY
-∞(0 Hz) + DRY
COLOR MODE
TAP
TAP
TAP
PT
FL
PP
VB
ST
DL

Effect Types and Parameters
ZOOM G2.1u
32
tE
TAPE ECHO
This effect simulates a tape echo.
TIME 1 – 99,
1.0 – 2.0 FEEDBACK 0 – 98, 1.0 MIX 0 – 98, 1.0
Adjusts the delay time. In the range
from 10 – 990 ms, the adjustment is
made in 10-ms steps (1 – 99). For 1
second and above, the adjustment is
made in 100-ms steps (1.0 – 2.0).
Adjusts the feedback amount.
Adjusts the level of the effect
sound mixed to the original
sound.
dd
DYNAMIC DELAY
This is a dynamic delay where the effect volume changes depending on the input signal level. With positive
settings, the effect volume increases at higher input signal levels. With negative settings, the effect volume
increases at lower input signal levels.
TIME 1 – 99,
1.0 – 2.0 AMOUNT 0 – 10 SENSE -10 – -1, 1 – 10
Adjusts the delay time. In the range
from 10 – 990 ms, the adjustment is
made in 10-ms steps (1 – 99). For 1
second and above, the adjustment is
made in 100-ms steps (1.0 – 2.0).
Adjusts the level of the effect
sound mixed to the original sound Adjusts the effect sensitivity.
dF
DYNAMIC FLANGER
This is a dynamic flanger where the effect volume changes depending on the input signal level. With positive
settings, the effect volume increases at higher input signal levels. With negative settings, the effect volume
increases at lower input signal levels.
DEPTH 0 – 98, 1.0 RATE 0 – 50 SENSE -10 – -1, 1 – 10
Adjusts the modulation depth. Adjusts the modulation rate. Adjusts the effect sensitivity.
MP
MONO PITCH SHIFTER
This is a monophonic pitch shifter with low sound modulation, suitable for single-note playing.
SHIFT -12 – -1, dt,
1 – 12, 24 TONE 0 – 10 MIX 0 – 98, 1.0
Adjusts the pitch shift amount in
semitones. Selecting "dt" gives a
detuning effect.
Adjusts the sound quality.
Adjusts the level of the effect sound
mixed to the original sound.
HP
HARMONIZED PITCH SHIFTER
This is an intelligent pitch shifter that automatically generates harmonies according to a preset key and
scale.
SCALE -6, -5, -4, -3,
-m, m, 3, 4, 5, 6 KEY C, Co, d...b MIX 0 – 98, 1.0
Determines the interval for the pitch
shifted sound (see Table 2).
Determines the tonic for the scale used
for pitch shifting (see Table 3).
Adjusts the level of the effect sound
mixed to the original sound.
Table 2 Table 3
Setting Type of scale Interval Setting Type of scale Interval Setting Tonic Setting Tonic
-6
Major scale
Sixth down 3
Major scale
Third up CCFo F#
-5 Fifth down 4Fourth up Co C# GG
-4 Fourth down 5Fifth up dDGo G#
-3 Third down 6Sixth up do D# AA
-m Minor scale Third down EEAo A#
mThird up FFbB
TAP
TAP
TAP
TE
DD
DF
MP
HP
Effect Types and Parameters
ZOOM G2.1u 33
DELAY
DELAY module
This is a delay module which allows long delay times and use of the hold function.
dL
DELAY
This is a delay with a maximum setting of 5000 ms.
Pd
PINGPONG DELAY
This is a ping-pong type delay where the delay sound alternates between left and right.
EC
ECHO
This is a warm sounding long delay of up to 5000 ms duration.
These three effect types have the same parameters.
TIME 1 – 99,
1.0 – 5.0 FEEDBACK 0 – 98, 1.0 MIX 0 – 98, 1.0
Adjusts the delay time. In the
range from 10 – 990 ms, the
adjustment is made in 10-ms
steps (1 – 99). For 1 second and
above, the adjustment is made in
100-ms steps (1.0 – 5.0).
Adjusts the feedback amount.
Adjusts the level of the effect
sound mixed to the original
sound.
REVERB
REVERB module
This module comprises various reverb functions such as hall reverb, early reflection, and
multi-tap delay.
HL
HALL
This reverb simulates the acoustics of a concert hall.
rM
ROOM
This reverb simulates the acoustics of a room.
SP
SPRING
This effect simulates a spring-type reverb.
The above three effect types have the same parameters.
DECAY 1 – 30 TONE 0 – 10 MIX 0 – 98, 1.0
Adjusts the duration of the reverb. Adjusts the sound quality.
Adjusts the level of the effect sound
mixed to the original sound.
Er
EARLY REFLECTION
This effect isolates only the early reflection components of the reverb.
DECAY 1 – 30 SHAPE ±10 MIX 0 – 98, 1.0
Adjusts the duration of the reverb.
Adjusts the envelope of the effect sound.
In the negative range, the envelope is
reversed. At 0, the effect is a gate reverb.
In the positive range, the envelope is a
decay-type envelope.
Adjusts the mixing ratio of
original sound and effect sound.
Md
MULTI TAP DELAY
This effect produces several delay components with different delay times.
TIME 1 – 99,
1.0 – 3.0 PATTERN 1 – 8 MIX 0 – 98, 1.0
Adjusts the delay time. In the
range from 10 – 990 ms, the
adjustment is made in 10-ms
steps (1 – 99). For 1 second and
above, the adjustment is made in
100-ms steps (1.0 – 3.0).
Selects the combination pattern for the
taps. The selection ranges from
rhythmical to random patterns.
Adjusts the mixing ratio of
original sound and effect
sound.
HOLD
HOLD
HOLD
TAP
TAP
DL
PD
EC
HL
RM
SP
ER
MD

Effect Types and Parameters
ZOOM G2.1u
34
"UP"
Maximum value
Minimum value
Maximum value
Maximum value
V
alue set in patch
V
alue set in patch
Minimum value
Minimum value
"DOWN"
"HIGH"
"LOW"
CONTROL
CONTROL module
Serves for making pedal settings and lets you control the foot switch function and master
level setting applying to all patches.
RTM DESTINATION
See Table 4 FS See Table 5
MASTER LEVEL
0 – 98, 1.0
When an expression pedal (FP01/FP02)
is connected to the [CONTROL IN]
jack, this selects the modulation target
module for the RTM function (See Table
4).
When a foot switch (FS01) is connected
to the [CONTROL IN] jack, this selects
the function that can be operated with
the foot switch (See Table 5). The
function selected here applies to all
patches.
Adjusts the master level for all patches.
Table 4 Table 5
Setting Modulation target Setting Function
oF OFF bP Bypass/Mute
VL Volume tP Tap tempo
WU, Wd, WH, WL WAH/EFX module (*) bU Bank up
GU, Gd, GH, GL DRIVE module (*) rH Rhythm function on/off
MU, Md, MH, ML MOD/SFX module (*) dH Delay hold
dU, dd, dH, dL DELAY module (*) dM Delay mute
rU, rd, rH, rL REVERB module (*)
The operation of modules denoted by (*)
changes as follows, according to the letter at
right.
UP
The parameter is at minimum when the pedal is
fully raised and at maximum when the pedal is fully
pushed down.
DOWN
The parameter is at maximum when the pedal is
fully raised and at minimum when the pedal is fully
pushed down.
HIGH
When the pedal is fully raised, the parameter is at
the value set in the patch. When the pedal is fully
pushed down, the parameter is at maximum.
LOW
When the pedal is fully raised, the parameter is at
minimum. When the pedal is fully pushed down,
the parameter is at the value set in the patch.
U
D
H
L
ZOOM G2.1u 35
Specifications
Effect types 54
Effect modules Max. 9 simultaneous modules
Patches User area: 10 patches x 4 banks
Preset area: 10 patches x 4 banks
Sampling frequency 96 kHz
A/D converter 24 bit, 64 times oversampling
D/A converter 24 bit, 128 times oversampling
Signal processing 32 bit
Frequency response 20 Hz – 40 kHz +1 dB -3 dB (with 10 kilohms load)
Display 2-digit 7-segment LED
Parameter LEDs, Pedal assign LEDs
Input Standard mono phone jack
Rated input level -20 dBm
Input impedance 1 megohm
Output Standard stereo phone jack (doubles as line and headphone jack)
Maximum output level Line: +5 dBm (output load impedance 10 kilohms or more)
Phones: 20 mW + 20 mW (into 32 ohms load)
Control input For FP02/FS01
USB interface
PC interface: 16-bit (stereo configuration for recording/playback)
Sampling frequency: 44.1 kHz, 48 kHz
Power requirements
AC adapter9 V DC, 300 mA (center minus plug) (ZOOM AD-0006)
Batteries Four IEC R6 (size AA) batteries,
Approx. 7.5 hours continuous operation (alkaline batteries)
Dimensions 165 mm (D) x 255 mm (W) x 79mm (H)
Weight 1100 g (without batteries)
Options Expression pedal FP02/ Foot switch FS01
• 0 dBm = 0.775 Vrms
• Design and specifications subject to change without notice.
Troubleshooting
●No power
Refer to "Turn power on" on page 8.
●Reverb effect does not operate
While a rhythm pattern is playing, the reverb effect is not available. Stop the rhythm pattern first
(→p. 12).
●High level of noise
Is ZOOM AC adapter being used? Be sure to use only adapter for 9 V DC, 300 mA with center
minus plug (ZOOM AD-0006).
●Battery life is short
Are manganese batteries being used? The use of alkaline batteries is recommended.

ZOOM CORPORATION
ITOHPIA Iwamotocho 2chome Bldg. 2F, 2-11-2, Iwamoto-cho,
Chiyoda-ku, Tokyo 101-0032, Japan
Web Site: http://www.zoom.co.jp
G2.1u - 5000-1
G2.1u Preset Pattern
# PatternName TimSig # PatternName TimSig
1 8beat_1 4/4 21 POP_3 4/4
2 8beat_2 4/4 22 DANCE_1 4/4
3 8beat_3 4/4 23 DANCE_2 4/4
4 8shufle 4/4 24 DANCE_3 4/4
5 16beat_1 4/4 25 DANCE_4 4/4
6 16beat_2 4/4 26 3per4 3/4
7 16shufle 4/4 27 6per8 3/4
8 ROCK 4/4 28 5per4_1 5/4
9 HARD 4/4 29 5per4_2 5/4
10 METAL_1 4/4 30 LATIN 4/4
11 METAL_2 4/4 31 BALLAD_1 4/4
12 THRASH 4/4 32 BALLAD_2 3/4
13 PUNK 4/4 33 BLUES_1 4/4
14 DnB 4/4 34 BLUES_2 3/4
15 FUNK_1 4/4 35 JAZZ_1 4/4
16 FUNK_2 4/4 36 JAZZ_2 3/4
17 HIPHOP 4/4 37 METRO_3 3/4
18 R'nR 4/4 38 METRO_4 4/4
19 POP_1 4/4 39 METRO_5 5/4
20 POP_2 4/4 40 METRO

6
7
8
9
10
1
2
3
4
5
6
7
8
9
10
1
2
3
4
5
6
7
8
9
10
1
2
3
4
5
6
7
8
9
10
1
2
3
4
5
6
7
8
9
10
1
2
3
4
5
6
7
8
9
10
1
2
3
4
5
6
7
8
9
10
1
2
3
4
5
6
7
8
9
10
1
2
3
4
5
Early Reflection
Early Reflection is the component of the reverb sound that reaches to the listener first
after the original sound has bounced off the wall. The reverb sound consists of this
early reflection and the late reflection, and the former characterizes the size of the
room. The early reflection effect extracted from the whole reverb sound has been
quite popular among the rack-mounted signal processors but we have arranged this
effect on the G series especially for the guitar. To get the most popular type of this
effect, you can set the “SHAPE” parameter to the plus value (decaying effect) and
adjust the “DECAY” parameter to decide the size of the simulated room. If you
would like a wild effect, set the “SHAPE” parameter to the extreme minus value and
you will get the special effect that sounds like the tape machine played in reverse.
EXTRA EQ
In addition to the frequency ranges of 160Hz, 800Hz and 3.2kHz (LOW, MID and
TREBLE respectively,) controlled by the normal EQ module, you can boost or cut the
ranges of 400Hz, 6.4kHz and 12kHz using the LOW MID, PRESENCE and HARMONICS
controls respectively in the EXTRA EQ module. These frequency ranges are rarely
controllable with other effect devices made for guitars. With “PRESENCE” you can
adjust the high frequency range that affects the projection of the sound and with
“HARMONICS” you can tweak the overtone contained in the clipped sound. The
overdriven sound of tube amplifiers is rich in overtone and this EXTRA EQ module is
indispensable for the simulation of this aspect of the sound.
Multi Tap Delay
With this effect, you can utilize up to eight independent delay lines whose delay
times can be set separately to make rhythmical patterns. We also provided eight
practical settings ranging from the constant rhythmic pattern to the random one. Try
pattern 2 for example: the played notes are fed back like rhythmical patterns that will
inspire you to come up with various phrases one after another. You could apply this
effect to your solo performances as something different from the sound-on-sound
effect. This effect is programmed as a stereo ping-pong delay and thus we strongly
recommend you to try it using headphones. The delay time can be set to 3 sec.
maximum.
Dynamic Delay/Dynamic Flanger
This is the so-called ducking effect: the mix balance of the dry signal and the effect
signal of a delay or a flanger is controlled by the envelope of the original signal of the
guitar.
In the Dynamic Delay section, you can set the “SENSE” parameter to the minus value
to get the ducking delay effect: the feedback component in the delayed signal is not
put out while there is an input signal and the feedback component arises as soon as
the input signal is muted. This effect is very handy when, for example, you play fast
phrases on the guitar and the feedback component gets in the way. On the other
hand, you can set the “SENSE” parameter to the plus value and you will have the
feedback component while you are playing the guitar and you can cut off the
feedback as soon as you mute the guitar, which should be very handy in the break of
a song where you want to mute all of the sound.
The same thing goes with the “Dynamic Flanger”: you can set the “SENSE”
parameter to the minus value and you will get no flanging effect while the input
signal is high and you will get flanging effect when you lower the signal level of the
input. You can get a unique effect like a long note that is completely dry at the
beginning and then the flanging effect is gradually added as the signal level of the
note decreases. On the other hand, you can have the flanging effect only when you
play loud if you set the “SENSE” parameter to the plus value. This effect works great
when you want to embellish the accents in your arpeggios and riffs or to add a
hidden flavor to your lead guitar sound.
Introduction for newly developed effects
Fender TWIN Reverb
Marshall JCM-2000
Roland JC-120
Setting recommendation on popular guitar amps
In case of patches for Live(A0〜A9、b0〜b9 ) In case of patches for Recording(C0〜C9、d0〜d9 )
In case of patches for Recording(C0〜C9、d0〜d9 )
When you use guitar amp for recording patches, not only intended modeling sound will not existing,
but also you hear harsh-sounding sometimes. Please adjust guitar amp setting as above reference.
ダイレクト
セッティング
VOLUME
BRIGHT
TREBLE MIDDLE BASS
12
NORMAL
8.5 5 5
VOLUME
BRIGHT
TREBLE MIDDLE BASS
12
NORMAL
4.5 5 5
In case of patches for Live(A0〜A9、b0〜b9 )
0
2
46
8
10
PRESEMCE
0
2
46
8
10
TREBLE
0
2
46
8
10
MIDDLE
0
2
46
8
10
BASS
0
2
46
8
10
CHANNEL B
0
2
46
8
10
EQUALISATION REVERB
DEEP TONE SHIFT
0
2
46
8
10
VOLUME
0
2
46
8
10
VOLUME
0
2
46
8
10
GAIN INPUT
0
2
46
8
10
GAIN CHANNEL
CLASSIC GAIN / CHANNEL A
CLEAN
CRUNCH
READ 1
READ 2
OFF OFF OFFOFF
0 2 54 2
In case of patches for Recording(C0〜C9、d0〜d9 )
0
2
46
8
10
PRESEMCE
0
2
46
8
10
TREBLE
0
2
46
8
10
MIDDLE
0
2
46
8
10
BASS
0
2
46
8
10
CHANNEL B
0
2
46
8
10
EQUALISATION REVERB
DEEP TONE SHIFT
0
2
46
8
10
VOLUME
0
2
46
8
10
VOLUME
0
2
46
8
10
GAIN INPUT
0
2
46
8
10
GAIN CHANNEL
CLASSIC GAIN / CHANNEL A
CLEAN
CRUNCH
READ 1
READ 2
OFF OFF OFFOFF
0 0 1 52
In case of patches for Live(A0〜A9、b0〜b9 )
5
0 10
5
0 10
5
0 10
5
0 10
HIGH
BRI VOLUME TREBLE
CHANNEL-1
MIDDLE BASS
LOW 555555
OFF
5
0 10
5
0 10
5
0 10
5
0 10
HIGH
BRI VOLUME TREBLE
CHANNEL-1
MIDDLE BASS
LOW 0 10 0~30 10 0~3
OFF
OFF OFF
Such as product names and company names are all (registered) brand
names or trade marks of each respective holders, and Zoom Corporation
is not associated or affiliated with them. All product names, explanation
and images are used for only purpose of identifying the specific products
that were referenced during product development.
This patch is modeled after the powerful sound which uses the silicone rectifier section of that popular amplifier. You
may want to play riffs and solos with this sound valued by heavy rock guitarists.
Referenced album: "Hybrid Theory" by Linkin Park (2001)
This sound features the high-quality sound of our G2’s signal processing technology with a clean and lush chorus plus
delay patch. Try to use it for accompaniments in pop music, or solo music with your favorite guitar.
We have already started to call the sound of this UK rock band "traditional". This patch is modeled after the punchy
sound of the overdriven JCM 800 amplifier and thus it is suitable also for the hard plucking of modern punk rock guitar
style. This is the sound of Humble Pie in later years with Dave Clemson as its guitar player.
Referenced album: "Smokin'" by Humble Pie (1972)
We took advantage of a newly developed fast tracking pitch shift algorithm and created this simulated synthesizer
sound. We hope you will come up with great solos using this sound reminiscent of Jan Hammer’s exciting trades with
Jeff Beck. Referenced album: “Wired” by Jeff Beck (1976)
This patch is a straightforward modeling of the sound of that black-face Fender Twin Reverb and provides a clean sound
that is indispensable for the ensemble. When you foot down the expression pedal and with the EFX module switched on,
you can add a unique tremolo effect to get that retro-sound instantly. We have selected a room ambience as default to
make this patch suitable for current musical style but, of course, you can replace it with the spring reverb simulation.
Many people through the years have favored Carlos Santana’s guitar sound. This patch is modeled specifically after his
wailing lead sound with sweet distortion. Any of his hits like “Black Magic Woman”, “Europe” or “Adouma” will
sound pleasant if you make use of this patch.
Referenced album: “Amigos” (1976) and “Shaman” (2002) by Santana
This patch is suitable for funky chording, and using the pedal-wah effect. We have arranged a clean sound which can be
used for not only funk music but also any music style. You can create a funky groove by using brushing or single note
cutting.
This patch is the simulation of the legendary tone of the BOSS OD-1 that is considered the de-facto standard for the
overdrive stomp box. The patch can provide high playability and retains the nuances of the guitarists' touches. The
addition of the chorus effect using expression pedal will enable the guitar players to adapt to virtually any musical
situation.
This patch provides a mild lead sound accompanied by the harmonies based on the C major scale and makes our G2 the
world’s first effective device in the class that features the HPS (harmonized pitch shifter) function. You can select the
key and the scale according to the phrase you play.
With this patch selected, your electric guitar will start to sound like an acoustic electric guitar. You can use rich chorus
sound when you foot down the expression pedal. We would recommend you to combine this patch with the single-coil
type front pick-up. You can also use this patch actively to create the clean ensemble effect.
Even if you are the type of guitar player who is proud of wailing solos, you may sometimes want to use thrash power
chords (with some muting-technique on the bridge). The distorted sound of this patch provides the best playability for
that purpose. Referenced album: “Dookie” by Green Day (1994)
This patch provides you with a clean sound with effective use of the compressor. Also with the delay effect set to
synchronize with the 8th notes, you will get Andy Summers' signature sound for arpeggios. You can control delay mix by
expression pedal. Referenced album: “Synchronicity” by the Police (1983)
This wildly fat sound with infinite sustain is modeled truthfully after the sound created by the combination of MXR’s
Dyna Comp and Dallas’ Fuzz Face. Designed for using your guitar’s front pick-up.
Referenced album: “In The Court Of The Crimson King” by King Crimson (1969)
This patch provides the jet sound from the good old days created by the combination of the edgy vintage distortion
stomp box and the flanger. We have rearranged that sound to give a hybrid tone that is retro sounding and refreshing
at the same time by combining the dry distortion, flanging jet-effect and lush reverb.
Referenced album: “Barracuda” by Heart (1972)
This patch is modeled after the classical Brit clean sound of the VOX AC series guitar amps operated in the class A
without the negative feedback. The sound of those amps became enormously popular in the British musical industry of
the 1960s, continued through many famous British groups in the 1970s and has remained popular to this day.
Referenced album: “1962-1966…Red Album” by the Beatles
This powerful sound is the result of the deepest distortion ever created by any multi-effect pedals. The overwhelming
presence of the power chords in lower registers and the smooth responses to the tapping technique will be favored by
the connoisseurs of the high-gain sound. In addition, you can create a pedal pitch effect that bends down 2 octaves.
This patch is modeled after the sound that utilizes the so-called Leslie effect for its vibrato-like character and it is popular
among the American blues-rock players like the late S.R.V. It is suitable for crisp rhythm playing or the dynamic
chording. Referenced album: “Texas Flood” by Stevie Ray Vaughan (1983)
Recently E.V.H. is known as the user of the 5150 amps but in the past he used to create that big crunchy sound with his
specially modified Marshall amp. This patch is the consummate simulation of that E.V.H. sound from his early years. The
name of this patch is, of course, borrowed from that greatest album of V. H. with David Lee Roth. When you foot down
the expression pedal and get the long delay effect on, it makes the best lead sound.
Referenced album: “1984” by Van Halen (1984)
The sound will remind you of the soundtracks of the James Bond series or Spaghetti Western movies.
Referenced album: The soundtracks from “007, Dr. No” (1962)
This sound is ZOOM’S original that became a favorite of the guitarist Brian May. The patch has a very strong character
but you can hear how it is effectively used in his actual recordings. If you are big-fan of Brian May, you may also want
to try the sound with the “step” turned “off” and the “delay” turned “on”. You will be transported to the world of
“Brighton Rock” with that incredible guitar orchestration. With the additional use of the HPS set to the minor 3rd in the
key of E, you will be able to perfect the simulation!! Referenced album: “Innuendo” by Queen (1991)
Name of patches
for Live for Recording Key effectDescriptions
A0
A1
A2
A3
A4
A5
A6
A7
A8
A9
B0
B1
B2
B3
B4
B5
B6
B7
B8
B9
C0
C1
C2
C3
C4
C5
C6
C7
C8
C9
d0
d1
d2
d3
d4
d5
d6
d7
d8
d9
PV DRIVE
BG DRIVE
CHORUS
MS
CRUNCH
METAL
ZONE
FENDER
CLEAN
BG
CRUNCH
PHASER
OD1
PV DRIVE
ACOUSTIC
SIM
JC CLEAN
FUZZ
FACE
GUV'NOR
CLASS A
CLEAN
BG DRIVE
VIBRATO
MS DRIVE
FENDER
CLEAN
STEP
G2.1u Patch List
RECTIFYING
LUSH LIFE
The Pie
SynthDaze
FENDER CLEAN
SANTANA
FUNK PLANET II
C MAJOR HARMONY
NUANCE DRIVE
ACOUSTIK
POWERED BY
BREATH YOU TAKE
Mr. Fripp
ORANGE CRUSH
BIG WALL
AC CLEAN
VibroCrunch
1984
The SPY who loved me (or Spagetti Western)
HEAD LONG
Please use patches "for Live" when you use guitar amp, and use patches "for Recording"
when you connect your guitar directly to a recorder.
Note 1 : The default patches stored in the pre-set area from the bank No. 0 to No. 3 are the same as those stored in the banks from A to d.
Note 2 : We recommend you to adjust the parameter for the noise reduction according to your guitars and amps.
VOLUME
VOLUME
VOLUME
VOLUME
PEDAL PITCH
2oct DOWN
VIBRATO
RATE
DELAY(OFF)
MIX
SPRING
MIX
STEP
RATE
DELAY
MIX
DRIVE
GAIN
DRIVE
GAIN
FLANGER
RATE
WAH
FREQ
TREMOLO
RATE
WAH
FREQ
WAH
FREQ
ST CHORUS
MIX
ST CHORUS
MIX
HPS
MIX
Pedal setting
Other manuals for G2.1u
1
Table of contents
Other Zoom Music Pedal manuals

Zoom
Zoom G1N EXT User manual

Zoom
Zoom 503 AMP SIMULATOR User manual

Zoom
Zoom Guitar Effects Console G9.2tt2q User manual

Zoom
Zoom MULTISTOMP MS-100BT General instructions

Zoom
Zoom B2.1u User manual

Zoom
Zoom 2020 User manual

Zoom
Zoom G1 Four User manual

Zoom
Zoom G2 User manual

Zoom
Zoom G1 Four User manual

Zoom
Zoom G1on User manual