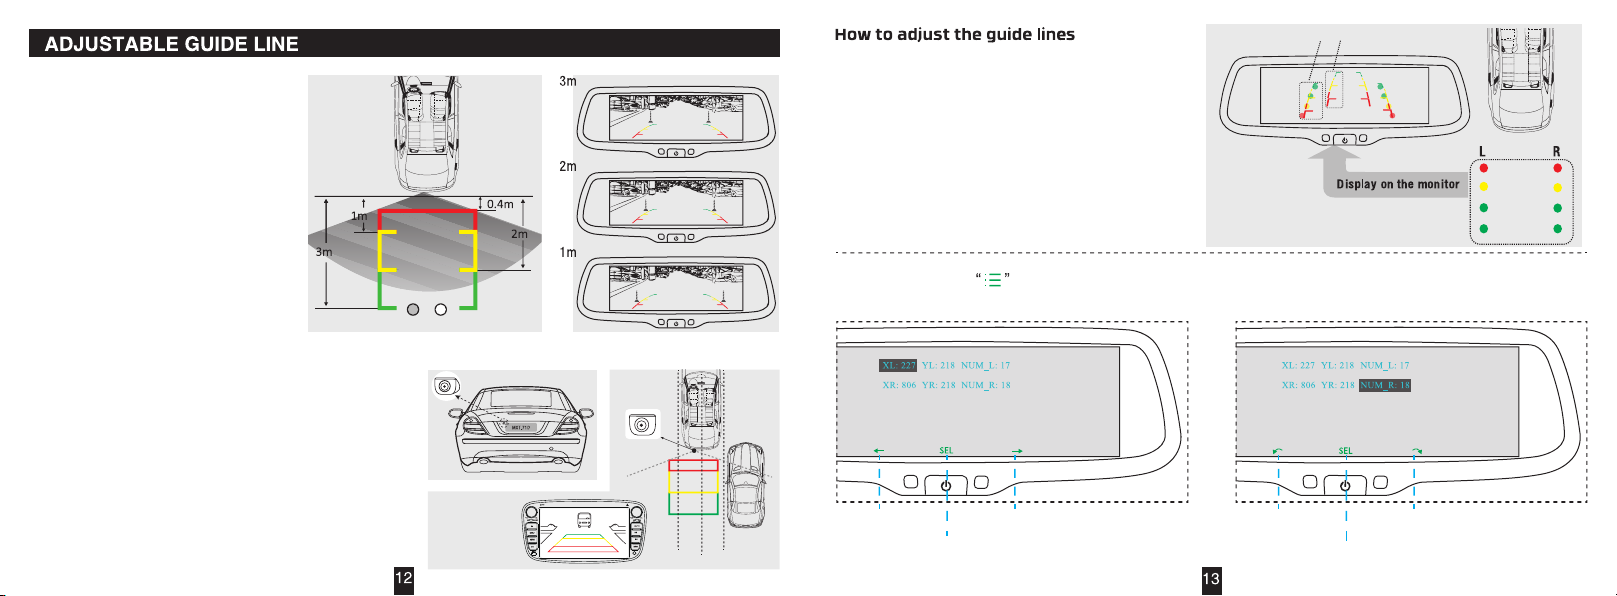
The guide lines provide an approximate
distance for reference while backing up.
The camera angle, position, and vehicle
type can effect the perceived distance.
We recommend adjusting the guide lines
to a distance similar to what we show
in the diagram.
The distance between the guide lines
can be adjusted to reflect the actual
vehicle size as well.
Adjustments should be done at installation
using the menus provided.
Suggested Distances
Reverse Guide Lines
Side Camera Guide Lines
Guide lines on the Right and Left inputs
are fixed and can not be adjusted. These
are for reference only and the driver needs
to learn the distance for their own vehicle.
We recommend parking the vehicle outside in a
open area such as a parking lot. Place cones or
markers behind the vehicle to represent the
desired distances and the accurate width of the
vehicle.
Engage the parking brake, and if possible with the
vehicle NOT running, place the vehicle in reverse gear.
Keep your foot on the brake pedal while adjusting the
lines for your safety.
Follow the instructions below to adjust each parking line
to match your vehicle requirments.
Start by long pressing to enter the guide line programming mode. The system will start with the left side line first.
Use the Right / Left and SEL options as shown below to move the line and select the next line. The lines can be moved
and the angle changed. As you move through the line coordinates you will be able to customize the installation.
Touch the mirror glass to activate the touch screen controls.
Move Left Move Right
Short Press SEL to switch tothe next item
Long Press SEL to save and exit the menu.
Rotate the line
Counter Clockwise
Rotate the line
Clockwise
Short Press SEL to switch tothe next item
Long Press SEL to save and exit the menu.
Cones
Cones
Cones
Cones
Adjust the lines to match the
cones behind the vehicle
Correct Incorrect