ZORN INSTRUMENTS ZFG 3.0 User manual

User Manual
for the
Light Weight Deflectometer (LWD)
ZFG 3.0
according to German standards
Technical Test Code for Soils and Rock Mechanics in
Road Construction
(Technischer Prüfvorschrift
für Boden und Fels im Straßenbau)
TP BF –StB Teil B 8.3
Benzstraße 1, 39576 Stendal (Germany)
Tel: +49 3931 25273-0 Fax: +49 3931 25273-10
www.zorn-instruments.com info@zorn-instruments.com
Technical changes reserved
Effective: 21.03.2013

ZFG 3.0 with printer
ZFG 3.0 with carrier bag

Table of content
1Purpose ......................................................................................................................................4
2Concept of saving....................................................................................................................5
2.1 Measuring without SD-card ...........................................................................................5
2.2 Plug in/ remove SD-card.................................................................................................6
3Measuring with the ZFG 3.0 ..................................................................................................7
3.1 User advice for engaging drop weight .......................................................................7
3.2 Preparation.........................................................................................................................7
3.3 Performing a measurement ...........................................................................................8
3.3.1 Switch on device ........................................................................................................................................ 8
3.3.2 Start measurement .................................................................................................................................... 8
3.4 Evaluation and Printing the results.............................................................................9
3.4.1 After measurement .................................................................................................................................... 9
4Menu..........................................................................................................................................10
4.1 Measure.............................................................................................................................10
4.2 View card ..........................................................................................................................10
4.3 Delete test.........................................................................................................................10
4.4 Delete card .......................................................................................................................10
4.5 Settings .............................................................................................................................10
4.5.1 Language................................................................................................................................................... 10
4.5.2 LCD contrast ............................................................................................................................................. 10
4.5.3 Type ........................................................................................................................................................... 11
4.5.4 Unit ............................................................................................................................................................. 11
4.5.5 Text input................................................................................................................................................... 11
4.5.6 Preloading ................................................................................................................................................. 11
4.5.7 GPS............................................................................................................................................................ 11
4.5.8 Coordinates............................................................................................................................................... 12
4.6 Set clock ...........................................................................................................................12
4.7 Info......................................................................................................................................12
4.8 Calibration / Self-test.....................................................................................................12
4.9 Update Firmware.............................................................................................................12
5Care and maintenance..........................................................................................................13
5.1 Care of loading device ..................................................................................................13
5.2 Battery change ................................................................................................................13
6Technical data.........................................................................................................................14
6.1 Mechanic and terms ......................................................................................................14
6.2 Loading device................................................................................................................15
6.3 Load plate.........................................................................................................................15
6.4 Settlement gauge............................................................................................................15
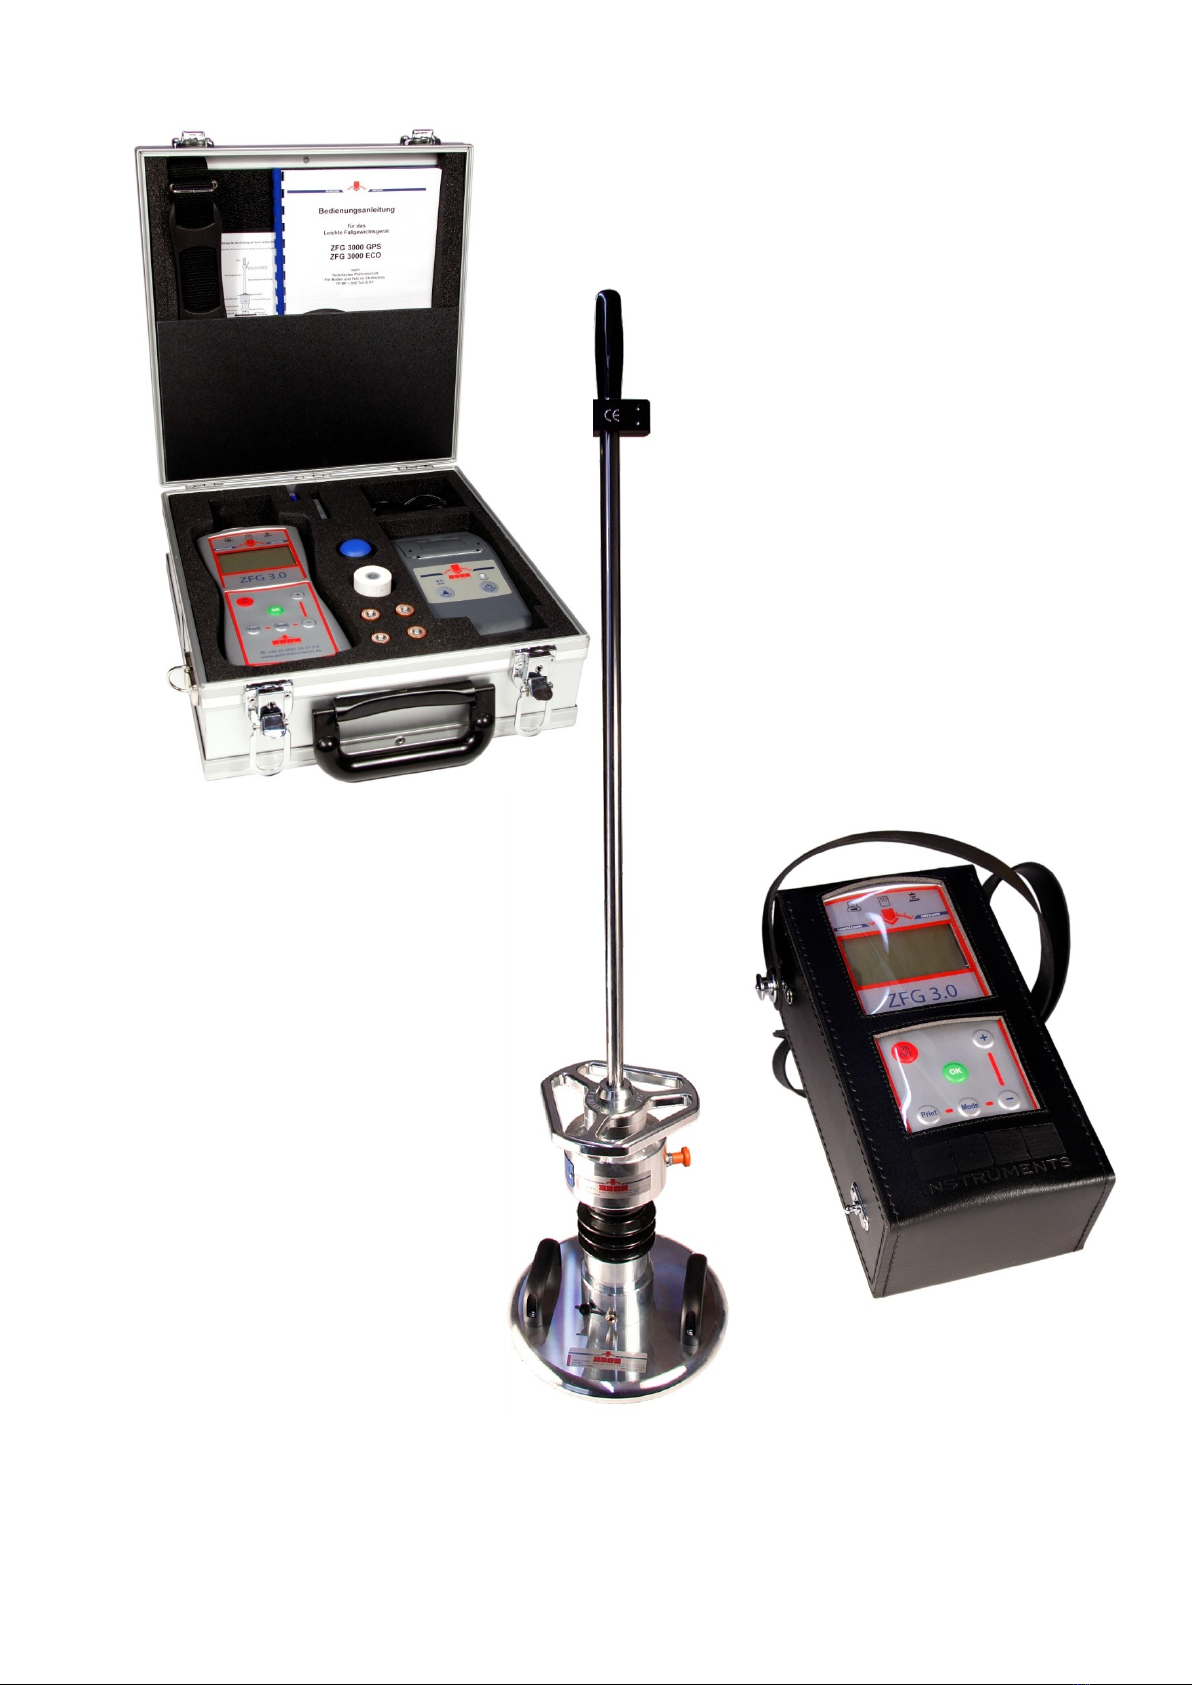
7Scope of delivery ...................................................................................................................16
7.1 Optional equipment .......................................................................................................16
7.1.1 Carrier bag ................................................................................................................................................ 16
7.1.2 Suitcase ..................................................................................................................................................... 16
7.1.3 Printer......................................................................................................................................................... 17
7.1.3.1 Usage of the printer......................................................................................................................... 17
7.1.3.2 Charge printer .................................................................................................................................. 18
7.1.3.3 Self test of printer ............................................................................................................................ 18

7.1.3.4 Problems using the printer ............................................................................................................. 18
7.1.3.5 Change paper .................................................................................................................................. 18
7.1.3.6 Technical data.................................................................................................................................. 19
7.1.4 Transport box............................................................................................................................................ 19
7.1.5 Transport trolley........................................................................................................................................ 19
7.1.6 Software..................................................................................................................................................... 20
7.1.6.1 Short manual .................................................................................................................................... 20
8Calibration ...............................................................................................................................21
9Correlations.............................................................................................................................22
10 Warranty ...............................................................................................................................26
11 Safety instructions.............................................................................................................26
12 Information on safe disposal ..........................................................................................26
13 EU –declaration of conformity.......................................................................................27

Primary note
This user manual refers to the default settings of the measurement device. When changes on the
settings have been made, the described characteristics can differ. In regarding chapters are links
which leads to additional information.
For ZFG 3.0 different configurations are available. This manual mainly refers to the 10 and 15 kg
configuration.

User Manual ZFG 3.0
- 4-
1 Purpose
The dynamic plate load test with the help of the ZFG 3.0 light weight deflectometer (LWD) is a
rapid method of determining the dynamic deflection modulus Evd [MN/m²]. This allows
conclusions to be made about the load-bearing capacity and compaction of soils.
In accordance with German regulations TP BF-StB Part B8.3, the procedure can be used on
mixed-grained and course-grained soils up to a grain size of maximum 63 mm, loose base courses,
and backfill material and for soil improvement. It is used in civil and road construction. It is ideal
for documentation, self-monitoring and preparing reports.
When the compaction of very high compacted sub bases has to be measured, we recommend the
15 kg loading device. With its 1.5 times drop load, the measure limit is extended up to 105 MN/m²
The light drop weight tester can be used alternatively to static plate load device according to DIN
18 134, and has the following benefits:
•no necessity for a loaded truck as a required counter balance in the static plate bearing test or
the tripod required for settlement measurement
•testing facilities in restricted spaces, for example during rail track construction, trench
backfilling, for general backfill, in boreholes or other locations with difficult access
•low space requirements and low test equipment weight
•low time requirements for testing - around 3 minutes for each measuring point
Correlations between Evd and Ev2 can be found in Chapter 8 –Calibration.

User Manual ZFG 3.0
- 5-
2 Concept of saving
The measurements are saved on the SD-card, which is plugged into the SD-slot of the measurement
device. The measurement device uses the sub directory „ZFG“ of the SD-card. There are three
different file types in it: .ZXZ-files, .NRZ-files and .ZXC-files.
Each measurement will be saved in an own ZXZ-file. The file name contains the test number (e.g.
10 measurements have been saved so that 10 .ZXZ-files are created in the folder
(0001.ZXZ...0010.ZXZ)).
The number of .ZXZ-files is saved in the ZFG.NRZ-file. The ZFG.ZXC file contains the card
number. The measurement device uses every file. When manual changes are made (i.e. renaming or
deleting of files) it is possible, that the measurement device does not recognize the „ZFG“ folder
anymore. In this case, when you try to view the card in measurement device, the following screen
appears:
To avoid problems, it is not recommended to manually change the „ZFG“ folder. To back up data,
save the whole folder „ZFG“. If data are not needed anymore, delete the complete folder.
2.1 Measuring without SD-card
It is possible to perform measurements without plugged in SD-card. In this case, the measurement
will not be saved. When starting a measurement without SD-card, following warning appears on
screen:
View Card
0/0
No files or
card damaged
Measure
No card inserted!
Press <OK>

User Manual ZFG 3.0
- 6-
2.2 Plug in/ remove SD-card
To plug the SD-card into the ZFG 3.0 hold the card as shown on Picture 1. Push the card in as far as
possible until a click sounds. When the card is plugged in correctly, it sticks 3 mm out of the top.
To remove the card, push it into the device. It sounds a click and the card will be pushed out 7 mm.
Now it can be pulled out.
1. Symbol LWD
2. Sensorjack at ZFG 3.0
3. SD-card
4. Symbol printer
5. Symbol SD-card
6. Printerjack at ZFG 3.0
7. SD-slot
Be careful when plugging in or removing the SD-card. Be sure to insert the card the right way
round. The SD-card has to be plugged in and removed easily from the slot.
Picture 1: ZFG 3.0 top side
1
2
3
6
4
7
5

User Manual ZFG 3.0
- 7-
3 Measuring with the ZFG 3.0
Variations through chapter 4.5.5 –Text input or chapter 4.5.6 Preloading are possible.
3.1 User advice for engaging drop weight
To engage the drop weight in the release device, operate the release device with one hand and pull
the drop weight to the end stop with the other hand. Then, engage the release device. Be sure the
detent engages in the indentation of the drop weight.
3.2 Preparation
Prepare a measurement by applying the load plate all-over the test area by rotating and pushing.
Ensure that there are no hollows underneath the load plate. In this case, fill the hollows with dry
medium sand. Then, put the load device on the load plate.
Connect the load plate to the ZFG 3.0 with the electronic lead.
Pull the transport lock.
To avoid damages, be sure the transport lock is in the right position
3.2.1 Perform 3 pre-load pulses. To do so, lift the drop weight and engage it into the release
device (reference to chapter 4.5.6 - PreloadingFehler! Verweisquelle konnte nicht gefunden
werden.). When holding the guiding rod vertical, disengage the drop weight and catch it after
rebound. After this, engage the drop weight in the release device. This has to be done 3 times.

User Manual ZFG 3.0
- 8-
3.3 Performing a measurement
3.3.1 Switch on device
After preparation of measurement (chapter 3.2 - Preparation) switch on the device by pressing the
<On/Off> Button. The following start screen appears:
The current date/time and battery voltage with load capacity are shown. If you want all data to be
saved on SD-card, plug it in now.
3.3.2 Start measurement
Press <OK> Button to start a measurement. The screen shows the following:
The display shows the current measurement type (i.e. diameter of load plate and mass of drop
weight). If available, switch to desired measurement type (see chapter 4.5.3 Type).
In the second line, the command to execute the 1st drop appears. A single beep signals readiness.
After executing the 1st pulse, the display shows the deflection s1.
The beep signals the readiness for the execution of the 2nd pulse.
This procedure repeats until the 3rd pulse.
After that, all three deflection values are shown and it a double beep signal sounds. The
measurement will be saved automatically on SD-card. By pressing the Button <OK>, the results are
shown.
ZFG 3.0
Mi 12.01.11
11:58:37
Battery: 5,4V
Zorn Instruments
Measure: 300mm/10kg
Execute 1st pulse
Measure: 300mm/10kg
s1: 0.312 mm
Execute 2nd pulse
Press <OK>
s1: 0.312 mm
s2: 0.303 mm
s3: 0.285 mm

User Manual ZFG 3.0
- 9-
3.4 Evaluation and Printing the results
Following results are shown:
Meaning of the lines:
1. Screen mode and possibly text input.
2. Test number (only with plugged in SD-card), date and time.
3. sm= mean value of deflection in mm.
4. s/v = degree of compatibility, which gives information about whether the existing soil can be
compacted further or not. It is an empiric value. Evaluation is only based on already compacted soil
(in general: s/v < 3,5 no further compaction possible; s/v > 3,5 further compaction possible).
5. Evd = dynamic deflection modulus in MN/m² (MPa).
To show the deflection graphs and individual deflection values, press the <Mode>Button.
Print the protocol by pressing the <Print> Button (see section 7.1.3.1 Usage of the printer for
further information).
Finish measurement by pressing <OK>.
Please check after measurement if the data has been saved on SD-card (Menu “View Card”).
When “repeat pulse” is shown on the display during the measurement (along with a double beep),
the reason is a plausibility check. It can be caused by hard engagement of the drop weight. When
this message appears continuously it is possible, that the soil is too soft (v>4.000mm/s or s>20mm)
or too hard (s<0.1mm). Also possible is a faulty sensor, a connection problem or a broken lead. In
this case, the measurement can not be continued (see section 4.8 Fehler! Verweisquelle konnte
nicht gefunden werden.)
3.4.1 After measurement
After performing a measurement, the device can be switched off by pressing the <ON/OFF>
button. It is also possible to continue with the next measurement. See also chapter 5 Care and
maintance.
Result TEXT
Nr:33 11.03.09 13:22
sm:0.266 mm
s/v: 2.414
Evd: 84.59 MN/m2
Result
0,370
0.369
0,365

User Manual ZFG 3.0
- 10-
4 Menu
In the menu, further functions are available. Enter the Menu from the start screen by pressing the
<Mode> button. Scroll through the menu by pressing the <Mode> button again. By pressing the
<OK> button it is possible, to select a menu item.
Save and exit menu by pressing <On/Off>.
4.1 Measure
Starts measuring (see chapter 3.3 performing a measurement).
4.2 View card
This menu item allows to view the data, which has already been saved on the SD-card.
At first, the last saved data set is shown.
Scroll through the data sets with the <+> or <-> buttons.
With the <Mode> button it is possible to switch to the graph view and back.
Press <Print> to create a printout of a data set.
4.3 Delete test
Deletes the last saved measurement. The following screen appears:
In this example, the last test number is 10. When the <OK> button is pressed, the data set will be
deleted irreversibly.
4.4 Delete card
Deletes all data sets in Folder “ZFG” on the SD-card. The prompt shows the number of data sets
which are going to be deleted.
4.5 Settings
In the menu item ´Settings´ it is possible to customize the device for the user’s needs. Settings is a
sub menu. Following items are available (scroll with <Mode>, change with <+> or <-> Save and
exit with <On/Off>)
4.5.1 Language
There is a choice between German, English, French, Polish, Slovenian/Croatian, Italian, Serbian,
Hispanic, Portuguese, Russian and Chinese.
4.5.2 LCD contrast
Changes the pixel brightness of the display.
Delete test SD
0010.ZXZ
Are you sure?
<OK> Delete
<OFF> Escape

User Manual ZFG 3.0
- 11-
4.5.3 Type
If the device is prepared for several measurement types, it is possible to change the current
measurement type for measuring (i.e. 300mm/10kg, 300mm/15kg, CBR etc.).
4.5.4 Unit
The unit of Evd-can be shown in MN/m² or MPa.
4.5.5 Text input
By the text input function, it is possible to add text to a measurement. The user can insert any text at
the beginning of a measurement. The text input is shown on the printout and will be saved in the
according .ZXZ-file of the data set. When the data set is read in by the software, it appears in the
text field “Remarks”.
By default, the text input function is disabled (off). To activate the function, change its state to on.
When the device and text input function is activated, press <OK> to start a measurement. First, the
following text input display appears:
The selected character is marked with a cursor (under score, here: 'A'). Change the cursor position
with the <+/-> buttons. The <Print> button adds the selected character to the text input. 16
characters can be inserted. The text input is shown in the last line of the display. The last character
will be deleted by pressing <Mode> button. Push <OK> to finish text input and continue with the
measurement.
The inserted text will be displayed as suggestion on the next measurement. If the last character of
the text is a number, it will be automatically increased by one.
4.5.6 Preloading
When preloading is switched on at the measurement device, the user is asked to perform the three
preloading pulses before the measurement. When preloading pulses were finished, measurement
starts automatically. The preloading pulses do not influence the result and will not be saved.
By default, this function is disabled (off). To enable it, select „on“.
4.5.7 GPS
- only for devices with GPS module-
GPS = Global Positioning System; used for position fixing.
The GPS module receives free-to-air satellite signals. Reception is
only available to a limited extent under roofing, covers, and in
enclosed rooms. The satellite signals are received by the GPS
module in order to fix the current position. Depending on the
satellite signal strength, the device may require between 30 and 120 seconds before the location
coordinates can be viewed in the display. The location coordinates are displayed in place of ‘Zorn
Instruments’.
Textinput
0123456789ABCDEF
GHIJKLMNOPQRSTUV
WXYZ /-+._,#
EXAMPLETEXT 01
ZFG 3.0-GPS
We 01.08.12
11:58:37
Battery: 5.9 V
Zorn Instruments

User Manual ZFG 3.0
- 12-
If no satellite signals can be received (e.g. due to enclosed rooms) soil compaction measurements
(incl. data storage) are still possible without position fixing.
Note: The power consumption of the device increases when the GPS receiver is switched on.
Approximately 150 measurements (with an activated GPS receiver) can be accomplished with one
battery pack only.
4.5.8 Coordinates
- only for devices with GPS module-
In accordance to current settings, the location coordinates are displayed either as longitude/latitude
or in the UTM format (Universal Transverse Mercator).
4.6 Set clock
Enables adjustment of the date and time shown. The selected value can be changed with the <+> or
<-> button. It is marked with a cursor (underscore). Use the <Mode> button to move the cursor.
Save and exit with <On/Off>.
Notice
When menu item “Set clock” is selected, the cursor marks the value “ppm”. This value is
responsible for accuracy of the clock. Only change this value, when the clock is too slow or too fast.
4.7 Info
Shows the devices data (firmware version, device number, calibration factor and -date, used
language)
It is possible to print the data. Leave menu item with the <On/Off> button.
4.8 Calibration / Self-test
This menu item can be used to check the proper functioning of the sensor and the connection to the
electronics. When the connection between sensor and electronics is ok, ashows 0.0 ± 5. The value
of achanges by 2 when turning the load plate upside down (bearing bold down).
The line Type shows the current used measurement type.
Self-test
If a shows a different value, which is not changing when moving the load plate, the device is faulty.
A reason may be a broken lead or a faulty jack or sensor. In this case, contact the manufacturer to
detect the error.
Fis the calibration factor. It can only be changed by authorized calibration points.
4.9 Update Firmware
Firmware can only be updated after contact with the manufacturer. In this case, the user gets further
information from the manufacturer.
Calibration
a = 0.0
F = 1.000
Type: 300mm/10kg

User Manual ZFG 3.0
- 13-
5 Care and maintenance
5.1 Care of loading device
After the measurement, the loading device must be cleaned of any dirt using a dry cloth. The
chrome-plated guide rod must not be greased. Heavy soiling must be removed using spirit or
kerosene. The drop weight tester must be stored carefully during transport, and the drop height must
be checked at regularly. The correct drop height is stated on the calibration report and on the
calibration nameplate on the drop weight.
5.2 Battery change
Batteries must be changed, when the warning “Battery empty” appears, the battery symbol signals
emptiness or when the device cannot be switched on anymore.
•Unscrew the two screws on the back of the device and open the battery compartment.
•Remove old batteries and replace them with new ones. Ensure that the batteries have the right
polarity. This is shown at the bottom of the battery compartment.
•When finished, close the battery compartment and screw it down.
Instead of batteries, it is also possible to use rechargeable batteries (4x1.2V). In this case, the state
of charge is invalid. A too low state of charge will be shown.
Picture 2: ZFG 3.0 with opened battery compartment

User Manual ZFG 3.0
- 14-
6 Technical data
6.1 Mechanic and terms
1. Handle
2. Top limit stop with release device
3. Guide rod
4. Handle on drop weight
5. Drop weight
6. Transport lock
7. Set of plate springs
8. Anti-tip device
9. Centering
10. Carrying handle
11. Sensor jack on load plate
Loading
device
Load plate
Picture 3: Mechanic of LWD

User Manual ZFG 3.0
- 15-
6.2 Loading device
Mass of drop weight 10 kg 15 kg
Total weight of loading device 15 kg 20 kg
Maximum width 200mm
Height 1135 mm 1150 mm
Maximum drop force 7,07 kN 10,6 kN
Pulse duration 17 ms ± 1,5 ms
Max. soil pressure 0,1MN/m² 0,15MN/m²
6.3 Load plate
Diameter of load plate 300 mm
Height 130 mm
Weight of load plate 15 kg
6.4 Settlement gauge
Dimensions 100x210x40 mm
Weight ca. 440 g
Deflection range 0,3 bis 5 mm
± 0,02 mm
Range Evd 5...70MN/m² 70...105MN/m²
Range of sensor ± 100 g
Frequency range 0 bis 500 Hz
Operating temperature 0 bis 40 °C
Power supply
Battery 4,8...6V
(4x 1.2...1.5V Type mignon / AA)
Automatic switch-off
When not in use 4 min
When battery is empty U < 3,9V

User Manual ZFG 3.0
- 16-
7 Scope of delivery
ZFG 3.0 is offered in 3 different versions:
1. ZFG 3.0 with carry bag
2. ZFG 3.0 with suitcase
3. ZFG 3.0 with printer (incl. suitcase)
Scope of delivery
1.
2.
3.
ZFG 3.0 electronic
X
X
X
Loading device
X
X
X
Load plate
X
X
X
Measurement cable
X
X
X
SD-card (min 1 GB)
X
X
X
User manual and short manual
X
X
X
Calibration protocol
X
X
X
Carry bag
X
Suitcase with screwdriver
X
X
Printer, AC-adapter, printer cable, replacement
part for thermal paper
X
7.1 Optional equipment
As required, following additional equipment can be bought.
7.1.1 Carrier bag
The carry bag protects the ZFG 3.0 during transportation and measurement. If the ZFG 3.0 is
delivered in a carrier bag, the electric measurement lead is 2 m long.
7.1.2 Suitcase
The suitcase protects the electronic device better against environmental influences. The screwdriver
can be used to open the battery compartment.

User Manual ZFG 3.0
- 17-
7.1.3 Printer
The following information refer to the printer GBT-4378-Flash-V.24. Changes to the default
settings should only be made by trained personnel.
1. Button <OFF/NEXT> (switch-off-
button)
2. Jack for printer cable on printer
3. Jack for AC-adapter
4. Button <FEED/ENTER> (switch-on-
button)
5. Status-LED
6. Paper compartment with cap
7.1.3.1 Usage of the printer
When a printer is connected and has been detected by ZFG 3.0, an
information appears on the start screen (see section 3.3.1) about the
loading capacity of the printer. This is shown by a voltage value and a
battery symbol . When the battery symbol shows empty, you can
only do very few printouts. When printer voltage is lower than 4.6V, the
warning „Printer battery empty“ appears. The battery of the printer has
to be charged using the provided AC-adapter.
1. To use the printer, connect it to the ZFG 3.0. Use the provided lead
(Mini-USB –3.5mm plug) and insert the 3.5mm plug into the
provided jack (see Picture 1 No. 6) and the Mini-USB plug into the
provided jack of the printer (see Picture 4 No. 2).
2. Switch on the printer (<FEED/ENTER> button).
3. Press <Print> on ZFG 3.0 to trigger a print job.
The printer information on the start screen appears or is updated, once
the printer is connected to the ZFG 3.0 and
1. ZFG 3.0 is switched on,
2. <Print> button on start screen is pressed or
3. a print job was done.
Picture 5:
Printout example
Picture 4: ZFG 3.0 with connected printer
1
3
2
4
5
6

User Manual ZFG 3.0
- 18-
7.1.3.2 Charge printer
Only use the provided AC-adapter to charge the printer. Please note: a new set of batteries reaches
its full capacity after 3 full charge- and discharge cycles. Deep discharge damages the battery.
When a battery was deeply discharged, charging can stop after 30 minutes. In this case, restart
charging by replugging the AC-adapter.
When the battery is faulty or “consumed”, replace it with a original one.
7.1.3.3 Self test of printer
To check the printer without the ZFG 3.0, it is possible to run a self test. Disconnect the Printer
from the ZFG 3.0. Switch off the printer (wait one minute). Press <FEED/ENTER> button, longer
than 3 seconds, a test printout will be created. Firmware version and a set of characters will be
printed. When no printout was done or the printout is faulty please note section 7.1.3.4 Problems
using the printer and 7.1.3.5 Change paper.
7.1.3.4 Problems using the printer
When the printer is not detected by ZFG 3.0 following screen appears:
In this case, it is not possible to create printouts. When the steps from section7.1.3.1 Usage of the
printer were noted, check if the power supply of the printer is ensured. Doing this, switch off
ZFG 3.0 and press the <FEED/ENTER> button on the printer. The power supply is ok, when the
LED flashes green. Charge the battery if the LED stops flashing after less than 1 minute or LED
does not respond to the button.
Perhaps, the paper is empty. In this case the LED flashes red. Fill in a new roll of thermal paper (see
section 7.1.3.5 –Change paper).
7.1.3.5 Change paper
To change the paper, open the cap of the paper compartment. Remove the empty roll of thermal
paper (or the capsule on which the paper was rolled) and replace it with a new one. Please note, that
the roll is in that way inserted in the printer, that it will be unrolled from the bottom (see Picture 6).
Place the beginning of the roll above the tear-off edge. Finally, close the paper compartment by
pushing the cap.
When printing fails after changing the paper, it may have been inserted
incorrectly (upside down) or it is not thermal paper.
Picture 6: Roll of paper
Connect printer
and switch on!
<OFF> Escape
Other manuals for ZFG 3.0
2
Table of contents
Popular Test Equipment manuals by other brands

Tonghui Electronic
Tonghui Electronic TH9310 Series Operation manual

Keysight Technologies
Keysight Technologies N5222-60124 Installation note

WIKA
WIKA CPH8000-ET operating instructions

Bosch
Bosch BAT 131 Original instructions

Extech Instruments
Extech Instruments 380353 user manual

CharlesWater
CharlesWater Micro Meg Operation and maintenance