ZUM Radio ZUMspot-USB User manual

ZUMspot USB Quick Start Guide
The ZUMspot USB has all of the capabilities of the regular ZUMspot all packaged up in a nice clear USB
dongle case. Because of the USB interface it takes up less space. It is made to work with a PC but it can
also interface with a Raspberry Pi through a USB port.

Table of Contents
Windows Setup:............................................................................................................................................3
Power Up: .............................................................................................................................................3
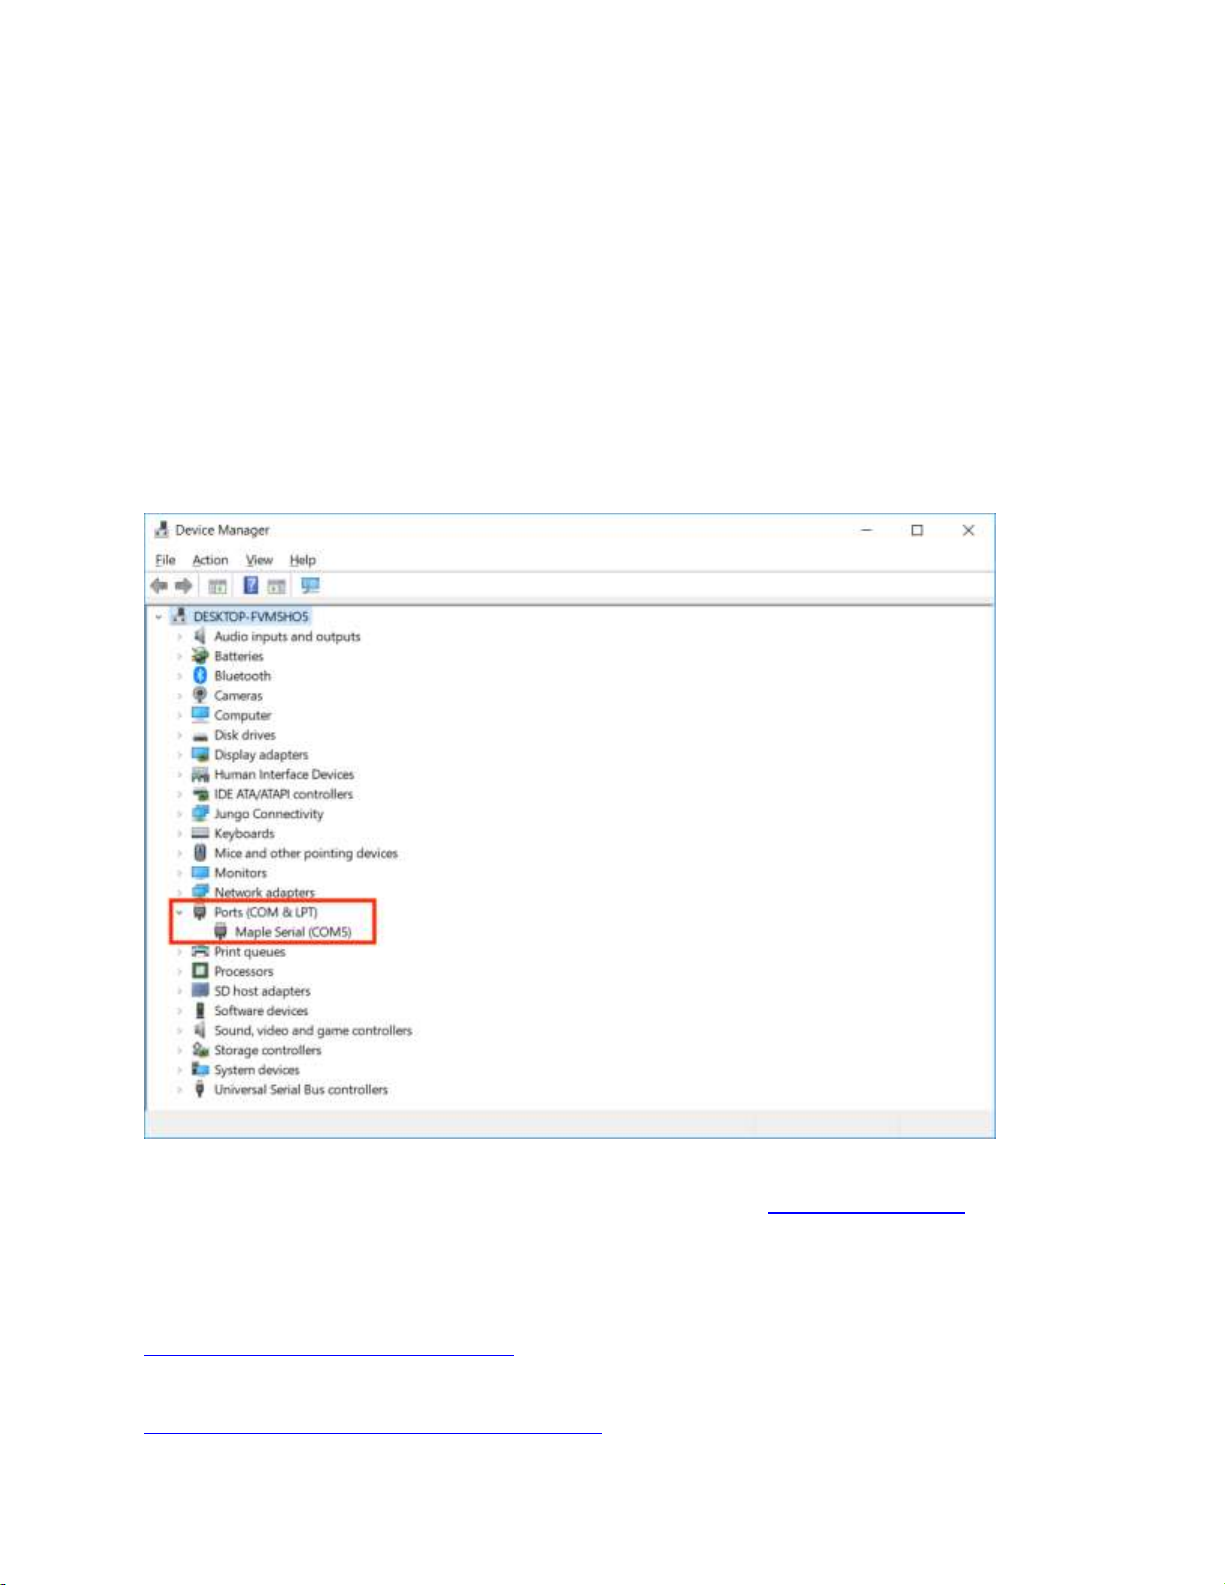
Device drivers:.......................................................................................................................................3
Windows Software................................................................................................................................3
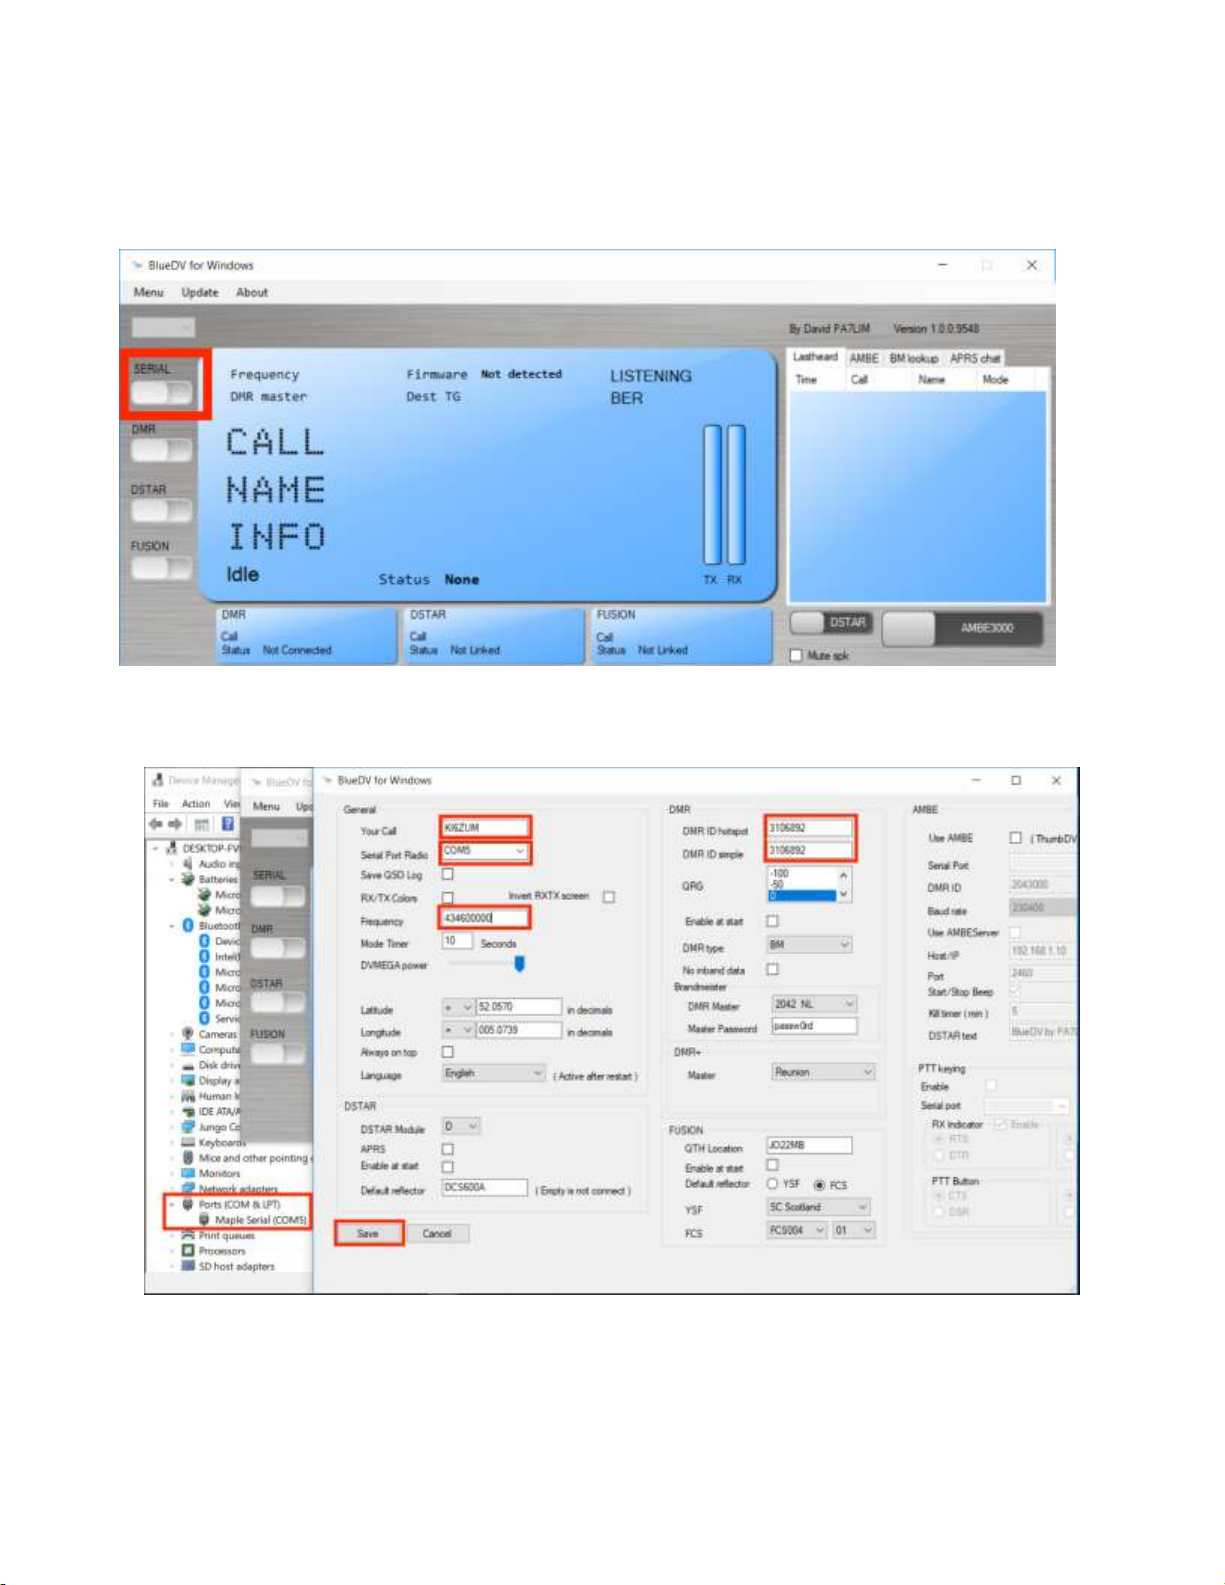
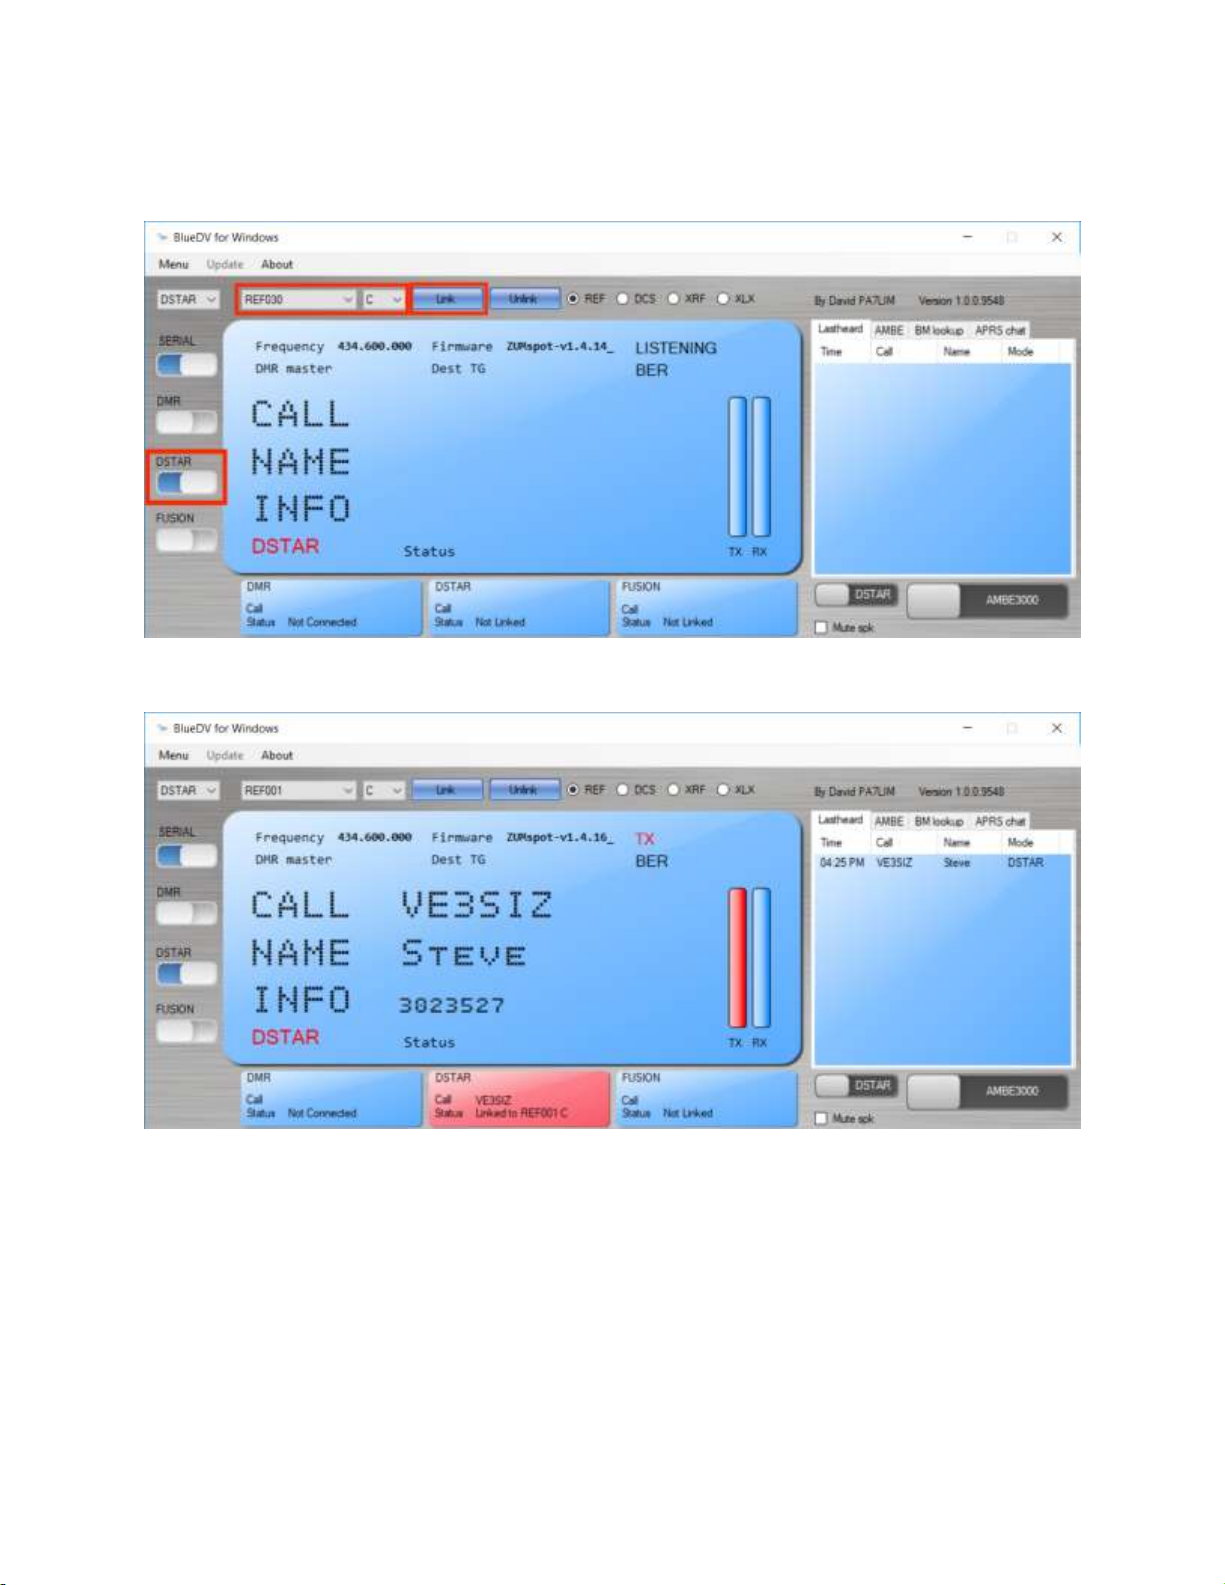
Configuring BlueDV...............................................................................................................................4
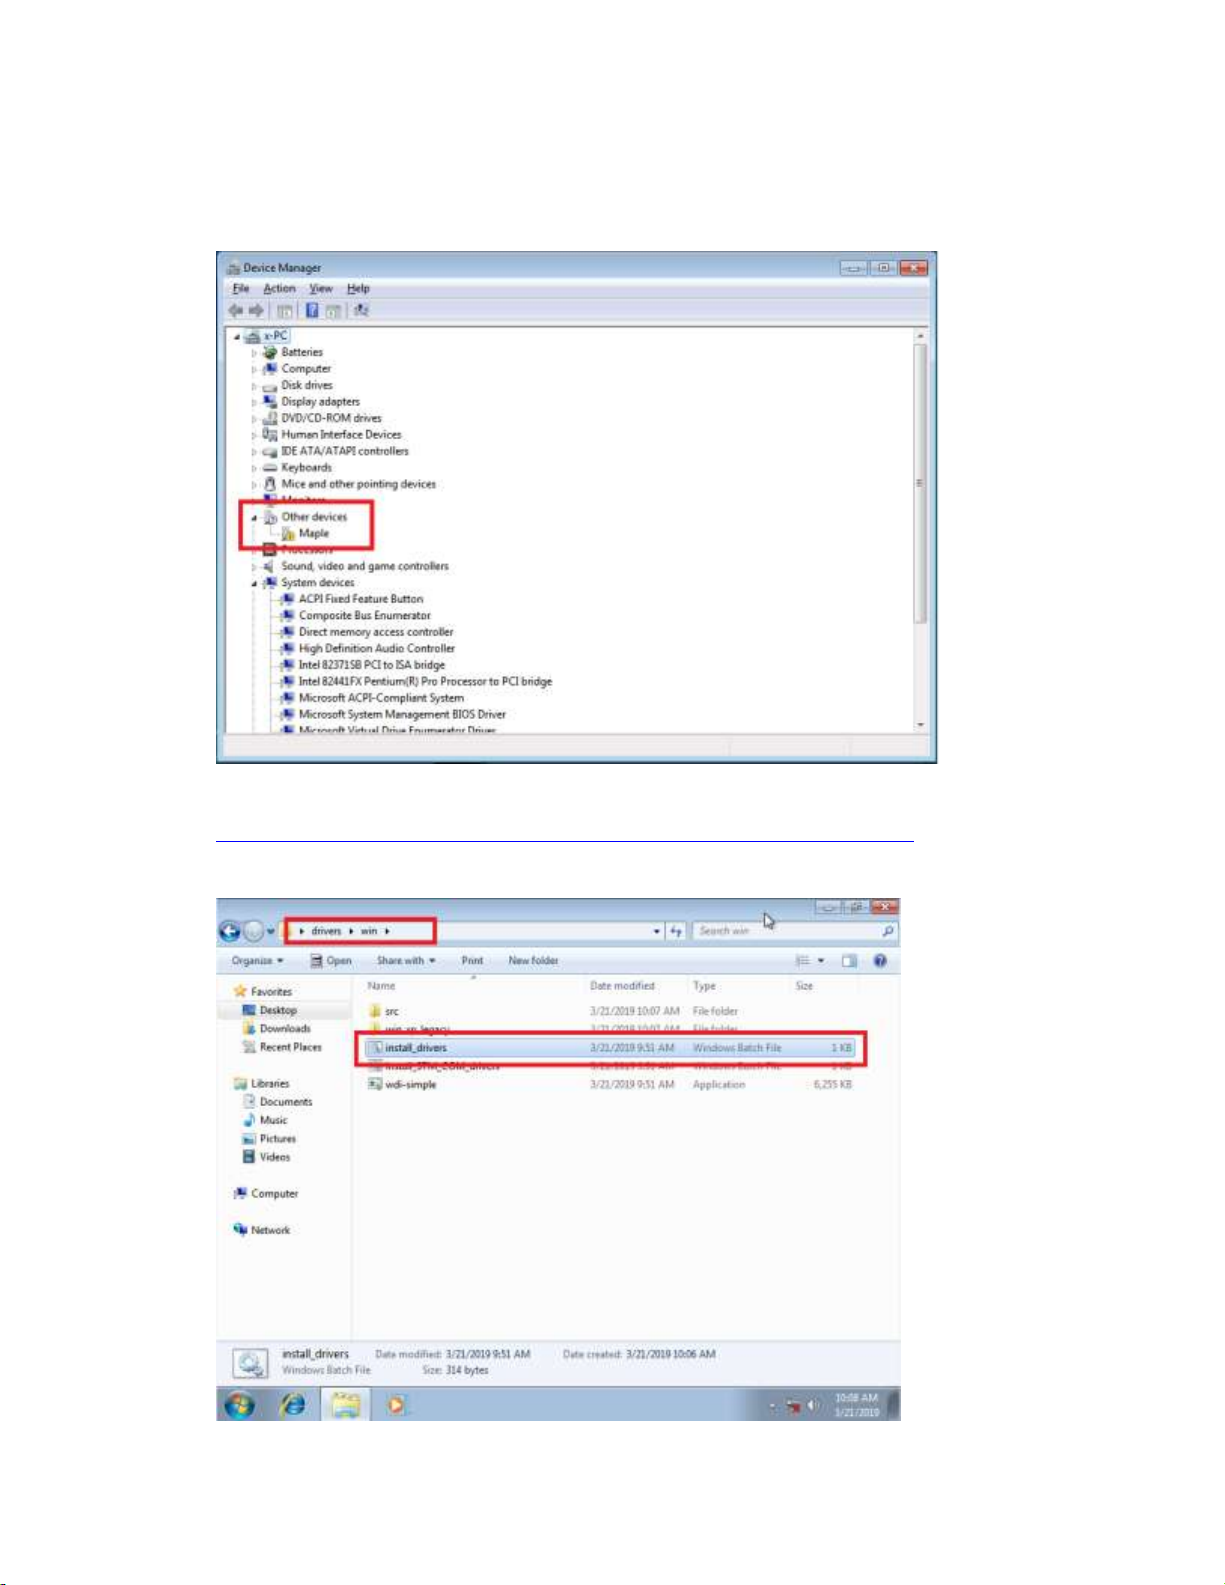
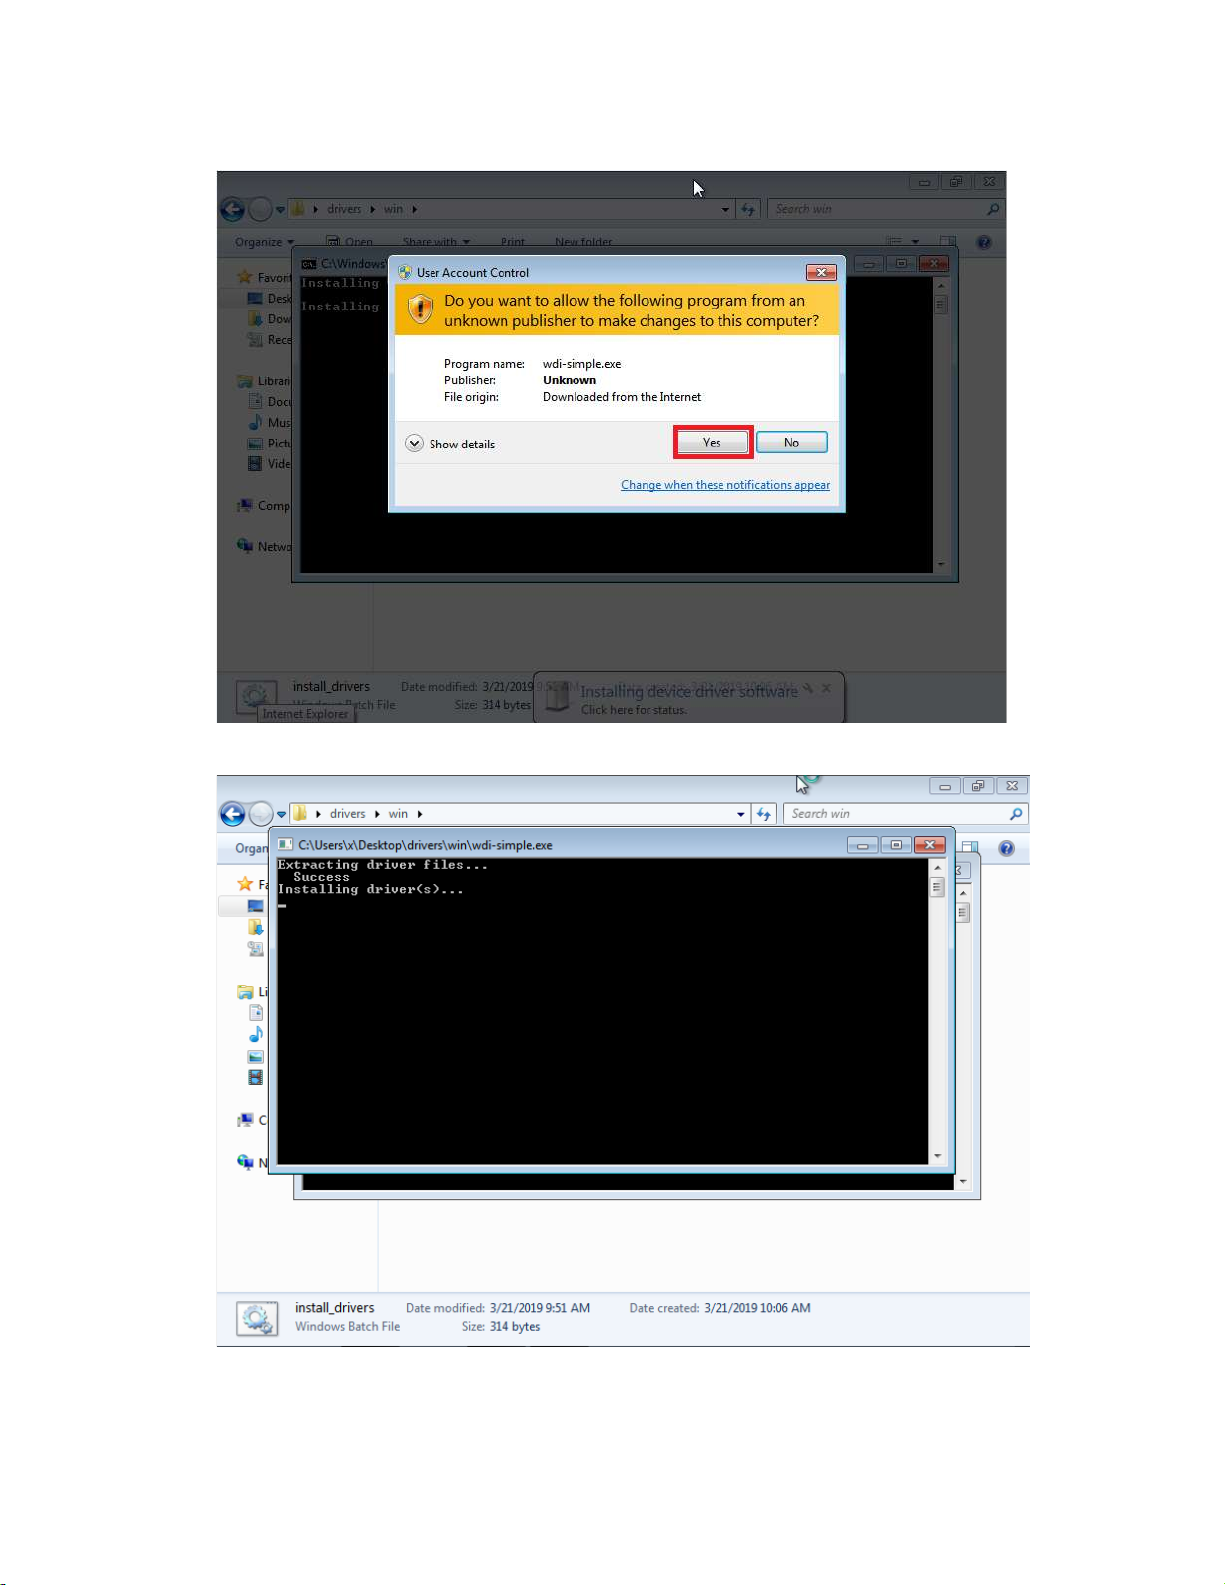
Installing device drivers ........................................................................................................................7
macOS Setup:..............................................................................................................................................12
Installing Crossover.............................................................................................................................12
Installing BlueDV Prerequisites...........................................................................................................13
Installing BlueDV.................................................................................................................................22
Modifying COM Port ...........................................................................................................................27
Finishing the setup of BlueDV.............................................................................................................32
Setup Pi-Star: ..............................................................................................................................................35
WiFi: ....................................................................................................................................................35
Ethernet: .............................................................................................................................................38
Configuration: .....................................................................................................................................38
Configuration (example to enable D-Star):.........................................................................................39
Finished:......................................................................................................................................................40
Support: ......................................................................................................................................................40

Windows Setup:
Power Up:
●Install the antenna into the RF connector.
●Insert the ZUMspot USB into any of the USB ports on your Windows machine. All of the LEDs will
flash when first powered on and the PWR LED will remain on. Also, if you have the sound
enabled on your computer, you should hear the USB device enumerate twice.
Device drivers:
Once the device drivers for the board have loaded, there should be a new COM port displayed. Make a
note of that port number.
You may have to manually load the drivers on machines running Windows 7 and earlier, or if there is a
yellow exclamation point. Follow the Installing device drivers section later in this document.
Windows Software
For more information about BlueDV, visit the website of David PA7LIM.
https://www.pa7lim.nl/bluedv-windows/
Download and install BlueDV for Windows. Be sure to download the zip file with the most recent date.
http://software.pa7lim.nl/BlueDV/BETA/Windows/

Configuring BlueDV
1. Launch the software and turn off “SERIAL” if it is already enabled.
2. Next select “Menu” -> “Setup”. As a minimum, set “Your Call”, the “Serial Port Radio”, “DMR
ID” and “Frequency”. Next select “Save”
3. NOTE: If you reconnect the ZUMspot to another USB port, it may enumerate under a different
COM port. So whenever you reconnect, double check your “Setup” with the COM port under
Windows Device Manager.

4. Next turn “SERIAL” back on.
5. If the USB connection to the ZUMspot USB is functional, the software should display the
“Firmware” version of the ZUMspot.

6. For DSTAR, turn on the DSTAR button, select the reflector (“REF”) you wish to connect to and
then select “Link”
7. Once connected to the reflector, the software will display info when others are transmitting.

Installing device drivers
1. If there is a yellow exclamation point next to the “Maple” device, the device drivers need to be
manually installed.
2. Download the drivers from GitHub:
3. https://github.com/rogerclarkmelbourne/Arduino_STM32/archive/master.zip
4. Extract the files from the zip file and go to the “drivers\win” folder.
5. Run the “install_drivers.bat” file.

6. Click “Yes” to allow the driver installer to run.
7. You will see the “installing driver(s)” message.

8. Click “Yes” to allow the second driver installer to run.
9. You will see the “installing driver(s)” message.

10. When the installation is done, “Press any key to continue”.
11. The drivers will now load for the ZUMspot USB. When done, you should see the “Device driver
software installed successfully” message.
.

12. Now you should see a “Maple Serial” com port with no yellow exclamation point.

macOS Setup:
Installing Crossover
To get BlueDV running on macOS, a Windows emulator is needed first.
1. Download Crossover from here: https://www.codeweavers.com/products/crossover-mac/
2. Use free trial or enter purchase info
3. Open folder where Crossover was downloaded into (Usually it’s the Downloads folder)
4. Unzip Crossover.zip (Double click on Crossover.zip so that Archive Utility can unzip it) if you
haven’t already.
5. Drag the file Crossover.app and drop it over Applications. This installs Crossover on your Mac.

Installing BlueDV Prerequisites
1. Open Crossover
a. Click on “Finder”
b. Go to the “Applications” folder
c. Double click on the Crossover app
2. Click on “Install a Windows Application”

3. Under the “Select Application” tab, type in “NET 4.5” and select “Microsoft .NET Framework
4.5”. Then press “Continue”
4. Select “New Windows 7 64-bit Bottle…”. Then change bottle name to something like “NET for
BlueDV” or whatever you would like to call it. Then press “Continue”

5. Press “Install”
6. Click “Next”

7. Click check box to accept license agreement, and then click “Install”
8. Click “Finish”

9. Click check box to accept license agreement, and then click “Install”
10. Press “Exit”

11. Click “Restart Now”
12. Click check box to accept license agreement, and then click “Install”
13. Click “Finish”

14. Click “Restart Now”
15. Click “Continue”
16. Click check box to accept license agreement, and then click “Install”

17. Click “Finish”
18. Click “Restart Now”
19. Click “Done” to conclude the installation
Table of contents