manuals.online logo
Brands
  1. Home
  2. •
  3. Brands
  4. •
  5. Zvox Audio
  6. •
  7. Speakers System
  8. •
  9. Zvox Audio SoundBase 450 Manual instruction

Zvox Audio SoundBase 450 Manual instruction

Setup&Operation
Don
't
Worry It's Pretty Easy.
(
!o
o o o
STEP 1
Placethe system on furniture.
STEP2
Connect one signal cabl
e.
STEP3
Connectthe
po
w
er
cable.
Home
Theater
Made Simple!
What's in the box
SoundBase system • Remote control • Instruction sheets
AC power cord • Optical digital and Analog signal cables
ZVO
X'
Gre.1t
Souno
Mc1dc
Sll'Tlpll'
(866)
367-9869 Iinfo@zvoxaudio.com
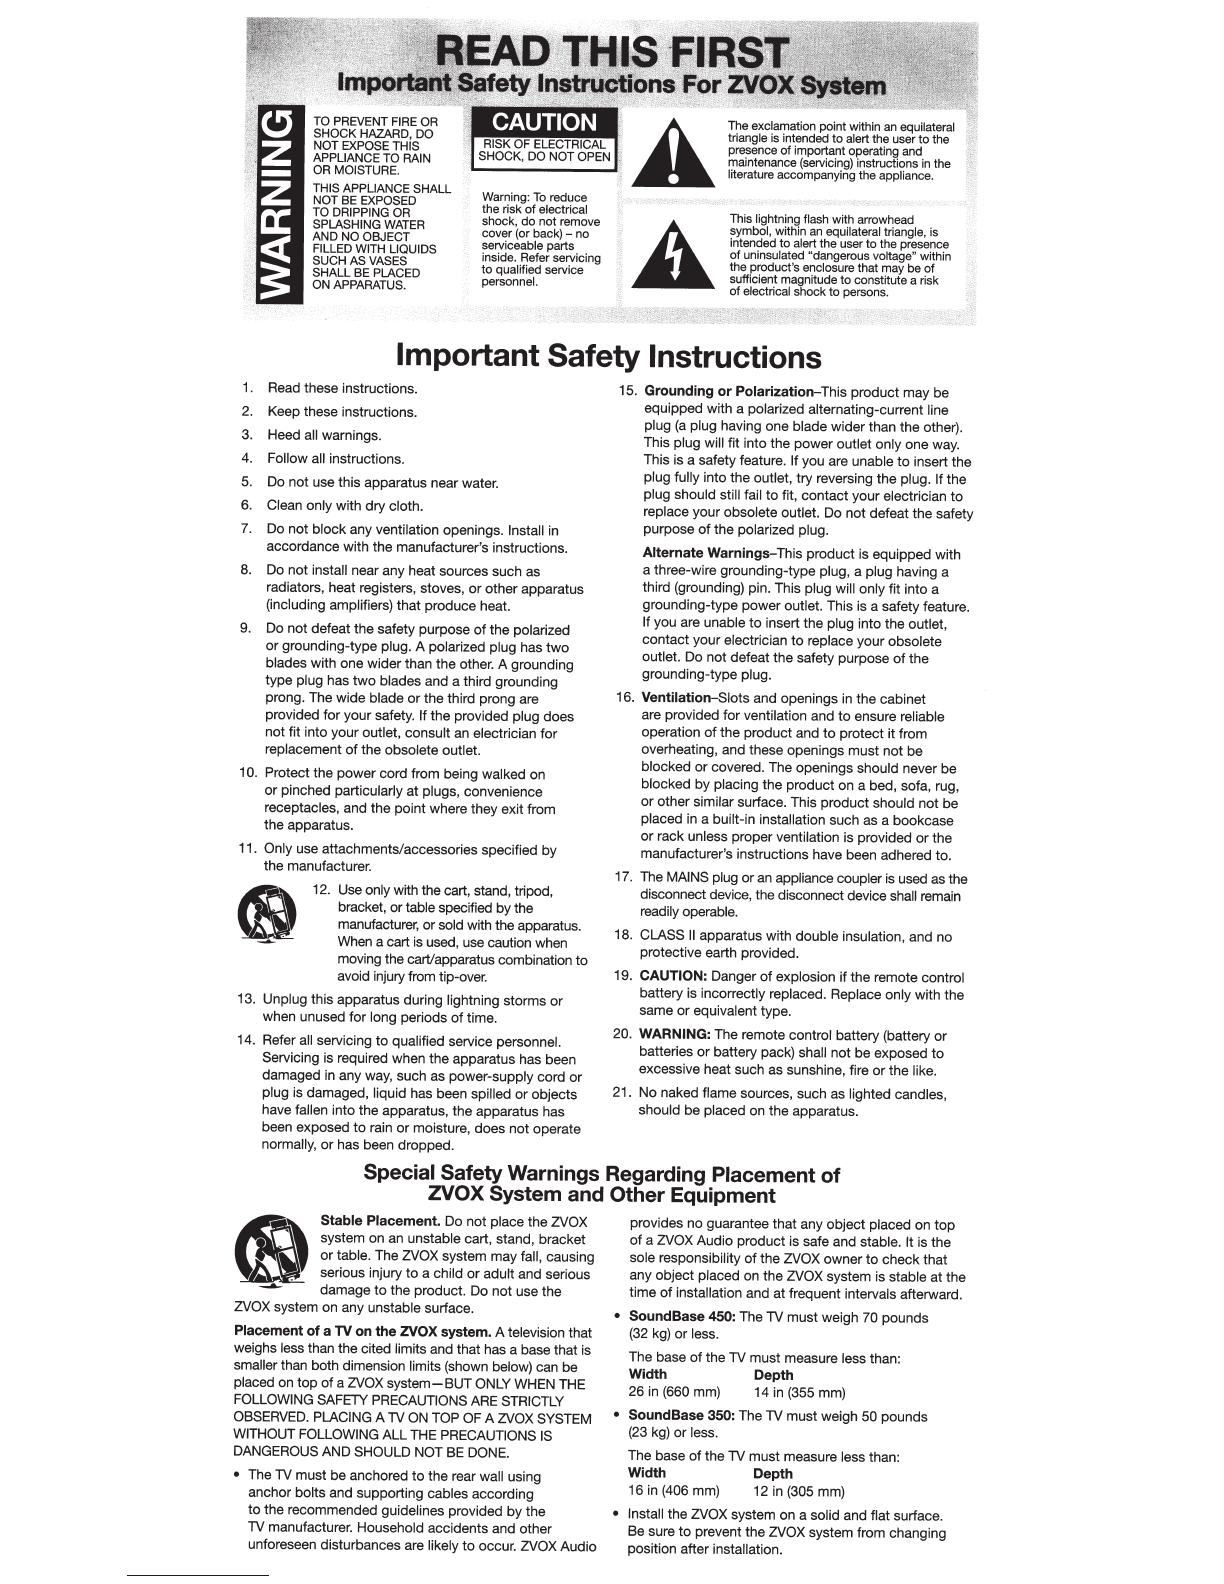
THIS APPLIANCE SHALL
NOT BE EXPOSED
TO
DRIPPING OR
SPLASHING WATER
AND
NO
OBJECT
FILLED WITH LIQUIDS
SUCH
AS
VASES
SHALL
BE PLACED
ON APPARATUS.
Warning:
To
reduce
the
risk
of
electrical
shock,
do
not
remove
cover (or back) -
no
serviceable parts
inside.
Refer
servicing
to
qualrtied service
personnel.
The exclamation pointwithin an equilateral
triangle is intended
to
alert
the
user
to
the
presence
of
importantoperating and
maintenance (servicing) instructions in
the
literature accompanyingthe appliance.
This lightning flash with arrowhead
symbol, within an equilateral
tr
iangle, is
intended
to
alert
the
user
to
thepresence
of
uninsulated "dangerous
vo
ltage" within
the
product's enclosurethat may
be
of
sufficient magnitude
to
constitute a risk
of
electrical shock
to
perscns.
Important Safety Instructions
1. Read these instructions.
2.
Keep these instructions.
3. Heed all warnings.
4.
Follow all instructions.
5.
Do not use this apparatus nearwater.
6. Clean only with
dry
cloth.
7.
Do not
block
anyventilation openings. Install in
accordance with the manufacturer's instructions.
8. Do not install near any heat sources such as
radiators, heat registers, stoves,
or
other apparatus
(including amplifiers)
that
produce heat.
9. Do
not
defeatthe safety purpose
of
the
polarized
or
grounding-type plug. A polarized plug has
two
blades with one widerthan the other. A grounding
type plug has
two
blades and a third grounding
prong. The wide blade
or
the third prong are
provided
for
your safety. If the provided plug does
not fit into your outlet, consult an electrician
for
replacement
of
the
obsolete outlet.
10. Protect the
power
cord from being walked
on
or
pinched particularly at plugs, convenience
receptacles, and
the
point where they exit from
the apparatus.
11. Only use attachments/accessories specified
by
the manufacturer.
12. Use onlywith the cart, stand, tripod,
bracket,
or
table specified
by
the
manufacturer, orsold with the apparatus.
When a cart is used, use caution when
movingthe cart/apparatus combination
to
avoid injuryfrom tip-over.
13. Unplug this apparatus during lightning storms
or
when unused
for
long periods
of
time.
14. Refer all servicing
to
qualified service personnel.
Servicing is required when the apparatus has been
damaged in any way, such as power-supply cord
or
plug is damaged, liquid has been spilled
or
objects
have fallen into the apparatus, the apparatus has
been exposed
to
rain
or
moisture, does
not
operate
normally,
or
has been dropped.
15.
Grounding
or
Polarization-
This product may be
equipped with a polarized alternating-current line
plug
(a
plug having one blade widerthan the other).
This plug will fit into the
power
outlet only one way.
This is a safety feature. Ifyou are unable
to
insert
the
plug fully into the outlet,
try
reversing the plug. If the
plug should still fail
to
fit,
contact
yourelectrician
to
replace your obsolete outlet.
Do
not defeat the safety
purpose
of
the polarized plug.
Alternate
Warnings-This product is equipped with
a three-wire grounding-type plug, a plug having a
third (grounding) pin. This plug will only fit into a
grounding-type power outlet. This is a safety feature.
If
you are unable
to
insert the plug into the outlet,
contact your electrician
to
replace your obsolete
outlet. Do not defeat
the
safety purpose
of
the
grounding-type plug.
16. Ventilation-Slots and openings in the cabinet
are provided
for
ventilation and
to
ensure reliable
operation
of
the product and
to
protect
it
from
overheating, and these openings must
not
be
blocked
or
covered. The openings should never be
blocked
by
placing the product on a bed, sofa, rug,
or
other similar surface. This product should
not
be
placed in a built-in installation such as a bookcase
or
rack unless proper ventilation is provided
or
the
manufacture
r'
s instructions have been adhered to.
17. The MAINSplug
or
an
appliance coupler is used as the
disconnectdevice, the disconnect device shall remain
readily operable.
18. CLASS
II
apparatus with double insulation, and no
protective earth provided.
19.
CAUTION:
Danger
of
explosion
if
the
re
mote control
battery is incorrectly replaced. Replace only with the
same
or
equivalent type.
2
0.
WARNING:
The remote control battery (battery
or
batteries or battery pack} shall
not
be
exposed
to
excessive heat such as sunshine, fire
or
the like.
21.
No
naked flame sources, such as lighted candles,
should
be
placed on the apparatus.
Special SafetyWarnings Regarding Placement
of
ZVOX System and Other Equipment
~
Stable Placement.
Do not place
the
Z:VOX
_ . system
on
an unstable cart, stand, bracket
or
table. The ZVOX system mayfall, causing
serious injury
to
a child
or
adult and serious
...-... damage
to
the product. Do
not
usethe
Z:VOX
system on any unstable surface.
Placement
of
a TV on theZVOX system.
A television that
weighs less than the cited limits and that has a base that
is
smaller
th
an both dimension limits (shown below) can be
placed on
top
of
a
Z:VOX
syste
m-BUT
ONLY WHEN
THE
FOLLOWING SAFETY PRECAUTIONS
ARE
STRICTLY
OBSERVED. PLACING A TV
ON
TOP OF A
Z:VOX
SYSTEM
WITHOUT FOLLOWING ALLTHE PRECAUTIONS IS
DANGEROUS AND SHOULD NOT BE DONE.
• The TV must
be
anchored
to
the rear wall using
anchor bolts and supporting
ca
bles according
to
the recommended guidelines provided
by
the
TV ma
nuf
act
ure
r.
Household
acc
ide
nt
s and
oth
er
unforeseen disturbances are likelyto
occ
ur
.
Z:VO
X Audio
provides
no
guarantee that a
ny
object placed on
top
of
a
Z:VOX
Audio product is safe and stable. It is the
sole responsibility
of
the ZVOX ownerto check that
any
object
placed
on
the ZVOX system is stable at the
time
of
installation and
at
fr
equent intervals afterward.
• SoundBase 450:
The TV must weigh
70
pounds
(3
2 kg)
or
less.
The base
of
the TV must meas
ur
e less than:
Width Depth
26
in (660 mm)
14
in (355 mm)
• SoundBase 350:
The TV
must
weigh
50
pounds
(23 kg)
or
less.
The base
of
the TV must measure less than:
Width Depth
16
in (406 mm) 12 in (305 mm)
• Insta
ll
th
e ZVOX system
on
a solid and flat surfa
ce
.
Be sure to preve
nt
the
Z:V
OX system from changing
position a
ft
er in
st
a
ll
ation.
Simple Setup -Just Four Steps
Place
the
SoundBase.
Connect the
SoundBase
to
your
TV
and/or
audio
devices.
1.
Speaker
placement
Learn
the
features and
controls
of
the
ZVOX sys
tem
.
"Teach"
th
e SoundBase
to
respond
to
your
preferred remote
controls commands
(Volume/Mute/Power).
You can place the Sound
Base
on
any flat, stable surface near your
TV.
If
the
TV base is small
enough, you can place the Sound
Base system on a piece
of
furniture and then place the TV
on
top
of
the
Sound
Base.
• Consider the surface that will support the SoundBase. It is
the
SoundBase owner's
responsibility
to
insure that a furniture finish is unaffected
by
supporting the combined
weight
of
a Sound
Base and possibly a
T\1.
Place an appropriate barrier between the surface
and the feet
of
the Sound
Base
if
you are in doubt. The
four
support pads
on
the bottom
of
a SoundBase are a soft, inert synthetic material that does not react with typical furniture
finishes. But some furniture finishes can be deformed
or
altered
by
having any heavy
object resting on them for a long period
of
time.
"NO
XAudio, Inc. cannot
be
responsible
for any change in the appearance
of
any supporting surface finish that may
occur
after a
SoundBase is placed upon the surface.
• A safe installation is the SoundBase owner's responsibility.
• Use
an
unswitched AC
ou
tlet
to
provide power
to
a Sound
Base. If Auto Standby is turned
on, a SoundBase will always enter its Standby state after 30 minutes of inactivity. A
SoundBase usesless than 0.5
watt
in Standby. Use
of
a switched AC outlet
to
cut
off AC
power
to
a SoundBase system mayerase user preferences and delays subsequent turn-on.
• A TV heavier than
70
lbs(32 kg) should not
be
placed directly
on
top
of
a Sound
Base 450.
• A TV heavier than
50
lbs(23 kg) should not
be
placed directly on
top
of
a Sound
Base 350.
• A flat panel
TV
has a high center
of
gravity. Please confirm the furnishing supporting
yourTV and the Sound
Base is stable and secure. The surface supporting the
SoundBase/TV combination should not movein any direction.
• A
ll
TV
manufacturers recommend that a flat panel TV be anchored
to
a secure vertical
surface with a tether. This prevents a household accident from causing a TV to fall
off
its
supporting surface. ZVOX Audio recommends you heed this recommendation and all other
installation recommendations made
by
the TV manufacturer.
2. Connecting
your
TV
to
the
SoundBase
Almost all HDTVs have an audio output, which you can connect
to
your
Sound
Base.
You
should
not
disconnect or change any video program source connected
to
your
TV.
TV Optical Output
ZV
OX Optical Input
Optical
Digital
Output
Almost all HDTVs use an optical digital audio output, which you connect to the Soundbase's
optical input using an optical cable.
Coaxial
Digital
Output
A few TVs, set
top
boxes and DVD/Biu-ray players have a coaxial digital audio output.
You
can connect this output
to
the coaxial input on the SoundBase using a cable with an RCA
plug
at
each end.
Pr
o
gram
So
ur
ces
with
an
Analog
Audio
Output
If you don't have a digital audio outputoption on yourTV, you could connect the TV set's
analog audio output
to
one
of
the
two
analog audio Inputs on the the Sound
base. The analog
audio outputon yourTVwill be a stereo minijack
or
a pair
of
RCA jacks. The
two
illustrations
below show the appearance
of
these
two
connections.
You
could also connect the headphone output
of
a smartphone (or any music player)
to
one
of
the
two
analog audio inputs on the SoundBase.
You
can connectan RCA
jack
analog audio
output
to
AnalogInput
2.
OR
You
can connect
a
minijackanalog audio
output
to
AnalogInput
2.
3. Connect
the
AC
cord
After making the signal connection, connect the AC powercord
to
the back
of
the speaker.
Then connect the AC powercord
to
an AC power receptacle.
Turn
on the speaker using the
power switch on the back panel next to the
ACcord
.
AC
cord
connection
to
SoundBase
back
panel.
If
your
home TV system does
not
co
nform
to
the
descriptions in this
guide,
don
't hesitate
to
send an inquiry
to
[email protected]
or
call ZVOX Audio
at
(866) 367-9869. Please provide your
TV
brand
and model number. A ZVOX Audio representative should be available
(Eastern Time Zone) Monday through Friday 9:30 AM
to
7:30 PM and
noon
to
4:00 PM
on
Saturday.
4a. Infrared
Remote
Control
Features
of
the
SoundBase
Learning:
You
can "teach" the SoundBase
to
respond to your cur-
rent
TV
remote control
for
the following functions: Vol-
ume, Mute (on/off) and Power (on/off). See the separate
sheet for instructions.
After
this "learning" process, you
will not need
the
SoundBase remote control for adjust-
ing Volume, Mute and Power. Teaching the Sound
Base
to respond
to
your preferred remote does not affect the
included SoundBase remote. The SoundBase remote
will still provi
de
i
ts
full range
of
adjustments.
Inp
ut
Se
l
ection:
Pressing the INPUT button allows you to select
a different input. Inputs are selected in the
following order:
Input 1- digital (optical
or
coaxial jack)
Input 2- analog (input 2}
R
emote
Control
Capabilitie
s
Mute
Volume
-
-Input 3- analog (input
3}
Bluetooth device -
-
nn
-uu-
The VOLUME buttons on the Sound
Base remote control operate in
the normal manner.
Bass
set
at
-2
I
,-,
-1
'-
u-
c
Treble
set
at
1
!-!!
I
. -
-
Bass a
nd
Tr
eb
le
Power
(S
TANDBY)
The Power button
on
the SoundBase remote control toggles the
SoundBase between STANDBY and On.
Not
e: You can choose
to
engage
the
AutoStandby feature from the
PS
menu
if
you want the
SoundBase
to
automatically
go
into Standby afterapproximately 7
minutes
of
silence.
A SoundBase in STANDBY will automatically turn back on if
it
senses
a volume adjustment
or
power command from the "learned" remote
control
or
the Sound
Base remote contro
l.
Mut
e
The MUTE button
on
the SoundBase remote control operates in
the normal manner. When MUTE is active, the display will show a
blinking -00-
for
20 seconds.
The Bass control has a range
of
-4 to
4.
TheTreble control has a range of -4
to
4.
1-
I I
::1
CJ
I
Not
e: The bass output
of
a SoundBase system is affected by its
position within a room. You may find
it
sounds best with slightly more
or
less bass than the neutral setting.
Surrou
nd
Settings
There are three SURROUND levels:
• Surround One ("Sd 1
") has l
ow
virtual surround effect and strong
vocals. Use this setting if vocal clarity is important
to
you.
• Surround Two ("
Sd
2"
) has moderate virtual surround effect
and moderate vocals.
Most
people prefer this setting for
most
program materia
l.
• Surround Three ("
Sd
3") has strong virtual surround effect
and moderate vocals. Many people preferthis setting when
watching movies.
Output
Leveling
I
1-
I
-1
~ICI
C
1-11
u
I_
Press this button to prevent large changes in volume. When engaged,
nl-
1-
II
1-1
'- '-
u
. '
-
it
boosts quiet dialog and lowers the output
of
loud commercial breaks.
It
also reduces volume swings between cable or satellite channel
s.
This
feature can
be
used along with any
of
the three Surround settings.
Accuvoice
Press this button
to
increase the clarity
of
most
voices.
Pressing Accuvoice overrides the current Surround setting. A second
press returns the Sound
Base
to
the last-used Surround setting.
4b. SoundBase
Front
Panel
and
RearPanel
SoundBase
Front
Panel Controls
and
Input
SoundBase B
ac
k Pane/Inputs
and
Outputs
U
MUTE/Power
button
. If the system is on, a press
of
this button toggles MUTE on and
off. Also while the system
is
on
,
if
you press and hold the MUTE button for longer than
four seconds, the system will enter STANDBY.
fA
VOLUME
-/
+
.The
volume range indication is
01
to
30.
!)
INP
UT
. Selects between the four input choices
on
a SoundBase. See4a
Input
in first
column.
5. Digital Audio Troubleshooting
TV sets
with
no
audio
output:
You
shouldcheck the program sourcesconnected
to
the
lV
for
an
audio output (cable box, disc
player,
gamebox). Manycableboxes and DVD/Biu-rayplayers have both analog and digital audio
outputs. Ifyou connectdirectly to a set
top
box and a DVD/Biuray
player,
you need to switch
inputson the
lV
and the SoundBase.
Bluray
disc
audio:
Ifyou don't get sound from a Bluray disc, the digital audio
on
that discmay be encoded using
a proprietary format.
In
this case, use the Bluraydisc menu
or
the Bluray playermenu to select
Dolby Digital orPCM digital output.
Int
ernet
streaming
HD video audio:
Ifyour
lV
features a Internet connection and displays HD streaming content, it may be
necessary
to
select Dolby Digit
al
or PCM digital audio in the
lV
or from the streaming provider's
sound options.
STILL NEED ASSISTANCE? If
your
home
TV
system
does
not
conform
to
the
descriptions
in
this
guide
,
don't
he
s
itate
to
send
an
inquiry
to
info@zvoxaudlo.
com
or
call ZVOX
Audio
at
(866) 367-9869. Please provide
your
TV brand
and
model
number. A ZVOX
Audio
representative should
be
available (Eastern
nme
Zone)
Monday
through Friday 9:30 AM
to
7:30
PM
and noon
to
4:00 PM
on
Saturday.
0 2010
l)I()X
Audio
lLC
el)l()x
lnd
Sound8ase
are~·---~
•
a-
ocl)I()XAudlo.LLC.
e
-ooth
11
a_.-,_
ownod
by
-00111
SIG.
Inc
used
undor-
by
l)I()X
Audio
lLC
1
Position
the
SoundBase.
Place the SoundBase
on stable, flat surface.
Ensure all components
are stable and secure.
Connect
the
power
cord.
Connect theAC
power cord to
the
back
of
the
SoundBase. Leave
the PowerSwitch in
"Off'~
Then insert the
AC plug intoan AC
power receptacle.
Connect
to
the
Optical
Audio
Output
of
the
TV.
Connect one end
of
an optical cable to
theTV's optical digital
audio output.
Other Possible
TV
Audio Out uts
RCA
JackAnalog
Audio Out
A red/white pair
of
RCA jacks
on the back
of
the TV labeled
OUTPUT. Do notconnect
to
RCA jacks labeled
INPUT.
"Minijack
" Analog
Audio
Out
Some TVs use a minijack
output
or
headphone jack.
Do not use a minijack
labeled INPUT.
Coaxial Digital
Audio
Output
(Single RCAjack,
may be orange)
Any cable with an RCA plug
at each end can
be
used.
Connect
to
the
Optical
Audio
Input
of
the
SoundBase.
SoundBase's Optical
Audio
Input
Connect
the
otherend
of
the
optical cable
to
the SoundBase's
optical input.
0 2014
l:I/OX
Audio LLC.
6
Confirm
you
hear
TV
sound
through
the
SoundBase.
After making
an
optical
connection, you should
heartheTV sound
through the SoundBase
with the SoundBase
volume set to 12-15.
Ifyou
don't
hearsound
or
ifyou did not usean
optical connection, press
the INPUT button
on
the SoundBase remote
control to select the
correct input.
Selectthe input
on
the
SoundBase with the TV
connectedto
it
using the
SoundBase remote
controlINPUTbutton
"--PUI
J'OW!
H
• •
• •
A(
(
lJVliU
!
'>1/Hfi(M.,NO
or
the frontpanel.
/,-,
I
cl
Input
1-d
lg
lta
l
(o
ptical or
coa
xial j
ac
k)
I,-,,~'/~/
In
put2--ana
log
(RCA
Jacks)
I
-,
C/
,,-,
::,,-,
Input
3-a
nalog
(
RCA
jack
s)
1_1
IIC
/_//_ /_//_
Bluetoo
lh
d
evi
ce
Your SoundBase has
both
analog
and
digitalaudio inputs. The majority
of
SoundBase owners
connect
between the optical
jack
on
a
TV
and
the optical
input
jack
on
the SoundBase. This
page
describes audio
output
types
found
on
a TV
or
Set
Top
Box
(opticaldigital,
coaxial digital
and
analog)
and
the cable needed
to
connect
to
a SoundBase. Any
of
these audiooutputsprovides excellent fidelity.
Important Notes
1
Where Is The
Audio Output?
Most
lVs
have an optical
digital audio output, while
a few have a coaxial digital
audio output instead.
You
could also use
an
analog
audio output
on
a
lY,
or
an audio output
on
a cable
or
satellite set
top
box.
Analog Versus Digital
Audio Outputs
A digital audio
output
provides the
"best"
signal
but
the audible advantage
compared
to
analog audio
is typically small. Ifyou find
it more convenient
to
make
an analog audio connection
to
the SoundBase, then use
it. Dialog clarity should
be
equally
good
using either
a digital
or
analog signal.
Digital audio can
be
an
advantage if you
want
more
audio dynamic range.
Pa~r~ng
w1th
a 0
Bluetooth
dev1ce
You
see
r.l
appear
on
the SoundBase when the Bluetooth®
input is selected. The "bLUE" flashes ifthe SoundBase is
not
paired with a Bluetooth device.
If
your Bluetooth device has a dis-
play,
the SoundBase appears as
"ZVOX".
The SoundBase display
stops flashing when it pairs with the Bluetooth device.
Audio
output
jacks found on TVs and
cable/satellite set
top
boxes:
Analog Stereo Minij
ack
...
....ta-
--
#~
a:
Audio signal cable needed:
A stereo miniplug
at
oneend
and a pair
of
RCA plugs
at
the otherend.
Analog L
eft
and
Ri
ght
RCA
jack
s
AUDIO
OUTPUT
Audio signal cable needed:
A pair
of
RCAplugs
at
each end.
Optical Digital
Jack
Audio signal
cable
needed:
An
optical cable.
Coaxial Digital
Jack
(s
ingle
RCA
jack)
Digital
Audio
Audio signal cable needed:
An RCAplug
at
each end.
C 2014
Z</OX
Audio
LLC
.
Audio signal outputs
for popular TV brands:
Samsung:
Most
recent LED/LCD Samsung
TVs have
both
an optical digital
output
and a stereo minijack
audio output. Older LED/LCD
Samsung models have left and
right RCAjacks
as
an audio
output instead
of
the minijack
output.
Most
Samsung plasma
TVs have a single optical
audio output.
Panasonic:
Most
Panasonic TVs havean
optical digital audio output.
Toshiba:
RecentToshiba TVs have an
optical digital audio output.
Some models alsohavea
headphone jack
that
can
be
used as an analog audio output.
Sharp:
Recent SharpTVs have a
digital audio
output
and an
analogstereo audio output.
Jack
style will vary.
Insignia:
Most
InsigniaTVs havea digital
audio
output
and an analog
stereo audio output. Jack style
will vary.
LG:
LG TVs typically havean
optical digital audio output.
Some models alsohave a
headphone
jack
that
can
be
used
as
an analog
audio output.
Sony:
Recent SonyTVsan optical
digital
output
and a stereo
minijack audio output. Some
SonyTVs use leftand right RCA
jacks for
an
analog audio
output
instead
of
a stereo mlnijack.
Vizio:
Most
Vlzio TVs havea digital
audio
output
and an analog
stereo audio output.
Jack
style
will vary.
Your ZVOX SoundBase®system is equipped with a
Bluetooth®receiver that allows it to play music wire-
lessly from your smart phone, tablet, laptop computer
or other Bluetooth equipped audio devices.
•
To
start the Bluetooth connection process, use the
INPUT button on your remote control (
or
the control
module on the front
of
the SoundBase) to select the
Bluetooth
input
~
).
Keep pushing the INPUT but-
ton until the SoundBase display reads "bLUE."
• Nowfollow the directions for your Bluetooth device
to "pair" to the SoundBase. This typically involves
going to "Settings" then the "Biuetooth Settings" and
choosing the "ZVOX" listing when itappears on the
list
of
available devices.
• The "bLUE" symbol on the SoundBase display will
flash during the connection process. Once the con-
nection is made the "bLUE" symbol should stop flash-
ing -and your device should indicate "Connected" by
the "ZVOX" listing.
A SoundBase can remember "pairing" with up to five
different Bluetooth devices. The system will connect
more quickly to a Bluetooth device that has previously
been paired with the system.
We
stronglyrecommend thatyou have only one
Bluetooth-transmitting device operating in the same
room as the SoundBase. Having two Bluetooth de-
vices "on" in the same room as the SoundBase can
lead to an interrupted signal connection. Turn
off
Blue-
tooth transmission from other Bluetooth devices in the
same room. If your SoundBase drops a connection to
a Bluetooth device, check to see ifan additional de-
vice like a phone
or
tablet is present in the same room
(or even in a nearby room).
Using Bluetooth
wireless
audio
with
your
ZVOX
Sound
Base
system.
Ifyou wish to connect to a different Bluetooth-
equipped device, turn Bluetooth on from the new
device and turn Bluetooth
off
on the previous device.
Troubleshooting
suggestions
if
Bluetooth
won't
connect.
• Be sure the device is within range
of
the Sound-
Base. The closer the device is to the SoundBase, the
better. The device may need to be 20 feet
or
closer.
• Be sure the SoundBase input is set to "bLUE."
• Be sure the Bluetooth function on your device is
activated.
• Ifyour device indicates that it has connected -but
then disconnects, try re-connecting the device.
If
repeated attempts to connect don't work, try the fol-
lowing steps:
-Turn the SoundBase
off
using the Power button on
the remote control. Wait a few seconds, then turn it
back on. Repeat the Bluetooth connection process.
-Ifthere are other Bluetooth devices nearby, tempo-
rarily de-activate their Bluetooth function.
-Clear other Bluetooth sound systems from the pair-
ing list on your Bluetooth device (implement the option
"Ignore This Device"
).
-On your device, turn Bluetooth OFF, wait about 30
seconds, then turn Bluetooth back ON.
Note: Consistent Bluetooth reception can be de-
graded by other nearby sources
of
radio frequency
interference. A wifi router
or
radio-frequency remote
control near to the SoundBase can create interference
that reduces the effective range
of
the SoundBase's
Bluetooth reception. Infrared remote controls will NOT
cause interference with the Bluetooth reception.
zvox®
Great Sound Made Simple
www.zvoxaudio.com
866-367-9869
[email protected]
©
201
4
R2
ZVOX
A
ud
io LL
C.
ZVOX and SoundBase
ar
e registered trademarks
of
ZVOX
Audio LLC. Bluetooth is a registered trademark of Bluetooth SIG.
'
'
This guide applies
to
the SoundBase models 350, 450, 570, 670, 770 and 870.
It
does not apply
to
the Sound
Base 220, 320, 420, 555 and 580
and earlier ZVOX Audio products.
The PS Menu
The SoundBase
has
a
var
iety of function
and
sound adjustments that could prove
useful
depending
on
the
SoundBase
owner's
installation
and
usage
preference.
The
list
ofadjustments is
called
the
PS
Menu.
If
your1Vset does not
have
a "
internal
speakers
off'
feature
or
if
your
1V
displays
a distracting
"lV
speakers off"
message,
t
he
PS
menu
allows
you
to
adjust the
SoundBase
and
your
preferred
re
mote
control
so
that
the
volume buttons
on
your
preferred
remote
control adjust
the
sound
just
from
the
SoundBase
and
not the
T\1.
These
adjustments
are
made
using
the
four
front
panel
buttons
on
aSoundBase
while
watching
the
LED
display.
The
SoundBase
remote control cannot make
adjus
tments
to
the
PS
Menu.
Press both
butt
ons for three
or
more
se
co
nd
s to t
ri
gger
the
PS
number
adjustment mode.
Adjusting the PS Menu
To
make a
se
lection from t
he
PS
menu
lis
tin
g,
press
and
ho
ld down both
the
M
UTE
and
VOLU
ME
UP
front
panel
bu
ttons for about 3
seconds.
If
this
is
the
first
time
you
have
used
the
PS
menu
,
you
will
see
the
characters
"
PS
-0" start
flashing.
Immediately
release
the
two buttons when
you
see
the
PS
number
flashing.
Then
quickly
press
and
release
the
Volume
Up button
while
"PS"
is
still
fl
ash
i
ng.
This
will
increase
PS
number
se
tting.
Press
i
ng
Volume
Down
wil
l
decrease
the
PS
nu
m
ber
setting,
down to
"PS
-0".
Each
ti
me
you
press
the
Volume
Up or
Volume
Down
button,
you
have
an
additional
six
seconds to
make
an
adjustment.
Once
you
arrive
at your intended
PS
number,
just wait for the display
to
stop
flashing
the
PS
number.
When
the
flashing
stops, t
he
adjustm
en
t is
made.
While flashing, the Volume
Up
or
Down
buttons
set
the
PS
number.
After
adjustment,
the s
ett
ing is stored when the display turns
off
.
zvox
·
Grl'i11
Sound
M,t(J!• Sunph·
(866) 367-9869
Iinfo@zvoxaudio.com
PS Emulation
Modes
The
first
six
options in
the
PS
menu
are
emulation
modes.
See
"U
sing
t
he
SoundBase
remote
co
ntrol
e
mula
tion modes" for inst
ru
ction
s.
Sony LG Samsung Vizio Panasonic
Marantz
There
are
no
PS
number choices between
PS
6 and
PS1
0.
Additional PS Settings
Additional
SoundBase
adjustments
affect
how
you
turn
the
SoundBase
on
and
off
and
how it
responds
to
remotes
"AS" Auto Standby:
When
PS10
is
selected,
the SoundBase
will
automatically
enter
a low-power draw Standby
mode after
20
-30
minutes
of
very
low to
no
audio
s
ignal
.
In
most
uses
,
thi
s
means
the
SoundBase
will
turn its
self
off after
you
turn
off
the
T\1.
"noAS" no Auto Standby:
When
PS11
is
selected, the
SoundBase
will
only
enter
Standby
in
response
to a
press
ofthe
POWER
button
on
the
SoundBase
remote
or
from
a "
learned"
remote contro
l.
The
SoundBase
wi
ll
not
enter
Standbyauto
mat
i
ca
l
ly
.
"AO" Auto On:
The
SoundBase
turns
on
in
re
sponse to
the Power,
Volume
and
Mute
commands
fr
om
the
SoundBase
remote
and
from
the
"
learned
"
remote
.
"noAO"
no
Auto On:
The
SoundBase
t
urns
on
in
response
to a
SoundBase
remote
command, but not a
"
learned
"
remote
command.
On
ce
on
,the
SoundBase
will
respond
to a
"learned
"
remote.
..
"OnEr''
One
Remote:
The
SoundBase
responds
to just
the
SoundBase
remote
control.
Any
"learned"
remote
response
is
disabl
ed
.
Choosing
PS12
or
PS1
3
restores
a "learned"
remote
's ability
to control the SoundBase.
Using the SoundBase remote control emulation modes
PS
1 through
PS
6:
Most
SoundBase users teach the
SoundBase
to
respond
to
their preferred
remote control using
the
SounBase built-in
"learning" function. Should this approach
not
work
with your preferred remote control, there
is an alternate method
that
can allow
your
preferred remote
to
control
the
sound level
heard from
the
SoundBase.
To
use this method, your preferred remote
control needs an
Aux
or
Audio device button
in
addition
to
device
buttons
for
the
1V
and
set
top
box
. This method cannot
be
used if
your preferred remote control controls only
two
devices (Set Top
Box
and
1V). You will
also need the User Manual for your specific
Cable
or
Satellite remote control, along
with
the
"device brand and code" list for
your
remote control. This list may
be
a
separate
document
from the remote
control User Manual.
Using
the
PS numbers 1 through 6, you set
the SoundBase
to
respond
to
the volume/
mute/
power
infrared
commands
of
a specific
1V
or
audio system manufacturer.
In
most
cases, you need
to
choose a different brand
than your
1V
Choosing a brand that is
different from your
1V
eliminates the chance
that
the
1V's
internal speakers will start
playing along with
the
SoundBase. Sony is a
good
choice from
the
PS menu
for
any brand
of
1V
that
is
not
Sony.
Most
cable
or
satellite
re
mot
e controls
ca
n
be
adjusted
to
co
ntrol a
SoundBase set
to
"Sony"
in
the PS menu. If
you have a Sony
1V
that
will not allow you
to
turn offthe internal speakers, you will have
to
choose a different brand from the PS menu
numbers 1 through 6.
On
ce
you have c
ho
sen a brand from the
SoundBase PS menu, you need
to
ad
ju
st
the setting on your cable
or
satellite remote
so
its Volume buttons adjust that same
brand
of
Aux
or
Audio device. There are
two
adjustments you
may
need
to
make
on
the
cable
or
satellite remote.
Cable/Sat remote adjustment
1:
The
volume buttons
on
a cable
or
satellite
remote are typically locked adjust
on
the
1V's
internal speakers. Even if you press the
"Cable" button on your remote, the volume
buttons will still send
out
volume
commands
for your1V,
not
the cable box.
You
need
to
unlock the Cable/Sat remote volume buttons
according
to
the cable
or
satellite remote
control's instructions.
Once
unlocked,
pressing
Aux
on
the
Cable/Sat remote
will then cause
the
volume buttons on
the
Cable/
Sat
remote
to
control whatever brand
of
device is set
on
the Aux button.
Cable/Sat remote adjustment
2:
The
cable/satellite remote instructions will also tell
you
how
to
set the "AUX"
or
"AUDIO" button
to
the brand you chose on
the
SoundBase
PS menu.
The
instructions should list a
few
numb
ers
th
at let you control a devi
ce
that
responds
to
Sony codes,
for
instance.
Try
the
different
"number
code"
options
listed until you find
one
that controls the
SoundBase. Ifyou cannot find a
code
that
controls
the
SoundBase, you can set
the
Sound
Base
to
one
of
the
other
four brands
available a
nd
search
for
a
co
mpatible
code
for that brand.
Once you find a
code
number
that controls
the SoundBase, you can then "lock" the
cab
le
or
satellite remote volume buttons
to
adjust only the Aux
or
Audio device and
not
the
1V.
On
ce
locked,
th
e volume buttons
will a
lw
ays
co
ntrol the SoundBase, even
if a
1V
/Cab
le/Satellite/DVD button on the
Cable/Satellite remote control is pressed.
MasterReset
A master
reset
restores a SoundBase to
the factory default
behavior.
It
erases
any
"learned"
remote
control
response.
It
sets
the
SURROUND
mode to Surround "2",
sets
OUTPUT
LEVELING
and
DIALOG
EMPHAS
IS
to
OFF
and
sets
BASS
and
TREBLE
to no boost orcut
in
bass ortreble
output.
It
sets
the
INPUT
to
Op
t
ical
Input 1.
To
perform the Master
Reset,
first put the
SoundBase
in
Standby mode
by
pressing
the
POWER
button
on
the
SoundBase
remote control.
When
you
see
"OFF"
on
the
SoundBase
display,
the unit
is
in
Standby.
You
can
also put a SoundBase
in
Standby
by pressing down
on
the
front
panel
MUTE
button for about 5-7 seconds.
Once
the
SoundBase
is
in
Standby,
locate the
I
NPUT
button on
the
face
ofthe SoundBase.
(You
cannot
use
the
INPUT
button on the
remote to perform a Master
Reset.)
Press
and
ho
ld down t
he
front
panel
INPU
T
button for about
15
to
20 seconds.
When
you
see
the
three
letters "r S t "appear on the
display
(see
figure
below)
,
re
l
ease
the I
NPUT
button. T
he
Sound
Base
wi
ll
then
show the
four-dig
it
firmware code number and turn "ON".
The
RESET
is
complete.
RESET
Ind
ication.
(866) 367-9869 Iinfo@zvoxaudio.com
C 2014
lYVOX
Audio LLC.
Your
Current
lV
Remote ®
After following thesteps outlined
in
thisguide,
your
cable remote will
adjustthe volume output from your SoundBasesystem. Please Note: remote control.
To
insureaccuracy, thelearning routine recor
ds
each
button's commands twice, then confirms a successful recording.
If
you havea DirecTV remote control, use the DirecTV remote guide
included along with this instruction sheet.
The steps involve pressing theVolume, Mute, and Powerbuttons
of
your
preferred remote control with it positioned close
to
the numericdisplay
of
the SoundBase. Once
comp
lete, the SoundBase will respond
to
thesebuttonsfrom
your
preferred remote,
In
addition
to
the SoundBase
~o
x-
Audio has specific Instruction setsavailable
for
a variety of
popularremotecon
tr
ols. These instructionsprovidean alternate method
for
configuring
your
SoundBase
to
respond to your preferred remote
control.
If
you can not easily teach theSoundBase
to
respond to your
preferred remote control, please contact
~OX
Audioabout additional
instructions for your preferred remote control.
Sit
within
easy
reach
of
the
SoundBa
se
system
's
front
control
panel.
You will need
to
press
two
buttons
on
the SoundBase system front panel to
start the learning process, then press
four
remote control buttons.
PREPARE
Locate
the
following
buttons
on
your
remote
control:
O
voLUMEUP
fJ
VOLU
ME
DOWN
~
MUTE
9
POWER
The learning process
involves pressingthese
four
buttons
in sequence.
This
remote
Is
only
an
example.
Your
remo
teIsprobablydifferent.
Please
locateth
es
ebuttons onyourremote.
Press
both
SoundBase
s
ystem
VOLUME
buttons
until
"
Lrn
"
appears
(about
4 s
econd
s). Then
release
both
VOLUME
button
s.
• Get ready
to
press
VOLUME
UP
on the
Remote Control.
Error
Message
of
the
SoundBase
Learning
Routine
1
·-r
~'
(-
:-.
t..
--
r
If
you see the "
no
change" message (
nocH
) during the learning routine, the
SoundBase system system
did
not
accept
the infrared code. The current step
in the learning routine will repeat.
volume up
When !fia.lappears, press
VOLUME UP
for
1 second.
·
··
~
••
••
••
w
You
should see
....
·.·•
··
I ,• l
,·
··
\·-·
:·····
' ••.v •
When W appears, press
VOLUME UP
for
1 second, again.
You
should see
•••
followed
by
~
LEARN BUTTONS
volume down
dn
2
When
l:m
appears, press
VOLUME DOWN f
or
1second.
••
•. . .
..
·~
·~
Yl'
You
shouldsee
WhenW appears, press
VOLUME DOWN for 1 second, again.
You
shouldsee
•••
followed
by
~
.
mute
.
..
......
..,..,
.
•v.•
When
~
appears, press
MUTE for 1second.
•••. ...... ...., w
You
shouldsee
When W appears, press
MUTE
for
1 second, again.
::::~~-
.·
••·.
.
••.·.
.
.....
}
: \ ·. .
..
..
.·
....
•
·.·.·•
··.·.·•
·
....
·
You should see
followed
by
~
YOU ARE DONE!
p
ower
When
~
appears,press
POWER for 1second.
I
I
·-· ·-·
,_,
.w
You
should see
.·
.·
.·
r ·
r··
:
....
. •
·.·.·
.
When m appears, press
POWER
for
1 second, again.
·:·
·
·:
;.
·~::.:~
{:.~:·
.=
..
~.~;:
:-.-~
·
.:~·
You
should see
followed
by
~
For
USA
SoundBase
*
Owners:
Altern
a
tive
Adjustment
Guide
For
Some Remote
Controls
Issued
by
USA
Cable and
Satellit
e TV
Provider
s.
This guide applies to specific remote controls from DirecTV, Dish, Verizon
FIOS, Comcast and AT&T th
at
have an AUX orAUDIO button.
If
you have a
remote control with just two device
bu
ttons (TV and Set Top Box), you should
"teach" your SoundBase to respond to your remote control as described
in
the instruction sheet titled
Your
Current
TV
Remote
Can
Control
Your
SoundBase
System
. Please confirm that your remote has the same device
keys as shown
in
the image on the relevant page
of
these instructions.
These instructions address the following situtations:
1) Your remote control does not
ad
just the SoundBase volume after follow-
ing
th_e
instructions
in
the guide titl
ed
Your
Current
TV
Remot
e Can
Control
Your
SoundB
a
se
System
.
2) Your TV has no
"i
nternal speakers off' feature and the poor sound from
yourTV interferes with the SoundBase audio.
3) Your
TV
displays an intrusive "TV Speakers
Off
' message after teaching
the SoundBase to respond to your preferred remote control and turning off
the internal TV speake
rs.
Two Device Re
mot
e control
There are
TV
and
STB
buttons,
but
no
AUDIO
or
AUX
button.
Re
mot
e control
with
AUX
Button
Besides
the
TV
and
STB
buttons,
this
remote has an
AUX
button.
©
201
4 ZVOX Audio LL
C.
(866) 367-9869
I
info@zvoxaudio.com
The Sound
Base "learn your remote" feature does not work
with many DirecTV remotes. The following instructions
should be used to adjust a DirecTV remote to control a
ZVOX
Audio Sound
Base.
DirecTV
remote
RC65,
RC66
and
similar
DirecTV
remotes:
Configure the ZVOX Audio speaker:
On the front panel of the ZVOXAudio speaker:
a) Press and hold down both the Mute/Power button and the
Volume Up button until you see "PS" on the display.
b) Release the buttons.
c) Press and release the Volume Up button until you see "PS-5"
("PS-3" for Panasonic TV)
d) Wait until the "PS-5"
or
"PS-3" display disappears.
Then, configure the DirecTV remote:
a) Move the slider button
at
the top
of
the DirecTV remote over
to the
AV1
position.
b) Press and hold the MUTE and SELECT buttons until the light
above
AV1
blinks twice.
c)
Enter 11480 (10812 for PanasonicTV). The
AV1
lightwill
blink twice.
d) Press and hold the MUTE and SELECT buttons until the light
above
AV1
blinks twice.
e) Enter 993 and then press SELECT.
f)
Move the slider button to the left, back
to
the DirecTV icon.
The
DirecTV remote now powers your
TV
on/off,
while the volume control will control
your
ZVOX.
DirecTV
remotes
RC23,
RC32
:
Configure the ZVOXAudio speaker:
On the front panel
of
the ZVOX Audio speaker:
a) Press and hold down both the Mute/Power button and the
Volume Up button until you see "PS" on the display.
b) Release the buttons.
c) Press and release the Volume Up button until you see "PS-5"
("
PS-3" for Panasonic TV)
d)
Wait until the "PS-5"
or
"PS-3" display disappears.
Then, configure the DirecTV remote:
a) Move the slider button at the top
of
the DirecTV remote over
to
the
AV1
position.
b) Press and hold the MUTE and SELECT buttons until the light
above
AV1
blinks twice.
c) Enter 10250 (10812 for Panasonic
TV)
. The
AV1
light will
blink twice.
d)
Press and hold the MUTE and SELECT buttons until the light
above
AV1
blinks twice.
e) Enter 993 and then press SELECT.
f)
Move the slider button to the left, back
to
the DirecTV icon.
The DirecTV remote now powers your
TV
on/off,
while the volume control will control your ZVOX.
-
--
....
....
-
lt65X
TV
INPUT
')
FOitMAT
()
Dish
Network
Remote
20.1
IR
or
21.0
IR:
These instructions describe howto configure your Dish
Network remote to control the volume from your ZVOXAudio
system and not from your
TV
.
The following instructions apply to any
TV
brand except
Panasonic. Ifyou havea Panasonic
TV
, use the alternate
instructions below.
For
any
TV
brand
except
Panasonic:
Part 1:
Configure
the
ZVOX
system
1. Power on yourZVOX system.
2. On the ZVOX system front panel, press and hold down both
MUTE and VOLUME UP until PS-0 appears on the display
(about 5-6 seconds). Release the buttons.
The PS-0 display will continue flashing for about 5 seconds.
3. While PS-0 is flashing, repeatedly press VOLUME UP until it
reads "PS-5
".
W
ait
for the display to stop
fl
ashing.
P
art
2:
Configure
·
your
Dish
Network
remot
e
Program code to the
AUX
button
1. On the Dish Network remote control, press and hold the AUX
button until all the other mode buttons light up, and then release
the
AUX
button. The
AUX
button flashes.
2. Enter 0-5-1-2 then press the pound key (#).
The AUX key will blink three times.
Lockthe volume buttons to the
ZVOX
1. Press and hold theAUX mode button until all mode buttons
light up, then release i
t.
TheAUX mode button will blink.
2 Press the
POUND(#)
button, press the plus (+) side
Of
the VOLUME button, press the 0 numberbutton,
press the POUND (#) button. The
AUX
mode button flashes
three times.
3. Press the SAT mode button then Press the
plus(+)
and
minus(
-) sides
of
the VOLUME button down simultaneously
and release them.
You
havejust completed the programming. When
you press VOLUM
E+,
VOLUM
E-
,
or
MUTE, the volume
of
the
SoundBase will respond regardless
of
which device button on
the
Di
sh Network remote was last pressed.
20. 1 IR above, 2 1.0 lR bel
ow
Dish
Network
Remote
20.1
IR
or
21.0
IR:
FOR
PANASONIC
TVs
:
P
art
1: Con
fig
ure
the
So
u
nd
Ba
se
sys
tem
1. Power on your ZVOX system.
2. On the ZVOX system front panel, press and hold down
both MUTE and VOLUME UP until PS-0 appears on the
display (about 5-6 seconds
).
Release the buttons.
The PS-0 display continues flashing for about 5 seconds.
3. While PS-0 is flashing, repeatedly press VOLUME UP
until it reads "PS-3
".
Wait for the display to stop flashing.
Pa
rt
2: Con
fi
gure
yo
ur Di
sh
Ne
tw
o
rk
r
emote
Program code to the
AUX
button
1. On the Dish Network remote control, press and
hold the AUX button until all the othermode buttons
light up, and then release the AUX button.
TheAUX button flashes.
2. Enter0-8-5-8 then press the pound key (#).
The AUX key will blink three times.
Lockthe volume buttons to the
ZVOX
1. Press and hold theAUX mode button until all
mode buttons are lit, then release i
t.
The AUX
mode button will blink.
2. Press the
POUND(#)
button, press the plus (+) side
of
the VOLUME button, press the 0 number button,
press the POUND (#) button. TheAUX mode button flashes
three times.
3. Press the SATmode button, then press down the
plus(+)
and
minus(-
) sides of the VOLUME button
simultaneously and release them.
You havejust completed the programming. When
you press
VOLUME+
,
VOLUME-
, or MUTE, the volume
of
the Sound
Base will respond regardless
of
which device
button on the Dish Network remote was last pressed.
20.1 IR above, 21.0
IR
below
Comcast
Custom
DVR
3-Device
Universal
Remote
Control
These instructions describe how to configure your Comcast cable remote
to
control the volume from your ZVOX Audio system and
not
from your
TV.
The
following instructions apply to any TV brand except Panasonic.
If
you have a Panasonic
TV
, use the alternate instructions
be
l
ow
.
FOR ANY TV BRAND EXCEPT PANASONIC:
Part 1: Configure the ZVOX system
1. Power on your ZVOX system.
2. On the ZVOX system front panel, press and hold down both
MUTE and VOLUME
UP
until PS-0 appears on the display
(about 5-6 seconds). Release the buttons.
The PS-0 display will continue flashing for about 5 seconds.
3. While PS-0 is flashing, repeatedly press VOLUME UP until
it
reads "PS-5". Wait for the display to stop flashing.
Part
2:
Configure your Comcast remote
Activ
ate the
AUX
function
1. On the Comcast remote control, press
AUX
once.
Then
press and hold SETUP until the
AUX
key blinks
twice, then release Setup.
2. Enter 1-0-0-4-7. The AUX key will blink twice.
Assign
ZVOX code
to
the
Aux
button
1. Press
AUX
once, then press and
ho
ld Setup until
the
AUX
key blinks twice, then release Setup.
2. Enter 1-0-2-5-0. The
AU
X keywill blink twice.
Lock
t
he
volume
buttons
to
the ZVOX
1. Press
AUX
once. Then, press and
ho
ld Setup until
the
AUX
key blinks twice, then release Setup.
2. Enter 9 - 9 - 3 (the
AUX
key blinks twice) and then
press AUX once. The AUX key will blink twice.
3. Press the CABLE button once.
You have just completed the programming. Now, when
you press VOL+, VOL-, or Mute, the volume
of
the ZVOX
system is controlled regardless
of
whether the
Comcast remote is in the TV mode or Cable mode.
Comcast
DVR
3-
Device
Universal
Remote
Control
These instructions describe how to configure your Comcast cable remote
to control the volume from your ZVOXAudio system and not from your TV.
The following instructions apply to anyTV brand except Panasonic.
Ifyou have a Panasonic TV, use the alternate instructions below.
FOR
ANY
TV
BRAND
EXCEPT
PANASONIC:
Part 1: Configure the ZVOX system
1. Power on your ZVOX system.
2. On the ZVOX system front panel, press and hold down both
MUTE and VOLUME UP until PS-0 appears on the display
(about 5-6 seconds). Release the buttons.
The PS-0 display will continue flashing for about 5 seconds.
3. While PS-0 is flashing, repeatedly press VOLUME
UP
until
it reads "PS-5
".
Wait for the display to stop flashing.
Part 2: Configure your Comcast remote
Activat
e the AUXfunction
1.
On the Comcast remote control, press
AUX
once.
Then press and hold SETUP until the
AUX
key blinks
twice, then release Setup.
2. Enter 1-0-0-4-7. The AUX key will blink twice.
A
ssign
ZVOX
co
de
to
theAwe
button
1.
Press AUX once, then press and hold Setup until
the AUX key blinks twice, then release Setup.
2.
Enter 1-0-2-5-0. TheAUX key will blink twice.
Lock
the
volume
buttons
to
the
ZVOX
1. Press AUX once. Then, press and hold Setup until
the AUX key blinks twice, then release Setup.
2. Enter
9-9-
3 (the AUX key blinks twice) and then
press
AUX
once. The AUX key will blink twice.
3. Press the CABLE button once.
You have
just
completed the programming. Now, when
you press VOL+, VOL-,
or
Mute, the volume
of
the ZVOX
system is controlled regardless
of
whether the
Comcast remote is
in
the
TV
mode or Cable mode.
@omcast
.

Other manuals for SoundBase 450

3

This manual suits for next models

1

Other Zvox Audio Speakers System manuals

Zvox Audio SB380 Manual instruction

Zvox Audio

Zvox Audio SB380 Manual instruction

Zvox Audio SB700 Specification sheet

Zvox Audio

Zvox Audio SB700 Specification sheet

Zvox Audio Z-Base 555 User manual

Zvox Audio

Zvox Audio Z-Base 555 User manual

Zvox Audio ZB550 HSD User manual

Zvox Audio

Zvox Audio ZB550 HSD User manual

Zvox Audio SoundBase 450 User manual

Zvox Audio

Zvox Audio SoundBase 450 User manual

Zvox Audio ACCUVOICE AV205 User manual

Zvox Audio

Zvox Audio ACCUVOICE AV205 User manual

Zvox Audio Z-Base 555 User manual

Zvox Audio

Zvox Audio Z-Base 555 User manual

Zvox Audio 430HSD User manual

Zvox Audio

Zvox Audio 430HSD User manual

Zvox Audio ZVOX 325 User manual

Zvox Audio

Zvox Audio ZVOX 325 User manual

Zvox Audio AV205 User manual

Zvox Audio

Zvox Audio AV205 User manual

Zvox Audio SB400 Manual instruction

Zvox Audio

Zvox Audio SB400 Manual instruction

Zvox Audio SB700 Manual instruction

Zvox Audio

Zvox Audio SB700 Manual instruction

Zvox Audio SB500 Manual instruction

Zvox Audio

Zvox Audio SB500 Manual instruction

Zvox Audio SoundBase 220 User manual

Zvox Audio

Zvox Audio SoundBase 220 User manual

Popular Speakers System manuals by other brands

Peavey PR 600 Specification sheet

Peavey

Peavey PR 600 Specification sheet

Vizio VSB210WS - V - Home Theater Speaker Sys user manual

Vizio

Vizio VSB210WS - V - Home Theater Speaker Sys user manual

QSC SC-414 Specifications

QSC

QSC SC-414 Specifications

Yamaha PC-8 owner's manual

Yamaha

Yamaha PC-8 owner's manual

Monacor EUL-2/SW manual

Monacor

Monacor EUL-2/SW manual

LENCO MC-129 MP3 RDS manual

LENCO

LENCO MC-129 MP3 RDS manual

TAD TAD-R1 owner's manual

TAD

TAD TAD-R1 owner's manual

Benwin ECCO USB-P 2.0 user manual

Benwin

Benwin ECCO USB-P 2.0 user manual

Philips audio players user manual

Philips

Philips audio players user manual

Soundstage CS200B owner's manual

Soundstage

Soundstage CS200B owner's manual

Yamaha YAS-201 owner's manual

Yamaha

Yamaha YAS-201 owner's manual

Fenton Jellyball FT12JB instruction manual

Fenton

Fenton Jellyball FT12JB instruction manual

SWEEX SP300 - ARENA 2.0 manual

SWEEX

SWEEX SP300 - ARENA 2.0 manual

Creative N400 quick start guide

Creative

Creative N400 quick start guide

Onkyo D-30PC5X Service manual

Onkyo

Onkyo D-30PC5X Service manual

Sharp PS-920 user manual

Sharp

Sharp PS-920 user manual

iLive IHB23B user manual

iLive

iLive IHB23B user manual

iLive ISB172 user manual

iLive

iLive ISB172 user manual

manuals.online logo
manuals.online logoBrands
  • About & Mission
  • Contact us
  • Privacy Policy
  • Terms and Conditions

Copyright 2025 Manuals.Online. All Rights Reserved.