Zylight Z50 User manual

MECHANICAL
SIZE:
WEIGHT:
MOUNTING:
ELECTRICAL
INPUT:
DC PLUG:
AC ADAPTER:
POWER:
OUTPUT
BEAM ANGLE:
DIMMING:
PRESETS:
LED LIFE:
5.4" x 2.0" x 2.0" [137mm x 51mm x 51mm]
11oz. [314g]
Two: 1/4"-20 Socket
9-20V DC
OD: 5.5mm, ID: 2.1mm
100-240V, 50-60Hz
30W max. [2.5A max. @ 12V]
163°
1% - 100%
Color Mode - Two: User defined
White Mode - Two: 3200K, 5600K
10,000 Hours
Z50 SPECIFICATIONS
THE ZYLIGHT Z50 IS PROTECTED BY THE FOLLOWING U.S.
AND FOREIGN PATENTS WITH OTHER U.S. AND FOREIGN
PATENTS PENDING:
US 6,016,038
US 6,150,774
US 6,211,626
US 6,340,868
CA 2,302,227
EP 1 016 062 B1
AU 757000 B2
HK 1025416
DE 698 07 092 C0
Zylight LLC
PO Box 54
Chelmsford, MA 01824
www.zylight.com
This device complies with part 15 of the FCC Rules. Operation is subject to the following two conditions: (1)
This device may not cause harmful interference, and (2) this device must accept any interference received,
including interference that may cause undesired operation. Changes or modifications not expressly approved
by the party responsible for compliance could void the user's authority to operate the equipment.
Per FCC 15.105(a), Note: This equipment has been tested and found to comply with the limits for a Class A
digital device, pursuant to part 15 of the FCC Rules. These limits are designed to provide reasonable
protection against harmful interference when the equipment is operated in a commercial environment. This
equipment generates, uses, and can radiate radio frequency energy and, if not installed and used in accor-
dance with the instruction manual, may cause harmful interference to radio communications. Operation of
this equipment in a residential area is likely to cause harmful interference in which case the user will be
required to correct the interference at his own expense.
US 6,608,453
US 6,777,891
US 6,788,011
US 6,806,659
© Copyright 2003-2006 Zylight LLC. All rights reserved. 24-07001 Rev. 2
Z50
Intelligent LED Light
USER GUIDE

2
Thank you for choosing Zylight.
We at Zylight are happy that you chose the Z50. There
are many lighting systems out there to choose from,
and we think you will agree that what you hold in your
hands is the most versatile production light instrument
on the planet.
At Zylight our mission is to bring truly intelligent lighting
to your shoots. With its small size and weight, the
amazing HD-led™ module, and ZyLink™ technology,
the Z50 represents the most advanced lighting instru-
ment for film and video production today.
The people who engineered and built your Z50 are the
same folks who will answer any questions you may
have about it. We use our lights everyday, and would
love to hear any comments or suggestions you may
have about how we can improve our products.
The Z50 may be small, but what it will do for your
shoots is big news!
Enjoy,
- The Zylight Team
www.zylight.com
7
Adding a Z50 to an Existing Group
To add a Z50 to an existing group, the process is the same as in How To
ZyLink™. Simply push in and hold the POWER button on the light you wish to
add to the group until the output changes and the target group flashes. If there
are multiple groups on your shoot, repeat the process until the light in your
hands is linked to the correct group.
Removing a Z50 from a group
To remove a Z50 from a group, simply unplug the Z50 then plug it back in. The
light will now operate independently.
Using the Accessory Adapter
Overview
The Z50’s Accessory Adapter allows you to mount most standard lighting ac-
cessories with a 3-inch mounting flange, such as a soft box, snoot, or
barndoors. Accessories with a mounting flange up to 0.075” thick can be
mounted.
Mounting the Accessory Adapter
1. Remove the lens cap from the Z50.
2. Position the Accessory Adapter over the front of the Z50 as shown below
with the two mounting prongs straddling the sides. Make sure the Adapter
is resting against the front of the light.
3. Turn the Accessory adapter counter-clockwise until the two spring clips
snap over the corners of the light. The Adapter is now mounted.
Mounting the Accessory
To mount the lighting accessory, simply slide the accessory’s flange over the
locking tab and into the three retention hooks.
Removing the Accessory
To remove the accessory, gently depress the locking tab and slide the acces-
sory’s flange out of the three retention hooks.

6
Presets
In COLOR mode you can save two of your favorite colors as presets. The preset
buttons P1 and P2 work like those on a car radio: To save a color push and hold
the button for ~1 second. The status light will flash to show the color has been
saved. To recall a saved color push and release the appropriate preset button.
All aspects of your preset colors (hue, pastel, and intensity) are stored in the
preset. Preset colors are retained even after you remove power from the Z50.
In WHITE mode the presets buttons are fixed at 3200K and 5600K white output.
Using ZyLink™ (patent pending)
Overview
Every Z50 is able to be wirelessly linked to other Z50s, creating a group of
lights that will operate in concert as if they were one larger light. The group can
contain as many Z50s as you need. Adjusting the controls on one Z50 in the
group will change all of the other lights in the group.
You can have Z50s operating independently on the same shoot that you have
linked Z50s. Any independent Z50 can be added to the existing group, and any
linked Z50 can be removed from the group.
How to ZyLink™
1. Plug in and turn on at least two Z50s.
2. Push in and hold the POWER button on one Z50 for ~3 seconds, then re-
lease the button. ZyLink™will then be enabled on that light.
3. Do the same thing to the second light: Push in and hold the POWER button
for ~3 seconds, then release the button. ZyLink™will then be enabled on
that light as well.
Turning off a Group of Z50s
To turn off a group of Z50s, push and release the POWER button on any one of
the lights in the group. All lights in the group will turn off. Repeat the process to
turn the lights back on again. DO NOT unplug or remove power from any Z50 in
a group or that particular light will be un-linked.
— Tip: Removing power from any linked Z50 will also un-link it. Do not
remove power from any light or group of lights you wish to remain linked.
You will then have to repeat the ZyLink™ process.
3
Z50 Overview
3200K &
P1Button POWER Button
Status Light
5600K &
P2Button
DC Power
Jack
Small Knob
(Hue &Mode)
Big Knob
(Intensity) 1/4”-20 Mount
(Top & Bottom)
REAR VIEW
TOP VIEW

4
Powering the Z50
Power Cables
The Z50 should be powered only from a battery cable or AC adapter supplied
and approved by Zylight for use with the Z50.
Input Voltage
The Z50’s input voltage is 9-20 Volts DC. Most types of professional batteries
used in the video industry fall into this range, including those rated at 12V,
13.2V, and 14.4V nominal output voltage.
Power Consumption
The powerful Z50 can draw up to 30 Watts at full power (2.5 Amps @ 12 Volts,
or 2.1 Amps @ 14.4 Volts). When powering the Z50 from a battery, be sure
your battery is rated to supply up to 30 Watts continuously.
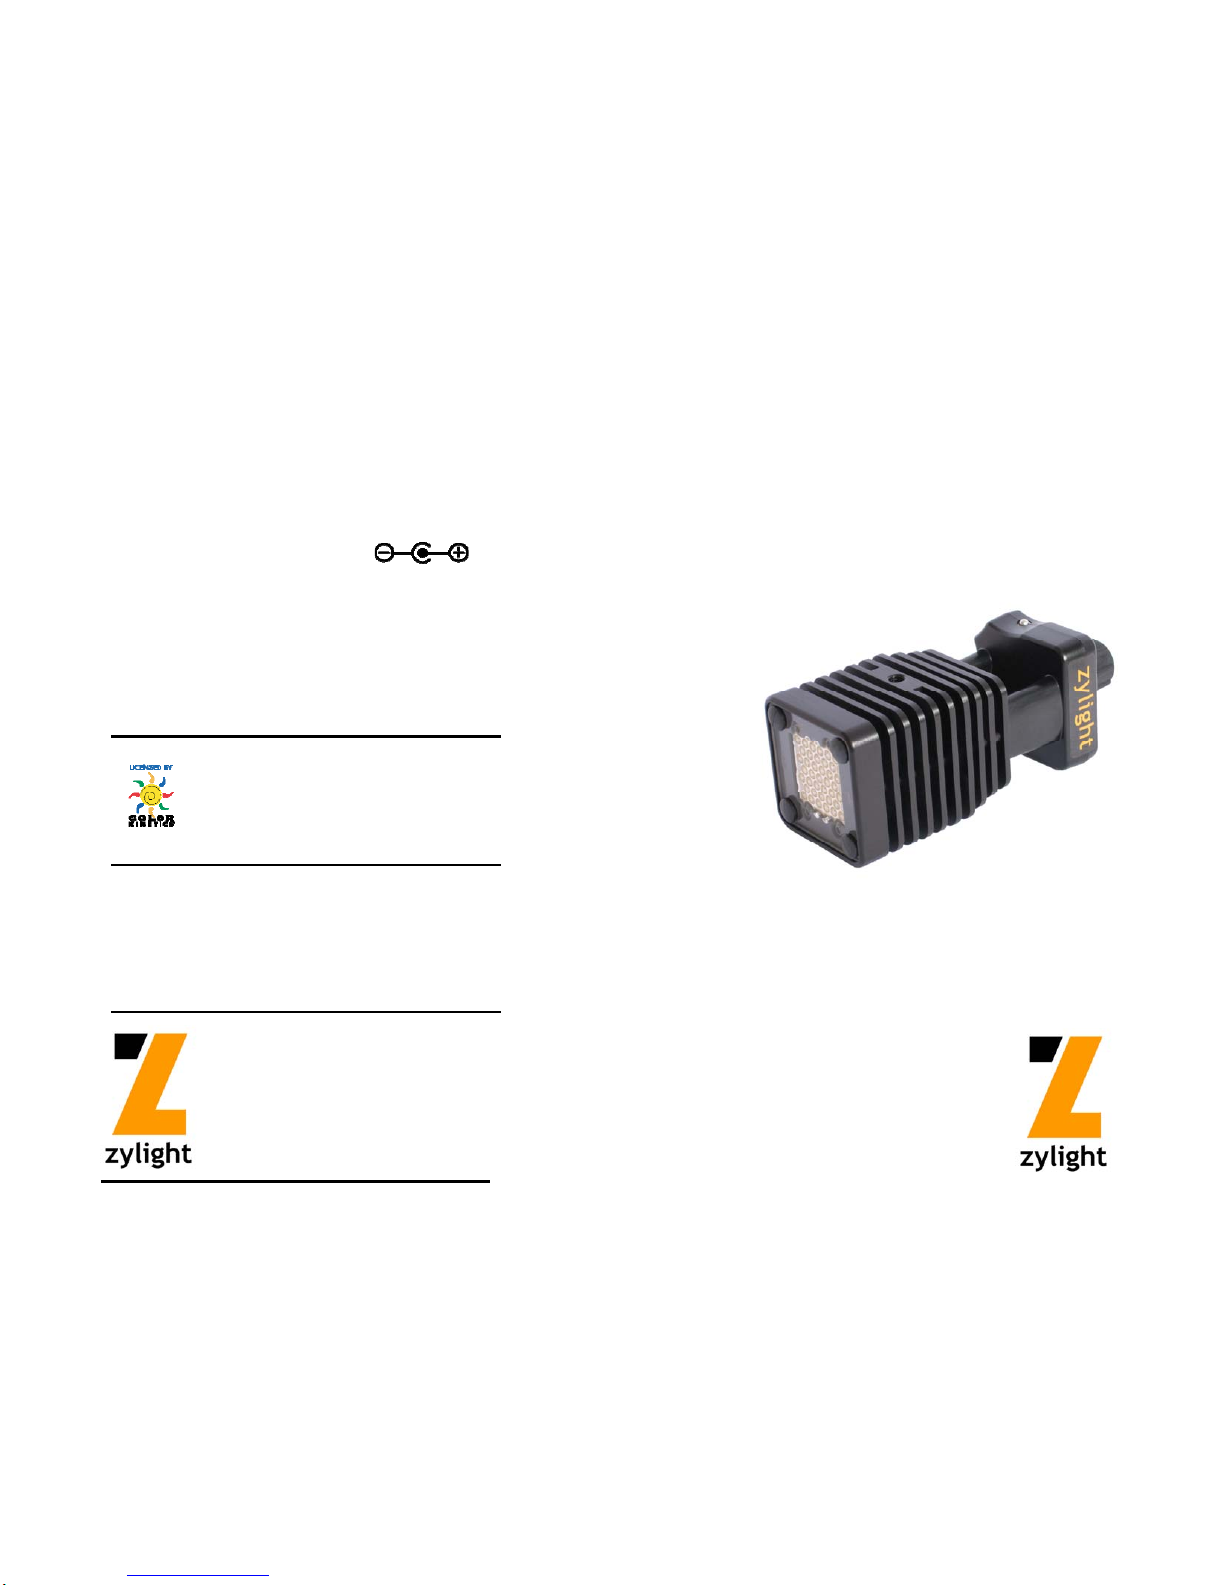
Z50 Orientation
Avoid operating the Z50 for extended periods in the lens-down orientation
(shown below left). An angle of at least 30-degrees away from the lens-down
position is necessary to effectively dissipate heat (shown below right).
!!! WARNING: The input voltage to the Z50 must remain below 20
Volts. Application of excessive voltage, or reverse polarity voltage, will
void the factory warranty and possibly cause damage to the Z50.
>30°
— Tip: The Z50 will draw the most power in WHITE mode at full bright-
ness. The power draw can be significantly reduced by dimming the
output.
5
— Tip: Be careful not to inadvertently push in the small knob while
changing hues. This will add unwanted pastel and the output will look
white. If your color output looks ‘white’, first confirm that you are in
COLOR mode (blue status light), then push in the small knob and turn
counter-clockwise to remove the pastel.
Using the Z50
Power
The Z50 accepts 9-20 Volts DC from either the supplied battery cable or AC
adapter. The status light will glow whenever power is applied.
Before turning on the Z50, be sure to remove the lens cap. Operating the Z50
with the lens cap in place could cause overheating.
Turning the Z50 On and Off
Push the Z50’s POWER button to turn the light on and off. If the LEDs do not
come on, the light is dimmed down; turn the big knob clockwise to increase the
intensity.
Dimming
Turn the big knob clockwise to increase the Z50’s intensity, counter-clockwise
to decrease intensity.
Modes
The Z50 operates in two modes: WHITE and COLOR. To switch between modes,
push in and hold the small knob for ~1 second. The status light indicates the
mode:
WHITE Mode
In WHITE mode the Z50 outputs 3200K or 5600K white light.
Push the appropriate preset button to change the output.
Note: Turning the small knob in WHITE mode does nothing.
COLOR Mode
In COLOR mode the Z50 can output a multitude of colors. Turn the
small knob in either direction to change the hue of the output. The hue
Will gradually cycle continuously through red, green, blue, and every
color combination in between.
Adding Pastel (COLOR mode only)
After you have found the color you like, you can add or subtract white (pastel)
by pushing in the small knob while turning it. Turn the knob clockwise to add
pastel, counter-clockwise to subtract.
— Tip: When spinning the small knob be careful not to inad-
vertently turn the big knob with the tips of your fingers. This
will cause unwanted changes to the output intensity.
White status light = WHITE mode
Blue status light = COLOR mode
Other Zylight Lighting Equipment manuals
Popular Lighting Equipment manuals by other brands

Larson Electronics
Larson Electronics EPL-HB-50LED-RT instruction manual

Luci
Luci SHIN FLEX Indoor instruction manual

ADJ
ADJ ILLUSION DOTZ 3.3 User instructions

thomann
thomann Stairville PAR 56 user manual

HUDSON VALLEY LIGHTING
HUDSON VALLEY LIGHTING mitzi AIMEE installation instructions

Artistic Licence
Artistic Licence railSplit dmx user guide