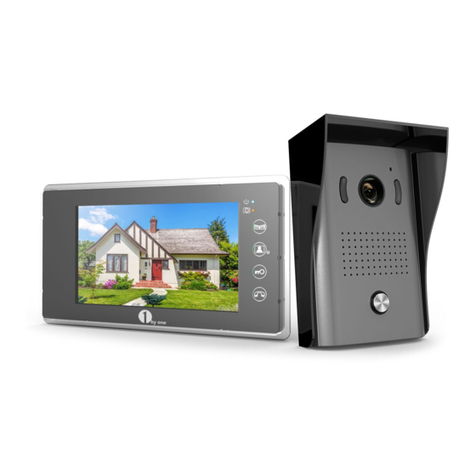
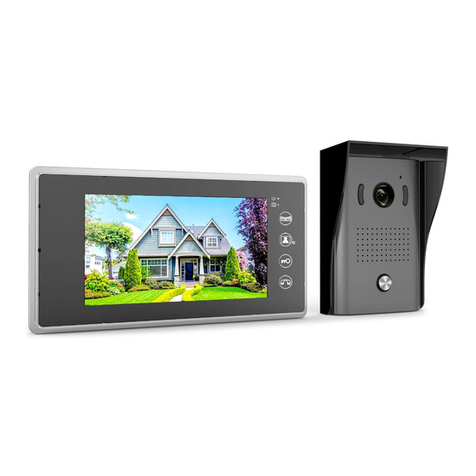
1 BY ONE 000VP-0406 User manual

www.1byone.com
2.4G wireless video door phone
Instruction Manual
O00VP-0406
□

www.1byone.com www.1byone.com
CONTENT
1.Features
2.Outdoor Camera Performance Data
3.Indoor Monitor Performance Data
4.Indoor Monitor Installation
5.Outdoor Camera Installation
6.Menu Operation
7.Operation Instruction
8.Accessories
9.Notices
1
1
2
3
4
5
8
8
8
This instruction manual detailedly and directly expound
the operation of this product, due to the product upgrades
and the different production batch, it may be slightly
different from actual machine. If there difference, please
refer to the machine.

1. Features
2. Outdoor Camera Performance Data
1 . I R d i s t a n c e m o r e t h a n 4 M
2 . A u t o m a t i c g a i n c o n t r o l
3 . W o r k i n g t e m p e r a t u r e : - 2 0 ° C ~ 5 0 ° C
4 . O u t d o o r c a m e r a d i m e n s i o n : 9 8【W】X 1 4 2【H】X 3 8【D】m m
speaker
nameplate
infrared light
call
microphone
camera
magnetic lock
+
_
External switch
electronic
controlled-lock
unlock to go out
switch button
unlock time setting
DC 15V
Code setting
7. Operation Instruction
8. Accessories
● One indoor monitor
● One outdoor camera
● Two adapters
● Rain cover
● One iron bracket for indoor monitor
1.Do not install the indoor monitor at high temperature, high humidity place or near TV.
2.Don’t touch the monitor screen with wet hands.
3.Please use only soft cloth to clean the monitor screen or camera in order to get a clear
image. Never use dish-washing liquid, lacquer diluent, or corrosive liquid to clean.
4.Avoid throwing or hitting the units.
5.Image could be illegible if the camera is shined by strong light.
6.Don't take the unit apart casually.
7.Don’t make movement or short-circuit in the phone which unmentioned in the
instruction
9. Notices
1. 2.4G ISM digital public frequency channel: 2402~2483.5 MHZ.
2. Transmitting rate reaches up to 2Mbit/s, which greatly shortens the transmitting
time in space.
3. Full duplex audio mode. CFSK Modulation
4. Data transmission of image happens with that of audio simultaneously.
5. OV7725 camera and 7 inch TFT screen with high definition.
6. Transmission power: 16-20dBm; receive sensitivity: -90~-100dBm.
7. Operating range being up to 300meters (open area).
8. Power supply: indoor monitor, DC5V, 1000mA; outdoor station, DC15V,
1200mA.
9. Adaptive Frequency Hopping technology, having the function of sharing 2.4G
frequency band with WLAN card and Bluetooth.
10. Generating randomly telecommunication and synchronization channels with
strong anti-interference.
11.16 polyphonic melodies and volume being selected by finger touch.
12.Four outdoor stations can be connected with one indoor monitor is avilable.
13.Two kinds of brackets selected for hanging on the wall or putting on your table.
(1)When press the call button outside, indoor monitor can photo-take or video in the
condition of having SD card in the indoor monitor, Besides, you can hear the marvelous
ring, pressing the ring volume button to adjust the three different levels. You can talk
with the customer by pressing the talk button,
Then press the ring volume button to adjust the talking volume of the indoor monitor,
and unlock button to unlock the door.
(2) Touching monitoring button to monitor outdoor area, and after doing that to touch
intercom button to talk with visitor.
(3) When monitoring, press the photo-taking button to take pictures, press the video
button 3S continuously for video, then press the monitoring button to quit the video,
press talking button 2 times to come back to the menu.
(4) Menu button for operating the inside operations, using volume button to adjust left and
right, talking button to adjust up and down, photo-taking button to confirm and menu
button to return.
(5) Users can set unlock time according to their own lock, The unlock time is about 5
seconds when the two straight needles connected,1 second unconnected.
● Screws
● One plastic bracket for indoor monitor
● SD card(1G)
● USB line
www.1byone.com www.1byone.com
- 1 -- 8 -
1Byone Products Inc.
2313 E,Philadelphia Street,Unit M, Ontario,CA 91761
www.1byone.com

3. Indoor Monitor Performance Data
Performance parameters
1. Input voltage and frequency of adapter: AC110-240V/60Hz -50Hz.
2. Output voltage and current of adapter:
Indoor monitor: DC5V 1000mA.
Outdoor camera: DC15V 1200mA
3. Monitoring lasts time: 40s±10%
4. Range being up to 300meters (open area).
5. Illumination: 2LUX
6. Visual angle: 92° wide-angle
7. Working temperature: -10°C~40°C
8. Humidity: 10%-90%(RH)
10. Indoor monitor dimension:232【W】X 140【H】X 21【D】mm
④
Speaker
parameter
Screen size
resolution
Active area
Pixel size
⑤
⑥
Microphone
Indication Light
specifications unit
Inch
Dot
mm
mm
mm
7
480×3×234
154.1(H)×86.58(V)
0.107(W)×0.37(H)
①
②
③
Power Socket
4.7 Covering setting 4.8 System information
Entering the system information, press the
monitoring button 5S continuously into the
connection setting and restore factory setting
4.9 Connection setting
Choose the channel you want to connect
using the confirming button( shown it is in
the process of connecting, then press the
matching code button 3S continuously to
match the code)
4.11. Return
Select the back icon to return.
①Photo-taking/confirming button
③Ring volume/left and right button
⑤Unlock
②Menu/return button
④Monitoring/video button
⑥Talk/up and down button
169.4(W)X 100(H)X5.7(D)
Screen figure dimension
4.10 Restore factory setting
For the step 4.9 and 4.10, kindly remind you
to operate carefully.
www.1byone.com www.1byone.com
- 7 -- 2 -

4. System setting
Entering the last menu for your option
4.0 Time setting
Use the button to adjust the time and date.
4.1 Taking-photo setting
Use the arrow button to choose number
of photos at one time: 1, 2, 3. 5
4.5 Ring setting
Choose your favourite ring to confirm
4.2 Calling setting
Pressing the call button, you can set the
mode photo-taking, video or no photo no
video.
4.3 Talking time setting
Talking time can be 30s, 60s, 120s, 180s.
4.4 Video time setting
Only in the condition of video mode at the
last setting, video time setting is available.
4.6 SD card format
1. Fix the bracket of the video indoor monitor on the wall with enclosed screws
2. Hang the monitor on the bracket after finishing the wire connection. Plug the enclosed
adapter into the sockets of AC power and the monitor (Picture 1, 2).
4. Indoor Monitor Installation
12
12
34
A: Hang installation
B: Vertical Installation
Bracket
1.As shown in picture 1, insert support chip into the slot of base
2.As shown in picture 2, use two screws to fix support chip
3.Insert main unit into the support chip in the base (picture 3),then the installation
is finished (picture 4)
www.1byone.com www.1byone.com
- 3 -- 6 -

5. Outdoor Camera Installation
1
3
140~170cm
call within 30cm
4
30cm
1)Take out th e s crew s locat ed at the bottom of t h e o utdo or c amer a ( pictu re 1),
a nd t ake apart the br acke t.
2)Take out th e f our screws in th e b a ck cover, and then t ake apart the fr ont
c over (Pictu re 2 ).
3)Take off the name plate for mar king family name or ro om n ame, and then fi x t he
s crews of t he back co ver (Pictur e 3 ).
54)In s tall the outdoor camera at a height of
1 .4m-1 .7m, and m ake sure it avoi ds the
d irect sunsh ine or rai n ( Pict u re 4).
5)Fi x the bracket of th e o utdo or c amer a o n
t he w all by ti ghten ing screws , and then
f ix t he screws at the botto m o f the outdoor
c amera (Pict ure 5).
2
- 5 -
6. Menu Operation
1. Monitoring setting
Entering the monitoring setting menu, you can choose one of the four cameras for monitoring
2. Document management
Entering this interface as picture shown, video and photo documents for reviewing or deleting.
3. Brightness, chroma and ring volume setting of outdoor camera
You can choose the camera for adjusting the brightness, chroma and ring volume.
www.1byone.com www.1byone.com
- 4 -
Table of contents
Other 1 BY ONE Intercom System manuals
Popular Intercom System manuals by other brands
FARFISA INTERCOMS
FARFISA INTERCOMS MAS22S manual

Robin
Robin Robin SmartView manual

Williams Sound
Williams Sound HH1000 installation instructions
RTS
RTS IFB-828 user manual
Automatic Solutions
Automatic Solutions AB Installation & user manual
Valcom
Valcom IP bold series Installation & operation instructions
