2N StarPoint 500 Entry User manual

www.2n.czVersion
2N StarPoint
®
User Manual
3.1.0

The 2N TELEKOMUNIKACE joint-stock company is a Czech manufacturer and supplier of
telecommunicationsequipment.
Theproductfamilydevelopedby2NTELEKOMUNIKACEa.s.includesGSMgateways,private
branchexchanges(PBX),anddoorandliftcommunicators.2NTELEKOMUNIKACEa.s.has
beenrankedamongtheCzechtopcompaniesforyearsandrepresentedasymbolofstability
and prosperity on the telecommunications market for almost two decades. At present, we
exportourproductsintoover120countriesworldwideandhaveexclusivedistributorsonall
continents.
2N is a registered trademark of 2N TELEKOMUNIKACE a.s.. Any product and/or other
®
namesmentionedhereinareregisteredtrademarksand/ortrademarksorbrandsprotected
bylaw.
2NTELEKOMUNIKACEadministerstheFAQdatabasetohelpyouquicklyfindinformationand
toanswer yourquestions about2Nproducts andservices. Onwww.faq.2n.czyou canfind
informationregardingproductsadjustmentandinstructionsforoptimumuseandprocedures
„Whattodoif...“.
DeclarationofConformity
2NTELEKOMUNIKACEherebydeclaresthatthe2N StarPointproductcomplieswithallbasic
®
requirementsandotherrelevantprovisionsofthe1999/5/ECdirective.Forthefullwording
oftheDeclarationofConformityseetheCD-ROMenclosedandatwww.2n.cz.
The 2N TELEKOMUNIKACE company is the holder of the ISO 9001:2009 certificate. All
development, production and distribution processes of the company are managed by this
standardandguaranteeahighquality,technicallevelandprofessionalaspectofallour
Content

Content
1. Basic Information . . . . . . . . . . . . . . . . . . . . . . . . . . . . . . . . . . 4
1.1 Introduction . . . . . . . . . . . . . . . . . . . . . . . . . . . . . . . . . . . . . . . . . . . . . . . . . . . . . 5
1.2 Getting Started . . . . . . . . . . . . . . . . . . . . . . . . . . . . . . . . . . . . . . . . . . . . . . . . . . 6
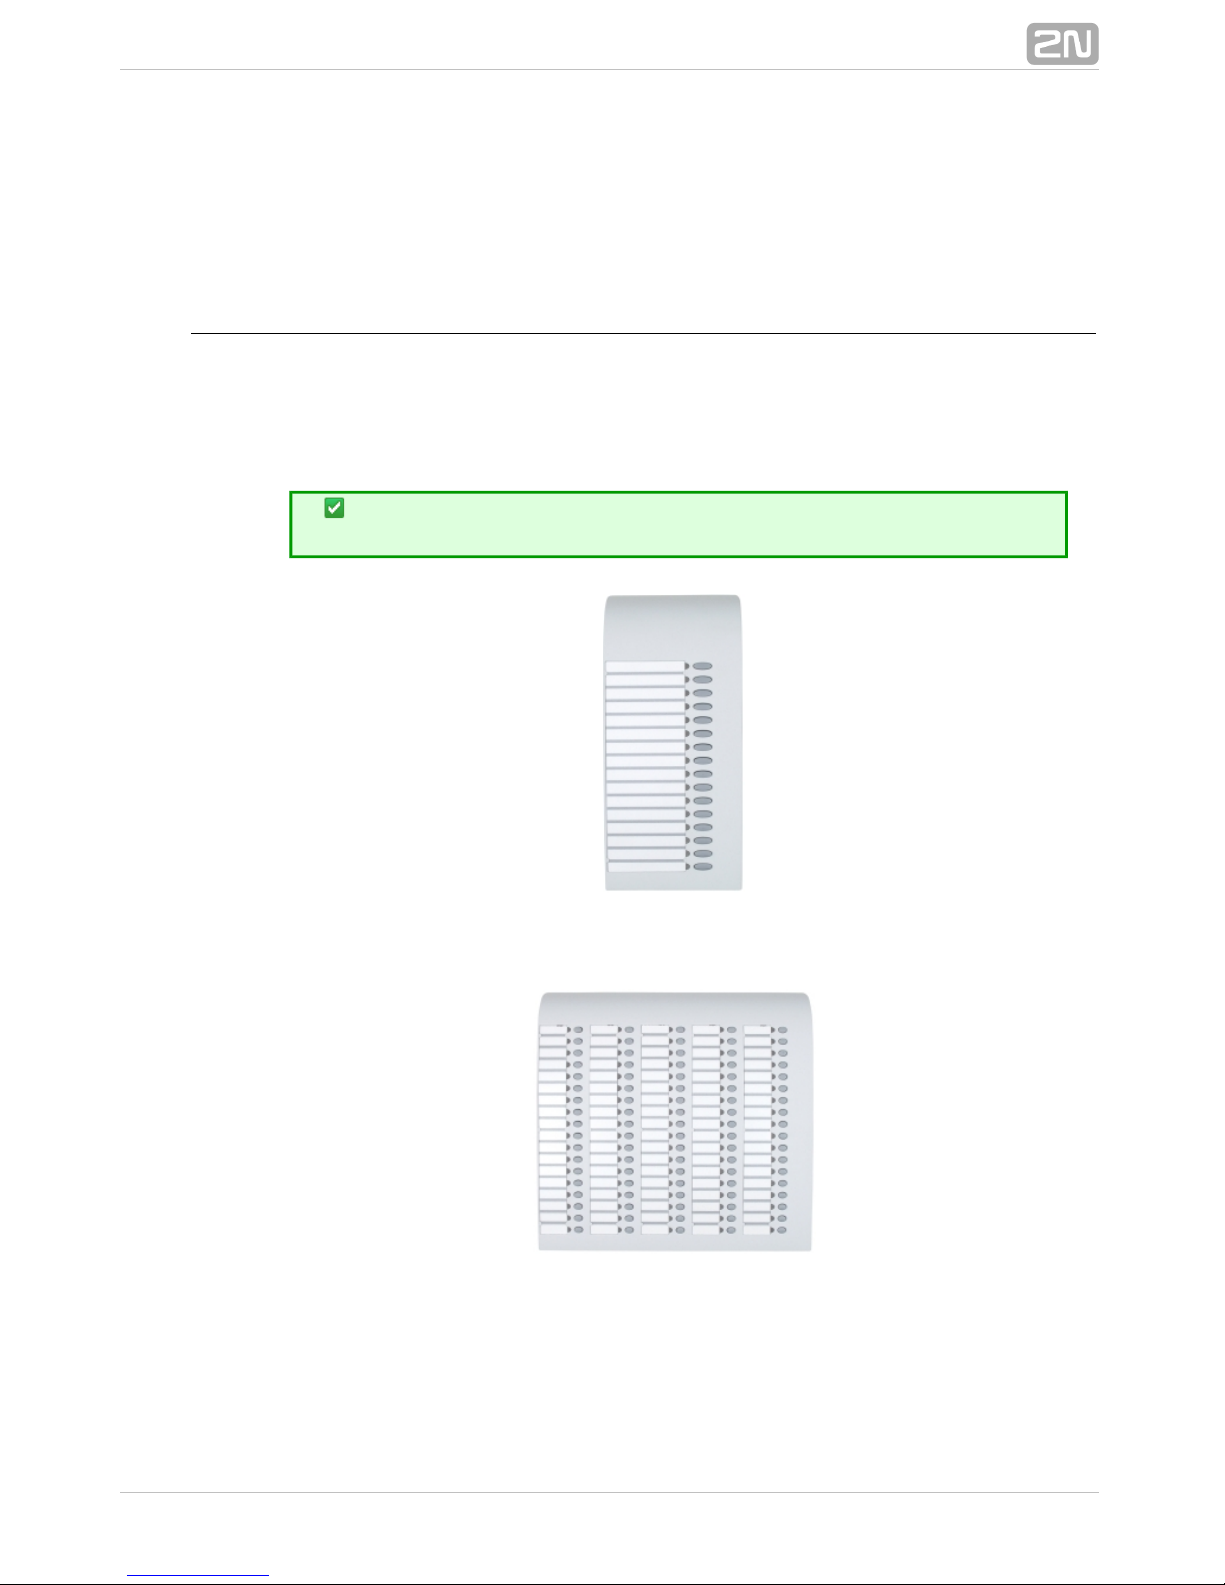
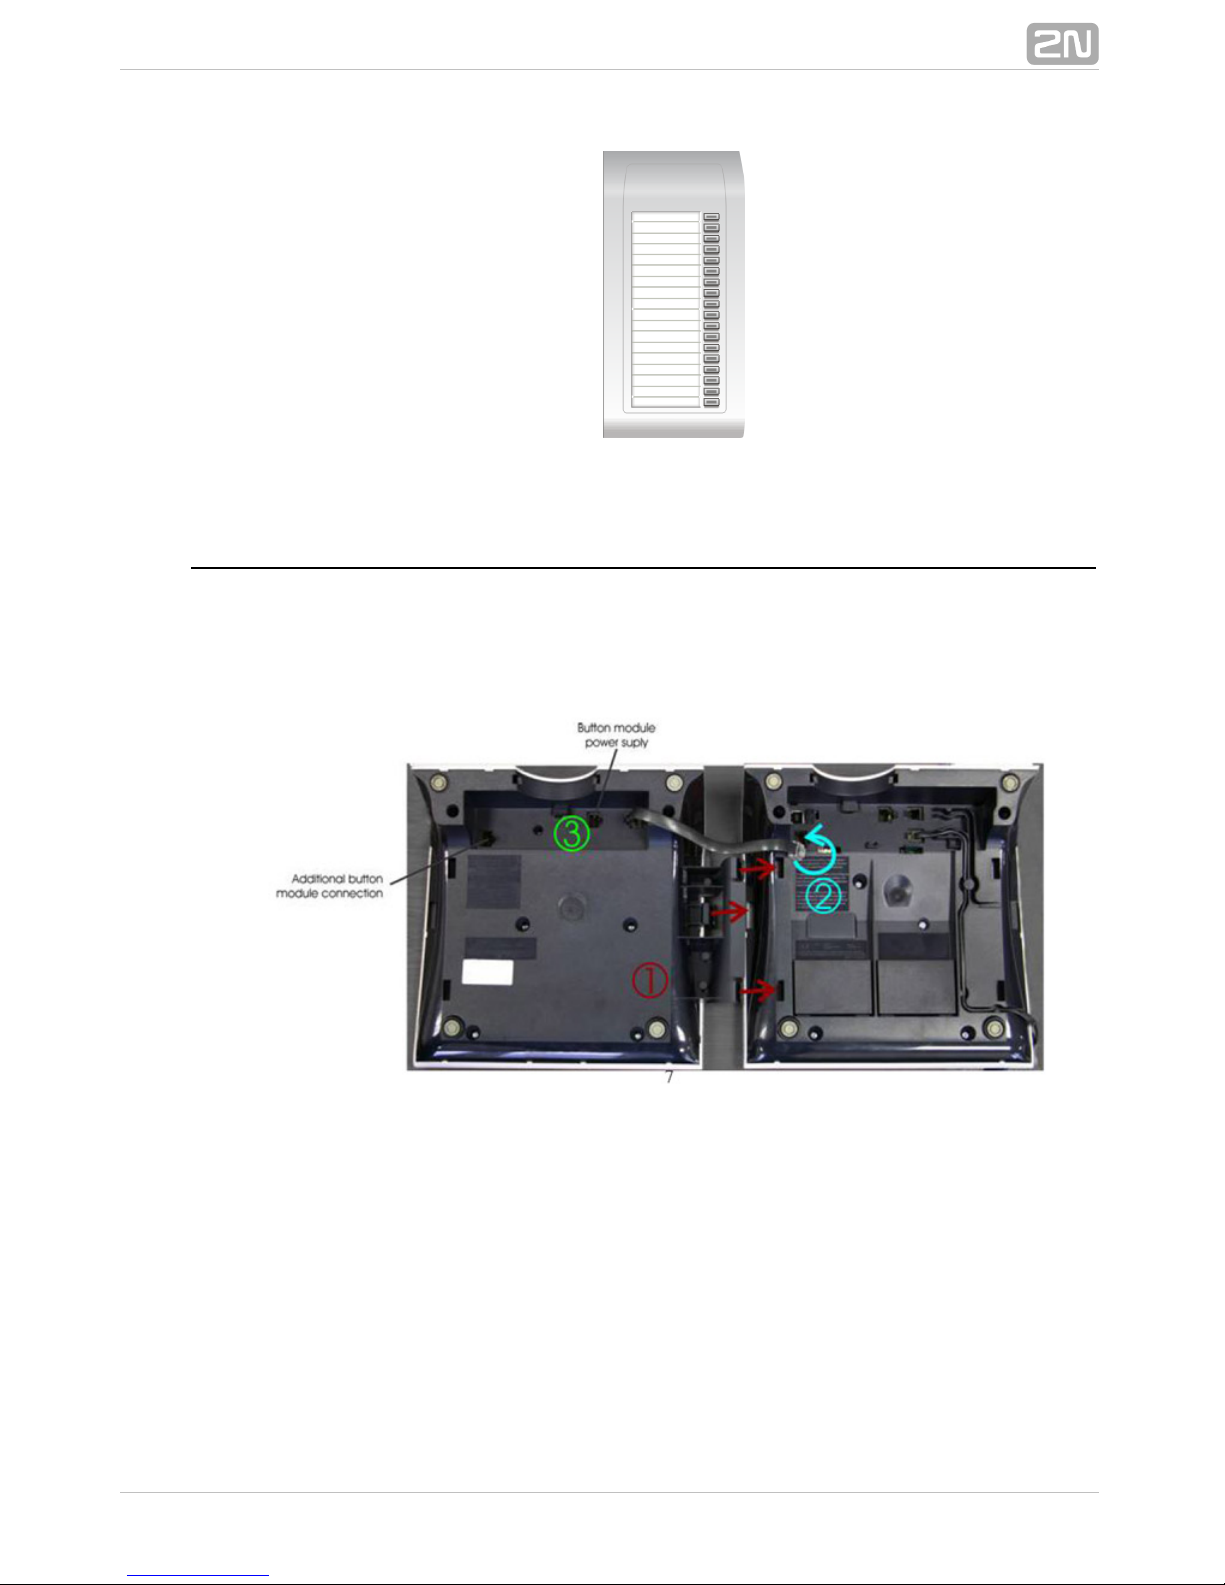
1.3 Accessories . . . . . . . . . . . . . . . . . . . . . . . . . . . . . . . . . . . . . . . . . . . . . . . . . . . . 7
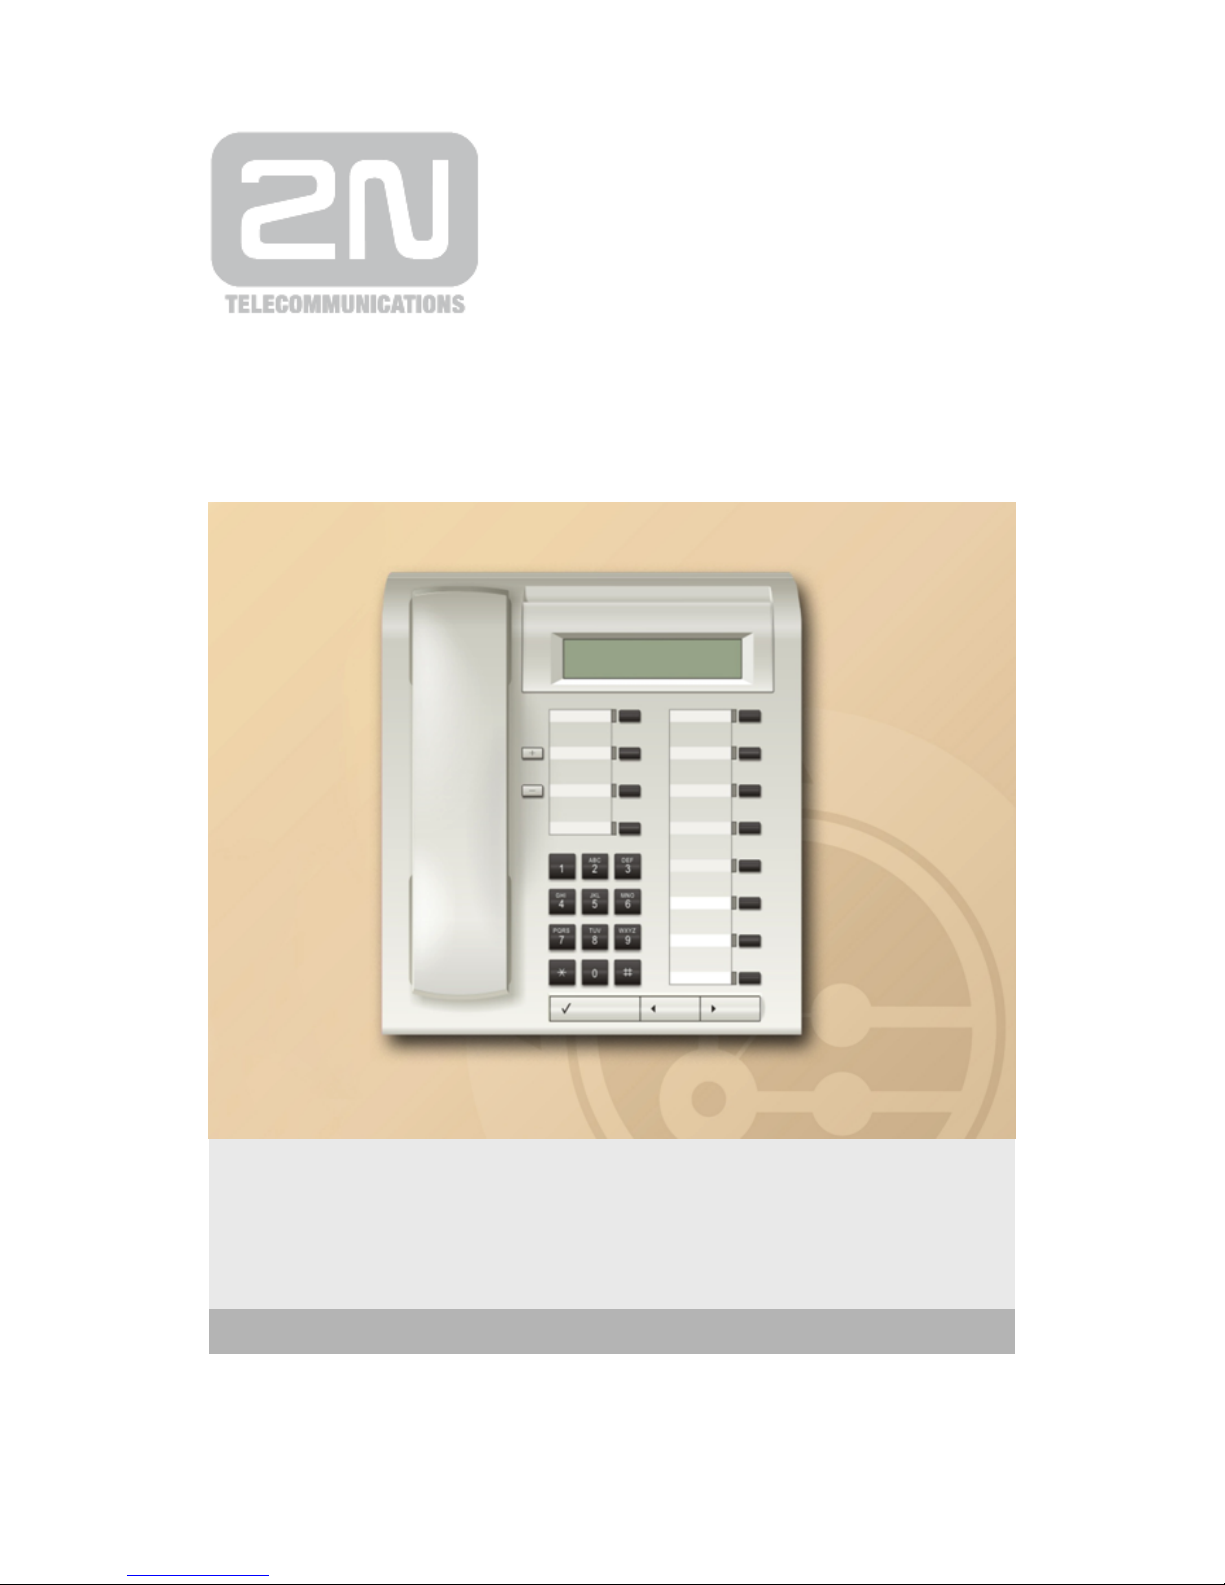
1.4 Telephone Description . . . . . . . . . . . . . . . . . . . . . . . . . . . . . . . . . . . . . . . . . . . . 9
2. Basic Operation . . . . . . . . . . . . . . . . . . . . . . . . . . . . . . . . . . . . 11
2.1 Outgoing calls . . . . . . . . . . . . . . . . . . . . . . . . . . . . . . . . . . . . . . . . . . . . . . . . . . . 12
2.2 Incoming calls . . . . . . . . . . . . . . . . . . . . . . . . . . . . . . . . . . . . . . . . . . . . . . . . . . . 15
2.3 During a Call . . . . . . . . . . . . . . . . . . . . . . . . . . . . . . . . . . . . . . . . . . . . . . . . . . . . 17
3. Telephone Menu and Functions . . . . . . . . . . . . . . . . . . . . . . 19
3.1 Main Menu . . . . . . . . . . . . . . . . . . . . . . . . . . . . . . . . . . . . . . . . . . . . . . . . . . . . . 20
3.2 Call Register . . . . . . . . . . . . . . . . . . . . . . . . . . . . . . . . . . . . . . . . . . . . . . . . . . . . 21
3.3 Messages . . . . . . . . . . . . . . . . . . . . . . . . . . . . . . . . . . . . . . . . . . . . . . . . . . . . . . 24
3.4 Contacts . . . . . . . . . . . . . . . . . . . . . . . . . . . . . . . . . . . . . . . . . . . . . . . . . . . . . . . 28
3.5 Profiles . . . . . . . . . . . . . . . . . . . . . . . . . . . . . . . . . . . . . . . . . . . . . . . . . . . . . . . . 32
3.6 Settings . . . . . . . . . . . . . . . . . . . . . . . . . . . . . . . . . . . . . . . . . . . . . . . . . . . . . . . . 36
4. Button Functions . . . . . . . . . . . . . . . . . . . . . . . . . . . . . . . . . . 41
4.1 Basic Terminal Buttons . . . . . . . . . . . . . . . . . . . . . . . . . . . . . . . . . . . . . . . . . . . . 42
4.2 Programmable Buttons - Setting . . . . . . . . . . . . . . . . . . . . . . . . . . . . . . . . . . . . 44
4.3 Programmable Buttons - Functions . . . . . . . . . . . . . . . . . . . . . . . . . . . . . . . . . . 46
5. 2N® OptiSet Terminals . . . . . . . . . . . . . . . . . . . . . . . . . . . . . . 50
6. 2N® OpenStage Terminals . . . . . . . . . . . . . . . . . . . . . . . . . . . 52
7. Glossary . . . . . . . . . . . . . . . . . . . . . . . . . . . . . . . . . . . . . . . . . . 57
8. Important Warnings and Certifications . . . . . . . . . . . . . . . . . 58

4
1. Basic Information
Hereiswhatyoucanfindinthissection:
1.1Introduction
1.2GettingStarted
1.3Accessories
1.4TelephoneDescription

5
1.1 Introduction
The telephonesetsaredigitalkeysystemphonesdesignedforthe2N StarPoint 500
®
system.Allofthem(exceptforthe phones)2N NetStar
®2N StarPoint 500 Entry
®
areequippedwithatwo–rowdisplay,programmablebuttons,theHandsFreefunction,
and other options and accessories. The telephones are available in the arctic or
anthracitecolourversions.
2N StarPoint 500 Types:
®
Figure: 2N®StarPoint500Entry,2N®StarPoint500Economy/Standard,2N®
StarPoint500Advance
A telephone for common traffic– –isasimpledigital2N StarPoint 500 Entry
®
telephonewithoutadisplay,with8programmablebuttonsandone–waySpeakerphone
(itisnotequippedwithamicrophoneforHandsFreebutusesthehandsetmicrophone).
A mid–range office telephone– –isthe2N StarPoint 500 Economy, Standard
®
basictypeofadigitalkeysystemphonewithatwo–rowdisplayand12programmable
buttons.The modeloffersaone–waySpeakerphone(isnotequippedwithaEconomy
HandsFree microphone); the model has a two–way Speakerphone (isStandard
equippedwithaHandsFreeloudspeakerandmicrophone).The modelisnotEconomy
equippedwithinterfacesforoptionalmodules(e.g.buttonmodules).
A managerial telephone– –isthemostadvancedof2N StarPoint 500 Advance
®
all telephones. The phone is equipped with a backlit two–row2N StarPoint 500
®
display,19programmablebuttonsandaninterfaceforadditionalmodules.Aheadset
can be connected too. The apparatus provides a two–way Speakerphone (a
loudspeakerandmicrophoneareavailablefortheHandsFreefunction).
Phone Package Contents:
atelephoneset
atelephonesocketcable
UserManualandWarrantyCertificate
buttontagnametemplates

6
1.
2.
3.
1.2 Getting Started
Putting in Operation
Unpackthetelephoneset.
Connectthehandsettothetelephonesetusingatwistedcable(fromthebottom
–seethefigurebelow).
Connectthetelephonesettothetelephonesocketusingthecableincludedinthe
delivery.
Besuretoconnectthe phonetoadedicated2N StarPoint 500
®
socketonly.
Button Tagnames
Usethe tocreatebuttontagnamesautomatically.Click2N NetStar Assistant
®
on onthebuttondisplayingscreentocreateacompletePrepare for printing
templateinthePDFformatautomatically.
Youcanalsouseablanktemplateasincludedinthedeliverytocreatebutton
tagnames.
Referto fordetailsonbuttonProgrammableButtons-Setting
programming.

7
1.3 Accessories
Optionalacccessoriescanbeconnectedtothe phonebottomfor2N StarPoint 500
®
convenience:additionalbuttonmodulesorheadsets.
Button Modules
A 16/90-button console can be added to the Standard and2N StarPoint 500
®
Advancephonestoincreasethecountofavailablebuttons.Connectmultipleconsoles
seriallytogetanextremelyhighnumberofbuttons.Programtheconsolebuttonslike
yourtelephonebuttons.18-buttonmoduleisonlyavailableforthe 2N OpenStage
®
and terminals.15T 40T
Every90-buttonmoduleneedsapowersupplyofitsown.Everyother
16-buttonmoduleneedsapowersupplyofitsown.
Figure: Console,16buttons–2N®StarPoint
Figure: Console,90buttons–2N®StarPoint

8
1.
2.
3.
Figure: Console,18buttons–2N®OpenStage
Button Console Connection
Connecttheconsolemechanicallytothephone.
Interconnectthetelephoneandtheconsoleusingacable.
Connect the included mains adapter to the dedicated bottom socket for power
supply.

9
1.4 Telephone Description
Use the and buttons to browse through the phone menus and list items.
Pushthe confirmationbuttontoselectafunction.Usethe and buttons
to adjust the ringing and call volume (handset or HandsFree). Any volume change
applies to the current call only, the next call will have a volume level as set in the
phonemenu(or ).2N – NetStar Assistant
®
Telephone Display
Allthe telephones (except for Entry ones) are equipped with a2N StarPoint 500
®
two–rowdisplay.Thedisplaycontrastisadjustableineightsteps;timeisdisplayedin
12hor24hformats.Referto fordisplayparameterdetails.Settings
Displaydefault:

10
Station number–thisitemdependsonyourPBXsetting.Thestationnumber,
name,orbothcanbedisplayed.
Current profile–thisitemdependsonyourPBXsetting.
Toworkmorecomfortablywithyour telephone,adjustthedisplaytilt2N StarPoint
®
insixsteps:
Programmable Buttons
The telephones are equipped with programmable buttons. Use2N® StarPoint 500
the toprogramthebuttons.Thesystemadministratordefines2N NetStar Assistant
®
the basic settings, the user may adjust the button settings as required. Refer to
formoredetails.ProgrammableButtons-Setting
Referto foravailableProgrammableButtons-Functions
programmablebuttonfunctions.

11
2. Basic Operation
Hereiswhatyoucanfindinthissection:
2.1Outgoingcalls
2.2Incomingcalls
2.3DuringaCall

12
1.
2.
3.
4.
5.
1.
2.
3.
4.
5.
2.1 Outgoing calls
Outgoing Call Setup
Pickupthehandset.Youcanhearthedialtone.
Dialanumber.Havingdialledthelastdigit,waitforautomaticcallsetup.
Ifstoredinyourorgroupdirectory,thecalledsubsriber'snameisalsodisplayed.
Thecalltimewillbedisplayedwhenthecalledsubscriberanswers.
Ifthecalleduserisbusy,youwillgetthebusytoneandthe messageCall end
getsdisplayed.
Or,youcanenterthecallednumberonyourphonediplayfirstand
thenpickupthehandsettosetupthecall.
Push the HandsFree button to use the HandsFree function instead of lifting the
handset.TheHandsFreebuttonindicatorsignalsactivation.PushtheHandsFreebutton
againtoterminatethecurrentcall.
IftheHandsFreebuttonisnotprogrammedonyourphone,justpress
the confirmationbuttonafterdiallinganumbertoactivate
HandsFree.
Outgoing Call to Call Register Record
Thetelephonestoresrecordsonmissed,incomingandoutgoingcalls,theso–calledcall
register. Using these records, you can call the subscribers whom you called or who
calledyoubefore.Thecallregistercancontainuptoonethousandrecords.
Response to Missed Call
Situation:
Thephoneissignallingmissedcalls.Youwanttoreplytothesecalls.
Procedure:
Push toenterthelistofmissedcalls.
Or,usethepre–programmedmissedcallaccessingbuttonifavailable.
Ifthemissedcallisnotdisplayed,push toenterthemainmenu,selectCall
andthen .register Missed calls
Nowyoucanseethelistofmissedcallsonyourdisplay.Use and to
browsethroughthelistitems.
Havingselectedtheitemtobecalled(usingtheconfirmationbutton),pickupthe
handsetorpushtheHandsFreebutton.
Call to Previously Called Number
Situation:
Youwanttomakeacalltoanumberyoucalledbefore.
Procedure:

13
1.
2.
3.
1.
2.
3.
Usetheoutgoingcallhistoryforcallingapreviouslycallednumber.
Pushtheoutgoing callaccessingbuttonifpre–programmed toenterthelist.If
thebuttonisnotprogrammed,push toenterthephonemainmenu,select
andthen .Call register Dialled numbers
Use and tobrowsethroughthelistitems.
Pickupthehandset,orpresstheHandsFreebuttontodialtheselectednumber.
Call to Previously Calling Number
Situation:
Youwanttomakeacalltoanumberfromwhichyouweresuccessfullycalledbefore.
Procedure:
Pushtheansweredcallaccessingbuttonifpre–programmedtoenterthelist.If
thebuttonisnotprogrammed,push toenterthephonemainmenu,select
andthen .Call register Received calls
Use and tobrowsethroughthelistitems.
Havingselectedtheitemtobecalled(usingtheconfirmationbutton),pickupthe
handsetorpushtheHandsFreebutton.
Outgoing Call from Telephone Directory
Tofacilitatedialling,programatelephonedirectoryaccessbutton.Usethedirectoryto
searchitemsaccordingtotheirnamesornameparts.Pickupthehandset,press f
orconfirmation,orpushtheHandsFreebuttontodialthetelephonenumberforthe
selectedlistitem.Referto formoredetailsonphonedirectorysearch.Contacts
Speed Dialling
You can program the so–called speed (quick) dialling buttons for frequently used
numbers.Justpushthebuttononcetodialtheselectedtelephonenumber.Referto
forone–buttondiallingsettings.ProgrammableButtons-Setting
Calling Line Identification Restriction
Use the (Calling Line Identification Restriction) button to restrict yourCLIR
identification.Referto forCLIRbuttonprogramming.ProgrammableButtons-Setting
Remember to press this button before dialling a number. The active CLIR mode is
signalled by the button LED indicator. CLIR remains active until you re–press this
button.IfyouactivateCLIRduringdialling,itwillbeactiveforthenextcall.
Intercom
Intercomis aspecial typeof callwherea predefinedtelephone numberis dialledby
pressingthe buttonandthecalledstationreceivesthecallautomaticallyinIntercom
the HandsFree mode. The function provides flexible communication – you can speak
almostthemomentyoupressthebutton.

14
1.
2.
3.
4.
5.
Thefunctionworkswiththe telephonesonly.Ifa2N StarPoint 500
®
differenttelephonetypeisused,thecallwillnotbeanswered
automatically.
How to use Intercom:
PressandkeeppressedtheIntercompre–programmedbutton.
Startspeakingwhenyouhearabeep.
ThecalledsubscriberanswersthecallautomaticallyswitchingintotheHandsFree
mode.Thecalledsubscriberisnotifiedofthecallwithanacousticsignal.
Keepthebuttonpressedduringthewholecall.
Releasethebuttontoterminatethecall.
Referto forIntercombuttonprogramming.ProgrammableButtons-Setting

15
2.2 Incoming calls
Answering Incoming Call
Anincoming callis signalledbydisplayingthecalling stationname and/ortelephone
numberorthecallednumberifpossible.Namesfromyourprivatephonedirectoryor
thesystemadministratordirectoryareassignedtothenumbers.
Pick up the handset to answer the call.PresstheconfirmationorHandsFreebutton
toanswerthecallintheHandsFreemode.
Ringing Volume Control
Supposeyoudonotwanttoanswerorrejectacallyetdonotwanttobedisturbedby
yourtelephone'sloudringing.Inthatcase,eitherlowerthevolumeormutethecallas
follows.
Push toadjusttheringingvolume.a)
Pushthe or arrows,select andpress tomuteringingb) Ringer off
ofanincomingcall.
Rejecting Incoming Call
Usethe or arrows,select andpress forconfirmation.TheReject call
callingsubscriberwillgetthebusytone.
Or, you can use the programmable button. Refer toEsc Programmable Buttons -
forEscbuttonprogramming.Setting
Thediagrambelowshowsacompleteincomingcallmenu.

16
Do Not Disturb (DND)
Youcanusethe ( )functiontoworkwithoutbeingdisturbedbyDo Not Disturb DND
incoming calls. If this function is enabled, all incoming calls are rejected. Every
rejectionisfollowedbyamissedcallrecordonyourdisplay,allowingyoutocallthe
numberlater.Outgoingcallsaresetupwithoutlimitations.
Pre–programabuttonforthe mode.TheactivestateissignalledbyaDo Not Disturb
shiningLEDindicatoratthebutton.Pressthepre–programmedbuttonagaintocancel
themode.Referto forDNDbuttonprogramming.ProgrammableButtons-Setting

17
1.
2.
3.
4.
1.
2.
3.
4.
5.
6.
1.
2.
3.
2.3 During a Call
Switching to HandsFree During a Call
Supposeyouarespeakingwithyourhandsetpicked–up,butsuddenlyyouhavetoput
the handset aside without ceasing to speak. Push the button. TheHandsFree
telephonetransitsintotheHandsFreemodeassignalledbythebuttonLED.Nowyou
can hang up and go on speaking. Push the button with your handsetHandsFree
hung–uptoterminatethecall.
ThefunctiononlyworkswiththeHandsFreeorSpeakerphone
supportingterminals.
Handset/HandsFree Volume Control
Usethe and buttonstoadjustthevolumeofthehandsetorHandsFreemode
duringacall.Thechangewillapplytothecurrentlyactivemode(handset/HandsFree).
Microphone Muting
Doyouneedtoconsultacolleagueofyoursorjustnottobeheardduringacall?Use
the function. Microphone muting is signalled by the button LED flashing.Mute
Re–pressthebuttontoswitchthemicrophoneonagain.
Call Transfer
Suppose you want to transfer your opponent to another telephone number during a
call.
Call Transfer with Hang–Up Procedure:
Pushthe or programmablebutton.Flash Call slot
Youcanhearthedialtoneinyourhandset(theopponenthearsmusic).
Dialthetelephonenumbertowhichyouwanttotransferthecall.
Hangupafterreceivingtheringingtone.Thetwosubscriberswillgetconnected.
Call Transfer without Hang–Up Procedure:
Pushthe or programmablebutton.Flash Call slot
Youcanhearthedialtoneinyourhandset(theopponenthearsmusic).
Dialthetelephonenumbertowhichyouwanttotransferthecall.
Waituntilthecalledsubscriberanswersthecall.
Nowyoucanpush ortherespective buttontoswitchbetweentheFlash Call slot
activeandheldcalls.
Whenyouterminatetheactivecall,theheldsubscriberswillbeconnected.
Call Transfer with Speed Dialling Procedure:
Pushthe programmablebuttonduringacalltowhichtheState/Speed dialling
subscribernumberthatshouldreceivethetransferredcallisassigned.
Theactivecallisputonholdandanewcallissetuptotherequirednumber.

18
3.Havingreceivedtheringingtone,hangup(Calltransferwithhang–up),orwait
for answer and then hang up to complete the transfer (Call transfer without
hang–up).

19
3. Telephone Menu and
Functions
Hereiswhatyoucanfindinthissection:
3.1MainMenu
3.2CallRegister
3.3Messages
3.4Contacts
3.5Profiles
3.6Settings

20
3.1 Main Menu
Press the confirmation key when the telephone is at relax to enter the main
menu.Usethe and arowkeysto browsethrough themenuitems.Press
toenterthesubmenus.Youcanprograman buttontoaccelerateyourreturnESC
tohighermenulevels.
Ifyoupress atrelax,youwillgetdirectlytotheList of called
.numbers
Ifyoupress atrelax,youwillgetdirectlytothemenu Contacts
(Telephonedirectory).
Other manuals for StarPoint 500 Entry
1
This manual suits for next models
3
Table of contents
Other 2N Telephone manuals