manuals.online logo
Brands
  1. Home
  2. •
  3. Brands
  4. •
  5. 3M
  6. •
  7. Toy
  8. •
  9. 3M Guggenheim User manual

3M Guggenheim User manual

Popular Toy manuals by other brands

marklin 37321 instruction manual

marklin

marklin 37321 instruction manual

Canon PAPER CRAFT Assembly instructions

Canon

Canon PAPER CRAFT Assembly instructions

GREAT PLANES Pitts M-12S instruction manual

GREAT PLANES

GREAT PLANES Pitts M-12S instruction manual

NOCH 14261 manual

NOCH

NOCH 14261 manual

Hausler 450 SE V2 quick start

Hausler

Hausler 450 SE V2 quick start

Dynaflite Daydream instruction manual

Dynaflite

Dynaflite Daydream instruction manual

Kenner Batman 63651 instructions

Kenner

Kenner Batman 63651 instructions

LEGO 8527 instructions

LEGO

LEGO 8527 instructions

Multiplex EasyStar II Building instructions

Multiplex

Multiplex EasyStar II Building instructions

iKarus ECO 8 Assembly instruction

iKarus

iKarus ECO 8 Assembly instruction

Walkera 38 User handbook

Walkera

Walkera 38 User handbook

Hasbro TRANSFORMERS BUMBLEBEE manual

Hasbro

Hasbro TRANSFORMERS BUMBLEBEE manual

MD MXION SWD user manual

MD

MD MXION SWD user manual

Mattel Disney Pixar Cars Cozy Cone Spiral Rampway instructions

Mattel

Mattel Disney Pixar Cars Cozy Cone Spiral Rampway instructions

marklin 39671 user manual

marklin

marklin 39671 user manual

LEGO TECHNIC 8735 instructions

LEGO

LEGO TECHNIC 8735 instructions

Mattel HOTWHEELS DWL04 instructions

Mattel

Mattel HOTWHEELS DWL04 instructions

REVELL Bristol Beaufighter TF.X Assembly manual

REVELL

REVELL Bristol Beaufighter TF.X Assembly manual

manuals.online logo
manuals.online logoBrands
  • About & Mission
  • Contact us
  • Privacy Policy
  • Terms and Conditions

Copyright 2025 Manuals.Online. All Rights Reserved.

Guggenheim Model Assembly Instructions
This might appear daunting at first but if you work methodically you will soon have your model assembled. In
the instructions that come with the model I recommend PVA (hobby glue), this is the safest glue to use as any
mistakes you might make can easily be rectified. For this presentation I have used super glue (cyanoacrylate), it
was a cloudy day and I had to work fast. If you do choose to use super glue, please be careful.
I will be producing a similar set of instructions using PVA very soon. The principal is similar, you just have the
opportunity to drink more tea while you wait for the PVA to cure. Using super glue I find it easier to assemble
the parts as illustrated then carefully apply the glue to the rear of the joint while making sure it doesn't seap
through the gaps to your fingers.... please be careful.
Spend a bit of time familiarising yourself with the components before you start. The parts should fit together
easily. If any pieces have tabs left on them they can easily be removed using the piece of sandpaper supplied.
I have built this model straight from the box. If you want to make an exceptional model you might want to
lightly sand the dark edges which are a produced during the manufacturing process.
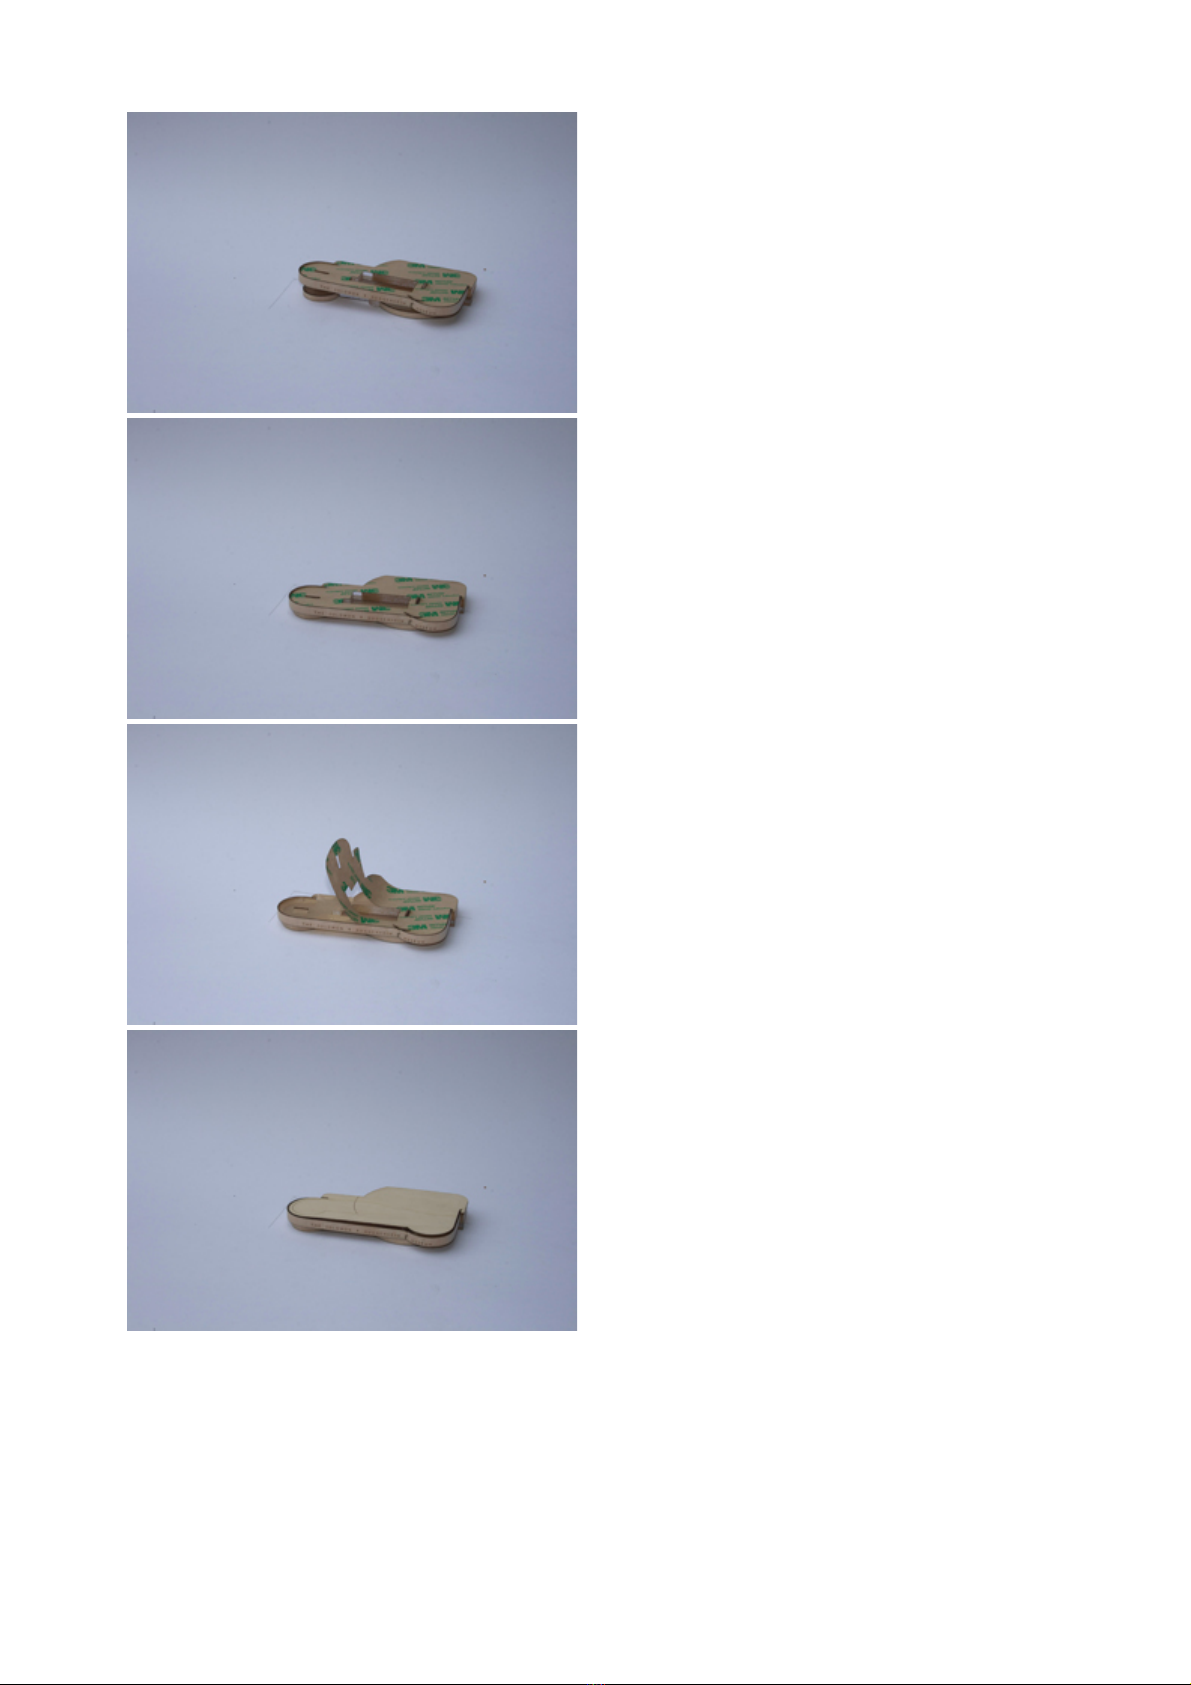
1
Peel the adhesive backing off the
ground plane (2) and carefully align
with base (1).
2
Press firmly together. Position self
adhesive feet to the underside of the
base.
1 of 25
3
Press part 3 out of part 25.
4
Peel the backing off the bottom of
acrylic block (3). Position on ground
plane as indicated. Press down firmly
5
Apply glue to the interlocking tabs and
along the bottom of part (4) and
position in place. Apply glue to the
back of the interlocking tabs and along
the bottom of part (5) and position in
place.
6
Apply glue to the tabs on part (6) and
position in place. Apply glue to the rear
of the interlocking tabs of part (7) and
to the tab that slots into the ground
plane, slot into place. If you are using
PVA, wipe off any excess glue from
joints with wet brush and use a rubber
band or tape to hold the structure
together while glue cures.
2 of 25
7
Apply glue to the top of the sidewalls and
the recesses in the top of the front and rear
walls of the annex. Apply glue to the sides of
part (8) and position in place. If you are
using PVA, wipe off any access glue and
secure with tape while glue cures.
8
Apply glue to bottom edges and tabs of (14)
and position in place on the ground plane.
9
Apply glue to bottom edges and tabs of (13)
and position in place on the ground plane.
10
Apply glue to bottom edge of part (15) and
slot into part (16). If using PVA hold in
place with rubber band or tape while glue
cures
3 of 25
11
When dry, apply glue to bottom edge and
side of part (15) and to the bottom and ends
of part (16). Slot assembly into ground
plane.
Apply glue to the notch in part 15 that fits
with part 16.
12
Rear view of model as per stage 11.
13
Apply glue to edges of part (17) and top
edges of parts (14) and (15) and position
part (17) as shown. Hold in place with tape
if using PVA.
14
Apply glue to the tabs on part (9) and
position in place. Wipe off any excess glue
with wet brush .
4 of 25
15
Apply glue to the tabs on part (10) and
position in place.
17
Apply glue to the tabs on part (11) and
position in place.
17
Apply glue to the tabs on part (12) and
position in place.
18
Peel backing off parts (18) and (19), and
position in place on ground plane. Press into
position.
I forgot to part 19 but I will add it later.
5 of 25
19
Remove part 38 from part 20.
21
Peel backing off part (21). Position one end
in the slot of part (20)
22
Gradually bend around acrylic form. You
may need a blunt object to poke the end of
part 21 into the slot.
24
Peel backing off part (22). Position one end
in the slot of part (20)
6 of 25
25
Bend part (22)around the acrylic former as
show and poke into slot of part 20.
26
Peel backing off part (26). Position one end
in slot as shown and gradually bend around
acrylic form (25). Take care to align the
bottom edge of (26) with the bottom of the
acrylic. This is easy to achiee if you
complete this stage with part 25 on a flat
surface. Position other end into slot before
sticking down.
27
Repeat this step again with part (27) as
shown, starting with slot as illustrated.
Take care to align the bottom edge of (27)
with the bottom of the acrylic.
28
Bend part (27)around the acrylic former as
show and poke into slot of part 20.
7 of 25
29
Press part (27) firmly against the acrylic to
ensure the adhesive bonds well.
30
Remove parts (23) and (24)
31
Peel backing off the top of part (20)
32
Push parts (23) and (24) into the slots in the
top of part (20)
8 of 25
33
Position part (25) over parts (23) and (24)
36
Press firmly into position.
37
Peel backing off the top of part (25).
38
Align part (28) and press firmly into place.
9 of 25
39
It should look like this.
40
Position the assembly from the stage above
as shown. Slot the part behind part 11.
41
Pivot into position.
42
Remove assembly.
10 of 25