A/DA ARMO 3D User manual

ARMO 3D
Operating manual
Line laser level
ARMO 3D
.

ARMO 3D
Table of contents
1. Kit . . . . . . . . . . . . . . . . . . . . . . . . . . . . . . . . . . . . . . . . . . . . . . . . . . . . . . . . . . . . 3
2. Application . . . . . . . . . . . . . . . . . . . . . . . . . . . . . . . . . . . . . . . . . . . . . . . . . . . . . . . 3
3. Specications . . . . . . . . . . . . . . . . . . . . . . . . . . . . . . . . . . . . . . . . . . . . . . . . . . . . . 3
4. Change of batteries. . . . . . . . . . . . . . . . . . . . . . . . . . . . . . . . . . . . . . . . . . . . . . . . . . .4
5. Laser lines. . . . . . . . . . . . . . . . . . . . . . . . . . . . . . . . . . . . . . . . . . . . . . . . . . . . . . . 4
6. Features . . . . . . . . . . . . . . . . . . . . . . . . . . . . . . . . . . . . . . . . . . . . . . . . . . . . . . . 5
7. Keypad . . . . . . . . . . . . . . . . . . . . . . . . . . . . . . . . . . . . . . . . . . . . . . . . . . . . . . . .6
8. Application demonstration . . . . . . . . . . . . . . . . . . . . . . . . . . . . . . . . . . . . . . . . . . . . . .7
9. Operation . . . . . . . . . . . . . . . . . . . . . . . . . . . . . . . . . . . . . . . . . . . . . . . . . . . . . . .8
10. To check the accuracy of line laser level
10.1. To check the accuracy of line laser level (slope of plane) . . . . . . . . . . . . . . . . . . . . . . . . . . . . 9
10.2. To check level . . . . . . . . . . . . . . . . . . . . . . . . . . . . . . . . . . . . . . . . . . . . . . . . . . . 11
10.3.To check plumb . . . . . . . . . . . . . . . . . . . . . . . . . . . . . . . . . . . . . . . . . . . . . . . . . . . .11
11. Care and cleaning . . . . . . . . . . . . . . . . . . . . . . . . . . . . . . . . . . . . . . . . . . . . . . . . . . 11
12. Specic reasons for erroneous measuring results . . . . . . . . . . . . . . . . . . . . . . . . . . . . . . . . . . 11
13. Electromagnetic acceptability . . . . . . . . . . . . . . . . . . . . . . . . . . . . . . . . . . . . . . . . . . . . .12
14. Laser classication . . . . . . . . . . . . . . . . . . . . . . . . . . . . . . . . . . . . . . . . . . . . . . . . . 13
15. Safety instructions . . . . . . . . . . . . . . . . . . . . . . . . . . . . . . . . . . . . . . . . . . . . . . . . . 13
16. Warranty . . . . . . . . . . . . . . . . . . . . . . . . . . . . . . . . . . . . . . . . . . . . . . . . . . . . . . 13
17. Exceptions from responsibility . . . . . . . . . . . . . . . . . . . . . . . . . . . . . . . . . . . . . . . . . . . . 14
18. Appendix 1- “Certicate of acceptance and sale”
19. Appendix 2- “Warranty card”

3
ARMO 3D
MEASUREMENT FOUNDATION
Kit
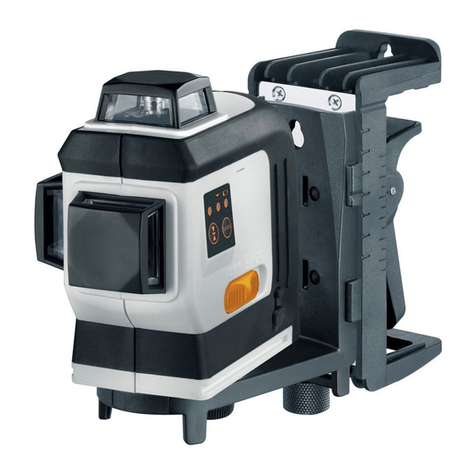
Cross Line Laser ADA ARMO 3D, batteries, tripod mount, bag for transportation, operating manual.
Application
Cross Line Laser projects visible laser planes. It is used for determination height, making horizontal and vertical planes.
Leveling Range: self-leveling, ±4°
Accuracy: ±3mm/10m
Working Range: 40 m* - without receiver; 70 m - with receiver
Power Supply: 3AA Batteries Alkaline
Service time ~ 20 h. with all lines ON
Operating temperature: 0°C to 40°C
Laser class 2
Light sources 635 nm/oor point 650 nm
Mounting thread 1/4"
Weight 580 g

4
ARMO 3D
MEASUREMENT FOUNDATION
Open battery compartment. Put in 3 x AA Alkaline batteries. Take care to correct polarity. Close battery compartment.
ATTENTION: If you are not going to use instrument for a long time, take out batteries.

5
ARMO 3D
Vertical and horizontal laser window
Battery cover
Compensator switch
Tripod mount 1/4"
Laser dot window
1.
2.
3.
4.
5.
MEASUREMENT FOUNDATION
1
3
2
45

6
ARMO 3D
MEASUREMENT FOUNDATION
Keypad
Indoor/outdoor measurement mode switch
Operating modes (number of planes- number of pressures)
Indoor/Compensator LED
Outdoor/Receiver LED
Working modes indication
1.
2.
3.
4.
5.
3
1
5
2
5
4

7
ARMO 3D
MEASUREMENT FOUNDATION
APPLICATION DEMONSTRATION

8
ARMO 3D
MEASUREMENT FOUNDATION
Operation
Take out the battery lid. According the sign “ �-”� insert three alkaline batteries or rechargeable batteries to the bat-“ �-”� insert three alkaline batteries or rechargeable batteries to the bat-insert three alkaline batteries or rechargeable batteries to the bat-
tery socket, then cover the battery lid.
Setting up the instrument on the oor or the tripod. When using tripod� support the centering nut of the instrument with
one hand and screw the centering screw into the centering nut female thread. Tighten the centering screw.
Make the oor point of the instrument aim at object on the oor� line to aim at object. ADA ARMO 3D has several
working modes: 2VH/VH/H/V/2V/2VH (without alarm). Plumb point is projected in the mode 2VH.

9
ARMO 3D
MEASUREMENT FOUNDATION
Set up the instrument between two walls, the distance is 5 m.Turn on the Cross Line Laser and mark the point of cross
laser line on the wall.
Set up the instrument 0,5-0,7m away from the wall and make, as described above, the same marks. If the difference
{a1-b2} and {b1-b2} is less then the value of “accuracy” (see specications)� there is no need in calibration.
Example: when you check the accuracy of Cross Line Laser the difference is {a1-a2}=5 mm and {b1-b2}=7 mm. The
instrument’s error: {b1-b2}-{a1-a2}=7-5=2 mm. Now you can compare this error with standard error.
If the accuracy of Cross Line Laser isn’t corresponding with claimed accuracy, contact the authorized service center.

10
ARMO 3D
MEASUREMENT FOUNDATION
Choose a wall and set laser 5M away from the wall. Turn on the laser and cross laser line is marked A on the wall.Find
another point M on the horizontal line, the distance is around 2.5m. Swivel the laser, and another cross point of cross
laser line is marked B. Please note the distance of B to A should be 5m.
Measure the distance between M to cross laser lune, if the difference is over 3mm, the laser is out of calibration, please
contact with seller to calibrate the laser.
m
m

11
ARMO 3D
To check plumb
Choose a wall and set laser 5m away from the wall. Mark point A on the wall, please note the distance from point A to
ground should be 3m. Hang a plumb line from A point to ground and nd a plumb point B on ground. turn on the laser
and make the vertical laser line meet the point B, along the vertical laser line on the wall and measure the distance 3m
from point B to another point C. Point C must be on the vertical laser line, it means the height of C point is 3m.
Measure the distance from point A to point C, if the distance is over 2 mm, please, contact with seller to calibrate the
laser.
Care and cleaning
Please handle measuring instrument with care. Clean with soft cloth only after any use. If necessary damp cloth with
some water. If instrument is wet clean and dry it carefully. Pack it up only if it is perfectly dry. Transport in original
container/case only.
Note: During transport On/Off compensator lock (3) must be set to position “OFF”. Disregard may lead to damage of
compensator.
Measurements through glass or plastic windows;
Dirty laser emitting window;
After instrument has been dropped or hit. Please check the accuracy.
Large uctuation of temperature: if instrument will be used in cold areas after it has been stored in warm areas
(or the other way round) please wait some minutes before carrying out measurements.
•
•
•
•
MEASUREMENT FOUNDATION

12
It cannot be completely excluded that this instrument will disturb other instruments (e.g. navigation systems);
will be disturbed by other instruments (e.g. intensive electromagnetic radiation nearby industrial facilities or radio
transmitters).
•
•
MEASUREMENT FOUNDATION
ARMO 3D

13
ARMO 3D
The instrument is a laser class 2 laser product accortding to IEC 60825-1:2007. It is allowed to use unit without further
safety precautions.
Please follow up instructions given in operators’ manual.
Do not stare into beam. Laser beam can lead to eye injury (even from greater distances).
Do not aim laser beam at persons or animals.
The laser plane should be set up above eye level of persons.
Use the instrument for measuring jobs only.
Do not open instrument housing. Repairs should be carried out by authorized workshops only. Please contact your
local dealer.
Do not remove warning labels or safety instructions.
Keep instrument away from children.
Do not use instrument in explosive environment.
Warranty
This product is warranted by the manufacturer to the original purchaser to be free from defects in material and work-
manship under normal use for a period of two (2) years from the date of purchase.
During the warranty period, and upon proof of purchase, the product will be repaired or replaced (with the same or
similar model at manufactures option), without charge for either parts of labour.
In case of a defect please contact the dealer where you originally purchased this product. The warranty will not apply
MEASUREMENT FOUNDATION
ARMO 3D

14
ARMO 3D
to this product if it has been misused, abused or altered. Without limiting the foregoing, leakage of the battery, bending or
dropping the unit are presumed to be defects resulting from misuse or abuse.
The user of this product is expected to follow the instructions given in operators’ manual.
Although all instruments left our warehouse in perfect condition and adjustment the user is expected to carry out periodic
checks of the product’s accuracy and general performance.
The manufacturer, or its representatives, assumes no responsibility of results of a faulty or intentional usage or misuse
including any direct� indirect� consequential damage� and loss of prots.
The manufacturer� or its representatives� assumes no responsibility for consequential damage� and loss of prots by any
disaster (earthquake� storm� ood ...)� re� accident� or an act of a third party and/or a usage in other than usual condi-
tions.
The manufacturer� or its representatives� assumes no responsibility for any damage� and loss of prots due to a change
of data, loss of data and interruption of business etc., caused by using the product or an unusable product.
The manufacturer� or its representatives� assumes no responsibility for any damage� and loss of prots caused by usage
other thsn explained in the users’ manual.
The manufacturer, or its representatives, assumes no responsibility for damage caused by wrong movement or action
due to connecting with other products.
MEASUREMENT FOUNDATION
ARMO 3D

WARRANTY DOESN’T EXTEND TO FOLLOWING CASES:
1. If the standard or serial product number will be changed, erased, removed or wil be unreadable.
2. Periodic maintenance, repair or changing parts as a result of their normal runout.
3. All adaptations and modications with the purpose of improvement and expansion of normal sphere of product ap-
plication, mentioned in the service instruction, without tentative written agreement of the expert provider.
4. Service by anyone other than an authorized service center.
5. Damage to products or parts caused by misuse, including, without limitation, misapplication or nrgligence of the terms
of service instruction.
6. Power supply units, chargers, accessories, wearing parts.
7. Products, damaged from mishandling, faulty adjustment, maintenance with low-quality and non-standard materials,
presence of any liquids and foreign objects inside the product.
8. Acts of God and/or actions of third persons.
9. In case of unwarranted repair till the end of warranty period because of damages during the operation of the product,
it’s transportation and storing, warranty doesn’t resume.
For more information you can visit our website WWW.ADAINSTRUMENTS.COM

WARRANTY CARD
Name and model of the product ________________________________________________
Serial number ________________date of sale_______________________
Name of commercial organization _____________________stamp of commercial organization
Warranty period for the instrument explotation is 24 months after the date of original retail purchase. It extends to the equipment, imported
on the RF territory by ofcial importer.
During this warranty period the owner of the product has the right for free repair of his instrument in case of manufacturing defects.
Warranty is valid only with original warranty card� fully and clear lled (stamp or mark of thr seller is obligatory).
Technical examination of instruments for fault identication which is under the warranty� is made only in the authorized service center.
In no event shall manufacturer be liable before the client for direct or consewuential damages� loss of prot or any other damage which
occur in the result of the instrument outage.
The product is received in the state of operability, without any visible damages, in full completeness. It is tested in my presence. I have no
complaints to the product quality. I am familiar with the conditions of qarranty service and i agree.
purchaser signature _______________________________
Before operating you should read service instruction!
If you have any questions about the warranty service and technical support contact seller of this product

__________________________________________________________________________
__________________________________________________________________________
name and model of the instrument
Corresponds to ______________________________________________________________
designation of standard and technical requirements
Data of issue _______________________________________________________________
Stamp of quality control department
Price
Sold ___________________________________ Date of sale ______________________
name of commercial establishment

ARMO 3D
Линейный лазерный нивелир
(построитель плоскостей)
ARMO 3D
Руководство пользователя

19
ARMO 3D
MEASUREMENT FOUNDATION
1. Комплект поставки . . . . . . . . . . . . . . . . . . . . . . . . . . . . . . . . . . . . . . . . . . . . . . . . . . 20
2. Применение лазерного построителя плоскостей . . . . . . . . . . . . . . . . . . . . . . . . . . . . . . . . . . 20
3. Технические данные . . . . . . . . . . . . . . . . . . . . . . . . . . . . . . . . . . . . . . . . . . . . . . . . . .20
4. Замена батареи . . . . . . . . . . . . . . . . . . . . . . . . . . . . . . . . . . . . . . . . . . . . . . . . . . . . 21
5. Лазерные плоскости . . . . . . . . . . . . . . . . . . . . . . . . . . . . . . . . . . . . . . . . . . . . . . . . . 21
6. Свойства . . . . . . . . . . . . . . . . . . . . . . . . . . . . . . . . . . . . . . . . . . . . . . . . . . . . . . . . 22
7. Кнопочная панель . . . . . . . . . . . . . . . . . . . . . . . . . . . . . . . . . . . . . . . . . . . . . . . . . . .23
8. Примеры применения . . . . . . . . . . . . . . . . . . . . . . . . . . . . . . . . . . . . . . . . . . . . . . . . .24
9. Использование лазерного построителя плоскостей . . . . . . . . . . . . . . . . . . . . . . . . . . . . . . . . 25
10. Проверка точности лазерного построителя плоскости
10.1. Проверка точности лазерного построителя плоскости (наклон плоскости) . . . . . . . . . . . . . . . . . . .26
10.2. Проверка точности горизонтального луча. . . . . . . . . . . . . . . . . . . . . . . . . . . . . . . . . . . . .2 8. . . . . . . .2 8
10.3. Проверка точности вертикального луча . . . . . . . . . . . . . . . . . . . . . . . . . . . . . . . . . . . . .28
10. Уход за устройством . . . . . . . . . . . . . . . . . . . . . . . . . . . . . . . . . . . . . . . . . . . . . . . . . 29
11. Возможные причины ошибочных результатов измерений . . . . . . . . . . . . . . . . . . . . . . . . . . . . 29
12. Электромагнитная совместимость . . . . . . . . . . . . . . . . . . . . . . . . . . . . . . . . . . . . . . . . . . 30
13. Класссификация лазера . . . . . . . . . . . . . . . . . . . . . . . . . . . . . . . . . . . . . . . . . . . . . .30
14. Инструкция по безопасности . . . . . . . . . . . . . . . . . . . . . . . . . . . . . . . . . . . . . . . . . . . . 31. . . . . . . . . . 31. . . 31
15. Гарантия . . . . . . . . . . . . . . . . . . . . . . . . . . . . . . . . . . . . . . . . . . . . . . . . . . . . . . . 31
16. Освобождение от ответственности . . . . . . . . . . . . . . . . . . . . . . . . . . . . . . . . . . . . . . . . . 32
17. Приложение 1 - “Свидетельство о приемке и продаже”
18. Приложение 2 - “Гарантийный талон”

20
ARMO 3D
MEASUREMENT FOUNDATION
Лазерный построитель плоскостей ADA ARMO 3D� батареи� крепление на штатив� сумка для транспортировки� ADA ARMO 3D� батареи� крепление на штатив� сумка для транспортировки�батареи� крепление на штатив� сумка для транспортировки�
руководство по эксплуатации.
Лазерный построитель плоскостей проецирует видимые лазерные плоскости. Это позволяет выполнять
измерительные задачи в строительстве: определение высоты� построения горизонтальной и вертикальной
плоскостей.
Диапазон работы компенсатора (самовыравнивание) ±4°
Точность ±3 мм/10 м
Рабочий диапазон без приемника 40 м*� с приемником: 70м
Электропитание 3 батарейки типа АА
Время работы ~ 20 ч.� если работают все лазерные излучатели
Лазерные излучатели 2 х 635nm/точка отвеса 650 nm
Диапазон рабочих температур 0°С до 40°С
Класс лазера 2
Резьба под штатив 1/4"
Вес 580 гр.
*зависит от степени освещенности помещения..
Table of contents
Languages:
Other A/DA Laser Level manuals
