A-EON 60210 User manual

MANUAL
TV Wall Mount with Two Shelves
Hardware List
Parts List
Three positions allow you to select the best height for your TV set on the stand. Use the appropriate hooked
opening on the vertical bar (11) to determine TV height. Using the top hooked opening on vertical bar (11) will set
the TV lower on the stand, while the bottom hooked opening will set the TV higher on the stand. Attach one of the
three hooked opening to the upper cross bar of the TV stand.
Select Height for Your TV Set
AB
11
C
A) With two people, carefully life the top of the TV to hang the vertical rails (part # 7) onto the horizontal cross bar of the TV
mount, catching the hooked opening of the vertical rails securely. Next, secure the bottom of the vertical rails and rmly
'lock' them into place. (Refer to step 6 to determine appropriate height setting).
B) Using a screwdriver and the two fasteners labeled part "K", thread (each) fastener upwards through the angled metal tab on Side
A and Side B to secure both vertical rails onto the TV bracket.
Note: Since your TV is now wall mounted, access to these fasteners will be limited. If your TV is facing you, please swivel the TV to
the left to tighten the fastener on 'Side A' and then swivel to the right to tighten the fastener on 'Side B'.
Side A
Side B
Attach Rails to TV Bracket
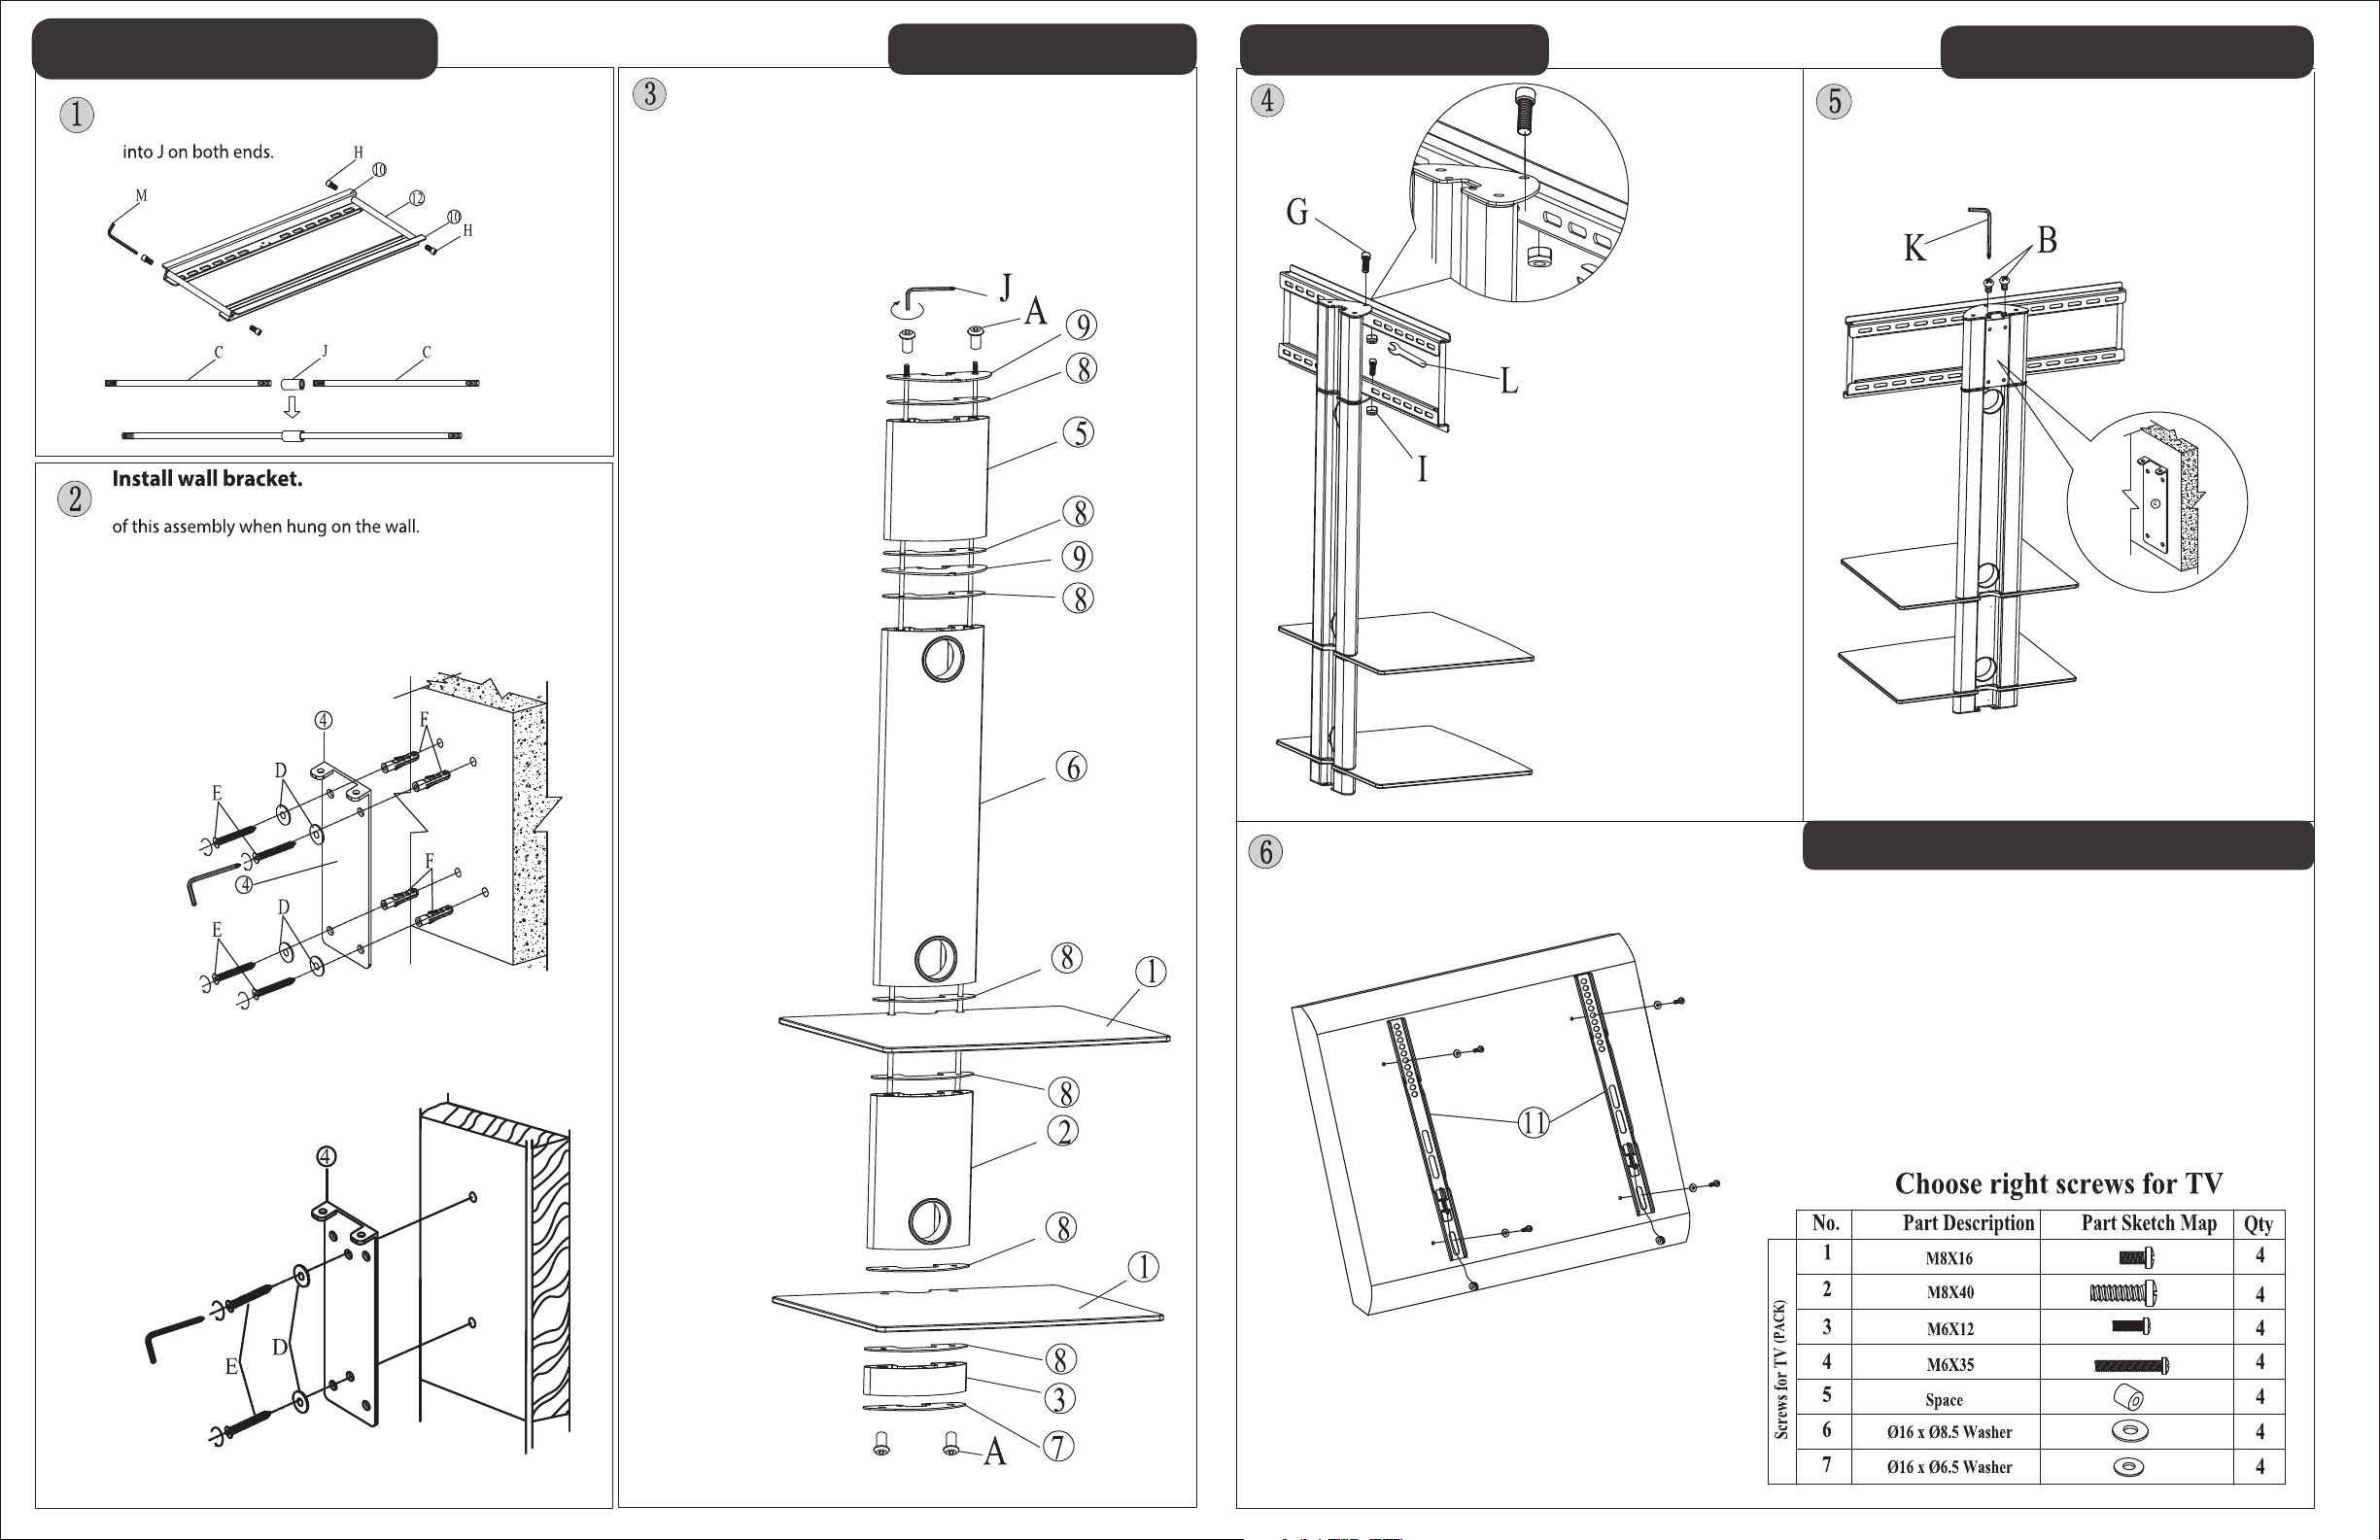
Installation Instructions
A) Assemble TV bracket via diagram (a) below .
B) Assemble threaded rod assembly. Screw C
Attach TV Bracket to
shelf assembly.
RUN Wires.
A) Stand up assembly 3
vertically.
B) Attach TV bracket
from step 1 onto the two
brackets shown in gure
(4) Tighten In two places
with bolt (G) and nut (I) .
C) Pre run wires for
components to desired
location through holes
in back of shelf. Neatly
bundle wires behind
recessed channel in
shelf.
Hang TV shelf Assembly Onto Wall Bracket.
A) Pick up TV Shelf
Assembly and hang onto
wall bracket from step 2.
B) Tighten two screws
B into wall bracket
with wrench K .
Note, that the top of this bracket will represent the top
Concrete/Brick Installation:
Align bracket in desired location
on the wall, then level top of bracket. Transfer 4 marks onto wall
via pencil or marker. Drill (4) 7/16 inch holes and install concrete
anchor F into the wall. Anchor should be ush with outside wall.
Wood Stud Installation:
Find the preferred vertical position of wall bracket. Find center of
stud with stud nder. Align three holes in center of wall bracket
Use screw E and
washer D to tighten
bracket into wall.
with center of stud, put
level on top of bracket and
make sure it is level. Mark
three holes in said location.
Pre drill 5/16 pilot hole and
tighten bracket into stud
with screws E.
NOTE:
MAKE SURE TO FIND CENTER OF STUD FOR INCREASED STRENGTH.
Note, two people maybe required to hold parts in place
while tightening assembly. Lay parts at on oor.
A) Align parts on the
oor per diagram
(3). Insert two
threaded rods from
Step 1 into and
through parts
shown in the
diagram (3).
B) Tighten four
screws (a) until
assembly is tight
with wrench K .
Once tightened
properly the shelves
should not be able
to be moved within
the assembly.
Assemble TV Shelf Attach TV Bracket Hang TV Shelf Assembly
Attach Rails to Back of TV Set
A) Carefully angle your TV against the wall with back of tv
shown. Align two vertical rails in center of your TV. Use
appropriate screw for your TV per chart shown below.
B) Tighten screws until rails are tight. Do not over tighten . Use
spacer if your holes are recessed.
Note: Make sure rails are in same holes on both rails to
insure TV is level.
Other A-EON TV Mount manuals


