Step 5
• Place the Spool (B) on the Frame (A) so the bushings are ori-
ented over the holes on the frame as seen in gure 5. You may
have to compress the spring to get the spool oriented properly.
Figure 5
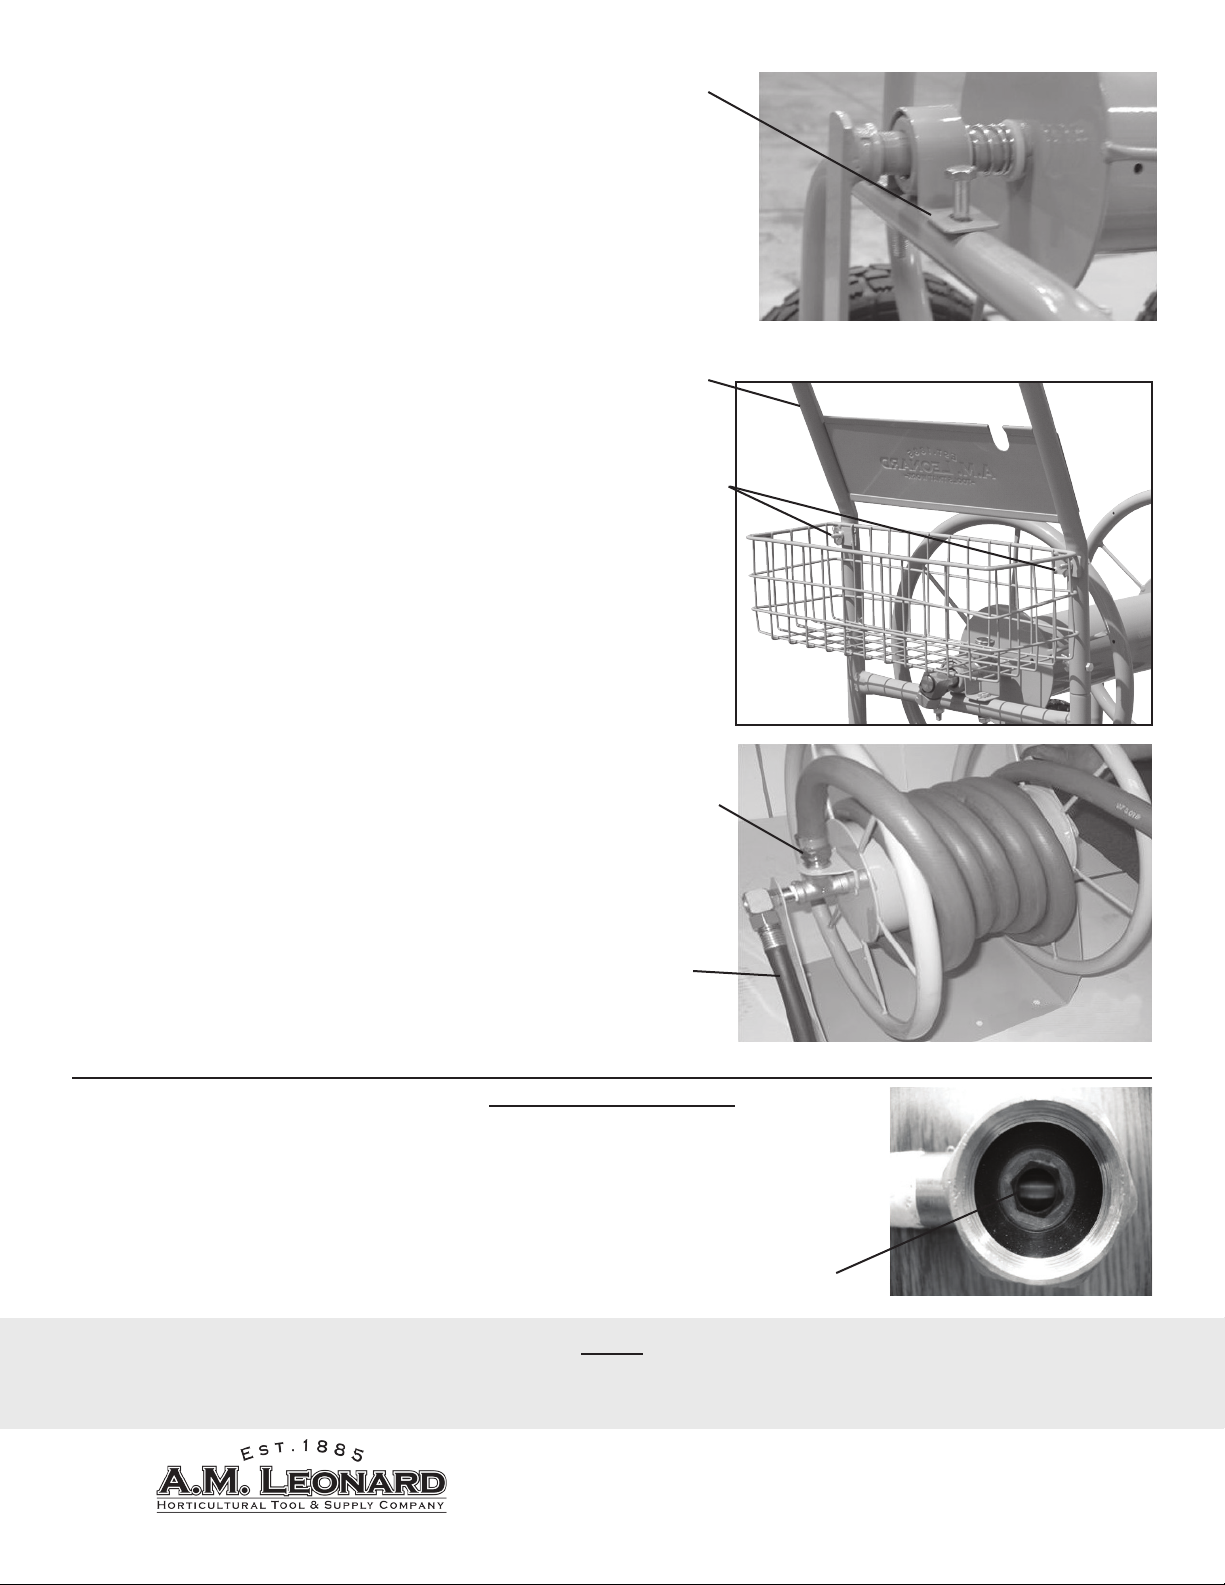
Bushing
Step 6
• Insert the 1.75” bolts thru the bushings and thru the holes in the frame
as seen in gure 5.
• Attach lock nuts. Repeat for other side of the spool and tighten rmly.
Step 7
• Slide Push Handle (E) over the exposed frame ends
and align the holes.
• Insert the 1.44” bolts thru the handle holes and secure
with supplied wing nuts as seen in gure 6.
• Hand tighten.
Figure 6
Push Handle
Wing Nuts
Step 8
• Attach Rubber Handle (J) to crank arm using supplied
handle bolt and nut. Tighten securely.
Step 9
• Attach the Leader Hose (F) to the end of swivel
assembly. DO NOT OVERTIGHTEN.
Step 11
• Pneumatic wheel model, Fill the tires with air. The recom-
mended pressure for the tires is 15 psi. If using an air compressor
be very careful not to over inate the tires. The internal volume of
these tires is small––over ination can occur quickly.
Figure 7
Step 12
• Attach your garden hose. The reel is designed to
hold up to 300 feet of 5/8” hose. Attach your hose to
the Brass Adaptor as seen in gure 7.
• Loop the hose over the spool end to avoid kinking as
shown.
• Your hose cart is now ready to use. Attach Leader
Hose to a water supply.
Brass
Adaptor
Leader
Hose
Trouble Shooting
Problem: Your new Hose Wagon is leaking at the swivel.
Solution: It is normal for the swivel to leak slightly until the O-rings are wet and have seated. If the leaking continues:
• Unscrew the leader hose
• Using a hex key, insert key into hex opening as seen in gure 8 and tighten threaded insert gently.
• Check if leak continues
• If these steps do not solve your leaking problem, contact A.M. Leonard
Figure 8
Hex
Adjustment
Tips
• To help avoid rust, periodically check for any scratches on your hose cart. Apply a clear acrylic or weather proof paint to x any scratch.
• Drain water before storing for long periods –– especially in colder climates.
• Use of Teon Tape on threaded pipe connections will greatly reduce leaks.
©2007 A.M. Leonard Inc.
241 Fox Drive Piqua, Ohio 45356
3
Step 10
• Install storage basket by lining up the holes in handle with holes in
basket bracket. Secure with two bolts and wing nuts as seen in g. 6.