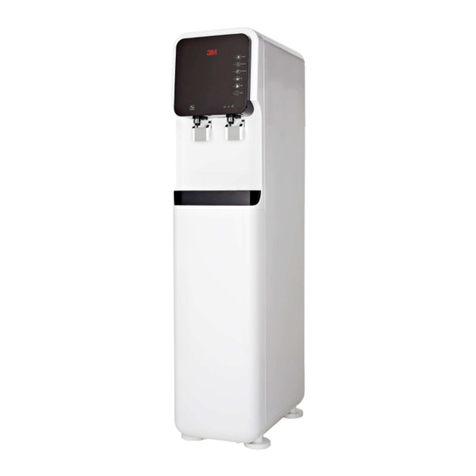
A.O. Smith FREZYA 600S Series User manual

Innovation has a name.
FREZYA 600S Serisi
High Capacity Water Dispenser with RO
User Manual
Ters Osmoz Arıtmalı Yüksek Kapasiteli
Su Sebili Kullanma Kılavuzu


ENG 1
Dear customer,
Thank you for purchasing a "A.O. Smith" branded water dispenser with RO!
You are now the owner of water treatment equipment produced by the world’s leading
manufacturer of water treatment systems. This equipment produces pure water that can
be consumed directly, providing you with a cleaner and healthier source of drinking water.
Please read this user manual carefully before you install and operate your
"A.O. Smith" branded water dispenser. To achieve maximum efciency this user manual
provides detailed instructions regarding the installation of your water dispenser as well as
information related to the proper operation and maintenance of your water dispenser
with RO.
The installation should only be handled by professionals authorized by A.O. Smith
Su Teknolojileri A.Ş.
Spare parts used for maintenance and replacement lter should be approved
by A.O. Smith Su Teknolojileri A.Ş. before they are installed.
Any degradation of performance caused by the use of spare parts or lters that have not
been approved by A.O. Smith Su Teknolojileri A.Ş. will not be covered by our warranty.
If you experience any difculties during installation or operation, please contact your local
distributor to have them carry out repairs or maintenance on your equipment.

CONTENTS
İÇİNDEKİLER

ENG
SAFETY CONSIDERATIONS 4
General Precautions 4
Electrical Precautions 6
TRANSPORTATION 7
PRODUCT DESCRIPTION 8
Brief Introduction 8
Description of Components Frezya 600S 8
Technical Specications 10
Product Features 11
Functions of R.O. System Components 11
Water Filtration Process 12
Functions of ECO System 12
INSTALLATION AND OPERATION METHODS 13
Installation Methods 13
Operation Methods 14
MAINTENANCE AND REPAIR 16
Filter Replacement Warnings 16
Filter Replacement Method 16
General Warnins for Maintenance 17
Cleaning Cycle 18
AFTER-SALES SERVICE 18
TROUBLESHOOTING GUIDE 19
TR
GÜVENLİK UYARILARI 22
Genel Uyarılar 22
Elektrik Uyarıları 24
NAKLİYE 25
ÜRÜN TANITIMI 26
Kısa Tanıtım 26
Frezya 600S Su Sebilinin Ayrıntılı Proli 26
Teknik Bilgiler 28
Genel Ürün Özellikleri 29
R.O. Sistem Bileşenlerinin İşlevleri 29
Su Filtrasyon Sistemi 30
ECO Sistem Özelliği 30
KURULUM VE KULLANIM TALİMATLARI 31
Kurulum Talimatları 31
Kullanım Talimatları 32
BAKIM VE ONARIM 34
Filtre Değişimi Uyarıları 34
Filtre Değişim Adımları 35
Genel Bakım Uyarıları 35
Parçaların Temizliği 36
SATIŞ SONRASI SERVİS 36
Arızalı Ürün Tanımı 37
ARIZA GİDERME KILAVUZU 37
YETKİLİ SERVİSLER 39
MONTAJ KONTROL KARTI 40
BAKIM KARTI 41
GARANTİ BELGESİ 42
GARANTİ KAPSAMI VE KOŞULLARI 43
Garanti Kapsamı Dışındaki Durumlar 43
İade Şartları ve Koşulları 43

ENG 4
Safety Considerations
Not considering the following safety precautions could result in risky situations for you, your water dispenser and your
environment.
Avoid heat and direct sunlight.
It could cause deformation of the exterior.
Do not put heavy stuff on the unit.
It could cause damage to the unit.
Product should be installed in a room-temp.
between 4°C and 45°C.
Do not install in places where there is a risk
of frost-accident during winter and over
heating in summer..
If not it makes lter life shorter.
Do not tilt the unit more than 45° while
moving it.
It could cause malfunction.
General Precautions
Do not install the unit at a moist place like
bathhouse, shower room or outdoor.
It can cause re or electric shock.
Do not attemp to repair, disassemble, or
transform.
It could cause re or electric shock.
Do not apply force to the unit.
It could cause malfunction, damage or electric
shock.
Place the unit on a level and hard oor.
It could cause malfunction.
If not observed, serious injury
or even death could occur.
If not observed, serious injury
or property damage could occur.
If not observed, slight injury of
property damage could occur.

ENG 5
Maintain a sufcient distance f om the wall.
At least 20 cm is recommended.
It could cause malfunction.
When installing the unit, use our genuine
parts.
It could cause water leakage or damage to
the unit.
Do not use this product under high water
pressure conditions!
Operating under high pressure conditions may
cause the unit pipes to rupture, resulting in
leakage, the machine working improperly, or
even serious property damage. There is a
pressure reducer inside the unit that can
tolerate water pressure between 147~490 kPa
(1.47 Bar~4.9 Bars)
In places where inlet water pressure is
more than 490 kPa (4.9 Bars), it is
recommended to use a pressure reducer
before the unit.
Children should not play with the appliance.
This appliance can be used by children aged
from 8 years and above and people with
reduced physical, sensory or mental
capabilities or lack of experience and
knowledge if they have been supervised or
instructed of the appliance in a safe way
and understand the hazards involved.
As this appliance functions with
electricity and water, using the device by
mentally handicapped people is not
advised.
Connect the unit only to the cold water pipe.
It is harmful for lters to connect to hot
water.
Before use, entirely close the cold tank cover
in the unit.
Insects or foreign substances may get inside
of the product.
Call only A.O.Smith Authorized Service for
lter change or in any case of malfunction.
A.O.Smith can not take responsibility for
any damage caused by replacing lters or
repair by third party who is not our service
man.
Do not let the inlet hose be twisted
or bended.
It could cause water and electric leakage.
ENG 6
Do not move the unit while it is being
operated.
It could cause malfunction.
This product must be plugged into
AC 220V ~ 50 Hz outlet.
It could cause e or electric shock.
Be careful not to get burned by the hot water.
It could cause scald.
Close main water supply valve and unplug
the power cord when not using the unit for
a long time. Before use it again, drain more
than 10 liters of water in water tank.
It could cause re or water leakage.
When you discard the unit or lter , follow
the proper process of disposal.
It could cause environmental pollution.
When replacing lter , use our genuine one.
It could affect water quality.
Never use Benzene, alcohol or gasoline to
clean the unit.
It could cause discolor, peeling and damage
of the unit.
Electrical Precautions
Before use, wipe dust or other foreign
substance off on the plug.
It could cause e by electric shock.
Do not use when the plug is damaged or
swinging. Do not insert a plug in a loose wall
outlet.
It could cause e or electric shock & leakage.
When the plug is damaged, contact customer
service center or your purchasing place.
Do not disassemble or modify the plug.
It could cause e by electric shock.

ENG 7
Do not plug in or unplug the power cord with
wet hands.
It could cause re by electric shock.
The outlet should be rated for more than
16A. Use a separate outlet for the unit.
Do not overload the outlet with too many
plugs. It can cause re.
Do not try to bend, tie or pull
the power cord.
It could cause re by electric shock.
Before replacing lter, unplug
the power cord.
It could cause electric shock.
When water supply is cut off, unplug the
power cord.
It could cause malfunction.
•Do not stock up on top of each other more than 2 pieces.
•Before lifting the packages be sure that xing tapes below
the package are intact.
•Lift the packages holding from bottom.
•Do not tilt the unit more than 45° while moving it.
•Persons, who are vulnarable to heavy lifting shoud not carry the packages
to prevent any health issues.
Transportation
Please take into consideration the following points while transporting the units.

ENG 8
Brief Introduction
This equipment utilizes the current, most advanced international RO technology. RO technology relies on the articial reversing of the naturally occurring
osmosis phenomena. The RO membranes have pores with a diameter of 0.0001 micron (0.1 nm), so they can effectively remove bacteria, viruses, heavy
metals, pesticide residue, and other harmful substances from the water. Produced water is fresh, pure and suitable or direct use.
Product Description
Diagram 1
Description of Components Frezya 600S

ENG 9
Description of Components Frezya 600S

ENG 10
Note: the parameters above may change due to product improvements, but the product name plate shall remain the same. TDS refers to inuent total dissolved solids.
Note:
0.1 MPa = 1.02 Kg/cm2 = 14.5Psi
1 Psi = 0.07 Kg/cm2
1 Gallon = 3.785 Liters
75 GPD = 75 Gallons/Day = 284 Liters/Day = 284 Milliliters/Minute
Technical Specications
Model Name
Product Type Free Standing
AISI 304 - about 6.3 l
370x480x1304.5 mm
40 kg.
Reverse Osmosis
220V~ 50Hz
1.47~4.9 Bars (21~71 PSI)
App.280 lt/day (75 GPD)
AISI 304 - about 4.2 l
AISI 304 - about 10.5 l
5~35ºC
Filtration Stages
Power Supply
Permitted Feed Water Pressure
Permitted Water Temp
Water Treatment System
Capacity
Cold Water Tank
Hot Water Tank
Ambient Water Tank
Cold Water Temp.
Hot Water Temp.
Cold Water Temp. Control
Hot Water Temp. Control
Overheat Protection Device
Heater Power Consumption
Motor Power Consumption
Refrigerant
Climate Class
Compressor
Condensor
Cooling
Usable Feed Water
Recommended Environment
Dimensions (Wx Dx H)
Net Weight
FREZYA 600S
Sediment Filter, Pre-Carbon Filter,
R.O. Membrane Filter, Alkaline Filter
4ºC~12ºC
70ºC~90ºC
Thermostat
Bi-metal (Automatic)
Bi-metal (Manuel)
750W~850W
120W (1A)/160W (0.9A)
ISOBUTANE R-600a
T<IPX1>
1/6 HP Sealed Type
Wire Type
Forced Cooling Type
Municipal Tap water
Indoor (House/ Ofce)

ENG 11
Product Features
• High capacity water tank
It is available to dispense a plenty of water with a total of 21l water
tanks (Hot 4.2l, Cold 6.3l, Ambient 10.5l).
• Power saving at night by ECO (illuminance sensor) function
The ECO sensor automatically stops water heating and save electric
charge, when it notices that illuminance around the unit darkens at
night.
• Continuous water dispensing function
By this function, you can conveniently receive a large amount of water
at once.
• RO membrane lter system
Our 4 steps of water ltration system provides fresh & clean water.
• Child lock for hot water safety
It is designed with double safety for children. When dispensing the
hot water, push the safety button rst, then pushing the hot water
lever.
• Separable water faucet
Easily separable water faucets help keep hot & cold water faucets always
clean.
• Safety in using hot water
Automatic Anti-Superheating function of heater & Automatic
Temperature Control function keep you safe from hot water.
• Water level control function
Automatic water level control function ensures durablity of the lters
& unit.
• Fresh water supply
4~12 of cold water and 70~90 of hot water are available at any time.
• Power saving function
When using only one sort of water temperature between hot & cold,
you can turn the other temperature switch off and save electric charge.
• Temperature control for cold water (Ambient-Light Cold-Cold)
It is possible to select cold water or ambient water (room
temperature water) according to the user's preference.
Functions of R.O. System Components
The standard conguration of this hot & cold water dispenser with R.O
system is as follows:
• The rst stage is a >0.5 µm Sediment Filter:
The pores on the aperture within polypropylene sediment lter allows
to lter rust, sand, other larger particles and solid impurities suspended
in the water effectively.
• The second stage is a Pre-Carbon lter:
Granular activated carbon lter effectively absorbs chlorine, mould,
disinfection by-products, odors, discolorations and other materials
suspended in the water.
• The third stage is the >0.001 µm RO membrane:
80 GPD membrane effectively removes bacteria, viruses, heavy metals,
pesticide residue, and other harmful substances contained in your water
supply .
• The fourth stage is Alkaline Filter:
This lter gives back the minerals such as ionized calcium,
magnesium, sodium, potassium ion which were taken out while
purifying the water by RO system.
This lter also changes the acidic water below 6.5 pH into more natural
alkali calcium ionized water above 8.0 pH.

ENG 12
Functions of ECO System
ECO function helps save power consumption by sensing illuminance
around the unit. When the illuminance aroud the unit darkens at
night, the product automatically stops water heating and adjusts the
bringtness of display.
1. Turn on the ECO switch at the back side of unit.
2. The HOT water lamp will turn Amber.
3. When activated, the HOT water lamp will turn Green.
ECO SW ON (Day) -HOT water lamp: Amber
ECO SW ON (Night) -HOT water lamp: Green
Because Fitting/ Tubing/ Float valve / Etc. are consumable parts, when replacing lters, it is recommended to replace them too.
Before replacing lters, pre-carbon lter and Alkaline Filter must need to be ushed for 10 minutes.
Water Filtration Process
Diagram 2
Diagram 3

ENG 13
Installation and Operation
Methods
Our company recommends that this unit is installed by trained professionals as the installation process is somewhat complex and requires the use of
various tools. However, if you decide to install this unit by yourself, please refer to the following steps and diagrams
11. If you move to the unit to operate
in a different location, wait an hour
before plugging and activating the
unit.
Installation Methods
Operation Methods
1. Turning on the Power
1. Remove tapes attached at the time of shipping to secure parts.
2. Place the product on a at-surface, horizontal and structurally sound
oor.
3. Maintain a sufcient distance from the Wall to place the unit. At least
20 cm is recommended.
4. Check the inlet water pressure is between the recommended
values of 147~490 kPa (1.47 Bar~4.9 Bars).
WARNING: Operating under high pressure conditions may cause the
products’ pipes to rupture, resulting in leakage, the machine working
improperly, or even serious property damage.
In places where inlet water pressure is more than 490 kPa (4.9
Bars), it is recommended to use a pressure reducer before the unit.
5. Close the main feed-water valve before
installation.
6. Open the tap for connecting and remove the remaining water in
piping-system.
7. Detach the faucet from the water pipe and connect the main water
adaptor to the water pipe.
8. Connect the unit only to the cold water pipe. It is harmful for lters to
connect to hot water.
9. Connect the inlet tube to the adaptor.
10. Be sure that the inlet hose is not twisted or bended. It could cause
water and electric leakage.
WARNING: If during the plug in, the Hot Water Switch was on then
the device will emit a thermostat. In such a case thermostat should
be reset. During reset the device should not be connected to the power
supply. Otherwise there a risk of electric shock.
1.2. After being sure that Hot and Cold water switches are off, connect
the unit to the electricity.
1.3. After connecting to the power, the unit will start to ll the tanks.
At this point before the tanks start to take water, do water ushing
process to each lter for mo e than 10 mins, until white, black or
bubble water doesn't come out from the lter. For sediment and
precarbon lter, disconnect them from the membrane and dump the
water for 10 mins.
For Alkaline Filter, disconnect it frrom the tank and dump the water
for 10 mins.
WARNING: Even the lters are ushed, it is recommended to dump
the rst 20 liters of water after the initial operation
1.1.Before supplying electric power to the unit, check that “Hot Water
Switch” and “Cold Water Switch” are both in closed position

ENG 14
2. Setting up Hot Water Function
2.1.Turn on the hot water switch at the back of the unit.
2.2.When the switch is on, “Hot Water/Lockout” lamp will be on.
2.3.After hot water function starts to work, it takes 30 mins to get
sufciently heated wate . Wait for 30 minutes and after that hot water
intake is possible (at rst)
2.4.At the rst operation, dump 20 liters water before start to use the
unit.
2.5.After Hot Water Function is on, the unit will automatically control
the hot water temperature and keep it between 83-85 C.
WARNING: While plugging in, if the Hot Water Switch was on, then
the device will emit a thermostat. In such a case thermostat should be
reset. During reset the device should not be connected to the pow er
supply. Otherwise there a risk of electric shock.
NOTE: It is possible to save energy by turning off hot water switch and
take room temperature water in summer time.
3. Dispensing Hot Water from Frezya 600S
3.1. To intake hot water, rst press the Hot Safety Button then press
the hot water lever.
3.2. To stop dispensing Hot Water, pull your hand away from the
hot water lever.
4. Setting up Cold Water Function
4.1.Turn on the cold water switch on the rear of the unit.
4.2.When the switch is on, “Cold Water/Lockout” lamp will be on.
4.3.After cold water function starts to work, it takes 90 mins to get
sufciently cooled wate . Wait for 90 minutes and after that hot water
intake is possible (at rst)
4.4.At the rst operation, dump 20 liters water before start to use the
unit.
4.5.After Cold Water Function is on, the unit will automatically control
the cold water temperature and keep it between 4-12°C.
NOTE: It is possible to save energy by turning off cold water switch and
take room temperature water in winter time.
To ush Alkaline lter, turn off the water connection to the tank and ush
water for at least 10 minutes until the water has no bubbles, white or
black carbon particles.
WARNING: During the start-up even the lters are ushed, initial 20
liters of water should be ushed and not consumed.
WARNING: Municipalities pump air to release pressure from the
plumbing lines.
This air can travel into the reverse osmosis unit within the inlet water.
You can sometimes receive white or bubbly water from your unit.
This is not any chlorine or limescale residue or any kind of technical
malfunction.
Water will be normal after a few minutes.

ENG 15
5.Dispensing Cold Water from Frezya 600S
5.1. To intake cold water, press only the cold water lever.
5.2. To stop dispensing cold water, pull your hand away from the lever.
5.3.. If you did not use the unit for a long time, dump 1-2 liters.
6.Dispensing Continuous Cold Water from Frezya 600S
6.1. To get continuous cold water to ll larger containers like Kettle,
beaker or pan, lift the cold water lever forward and upward.
6.2.Return the lever to its original position to stop water dispensing.
7.Adjusting Cold and Ambient Water Dispensing
The closer the valve is to the cold water side, that will be the more cold
water. And the more it is located to the puried water side, that will be
the more room temperature water comes out.
7.1. Ambient Water
Diagram 8
Diagram 9
Diagram 10

ENG 16
Filter Replacement Warnings
We recommend that authorized A.O. Smith service personel change your
lters. A.O.Smith can not take esponsibility for any damage caused
by replacing lters by a third party.
• When replacing lters, use our original lters for this product. If not,
A.O.Smith can not guarantee lter efciency and water quality.
• According to the lter eplacement cycle, replace lters regularly. If the
lter is not regularly replaced, it could degrade the water quality.
• Even if your water consumption is not much, following regular lter
replacement cycle is recommended.
• When replacing lters, be sure to ask service man to do ushing process
to new lters for more than 10 mins. (If not, it could degrade water
quality).
•Above lter replacement cycles are based on normal feed water
condition and 1500 liters of water purifying efciency . These period
are based on 4 people and 10 liters use in a day for house use and
these cycle doesn't mean quality guarantee period.
Filter replacement periods vary on the inlet water temperature,
water ow, number of people and daily quantity of usage.
5. Replace the necessary lters
6.Open the water supply valve
and insert the electric power plug.
Maintenance and Repair
REPLACEMENT CYCLE
4-6 Months
4-6 Months
18-24 Months
6-12 Months
FILTER
Sediment Filter
Pre-Carbon Filter
R.O. Membrane
Alkaline Filter
Step 1
Step 2
Step 3
Step 4
1.Before replacing lters, pull
the power cord out and close
the water supply valve.
2. Switch off the Hot Water Switch and Cold
Water Switch at the back of the unit.
3. Remove the waste water tank
(drip tray) from the product.
7.After connecting to the power, before the tanks start to draw water,
do water ushing process to each lter for more than 10 mins, until whi-
te, black or bubble water doesn't come out from the lter. For sediment
and pre-carbon lter, disconnect them from the membrane and dump
the water for 10 mins. For Alkaline Filter, disconnect it from the tank and
dump the water for 10 mins.
WARNING: After replacing carbon lter, black carbon dust may remain
on the bottom of the unit. The dust is spilled from carbon lter which
make water taste ne and harmless
8.After replacing lters, check if there is any leakage at connection part
and interior hoses.
9.When ushing is done,assemble back the f ont cover and screw.
10.Dump rst 20 liters of water coming from the unit.
Filter Replacement Method

ENG 17
General Warnings for Maintenance
1. When cleaning the surface of the unit, take into consideration the
following points:
• Always unplug the power cord before cleaning the unit.
• Never use detergent or chemicals.
• Wipe the front and back of the product with water-soaked soft cloth.
• Do not directly spray water on the surface of the product.
• If dust or other foreign substance has accumulated on the conden
ser, wipe off with water-soaked soft cloth.
• After cleaning the product, completely dry it before applying
electric power.
2. If the product is not used for a prolonged period, take into
consideration the following points:
• Unplug the power cord.
• Water can be drained completely bu loosening the Hot and Cold
water caps.
• Wipe dry any remaining surface moisture from each part of the
product. Damp surface will create rust.
• Wrap the product in its original vinyl and corrugated paper used
for shipping, before storage, to prevent from being damaged by rust and
other foreign substances.
3.Interior Cleaning of the Unit:
3.1. Unplug the power cord.
3.2. Close the main feed water valve and drain water from the dispen
sing faucet of the product.
3.3. Remove the lower panel and open the drain valve (hot water)
and drain remaining water completely.
Be careful as
hot water can
cause burns.
3.4. Remove the left and right screws on rear side of product and
remove the top cover.
3.5. Remove the ambient tank cover.
When separating tank cover, be careful not to damage rubber packing
of it.
The ambient tank is made of stainless steel,
so be careful not to hurt your hands.
3.6. Clean inside of the ambient tank
pouring water into it. Then, close water
drain valve and reassemble tank cover.
3.7. Then open the lid of cold water
tank, which is inside the product.
When separating tank cover, be
careful not to damage rubber
packing of it. The cold tank is made
of stainless steel, so be careful not
to hurt your hands.
3.8. Clean inside of the cold tank
pouring water into it. Then, close
water drain valve and reassemble cold
tank cover.
3.9. Open the water supply valve and check water leakage when both
ambient and cold tank is fully lled with water . Then, reassemble the
top cover.
3.10. Check the hot water dispensing. Then plug the power cord.
3.11. Keep checking operation and water leakage for a day.If there is
problem, contact customer service center.
3.12 Municipalities pump air to release pressure from the plumbing lines.
This air can travel into the reverse osmosis unit within the inlet water.
You can sometimes receive white or bubbly water from your unit.
This is not any chlorine or limescale residue or any kind of technical
malfunction.
Water will be normal after a few minutes.
WARNING: This unit’s preiters, RO membrane and post lter are
consummable parts.
Since they should be replaced periodically, they are not part of product
warranty.

ENG 18
After-Sales Service
• If your water purifier exhibits abnormal behavior, please turn off the water source immediately, cut off the power source and contact your local vendor.
Notes
• Our company reserves the right to change product design, configuration, and specifications without prior notice.
• Our company assumes no liability for problems that may occur as a result of technical or editorial errors, omissions or printing problems contained
herein.
Cleaning Cycle
CLEANING
Exterior
Drip tray
Water tap
Fitting / Tubing
CYCLE
Once a week
Frequently
Once a day
More than once
within 2 years
METHOD
Clean the exterior with water-soked, soft cloth.
(Never use Benzene, gasoline or thinner to clean the unit.)
Frequently clean the drip tray with a neutral detergent.
Loosen hidden taps counterclockwise and separate it. Then, clean
the hole of the taps with sterilized swap and wipe the taps with water
soaked cloth. After cleaning, tighten the taps again.
When replacing lter, check if Fitting and Tubing are ne. If necessary, replace them.
This manual suits for next models
1
Table of contents
Languages:
Other A.O. Smith Water Dispenser manuals

A.O. Smith
A.O. Smith PEARL User manual

A.O. Smith
A.O. Smith AO-WH-SOFT-350 User manual

A.O. Smith
A.O. Smith TRIASOFT MINI User manual

A.O. Smith
A.O. Smith FREZYA 300S User manual

A.O. Smith
A.O. Smith PEARL ULTRA User manual

A.O. Smith
A.O. Smith AO-US-RO-4000 User manual

A.O. Smith
A.O. Smith FREZYA 200S User manual

A.O. Smith
A.O. Smith Pro AOW-S400 User manual

A.O. Smith
A.O. Smith AO-WH-DSCLR User manual

A.O. Smith
A.O. Smith AO-WH-PRO-300 User manual