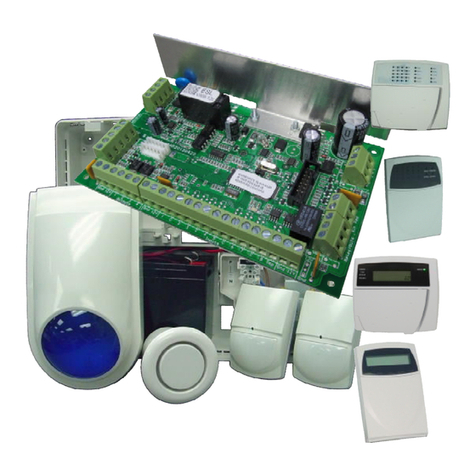
AAP Elite S series User manual

1
OperatingGuide

2

3

4
CONTENTS PageNo.
OPERATING YOUR ALARM5
GeneralInformation 5
ArmingtheAlarm5
DisarmingtheAlarm6
ArminginStayMode7
DisarmingStayMode8
BypassingZones8
ManualPanic,Medical&FireAlarms9
ResettingAlarms10
LCD Keypad QuickviewMode10
SPECIALCONTROLBUTTONFUNCTIONS11
DirectlyControllingOutputsfromtheKeypad 11
DisableDay(Chime)ModeAlarms11
OperatingtheAccess ControlOutput13
REMOTECOMMAND CONTROLOPERATION13
HowRemoteCommandControlworks13
LocalCommandControlofoutputs14
RemotelyAcknowledgingan Alarm 15
PROGRAMMING YOURALARM16
GettingintoProgramMode16
ExitingProgramMode16
AddingorDeletingUserCodes16
ChangingTelephoneNumbers17
ProgrammingtheTime&Date18
ProgrammingDTMFControlCode18
Program/Delete/FindRadioUsers19
Program/Delete/FindAccess Tag/CardUsers19
Program/Delete/FindRadioZones20
HideUserCodes21
USERFUNCTIONS22
Starting Walk-testMode22
Answeran In-coming Call 22
ForceaTest Call 23
MEMORYDISPLAYMODE24
Viewing MemoryMode24
CurrentSystemAlarms24
HistoricalEvent DisplayChart25
PROGRAMMING SUMMARYGUIDE28
TELECOMNOTIFICATION29
OWNERSDETAILS30

5
OPERATINGYOURALARM
GENERAL INFORMATION
YourELITESAlarmControllerhasbeen designed withyou the userin
mind.Clearlynamed backlitkeysmean you don't havetoremembercom-
plicated keycombinationstoachievenormaldailyoperations. Aswitheve-
rything aboutthe ELITESeven keyfunctionscan be fine tuned toyour
specificneeds. Pleaseaskyourinstallerformoredetails.
SINGLEBUTTONorCODEARMINGofTHEALARM
Arming can be achieved withthe <ARM>button orusingyourcode.
Arming the alarmwillturnonalldetectorsinthe Area orAreasbeing
Armed.ToArmthealarmpress;
<ARM>
Area A,Borbotharmed LED’swill turnON or;
<CODE><ENTER>
Area A,Borbotharmed LED’swill turnON or;
The twodifferent Armingmodesdetailed abovewillarmeitherasingle
area orbothareasdepending on what Areasareassigned tothe keypad,
orcode, orboth.The installerwilladviseyou on howtheyhaveconfigured
yourparticularalarm.
Thereisalsoaspecialfeaturethatcan be set byyourinstallertoallowthe
pressing of the <ARM> button during the ExitDelaytimetoDisarmthe
alarm.Thisfeatureistoallowaquickdisarmif you haveforgotten todo
something priortoArming the alarm.The featureisdisabled when the
alarmisfullyarmed following expiryof the exitdelaytime.
SELECTIVEAREAARMING ofTHEALARM
Ifthe panelissplitintotwoareasand the userand keypad areboth
assigned tothe twoareasitispossibletoselect whichArea orAreasyou
wishtoArm.Todo thisyourinstallerwill haveprogrammed the panelto
requirethe <ARM>button tobe pressed beforethe codetoarmthe panel.
ToselectivelyArmthe alarmpress;
<ARM><CODE><ENTER>
Onan LEDkeypad zone LED’s1&2will turnON.
(LED1 =Area A&LED2=Area B)

6
Onan LCD keypad the displaywill show
“Area/stoArm” “AB”.
ThisindicatesthatbothAreasA&Bareselected forarming.
At thispointifyou press the <ENTER> button, bothofthe selected Areas
willArm.
Ifbeforepressing the <ENTER>button you wishtode-select one ofthe
areaspriortoarming you canusebuttons1or2on thekeypad.
Button 1relatestoArea Aand button 2relatestoArea B.
Forexample,if you press the number2, AreaBwillturnoffon the LCD
keypad withthe displayshowing (A -),orzone indicator2willturnoff on
the LEDkeypad indicating that onlythe remaining selection (Area A)will
nowarmif youpress the <ENTER>button.
If you don’t do anything thepanelwill proceed toautomaticallyarmboth
areasin10 secondstime.
DISARMINGTHEALARM
Disarming the alarmwillturnoff alldetectorsinthe Area orAreasthat
wereArmed.ToDisarm the alarmpress;
<CODE><ENTER>
Area A,Borbotharmed LED’swill turnOFF.
Onlythe Areasassigned tothe usercode and keypad willdisarm.Toallow
disarming of bothareasthe keypad and the usercode must be assigned
toAreasA&B.Forexample,if the keypad wasassignedtobothareasbut
the code wasonlyassigned toArea A,Area Awilldisarm when the user
enterstheircode.If Area Bwasalsoarmed it willremain armed.
SELECTIVEAREADISARMING ofTHEALARM
Ifthe panelissplitintotwoareasand the userand keypad areboth
assigned tothe twoareasitispossibletoselect whichArea orAreasyou
wishtoDisarm.Todo thisyourinstallerwillhaveprogrammedthe panel to
requirethe <ARM>button tobe pressed beforethe codetoarmthe panel.
ThisspecialArming option when enabled will alsoenablethespecialdis-
arming mode.ToselectivelyDisarm the alarmpress;

7
<CODE><ENTER>
Onan LEDkeypad zone LED’s1&2will turnON.
(LED1 =Area A&LED2=Area B)
Onan LCD keypad the displaywill show
“Area/stoDisarm”“A B”.
ThisindicatesthatbothAreasA&Bareselected fordisarming.
At thispointifyou press the <ENTER> button, bothofthe selected Areas
willdisarm.
Ifbeforepressing the <ENTER>button you wishtode-select one ofthe
areaspriortodisarming you can usebuttons1or2on the keypad.
Button 1relatestoArea Aand button 2relatestoArea B.
Forexample,if you press the number2, AreaBwillturnoffon the LCD
keypad withthe displayshowing (A -),orzone indicator2willturnoff on
the LEDkeypad indicating that onlythe remaining selection (Area A)will
disarmif you press the <ENTER>button.
If you don’t do anything thepanelwill proceed toautomaticallydisarm
bothareasin10 secondstime.
ARMING INSTAYMODE
Staymode allowsyou toArmapre-selected part of thebuilding.Stay
mode can beused inaresidentialapplication toarmpartsof the house
that you willnot need togo intoatnighttimeorinacommercialapplication
toallowmonitoring of an unattended shop front. The Staymode alarmcan
be inthe formofafullalarmorpossiblyasmallbuzzer(Chime)towarnof
activityinthe staymode coverage area.ToarmStaymode press;
<STAY>
Area A,Borbotharmed LED’swill FLASH or
<STAY><CODE><ENTER>
Area A,Borbotharmed LED’swill FLASH.
The panelhastwodifferentStayarming modesand themethodsof Arm-
ing aredetailedabove.Theinstallerwilladviseyou on howtheyhavecon-
figured yourparticularalarm.
Ifthe second option shown above(<Stay><Code><Enter>)isused for
arming staymode and the code and keypad areassigned tobothareas
the selectivearming method described on page 4willapply.

8
OnceStaymode hasbeen Armed,the StayMode exit delaywillapply.
Whenarmed,if azone istriggered the StayMode entrydelayswillalso
apply.If, howeveryou press the <ENTER> button following Arming of Stay
mode,thiswillcancel the exitdelaysothe systemisarmed immediately
and alsocancelALL entrydelaytimessoallzoneswillbecomeInstant
zones. Thisallowsyou toselect whetheryou wishthe StayMode toArm
withorwithout delayseverytimeyou armthismode.
DISARMING STAYMODE
Disarming StayMode willturnoff allStayMode detectorsinthe Area or
Areasthat wereArmed.ToDisarmStayMode press;
<STAY>
Area A,Borbotharmed LED’swill turnOFF or
<CODE><ENTER>
Area A,Borbotharmed LED’swill turnOFF.
The singlebutton disarmof staymode indicated aboveisaprogrammable
option selectableatindividualkeypadssoyou willneed tocheckwithyour
installerhowyoursystemhasbeen configured. Disarming using the Stay
button can be programmed nottowork ifthe panelisinalarm.Ifthe button
isprogrammedthisway, wheninalarmyou must useyourcode todisarm.
Ifthe panelisprogrammed for<Stay><Code><Enter>forarming stay
mode and the code and keypad areassigned tobothareasthe selective
disarming method described on page 5willapply.
BYPASSINGZONES
The Bypass button allowsyou totemporarilybypass zonesofyourchoice
priortoarming yourpanel.The bypassedzoneswillrevert back tonormal
the nexttimeyou disarm the panel unless itisa24 hourzone. Abypassed
24 hourzone willremainbypassed until the bypass ismanuallyremoved
byreversing the procedureshown below. Tobypass azone (sayZone 1)
fromthe system, followthe instructionsbelow.
Tobypass zone1,key inthefollowing sequence:
<BYPASS>
BypassLEDwillturnON.
<01>

9
Zone 1LEDwillturnON.
<ENTER>
BypassLEDwillnowFLASH.
Whileinthe Bypass mode itispossibletoBypass morethan one zone.
The examplebelowdetailshowthisisdone.
Tobypass zones1,9&16, key inthefollowing sequence:
<BYPASS>
BypassLEDwillturnON.
<01,09,16>
Zone LED’s1,9&16 willturnON.
<ENTER>
BypassLEDwillnowFLASH.
NOTE:To Bypass azone,thekeypadyou are using mustbeas-
signed to thesame area as thezone/syouwishto Bypass. Ifyou are
tryingtoBypass azonethatisnotintheArea assigned to yourkey-
pad,thepanelwillnotallowyoutobypass thatzone.
Ifyouareusing an LCD keypad tobypass zones, the Bypassbutton works
the sameasthe LEDkeypad but the displayshowsthe numbersasen-
tered e.g.inthe exampleaboveasyou enterinthe digits“01”, the display
willshow“01”, then ifyou enter“09”, the displaywillshow“01”&“09”on
the displayand finallyasyou enter“16”the displaywillshowall three
numberson the screen. The LCD keypad willshowup to5twodigit num-
bersthen ifyouneed tobypass morezonesitwillalternatethe display
withthe first 5selectionsthen the next 5,switching betweendisplaysat
about a1second rate.
The installercan alsorestrict access tobypass mode byrequiring acode
tobe entered following the bypass button. Ifthisoption isturned on you
mustfollowthe sequenceshownbelowtoenterbypassmode.
<BYPASS><CODE><ENTER>
Onceyou haveaccessed bypass mode using yourcode, the method for
actuallybypassing zonesisidenticaltothatshown above.
MANUAL PANIC, MEDICAL &FIREALARMS
Therearethree specialManual Alarmsthat maybe triggered fromthe
keypads. Thesearea“PANIC”, “FIRE”, and “MEDICAL”alarm.When
using the LEDkeypad the Panicalarmcan be generatedbyeitherthe sin-

10
gle“Panic” button orbythe simultaneousoperation of twobuttons. The
Fireand Medicalalarmsaregenerated bypressing twobuttonssimultane-
ously.
TherearetwotypesofLCD keypad that can be used on the panel.The
methodsforgenerating thesemanualalarmsvary depending on the key-
pad used.
The specialbutton combinationsand the alarmstheygenerateareshown
inthetablebelow;
RESETTING ALARMS
Incaseof an alarmcondition,
pressing your <CODE> then <ENTER>
willreset the alarmand turnoff anyaudiblesirens. If yourcode doesnot
reset the alarmitmeansthatthe alarmoccurred inan Area eithernot as-
signed tothe keypad you areusing oryourcode isnotallowed toreset
alarmsinthat area.
NOTE: If atanystage you makean errorwhen entering acode allyou
need todo ispress the <ENTER> button toreset the keypad and start
again.
LCD KEYPADQUICKVIEW MODE
The LCD keypad willnormallyshowan unsealed zone bydisplayingits
programmablezone nameon the keypad.Ifmorethan one zone isun-
sealed at anytimethe LCD keypad will scrollthrough the zonessequen-
tiallyshowing eachzone nameindividually.Thiscan takesometimeto
displayallzonesifmultiplezonesareunsealed. The LCD keypad hasa
KEYPAD
TYPE
È
PANICALARM FIREALARM MEDICALALARM
LED
KEYPAD
<PANIC>
<1> &<3>
<4> &<6>
<7> &<9>
CROWLCD
KEYPAD <CHIME>&<CONTROL> <A>&<B> <B>&<CHIME>
AAPLCD
KEYPAD <PANIC>
<1> &<3> <4> &<6> <7> &<9>

11
specialfunction,ifthe <ENTER>button ispressed whenazone isun-
sealed it willprovideatwodigit numericdisplayforallunsealed zones. Up
to5zonescan be displayed atone timeeg 01 0307 11 14. Ifmorethan 5
zonesareunsealed the keypad willalternatebetween eachbankof up to
5zonesswitching at about a1second rate.Ifyou do not touchthe keypad
for10 secondsafterpressing the <ENTER>button the displaywillauto-
maticallyreturntothe normaldisplaymode.Alternativelyif you press the
<ENTER>button againbeforethe 10secondsexpiresthe keypad willre-
vert back tonormaldisplaymode.
SPECIALCONTROLBUTTONFUNCTIONS
The <CONTROL> button on the keypad hasanumberof usesdepending
on the optionsset byyourinstaller.
It canbe used todisableChime-zone alarmsordirectlycontrol anyof the
outputsfromthe keypad.
The operation of thespecial<CONTROL>button functions(ifenabled by
the installer)aredetailed below;
DIRECTLYCONTROLLING anOUTPUT
Todirectlycontrol outputsfromthe LEDorLCD keypadspress;
<CONTROL>
(Note:TheControlButton mustbeheldfor2seconds)
The controlLEDwillturnon atthe LEDkeypad,the LCDdisplaywill show
Ifan outputiscurrentlyon itsnumberwill be displayed eg if output 4was
Onthen number4wouldbe showing.
Nowbypressing anyofthe buttonsfrom1-8theappropriateoutputnum-
berwilltoggleOnorOff eachtimethe button ispressed. If the numberis
displayed it showsthat the outputison (yourinstallermustfirst allowthe
outputstobe directlycontrolled otherwiseyou cannot turnthemOnorOff
at thispoint).
Whenfinished, press the <ENTER>button toexitthe directoutput control
mode.
OUTPUTS
__ __ __ __ ____ __ __

12
DISABLECHIMEZONES
Anydetectoron yourELITEScanbe programmed totriggeran output or
the buzzeratyourkeypad when movement isdetected.Thesearecalled
ChimeZones. Chimezonesarenormallyonlyactiveduring the disarm
statebut if programmed byyourinstaller,theycanwork asChimezones
at alltimes(armed ordisarmed).Yourinstallercan alsogiveyou the ability
todisablethe ChimeZone monitoring via the keypad when itisnot re-
quired.
ToDisableChimeZone Monitoring at an LEDorAAPLCD keypad press
and hold;
<CONTROL>followedby<PROGRAM>
The “Aux(0)” LEDwillturnon indicating the ChimeZonesaredisabled on
the LEDkeypad or;
the words“CHIME OFF”willappearon the LCD keypad
The Displaywilltimeoutafter20 secondsback tothe normaldisplayor
you can press the <ENTER>button togoback tothe normaldisplay.
Tore-enableChimeZone monitoring press and hold;
<CONTROL>followedby<PROGRAM>
The “Aux(0)” LEDwillturnoff indicating the ChimeZonesarenowactive
on the LEDkeypad or;
the words“CHIME ON”willappearbrieflyon the LCD keypad
The Displaywilltimeoutafter20 secondsback tothe normaldisplayor
you can press the <ENTER>button togoback tothe normaldisplay.
ToDisablethe ChimeZone Monitoring ataCrow LCD keypad press;
<CHIME> (Holdfor2seconds)
The LCD displaywillread “CHIME OFF”
The Displaywilltimeoutafter20 secondsback tothe normaldisplayor
you can press the <ENTER>button togoback tothe normaldisplay.
Tore-enablethe ChimeZone Monitoring ataCrow LCD keypad press;
<CHIME> (Holdfor2seconds)
The LCD displaywillread “CHIME ON”
The Displaywilltimeoutafter20 secondsback tothe normaldisplayor
you can press the <ENTER>button togoback tothe normaldisplay.

13
REMOTECOMMAND CONTROLOPERATION
HOWREMOTECOMMAND CONTROLWORKS
AnotherpowerfulfeatureavailablefromyouralarmisCommand Control.
Thisfeatureisaremotecontrolfacilitywhichallowsvaliduserstoaccess
the panelviaastandardtouchtone telephone and check orchange the
Arm/Disarm statusofeachof the areas,operateeachoftheeightoutputs,
turnon an optionalMicrophone orforceatest calltotheCentralStation.
Onentryofavalid4digitDTMFcode fromaremotetelephone the panel
willrespond withan audibleprompttoindicateifthefunctionbeing con-
trolled ison oroff.Theaudiblepromptscan beintheformoftonesor
voicemessages.The CommandControlfeaturewithtone promptsisstan-
dardon allpanels(one Long Tone forOFForthree short beepsforON).
.Ifthe optional VoiceBoardisfitted the promptsarepre-recorded voice
messages.
Pleasetalktoyourinstallertofindout whichof the abovemaybe set-up in
yourpanel.
Toperformanyof the Command Control featuresyou mustfirstring the
phone numberwhichthe panel isconnected to.The panelmaybe set up
toanswerafteraspecificnumberofringsofit maybe set-up touseafax
defeatoption. Eitherway, when you ring the phone numberand the panel
answersthe call,the first thing you willhearoverthe phone isaburst of
modemtonesfortwoseconds. The panelwillthen pauseforaperiod of 5
secondsand listen forDTMFtonesfromthe remotephone. During the
pauseyou must enterthe access code whichisassociated withthe Com-
mand menu option you wishtoaccess. Remember, thecode you enter
will determine whichmenu option you access.If you miss the pause, the
panelwillrepeatthe modemtonesand then pauseagainfor5seconds
looking foryouraccess code. Thisprocess willbe repeated 4timesbe-
forehanging up ifnovalidcode isreceived.When entering codesorother
information inCommand Control the "#"keyactsasa"Clear"button.
Whenyou haveentered therequired 4digitaccess code the panel will
replywiththestatusmessage associated withtheCommand Control func-
tion you haveaccessed. Forexample,if the DTMF codeforArming &Dis-
arming of Area Awas“2045”,oncethiscode hasbeen received the panel
checksthe currentstatusofArea Aandreplieswiththe appropriatetone
orpre-programmedvoicemessage relating tothatstatuse.g.ifAreaAis
Armed then youwill eitherhear3shortbeepsortheArmedvoicemes-
sage.If Disarmed,you will heareither1long beep orthe Disarmed mes-
sage. If thereisno voiceboardfitted, youwillonlyhearthe tones.
Oncethe statusmessage hasinformed you ofthe actualstate,you can

14
usethe "*"keytotogglethe option on &off orArmand Disarm,e.g.inour
exampleabove, code “2045”accessesArea "A"arming ordisarming.
Assumingthestatusmessage we received indicated thatArea Awascur-
rentlyarmed, ifwepress the "*"key,Area "A"will beDisarmed and we
wouldreceiveadisarmstatusmessage.
Whileyou areon-line withthe panelyou can movetootherCommand
Controloptionsbyenteringthe code of the newoption you want tocontrol.
Assumingtherewasacode of“4321”programmedtocontroloutputs.
Afterhaving used code “2045”tocontrolthe Arm/Disarm statusofArea A
wefirstpress the “#”button toresetall previousentries.Then wecan en-
terthe digits“43215”(thatis“4321”asthe code tocontrol outputsand “5”
toselectoutput#5).Thecurrentstatusofoutput#5 will be giveneitherby
the voicemessage orthe appropriatetone and thenthe statuscan be
changed withthe “*”button onthe remotetelephone (Note; foroutputcon-
trolyou mustenterinthe 4digitcode e.g.4321 followedbythe output
numberyou wishtocontrol,inthiscase5).
Atanystage, ifyouenterinan incorrect code youcan pressthe “#”button
on the remotetelephone toclearallcode entriesand then start again.
Toturnon theoptionalMicrophone (onlyavailableifthe VoiceBoardis
fitted)you must enterinthe appropriatecode followed bythe “*”button.To
turnthe Microphone off you simplypress the “*”button again.
Toend aCommand Controlsession simplyhang up thephone. The panel
ismonitoring the line at alltimesand 15 secondsafterthe last keypress it
willautomaticallyhang up the line.This15 second timerisactiveduring
the wholecommand controlprocess soaperiod of 15 secondswithout a
keypress willcausethe paneltohang-up.
LOCAL COMMAND CONTROLOFOUTPUTS
IfaDTMFcontrolcode isprogrammed foroutputcontrolthe samecode
can be used tolocallycontroloutput/sfromthe keypad.Entering the 4
digitDTMFcode atakeypad willblankthe displayallowing controlofthe
outputs.Onan LEDkeypad the zone LED’sindicatetheoutputstatuse.g.
zone 1LEDindicatesoutput1status.ZoneLED1onshowsthatoutput1
ison.Ifusing an LCD keypad the displaywilllooklikethe displayshown
on page 10.Bypressing the “1”button atthepanelkeypad,output1can
be turned on oroff provided itisallowed tobe locallycontrolled.Toleave
local command controlmode simplypress the <ENTER>button and the
keypad will returntonormaloperation.Thisfeatureworksthe sameway
asusing the <CONTROL>button (see page 10)onlyacode isused to
accessthe function instead of using the <CONTROL>button.

15
REMOTELYACKNOWLEDGINGANALARM
The Alarmpanel can be programmed toreportalarmsdirectlytothe
ownerviaanominated landline ormobiletelephone number.
Therearetworeporting modesthat can be used, DomesticorVoicere-
porting.
Domesticreporting sendsan alarmsirentone downthe line toindicate
that an alarmhasoccurred.
Voicereporting sendsapre-recorded voicemessage toindicatethat an
alarmhasoccurred.
Inbothcasesyou will need toacknowledge the alarmcorrectlytostop
furthercallsfrombeing made.
Whenan alarmoccursthe control panelwill dialthe first telephone num-
ber(followed byup to7moreiftheyhavebeen programmedintothe sys-
tem)and send the alarmmessage tothe person listening at the otherend.
The alarmmessage sequenceconsistsofsending eitherthe siren tone
(Domestic) orpre-recorded message (Voice)and then waiting foraperiod
of 5secondsforan alarmacknowledgement.
Ifno acknowledgement wasreceived the panelwillrepeat the message
and wait afurther5seconds. Thispatternisrepeated 4timesand if no
acknowledgement wasreceived the panelwillhang-up and dialthe next
number(ifmorethan one wasprogrammed).
Toacknowledge the alarmyou must press the <#>button on yourtele-
phone during the 5second quiet period.
Ifyoumissed the first quietperiodthe message isrepeated up toatotalof
4timeswitha5second quiet period afterevery message.
Alternativelyif you requireamoresecuremethod ofacknowledging an
alarmtoensurethat the alarmisonlykissed offbythe correct person you
can programa1-4digit code inthe controlpanel atlocation P175E14E
(see programsummaryon page 26).If acode isprogrammedatthisloca-
tion youmust enterinthe code followed bythe <#>button toacknowledge
the alarmevent.
ToAcknowledge aDomesticorVoicealarmPress;
<#> (on the remotetelephone)
Or;
<1-4DigitCode>then<#> (on theremotetelephone)

16
PROGRAMMINGYOURALARM
GETTINGINTO PROGRAMMODE
Thereare2levelsof programmode, CLIENT mode and INSTALLER
mode.Normallythe installerwillgiveyou access tothe CLIENT mode so
you can add, delete, orchange the usercodes.
In CLIENT mode you can programup to100 individualUserCodesthat
maybe 1-6digitsinlength.Eachof the 100 Userscan be assigned NO
access, LIMITEDaccess orFULL access to CLIENT mode. AUserwith
FULL access can change all access codes, change thepaneltime&date,
change the telephone numbers, change the remotecontrolcodes(DTMF),
add orremoveradiodevices,initiateWalk-testmode and accesssome
diagnosticfeatures. Allof thesethingscan be explainedindetailbyyour
installer.
Togetinto CLIENT mode provided the systemisNOT armed press;
<PROGRAM><CODE><ENTER>
The ProgramLEDwithturnON(LEDkeypad)or
The LCD Keypad willdisplay“CLIENT: USERS”
Ifyouget asinglelong beep at thispointand the aboveindicationsdo not
happen itmeansyourcode cannot access Programmode.
EXITINGPROGRAMMODE
Toexit outof programmode press;
<PROGRAM><ENTER> (LEDKeypad)
ProgramLEDwill turnOff or;
Press andhold <PROGRAM> for2seconds (LCD Keypad)
ADDING ORDELETINGAUSERCODE
Oncein CLIENT mode,toprogramaUsercode you enterthe Usercode
address(Programlocation 1)then the code address 1-100. Forexample
toprogramUser#3withacode “2580”, keyinthe following sequence:
<PROGRAM><1><ENTER><3><ENTER><2580><ENTER>
(eg P1E3E2580E)
Ifthereisan existing code alreadyatthataddress it will be displayed on

17
the keypad. Entering anewcode whereacode alreadyexistswilldelete
the oldcode and the newcode willbe displayed atthe keypad.
The panelwillgive3short beepstoindicatecorrect entry or1long tone if
not accepted.
Todeleteorclearausercode atan LEDkeypad,e.gusercode 3, keyin
the following sequence
<PROGRAM>1<ENTER>3<ENTER><BYPASS><ENTER>
Todeleteorclearausercode atan LCD keypad, e.gusercode 3, keyin
the following sequence
<PROGRAM>1<ENTER>3<ENTER><CONTROL>&<0><ENTER>
(Note: on theLEDkeypad a“0”isindicated by“Aux(0)”)
CHANGINGTELEPHONENUMBERS
Yourpanelwillaccept up to8phone numberswithatotalof 16 digits. It
can be can be programmed todialalloranyofthesedepending on the
eventwhichhasoccurred.
(The 8phone numbers areatprogramaddressesP181E1-8E)
Whilein CLIENT mode, keyinthe following sequence:
<PROGRAM><181><ENTER><1><ENTER>
(the addressfortelephone number1)
Anyexisting numberwill be displayed atthe keypad then press;
<NEW TELEPHONENUMBER><ENTER>
The newnumberwillbe displayed atthe keypad.
At anytimeyou canenterintheaddressforthe telephone numberjust to
viewthe currentlyprogrammedvalue then press the <PROGRAM>button
tomoveon toanotheraddress.
AddressP181E1E=PH#1,P181E2E=PH# 2toP181E8E=PH# 8.
Note: on theLEDkeypad “0”isindicated bythe “Aux(0)”LED.

18
PROGRAMMINGTHETIME&DATE
The alarmsystemhasan internal clockthatmaybe used toautomatically
ArmorDisarmthe alarm,turnOutputsOnorOff orrestrictUseractivity.It
isalsoused toidentifywhen eventsoccurred inmemoryviathe LCD key-
pad. The clock alsohasprovision for8pre-programmedholidaysand
start/stop timesfordaylightsaving. Daylight saving timescan be adjusted
inclientmode butwillnormallybeset byyourinstallersothe programlo-
cationsarenot covered here.
Tochange the Time&Datepress;
<PROGRAM><26><ENTER><1><ENTER><HHMM><ENTER>
HHMM =0000 to2359 (programmedin24 hourformat)
<PROGRAM><26><ENTER><2><ENTER><D><ENTER>
D=Daynumber1-7(1=Sunto7=Sat)
<PROGRAM><26><ENTER><3><ENTER><DDMMYY><ENTER>
DDMMYY =date/month/year
Tovieworset daylight saving On
<PROGRAM><26><ENTER><4><ENTER>
IfLED1ison daylight saving iscurrentlyactive
ToProgramHolidays
<PROGRAM><170><ENTER><1-8><ENTER><DDMMYY><ENTER>
Where1-8relatestoholidays1-8and DDMMYY=date/month/year
PROGRAMMINGTHEDTMF REMOTECONTROLCODES
The alarmsystemhasthe abilitytoallowthe ownertocallthe panel from
aremotetelephone and Arm/Disarm the system,turnOutputsOn/Off, turn
on amicrophone at the control panelorforceatest calltothe monitoring
company.You can alsoacknowledge alarmsreported on voiceordomes-
ticreporting mode witha4digitcode.If the featuresareavailablethe
ownercan programthesecodesfrom CLIENT program mode.
Tochange the DTMF Arm/Disarm codes press;
<PROGRAM><63><ENTER><1or2><ENTER><####><ENTER>
1=Area A, 2=Area B, #### =1-4digit code

19
Tochange the DTMF OutputControl code press;
<PROGRAM><175><ENTER><12><ENTER><####><ENTER>
#### =1-4digit code
Tochange the DTMF MicrophoneControlcode press;
<PROGRAM><175><ENTER><13><ENTER><####><ENTER>
#### =1-4digit code
Tochange the DTMF Voice/DomesticAlarm Acknowledgecode press;
<PROGRAM><175><ENTER><14><ENTER><####><ENTER>
#### =1-4digit code
Tochange the DTMF Force TestCallcode press;
<PROGRAM><175><ENTER><15><ENTER><####><ENTER>
#### =1-4digit code
PROGRAMMING/DELETINGorFINDINGRADIO KEYCODESor
ACCESS TAGS
The alarmsystemcan haveup to80radiousersprogrammed. Theop-
tional receiverboardmust be fitted toallowradiouserstowork. Radious-
erscan be programmed atUserlocations21-100. Itcanalternativelyhave
up to100 access controltagsorcardsprogrammedatuserlocations1-
100. Theremust be at least one proximityreaderconnected tothe panel
foraccess tags/cardstowork. The ownercan add/removeorfind radio
usersoraccesstagsfrom CLIENT program mode.
To Learnanew Radio User press;
<PROGRAM><18><ENTER><21-100><ENTER>
21-100 isUsernumber21-100.When inlearnmode thekeypad willbeep
at one second intervalsfor30 seconds. You must operatethe radiokey
withinthisperiod tolearnitintothe panel.
To Deletean existing RadioUser press;
<PROGRAM><19><ENTER><21-100><ENTER>
21-100 isUsernumber21-100. You must enterthe exact RadioUseryou
wishtodelete.
To Find an ExistingRadio User press;
<PROGRAM><20><ENTER><0><ENTER>
During find mode the keypad willbeep atone second intervalsfor30 sec-
onds. You must operatethe radiokeywithinthisperiod. Ifthe radioUser
code isfound inmemorythe Usernumberwillbe displayed at the keypad.

20
To Learnanew Access Tag User press;
<PROGRAM><21><ENTER><1-100><ENTER>
1-100 isUsernumber1-100.When inlearnmode the keypad will beep at
one second intervalsfor4minutes.You must present the accesstag toa
proximityreaderwithinthisperiod tolearnitintothe panel.
To Deletean existing Access TagUser press;
<PROGRAM><22><ENTER><1-100><ENTER>
1-100 isUsernumber1-100. You must entertheexactAccess Tag User
you wishtodelete.
To Find an ExistingAccess Tag User press;
<PROGRAM><23><ENTER><0><ENTER>
Whenfind mode hasstarted the keypad will beep at onesecond intervals
for4minutes. You must present the access tag toaproximityreader
withinthisperiod.If the Access Tag/Cardcode isfound inmemory the
Usernumberwillbe displayed atthe keypad.
PROGRAMMING/DELETINGorFINDINGRADIO ZONECODES
The alarmsystemcan haveup to16radiodetectors(zones)programmed
provided areceiverisfittedtothe panel.Anyof the16 zonescan be wired
orwireless zones.
The ownercan add/removeorfind radiozonesfrom CLIENT program
mode.
To Learnanew Radio Detector(zone) press;
<PROGRAM><164><ENTER><1-16><ENTER>
1-16 isZone 1-16.When inlearnmode the keypad willbeep at one sec-
ond intervalsfor30 seconds. You must operatethe radiodetectorwithin
thisperiod tolearnitintothe panel.
To Deletean existing RadioZone press;
<PROGRAM><165><ENTER><1-16><ENTER>
1-16 isZone 1-16.You must enterthe exactRadioZone numberyou
wishtodelete.
To Find an ExistingRadioZone press;
<PROGRAM><166><ENTER><0><ENTER>
During find mode the keypad willbeep atone second intervalsfor30 sec-
onds. You must operatethe radiodetectorwithinthisperiod.Ifthe radio
detectorcode isfound inmemory the Zone numberwill be displayed atthe
keypad.
Table of contents
Other AAP Security System manuals