manuals.online logo
Brands
  1. Home
  2. •
  3. Brands
  4. •
  5. ABB
  6. •
  7. Controllers
  8. •
  9. ABB 300-line User manual

ABB 300-line User manual

—
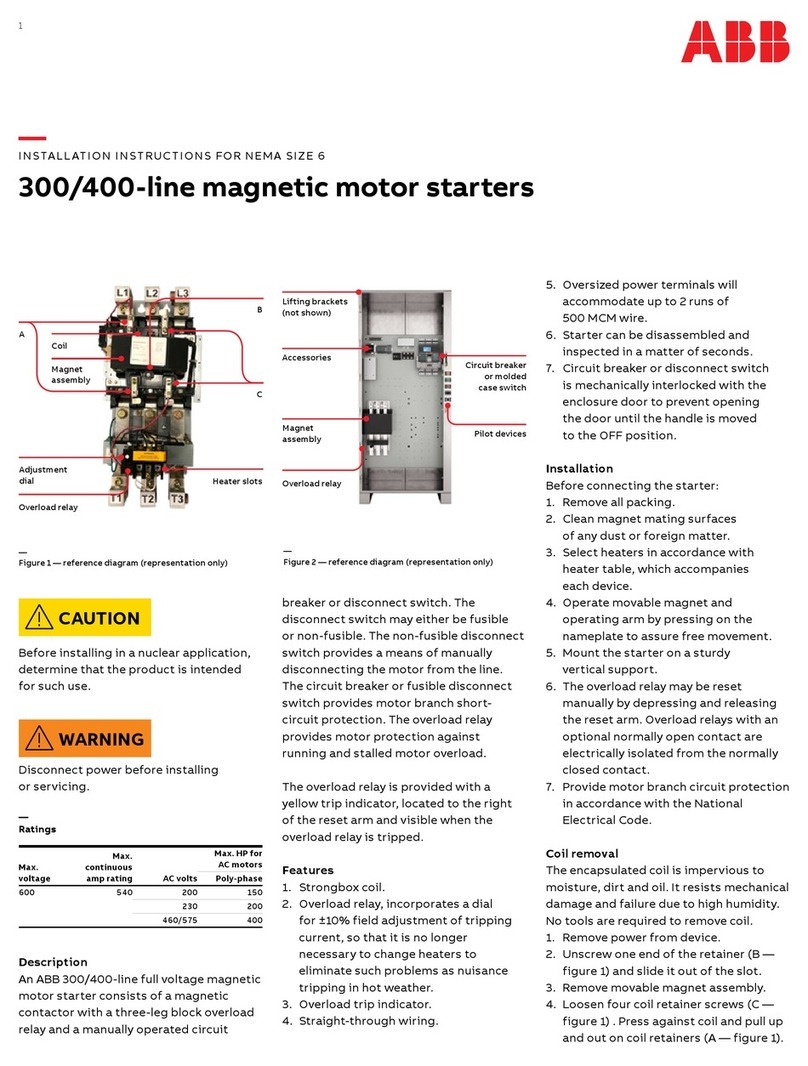
Figure 1 — reference diagram (representation only)
A
Coil B
Overload relay
Heater slots
Magnetic
assembly
Adjustment
dial
A
—
Figure 2 — reference diagram (representation only)
Coil retainer
Magnetic assembly
Adjustment dial
Overload relay
Fusible disconnect
switch
Fuse clip block
Spring clip
Coil retainer
OL relay heater slots
1
CAUTION
Before installing in a nuclear application,
determine that the product is intended
for such use.
WARNING
Disconnect power before installing
or servicing.
—
Ratings
Max.
voltage
Max.
continous
amp rating AC volts
Max. HP for AC motors
Single-
phase
Poly-
phase
   –
 –
  
 –
Description
An ABB 300-line full voltage magnetic
combination starter consists of a
magnetic contactor with a three-leg block
overload relay and a manually operated
circuit breaker or disconnect switch. The
disconnect switch may either be fusible
or non-fusible. The non-fusible disconnect
switch provides a means of manually
disconnecting the motor from the line.
The circuit breaker or fusible disconnect
switch provides motor branch short-
circuit protection. The overload relay
provides motor protection against
running and stalled motor overload.
The overload relay is provided with a
yellow trip indicator, located to the right
of the reset arm and visible when the
overload relay is tripped.
Features
1. Strongbox coil.
2. Overload relay, incorporates a dial
for ±10% field adjustment of tripping
current, so that it is no longer
necessary to change heaters to
eliminate such problems as nuisance
tripping in hot weather.
3. Overload trip indicator.
4. Straight-through wiring.
5. Oversized power terminals will

6. Starter can be disassembled and
inspected in a matter of seconds.
7. Circuit breaker or disconnect switch
is mechanically interlocked with the
enclosure door to prevent opening
the door until the handle is moved
to the OFF position.
Installation
Before connecting the starter:
1. Remove all packing.
2. Clean magnet mating surfaces
of any dust or foreign matter.
3. Select heaters in accordance with
heater table, which accompanies
each device.
4. Operate movable magnet and
operating arm by pressing on the
nameplate to assure free movement.
5. Mount the starter on a sturdy
vertical support.
6. The overload relay may be reset
manually by depressing and releasing
the reset arm. Overload relays with an
optional normally open contact are
electrically isolated from the normally
closed contact.
7. Provide motor branch circuit protection
in accordance with the National
Electrical Code.
Coil removal
The encapsulated coil is impervious to
moisture, dirt and oil. It resists mechanical
damage and failure due to high humidity.
No tools are required to remove coil.
1. Remove power from device.
2. Press against coil while pulling up
slightly on coil retainers (A—Figure 1)
and move retainers away from coil.
 
molded cover and movable arm
from device.
—
INSTALLATION INSTRUCTIONS FOR NEMA SIZE 3
300/400-line combination magnetic starters
2
 
remove armature from movable arm.
5. Remove coil from magnet.
6. Replace coil.
7. Reassemble device by reversing
procedure.
Contact removal
Movable contacts can be inspected
and replaced in seconds —without
tools (Figure 3).
1. Perform steps 1 through 5 under
“Coil removal.”
2. Remove magnet from molded cover
and movable arm.
3. Remove return spring from center
of movable arm.
4. Remove molded cover from movable
arm.
5. Depress and slide movable contact,
spring and spring seat from movable
arm.
6. Remove screws holding stationary
contacts in place and remove
stationary contacts
7. Reassemble device by reversing
procedure.
NOTE: Do not attempt to remove or
replace arc traps in arc chute cover.

chute cover will only fit one way and is
marked “TOP” in upper right-hand corner.
Magnet and movable arm will fit either
way but will be quieter if reassembled
the same way they were taken apart.
Check for welded contacts
in overload relay
This feature permits maintenance
personnel to check for welded relay
contacts by simply depressing the white
operator located at the top of the overload

the reset condition, an audible “click” will
be heard when the operator is depressed,
indicating that the contacts are operating
normally. A continuity check can also be
made by disconnecting the control wiring
from the terminals of the relay and placing
a bell set or a resistance measuring
instrument in the circuit. Connecting
either of these across the relay terminals
will indicate the relay contact is closed
until the contact-check operator is
depressed, opening the circuit. The
exclusive manual contact operation check
gives positive assurance that contacts
have not welded due to short circuits in
the control wiring.
Simple maintenance

require virtually no corrective
maintenance. Preventive maintenance
will assure many years of dependable
on-line service.
1. Always remove power from device
before performing any maintenance.
2. Keep magnet mating surfaces free
of accumulated dirt or dust.
 
mating surfaces.
4. Contacts are carefully designed for
maximum life. They need only be
replaced when nearly all the silver tip
is gone and the contact tip support is
exposed. DO NOT FILE the contacts.
Filing or otherwise dressing the
contacts only results in lost tip material
and reduces contactor or starter life.
5. The ultimate tripping current of the
installed relay heater can be adjusted
±10% by using adjustment dial.
—
Replacement coils



Frequency 115–120 V 200/208 V 230 –240 V – 460–480 V 575–600 V
    – 
Frequency 110 V – 220 V 380 V 440 V 550 V
  –   
—
Accessory kits
First NO auxiliary contact for contactor (right-side mounting) 
First NC auxiliary contact for contactor (right-side mounting) 
First NO-NC auxiliary contact for contactor (right-side mounting) 
Additional NO auxiliary contact for all forms 
Additional NC auxiliary contact for all forms 
Pushbutton, START-STOP 
Selector switch, H-O-A 
Selector switch, OFF-ON 
Indicating light 
Control circuit fuse 
Surge suppressor 
—
Figure 3 — reference diagram (representation only)
Stationary
contact
screws
Stationary
contacts
Movable
contacts
Movable arm
return spring
(not shown)
Spring seat
Spring
3
1SQC912011M0201 DEH-40628E, March 2021
—
We reserve the right to make technical
changes or modify the contents of this
document without prior notice. With regard
to purchase orders, the agreed particulars
shall prevail. ABB Inc. does not accept any
responsibility whatsoever for potential
errors or possible lack of information in
this document.
We reserve all rights in this document
and in the subject matter and illustrations
contained therein. Any reproduction or
utilization of its contents – in whole or in
parts – is forbidden without prior written
consent of ABB Inc. Copyright© 2021 ABB.
All rights reserved.
—
USA
ABB Inc.
305 Gregson Drive
Cary, NC 27511
electrification.us.abb.com
—
Principal renewal parts
Ref. no. Description Catalog number Quantity required
Coil retainer assembly  
   
   
   
   
Return spring for movable arm  
   
Armature and frame (magnet) with spring retainer  
   
 Spring retainer for armature  
*** Insert numbers for particular coil rating required. See coil table above.
These instructions do not purport to cover all details or variations in equipment nor
to provide for every possible contingency to be met in connection with installation,
operation or maintenance. Should further information be desired or should particular
problems arise that are not covered sufficiently for the purchaser’s purpose, the matter
should be referred to ABB Inc.
—
Figure 4 (representation only)
8
10
91
2, 3
4
5
7
6

This manual suits for next models

2

Other ABB Controllers manuals

ABB PSTX470 User manual

ABB

ABB PSTX470 User manual

ABB C50 User manual

ABB

ABB C50 User manual

ABB ACS310 Installation and operating manual

ABB

ABB ACS310 Installation and operating manual

ABB RMC-100 User manual

ABB

ABB RMC-100 User manual

ABB PSR User manual

ABB

ABB PSR User manual

ABB Triguard SC300E User guide

ABB

ABB Triguard SC300E User guide

ABB RVC User manual

ABB

ABB RVC User manual

ABB ACQ80-04 Series User manual

ABB

ABB ACQ80-04 Series User manual

ABB PDP32.0 User manual

ABB

ABB PDP32.0 User manual

ABB M2301 User manual

ABB

ABB M2301 User manual

ABB GPS2436 User manual

ABB

ABB GPS2436 User manual

ABB AC500 Series Manual

ABB

ABB AC500 Series Manual

ABB i-bus SA/S 2.6.2.1 User manual

ABB

ABB i-bus SA/S 2.6.2.1 User manual

ABB Welcome M2300 User manual

ABB

ABB Welcome M2300 User manual

ABB CR307 Series User manual

ABB

ABB CR307 Series User manual

ABB ACS550-U1-08A8-4 Operator's manual

ABB

ABB ACS550-U1-08A8-4 Operator's manual

ABB RELION REM615 User manual

ABB

ABB RELION REM615 User manual

ABB Contrac PME120AI User manual

ABB

ABB Contrac PME120AI User manual

ABB ACS880-07 User manual

ABB

ABB ACS880-07 User manual

ABB IED 670 User manual

ABB

ABB IED 670 User manual

ABB IRC5 Compact Instructions for use

ABB

ABB IRC5 Compact Instructions for use

ABB PSTX30 Parts list manual

ABB

ABB PSTX30 Parts list manual

ABB ACS880-17 User manual

ABB

ABB ACS880-17 User manual

ABB NIESSEN 2260 Series User manual

ABB

ABB NIESSEN 2260 Series User manual

Popular Controllers manuals by other brands

MICROIDEA EPFCB installation manual

MICROIDEA

MICROIDEA EPFCB installation manual

Carrier HSM user manual

Carrier

Carrier HSM user manual

AP Cumberland Feed-Link 2 Installation and operation manual

AP

AP Cumberland Feed-Link 2 Installation and operation manual

Bray PA(M)24-27 Series IOM manual

Bray

Bray PA(M)24-27 Series IOM manual

Afag SE-24 operating instructions

Afag

Afag SE-24 operating instructions

Demco DA66B Operator's manual

Demco

Demco DA66B Operator's manual

Calian SatService sat-nms ACU-19V2 user manual

Calian

Calian SatService sat-nms ACU-19V2 user manual

Emerson iPro Installation and operation manual

Emerson

Emerson iPro Installation and operation manual

Siemens SCALANCE M800 Getting started

Siemens

Siemens SCALANCE M800 Getting started

SKYDANCE V4-WPS quick start guide

SKYDANCE

SKYDANCE V4-WPS quick start guide

Hubbell Reversing-Plugging Control 4010 Specifications

Hubbell

Hubbell Reversing-Plugging Control 4010 Specifications

Team Losi LOSB9524 manual

Team Losi

Team Losi LOSB9524 manual

Monoprice 38174 Quick install guide

Monoprice

Monoprice 38174 Quick install guide

Velp Scientifica F201A0505 instruction manual

Velp Scientifica

Velp Scientifica F201A0505 instruction manual

GRAUPNER mc-24 PROFI-ROM manual

GRAUPNER

GRAUPNER mc-24 PROFI-ROM manual

Honeywell HON 5020 Assembly

Honeywell

Honeywell HON 5020 Assembly

Trident Raider Installation and operation manual

Trident

Trident Raider Installation and operation manual

Stairville DMX-Master 3-FX user manual

Stairville

Stairville DMX-Master 3-FX user manual

manuals.online logo
manuals.online logoBrands
  • About & Mission
  • Contact us
  • Privacy Policy
  • Terms and Conditions

Copyright 2025 Manuals.Online. All Rights Reserved.