6
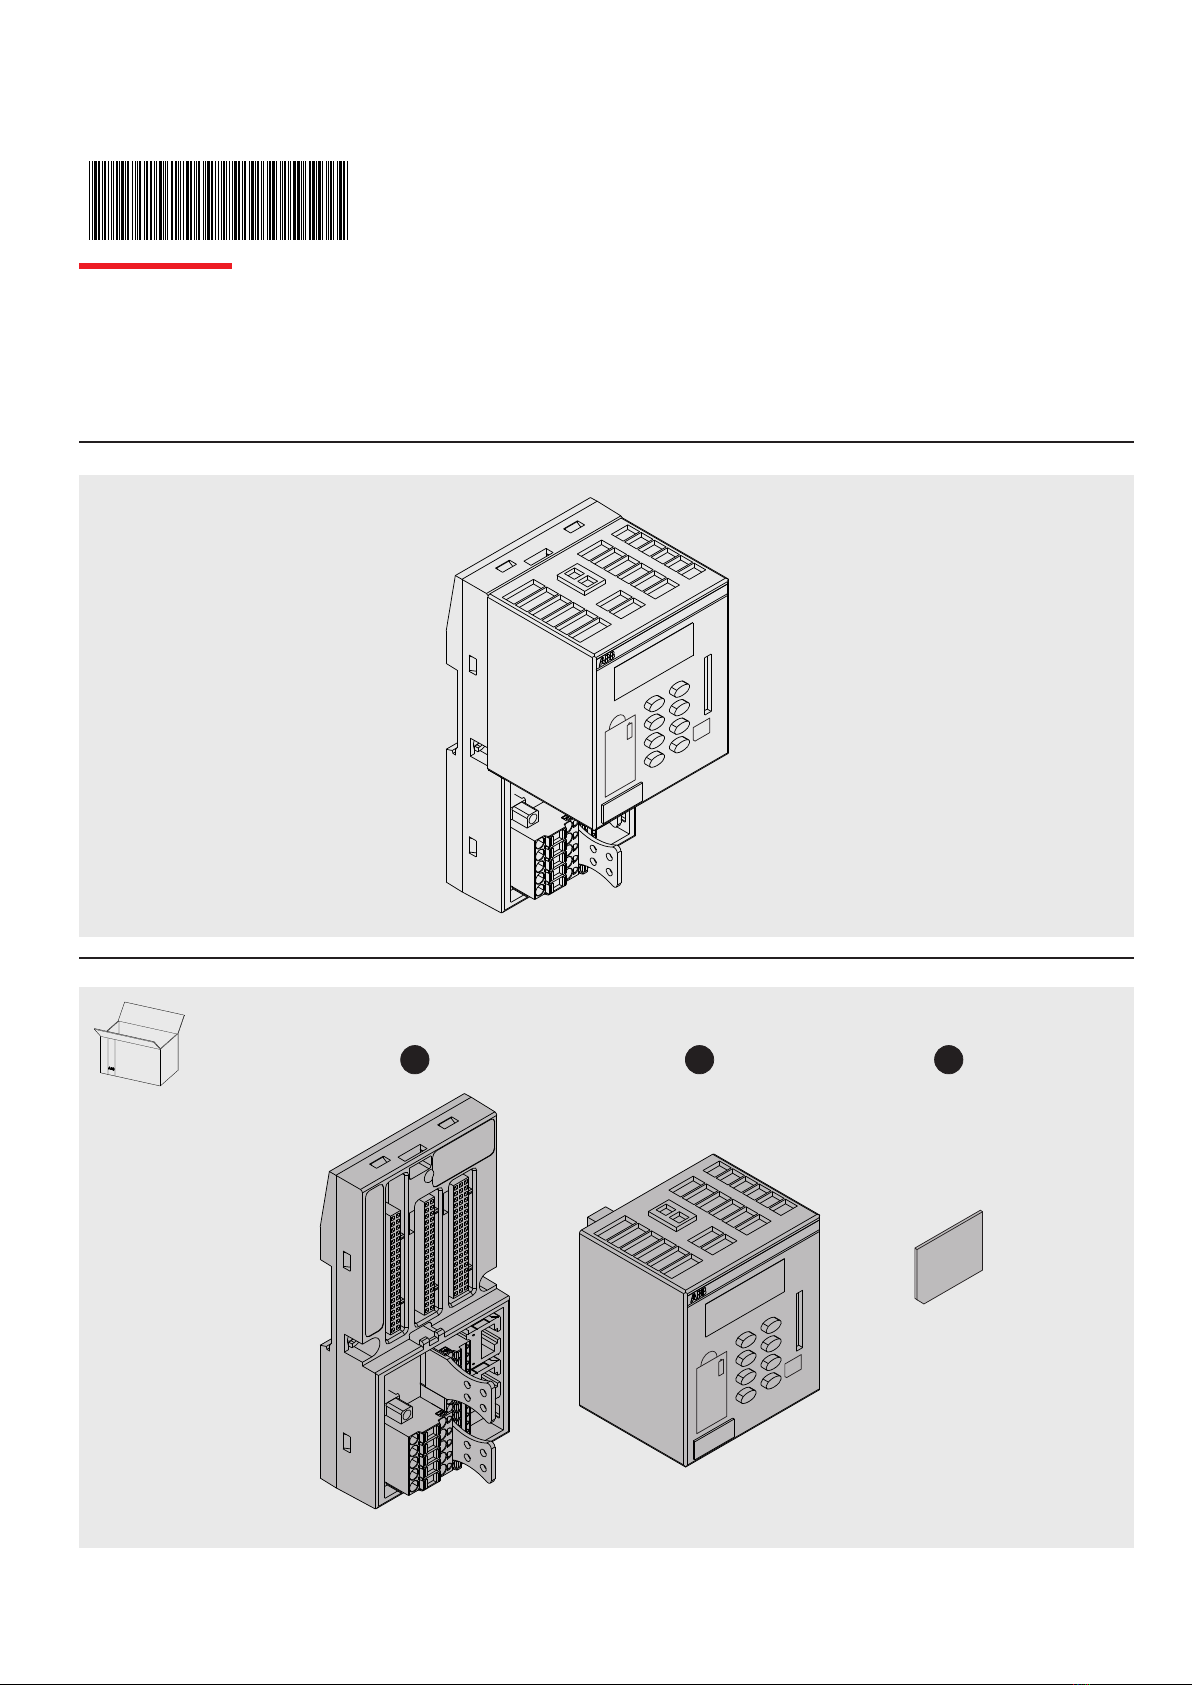
E-kit | ABB
IP Config
A2 168
A2 168
STATIC
APPLY
dOnE
OK
CFG
OK
OK
OK
- La pressione del tasto OK permette di visualizzare il secondo parametro
- Pressing the OK button displays the second parameter
- Durch Drücken der OK-Taste wird der zweite Parameter angezeigt
- Appuyer sur le bouton OK pour afficher le deuxième paramètre
- Al pulsar el botón Aceptar se muestra el segundo parámetro
- La pressione del tasto CFG permette la modifica del parametro.
È possibile cambiare il valore tramite i tasti freccia
- Pressing the CFG button allows the parameter to be changed.
You can change the value by using the arrow keys
- Durch Drücken der CFG-Taste kann der Parameter geändert werden.
Sie können den Wert mit den Pfeiltasten ändern
- Appuyer sur le bouton CFG permet de modifier le paramètre.
Vous pouvez modifier la valeur en utilisant les touches fléchées
- Pulsar el botón CFG permite cambiar el parámetro.
Puede cambiar el valor utilizando las teclas de flecha
- Ripetere i passaggi per la configurazione dei parametri
A3, A4, N1, N2, N3, N4, G1, G2, G3, G4
- Repeat steps for parameter configuration
A3, A4, N1, N2, N3, N4, G1, G2, G3, G4
- Wiederholen Sie die Schritte für die Parameterkonfiguration
A3, A4, N1, N2, N3, N4, G1, G2, G3, G4
- Répéter les étapes pour la configuration des paramètres
A3, A4, N1, N2, N3, N4, G1, G2, G3, G4
- Repetir los pasos para la configuración de parámetros
A3, A4, N1, N2, N3, N4, G1, G2, G3, G4
- La pressione del tasto OK permette di terminare la configurazione
- Pressing the OK button allows you to finish the configuration
- Durch Drücken der OK-Taste können Sie die Konfiguration beenden
- Appuyer sur le bouton OK pour terminer la configuration
- Pulsando el botón OK le permite terminar la configuraciónS
- La nuova pressione del tasto OK permette di confermare la modifica
- Press the OK button again to confirm the change
- Drücken Sie die OK-Taste erneut, um die Änderung zu bestätigen
- Appuyez de nouveau sur le bouton OK pour confirmer la modification.
- Pulse de nuevo el botón Aceptar para confirmar el cambioS
- Alla seconda pressione del tasto OK le modifiche sono attuate.
Spegnere e riaccendere la CPU per rendere effettiva la modifica
- At the second press of the OK button the changes are implemented.
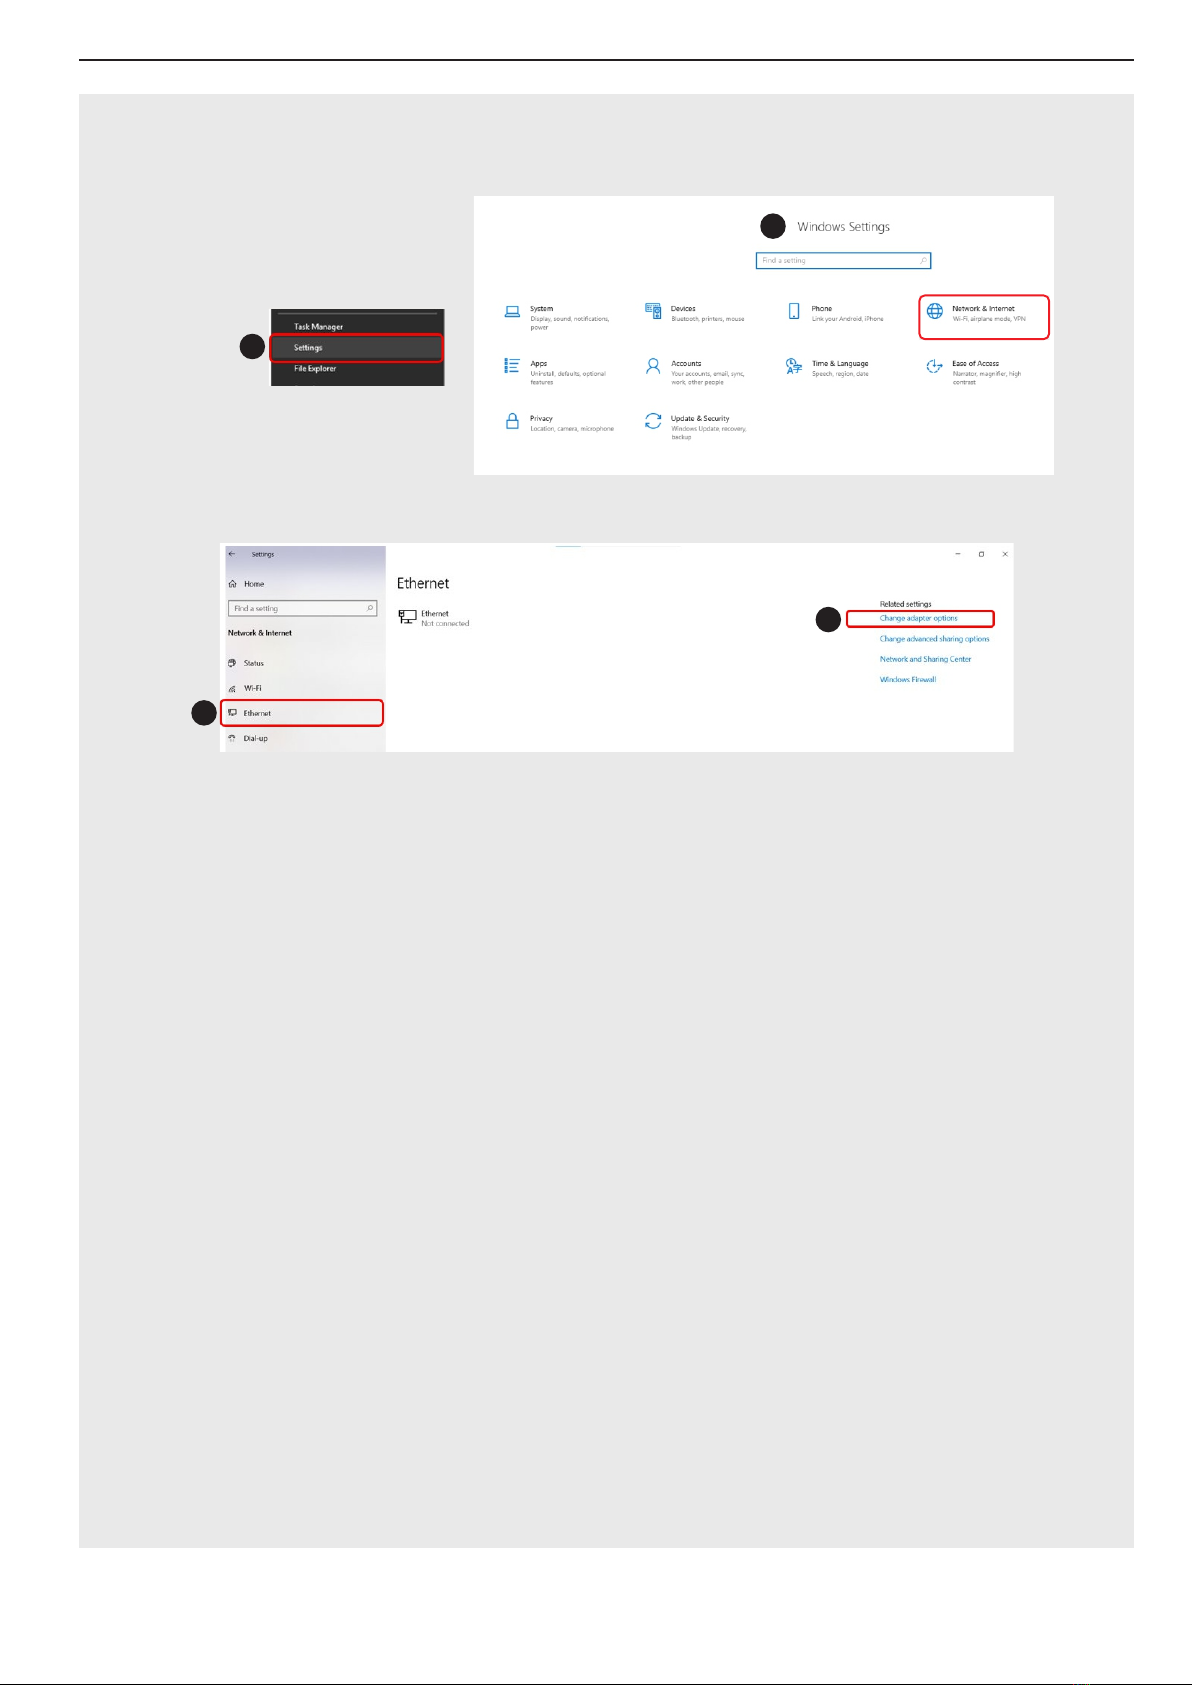
Turn off and on the CPU to make the change effective
- Beim zweiten Drücken der OK-Taste werden die Änderungen umgesetzt.
Schalten Sie die CPU aus und ein, um die Änderung wirksam zu machen
- À la deuxième pression du bouton OK, les modifications sont mises en œuvre.
Mettre l'UC hors tension pour que la modification soit efficace
- En la segunda pulsación del botón OK los cambios se implementan.
Apague y encienda la CPU para que el cambio sea efectivo
S OFF
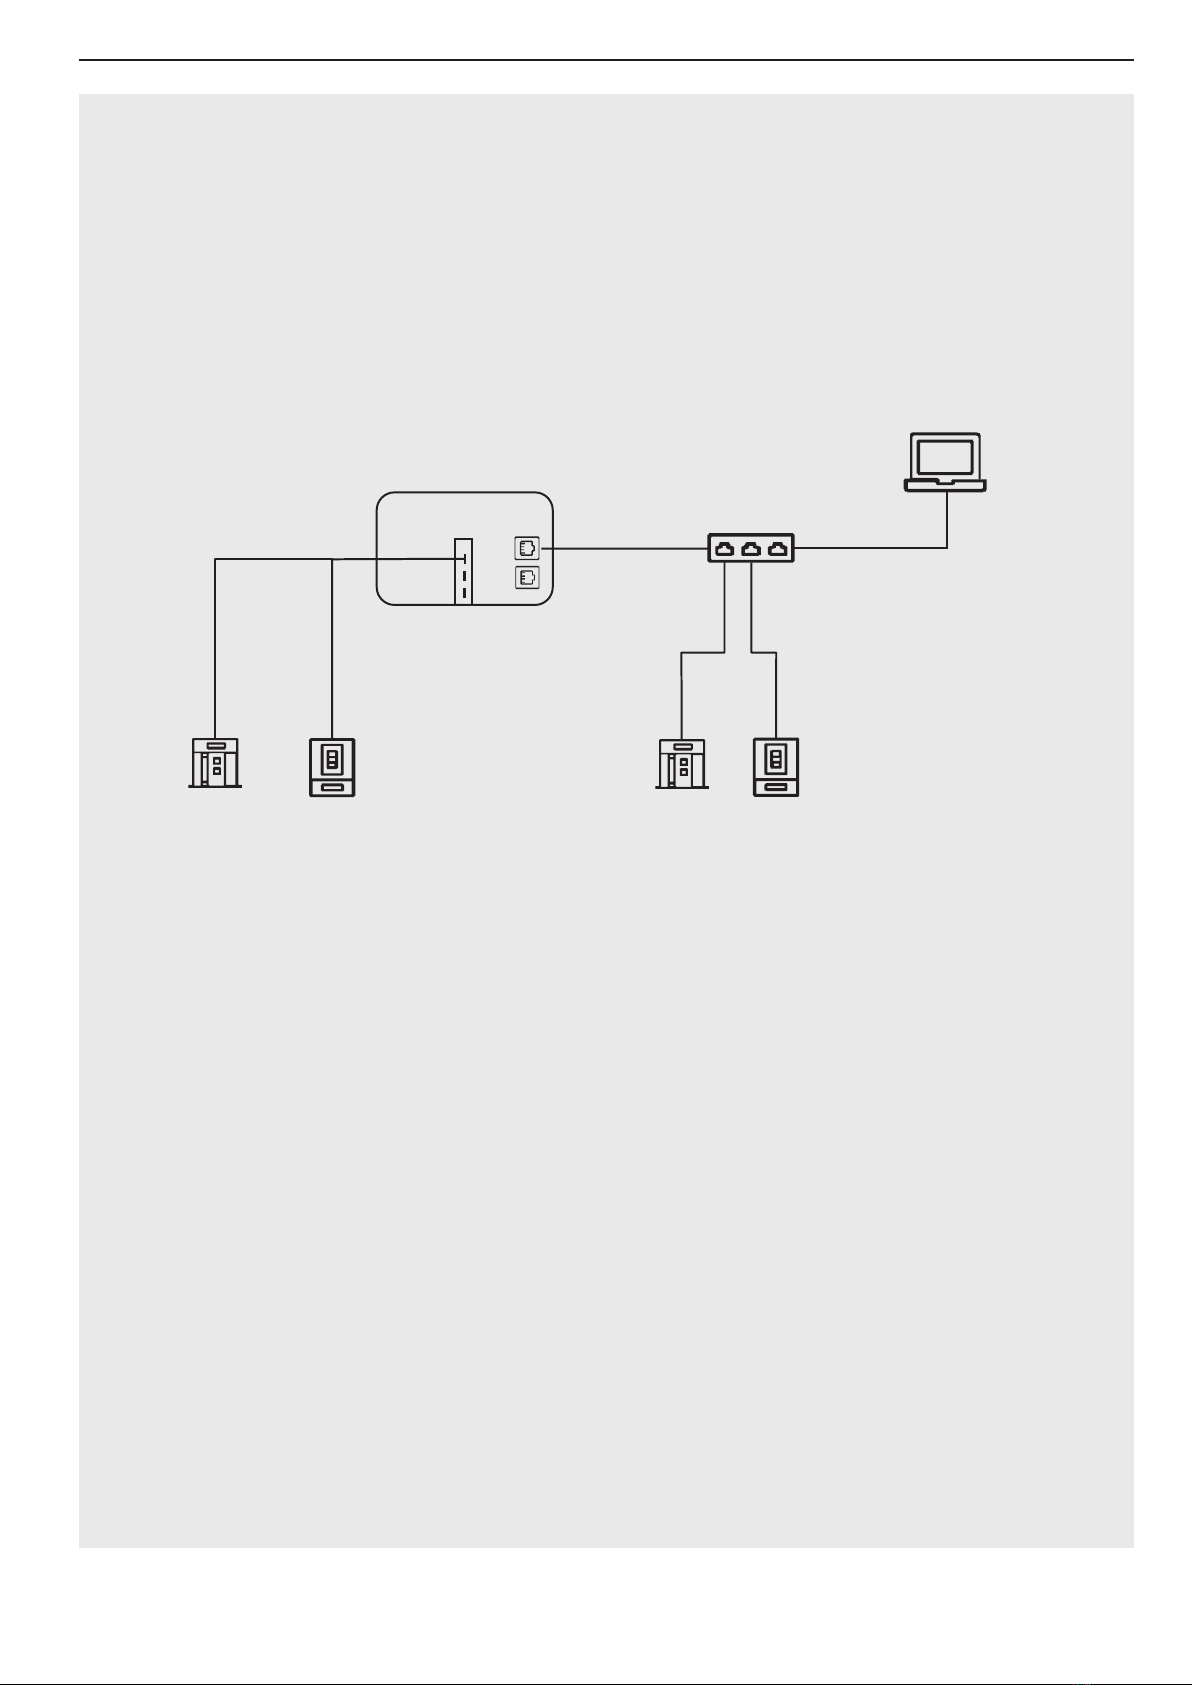
1 PEth1
STATIC
A1 192
A1 192
A2 168
A2 168
STATIC
APPLY
dOnE
CFG
CFG
CFG
CFG
OK
CFG
OK
OK
OK
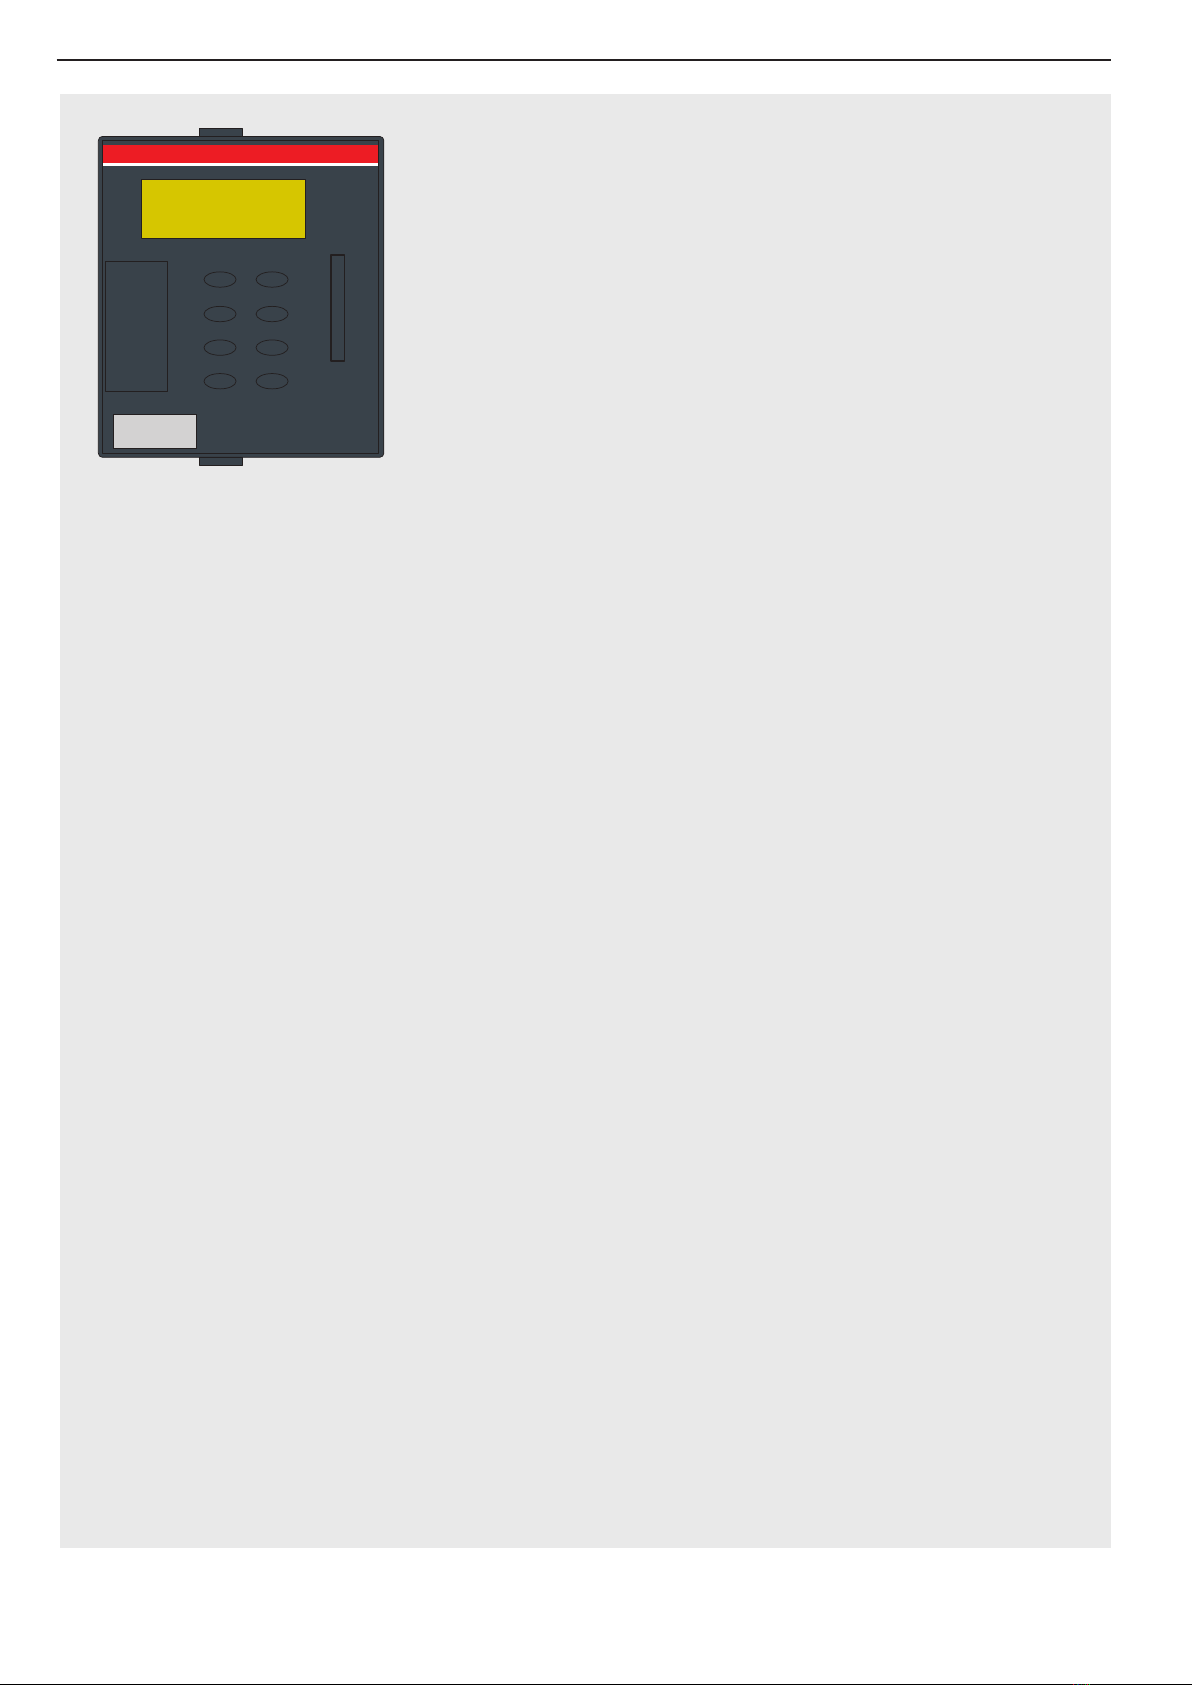
Con Package E-Kit acceso, premere il pulsante CFG
per entrare nella pagina di configurazione
Premere il tasto freccia per selezionare l’interfaccia
Eth1
Il pulsante CFG permette di impostare la modalità
con indirizzo statico
Il pulsante CFG permette di visualizzare il primo
parametro
L'indicatore del parametro comincia a lampeggiare e
tramite i tasti freccia è possibile modificarlo
La pressione del tasto OK permette di visualizzare
il secondo parametro
La pressione del tasto CFG permette la modifica del parametro.
È possibile cambiare il valore tramite i tasti freccia
Ripetere i passaggi per la configurazione dei parametri
A3, A4, N1, N2, N3, N4, G1, G2, G3, G4
La pressione del tasto OK permette di terminare
la configurazione
La nuova pressione del tasto OK permette di
confermare la modifica
Alla seconda pressione del tasto OK le modifiche sono attuate.
Spegnere e riaccendere la CPU per rendere effettiva la modifica