manuals.online logo
Brands
  1. Home
  2. •
  3. Brands
  4. •
  5. ABI INTERIORS
  6. •
  7. Bathroom Fixture
  8. •
  9. ABI INTERIORS Pixi 16007 User manual

ABI INTERIORS Pixi 16007 User manual

P IXI TILE INS E RT AS S E MBLY BE NCH-MO UNTE D
TAP S
Dis cla imer: P ro d u c ts in th is ma n u a l mu s t b y la w b e in s t a lled b y licen s ed a n d reg is tered tra d es p eo p le in a cc o rd a n c e w ith th e releva n t s ta n d a rd s . A B I a n d t h e ma n u f a ctu rer/dis trib u to r
res erve t h e rig h t t o va ry s p ecif ic a tio n s o r d elete mo d els f ro m th eir ra n g e w ith o u t p rio r n o t if ica t io n . D imen s io n s a re n o min a l mea s u remen ts o n ly. Th e in f o rma t io n lis ted is c o rrect a t th e time
o f p u b lica tio n , h o w ev er A B I a n d th e ma n u fa ctu rer/d is trib u to r ta k es n o res p o n s ib ility f o r p rin tin g erro rs . C o p y rig h t © A BI I n terio rs 2 02 2 P ty Lt d
SPECIFICATIONS
RECOMMENDED USE Domestic, Commercial
MATERIAL Solid Brass
TEMPERATURE RATING Maximum continuous working temperat ure 75°C
If the water temperature exceeds 75°C,an approved tempering
valve must be fitted
PRESSURE RATING Recommended minimum working pressure 150kPa
Recommended maximum working pressure 500kPa
Hot and cold water inlet pressure should be equal
SUITABLE HOT WATER UNITS Storage tank: Yes
Continuous Flow: Yes
Gravity Feed: Not suitable
BOXES IN SET 3 Boxes
AS/NZS 3718 : 2005
WM-0228 52
Regularly clean with mild
liquid detergent or soap
and water
DO NOT use cream
cleaners or bleach.
These substances are
abrasive
DO NOT use cleaning
pads with abrasive
surfaces as this may
scratch the material
1.
2.
1. Mount spindle attachment to spindle. IMPORTANT:
Ensure spindles are in the off position, turn clockwise
to turn off cold and ant-clockwise for hot.
2. Place cut tile on the face of the spindle attachment,
adjust its offset until the front face of tile is 43mm
from the face of the baseplate. Tighten the grub screw.
Remove the tile again and apply a bit of silicone to the
perimeter of the tile face and to the spindle attachment.
HHow to orientate the H/C symbol
At this point note where the symbol is located when the
handle is in the off position. Mark with a pencil the position
it needs to be. Return to step 2 and adjust the base plates
orientation by the referenced amount.
1. 2.
Mark out desired location of taps in relation to spout.
Cut holes using a 35mm hole saw.
Note: If cutting a stone bench top it will need to be cut
in a controlled environment by a licensed tradesperson
as per OH&S regulations.
Note: Spout
not included.
1
3 4
21. Screw spindle into in-bench breech, followed by the brass nut
and plastic washer.
2. Push spindles through holes and secure to the bench top,
ensure the base plates are 45mm down from spindle top.
This product must be installed by a licensed plumber. This is a general installation guide - there are many factors
involved that can alter the installation method. AU/NZ: For installations within Australia and New Zealand, this
product must be installed in compliance with AS/NZS 3500. UK: For installations in the United Kingdom this
product must be installed in compliance with the Water Supply (Water Fittings) Regulations and Water Supply
(Water Fittings) (Scotland) Byelaws. Other: For installations outside these countries, this product must be installed
in compliance with the standards in your respective country.
INSTALLATION GUIDE
51. Screw handle on to spindle attachment, while holding
then tile in disired position.
2. Fix handle into postion by inserting and tightening the
grub screw using allen key provided
Clean up any excess silicone
1.
2.
2 x handles 2 x baseplate 2 x spindle att. 1 x diamond hole saw 1 x 5mm allen key4 x M5 grub screw
Regularly clean with mild
liquid detergent or soap
and water
DO NOT use cream
cleaners or bleach.
These substances are
abrasive
DO NOT use cleaning
pads with abrasive
surfaces as this may
scratch the material
Note: Apply plumbing
tape where neccessary.
Allen key
inlet
inlet
4Connect pipework to spout from taps using flexi hoses.
(flexi hoses not included)
2 x spindle
2 x o-ring
2 x locking nut
IN THE BOX - (Spindle kit)
(1x R-hand turn, 1x L-hand turn)
IN THE BOX - (In-bench)
IN THE BOX - (Handle kit)
2 x washer
2 x in-bench breech 1 x compression tee fitting
2 x small nut
2 x olive2 x large nut
This product must be installed by a licensed plumber. This is a general installation guide - there are many factors
involved that can alter the installation method. AU/NZ: For installations within Australia and New Zealand, this
product must be installed in compliance with AS/NZS 3500. UK: For installations in the United Kingdom this
product must be installed in compliance with the Water Supply (Water Fittings) Regulations and Water Supply
(Water Fittings) (Scotland) Byelaws. Other: For installations outside these countries, this product must be installed
in compliance with the standards in your respective country.
INSTALLATION GUIDE
60mm Diamond Hole Saw
SKU: 15206
How to cut your tile insert
HOLE SAWS ARE INCLUDED WITH TAPS
Front View Isometric View
65
19
60
57
10
37
Using the provided 60mm diamond hole
saw, drill incrementally deeper into your tile
until through.
Drill press: we highly recommend getting a
professional to cut your tile using a drill press.
Work from the back face of the tile. Start
the drill on an angle so it is easier for the
hole saw to bite, then slowly bring the saw
vertical.
Hand drill: we do not recommend using this
method unless you are highly experienced.
1 2
Front face
Back face
Vertical
This product must be installed by a licensed plumber. This is a general installation guide - there are many factors
involved that can alter the installation method. AU/NZ: For installations within Australia and New Zealand, this
product must be installed in compliance with AS/NZS 3500. UK: For installations in the United Kingdom this
product must be installed in compliance with the Water Supply (Water Fittings) Regulations and Water Supply
(Water Fittings) (Scotland) Byelaws. Other: For installations outside these countries, this product must be installed
in compliance with the standards in your respective country.
INSTALLATION GUIDE

Other ABI INTERIORS Bathroom Fixture manuals
ABI INTERIORS 13076 User manual

ABI INTERIORS

ABI INTERIORS 13076 User manual

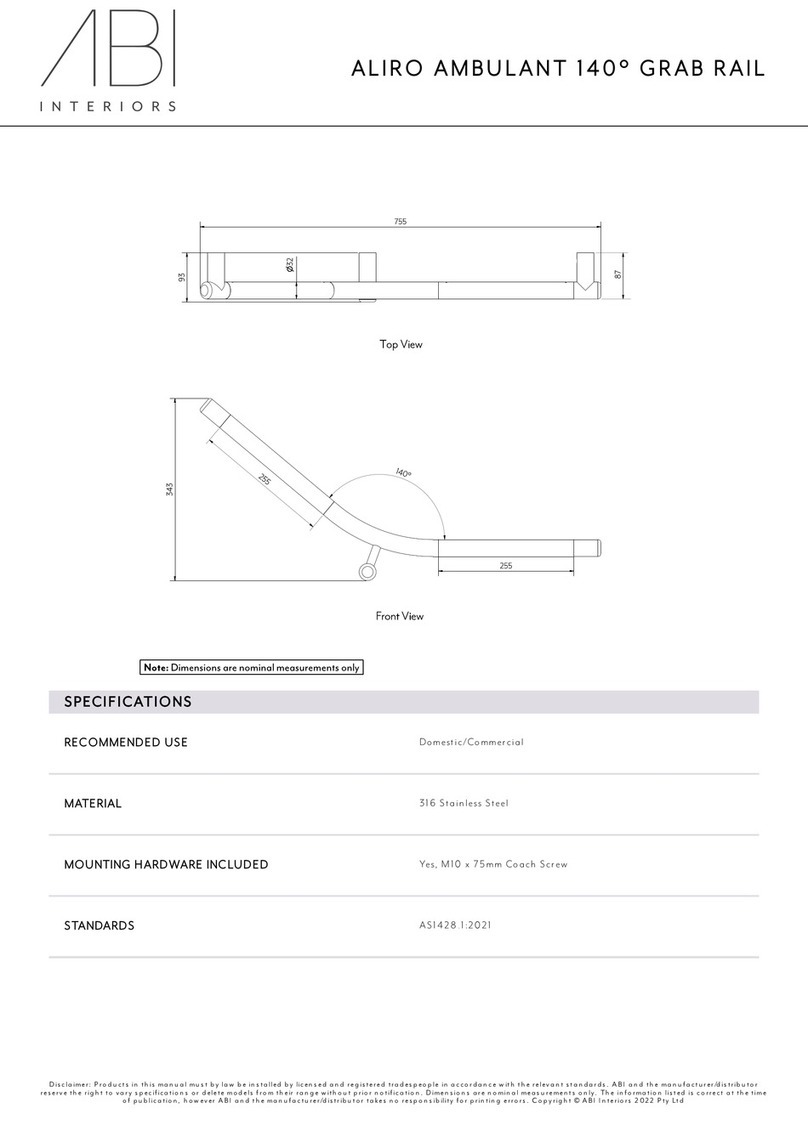
ABI INTERIORS Aliro Ambulant 14755 User manual

ABI INTERIORS

ABI INTERIORS Aliro Ambulant 14755 User manual

ABI INTERIORS ALIRO 14774 User manual

ABI INTERIORS

ABI INTERIORS ALIRO 14774 User manual

ABI INTERIORS Aliro Accessible 14736 User manual

ABI INTERIORS

ABI INTERIORS Aliro Accessible 14736 User manual

ABI INTERIORS Sola 15957 User manual

ABI INTERIORS

ABI INTERIORS Sola 15957 User manual

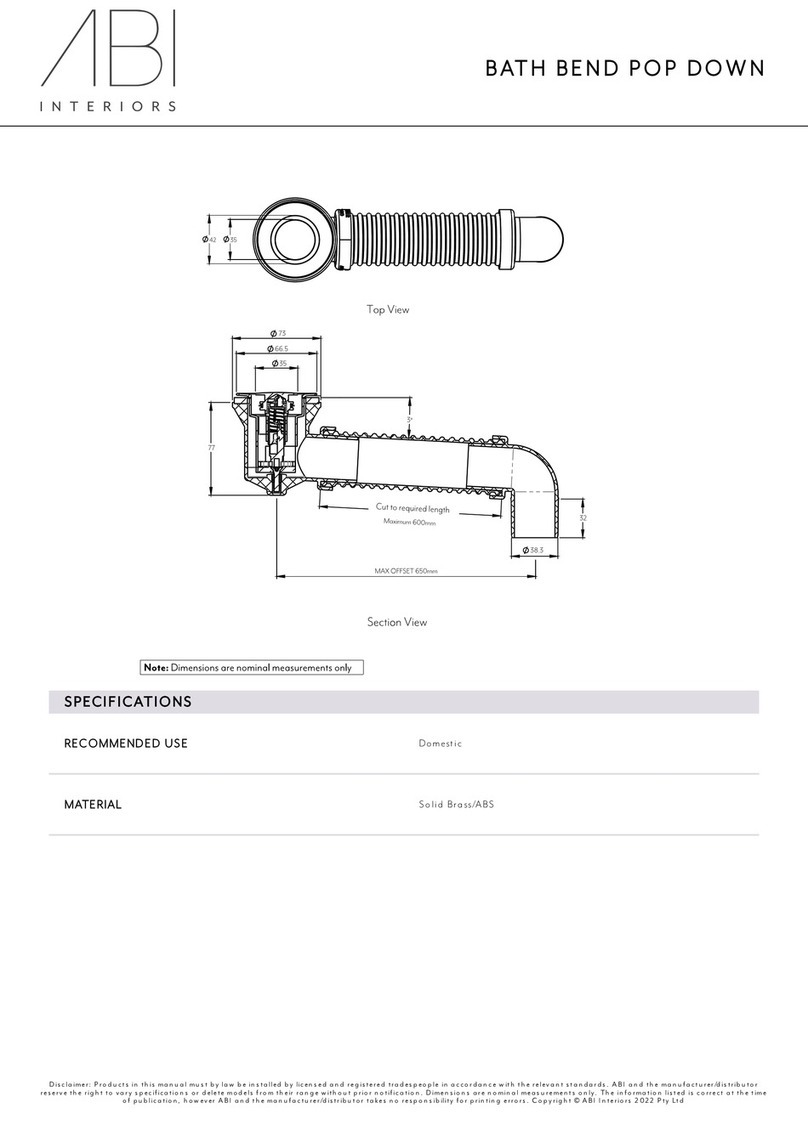
ABI INTERIORS BATH BEND POP DOWN User manual

ABI INTERIORS

ABI INTERIORS BATH BEND POP DOWN User manual

ABI INTERIORS Namika 15672 User manual

ABI INTERIORS

ABI INTERIORS Namika 15672 User manual

ABI INTERIORS ELYSIAN User manual

ABI INTERIORS

ABI INTERIORS ELYSIAN User manual
ABI INTERIORS ELYSIAN HAND TOWEL HOLDER 12250 User manual

ABI INTERIORS

ABI INTERIORS ELYSIAN HAND TOWEL HOLDER 12250 User manual

ABI INTERIORS ELYSIAN User manual

ABI INTERIORS

ABI INTERIORS ELYSIAN User manual

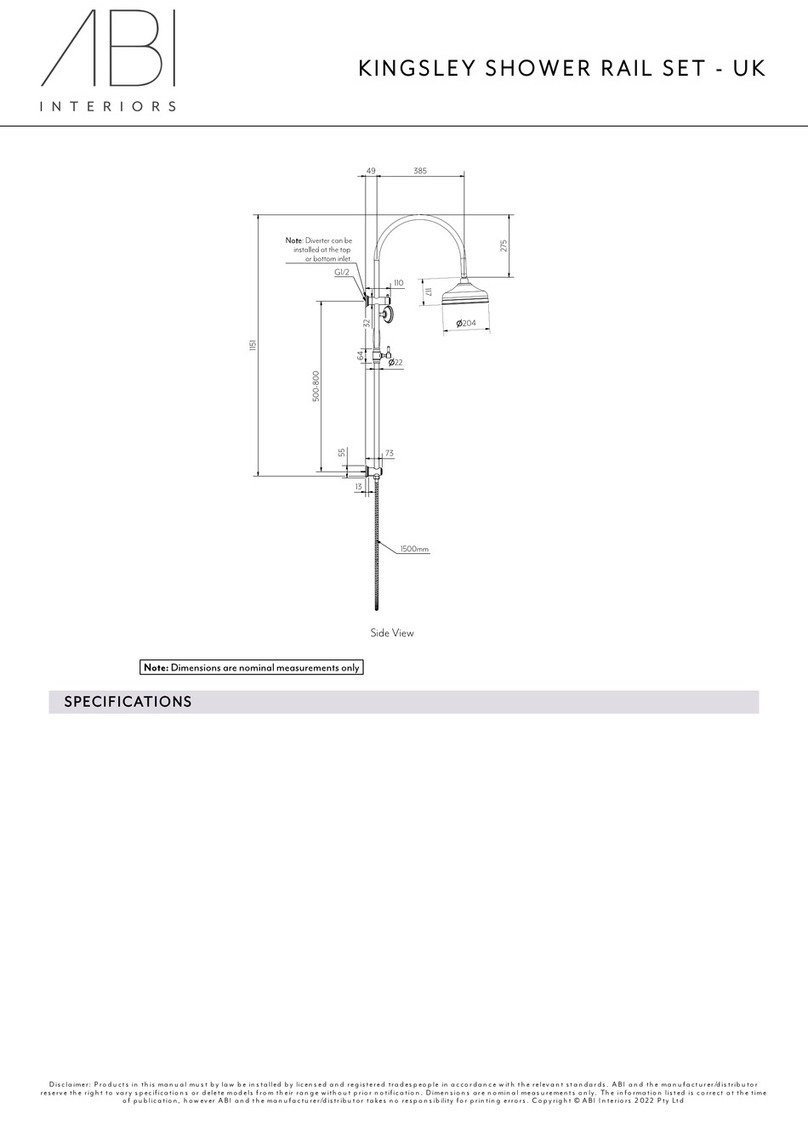
ABI INTERIORS KINGSLEY SHOWER RAILSET User manual

ABI INTERIORS

ABI INTERIORS KINGSLEY SHOWER RAILSET User manual

ABI INTERIORS Aliro 14772 User manual

ABI INTERIORS

ABI INTERIORS Aliro 14772 User manual

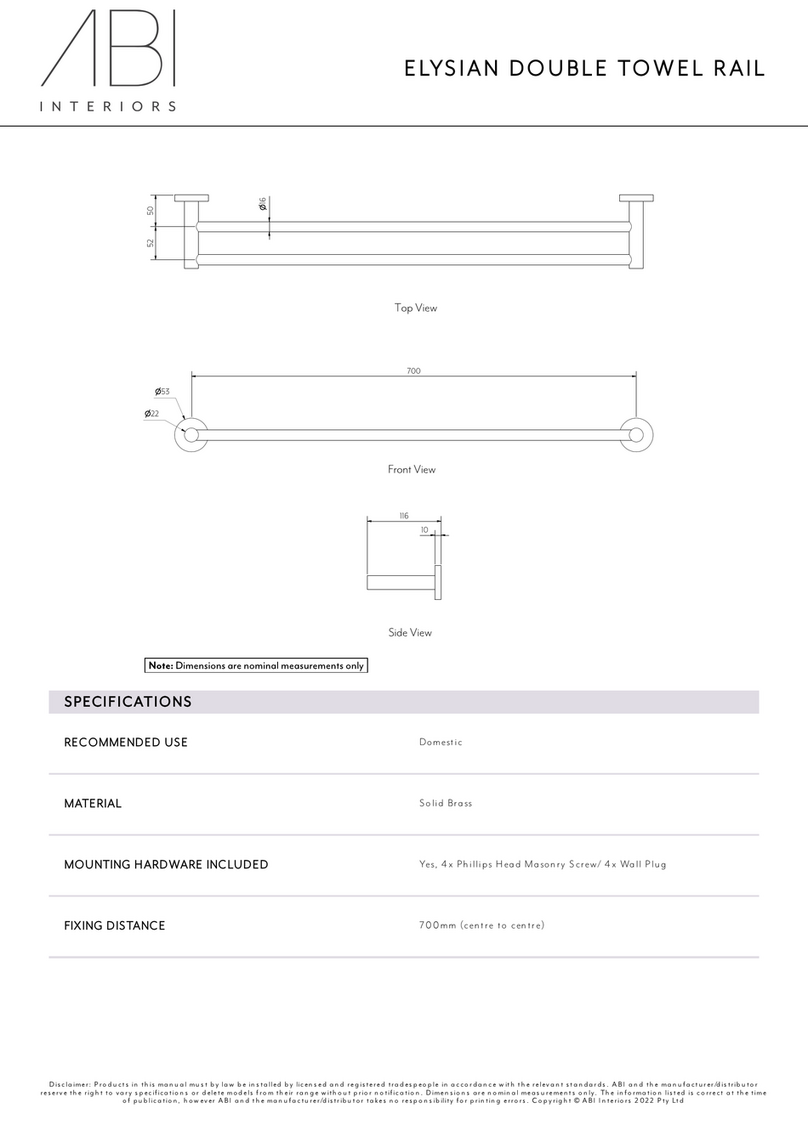
ABI INTERIORS ELYSIAN DOUBLE TOWEL RAIL 11447 User manual

ABI INTERIORS

ABI INTERIORS ELYSIAN DOUBLE TOWEL RAIL 11447 User manual

ABI INTERIORS 11836 User manual

ABI INTERIORS

ABI INTERIORS 11836 User manual

ABI INTERIORS AZUL User manual

ABI INTERIORS

ABI INTERIORS AZUL User manual

Popular Bathroom Fixture manuals by other brands

Fortis SCALA 8479700 quick start guide

Fortis

Fortis SCALA 8479700 quick start guide

Signature Hardware Key West 948308 manual

Signature Hardware

Signature Hardware Key West 948308 manual

Signature Hardware VASSOR 953802 manual

Signature Hardware

Signature Hardware VASSOR 953802 manual

Akuaplus NADIA SPB 9817BN user manual

Akuaplus

Akuaplus NADIA SPB 9817BN user manual

Brizo Tresa 65036LF-PC quick start guide

Brizo

Brizo Tresa 65036LF-PC quick start guide

Porcelanosa SYSTEMPOOL YOVE 9C+5 USA Installation and user manual

Porcelanosa

Porcelanosa SYSTEMPOOL YOVE 9C+5 USA Installation and user manual

Helvex UH-3300-WA installation guide

Helvex

Helvex UH-3300-WA installation guide

Helvex 285-19-0.5 installation guide

Helvex

Helvex 285-19-0.5 installation guide

Kohler Mira Sport Multi-fit J03E Installation and user guide

Kohler

Kohler Mira Sport Multi-fit J03E Installation and user guide

Miomare 296095 Assembly, operating and safety instructions

Miomare

Miomare 296095 Assembly, operating and safety instructions

Hans Grohe AXOR Starck Semi-Pro 10820000 Instructions for use/assembly instructions

Hans Grohe

Hans Grohe AXOR Starck Semi-Pro 10820000 Instructions for use/assembly instructions

Bradley 400 Series Installation

Bradley

Bradley 400 Series Installation

PEERLESS PTT188733 Series manual

PEERLESS

PEERLESS PTT188733 Series manual

Gessi INCISO 58525 manual

Gessi

Gessi INCISO 58525 manual

BATHSELECT BZ-5645RB installation instructions

BATHSELECT

BATHSELECT BZ-5645RB installation instructions

agape RIGO maintenance

agape

agape RIGO maintenance

Hans Grohe Raindance Showerpipe 27235000 Instructions for use/assembly instructions

Hans Grohe

Hans Grohe Raindance Showerpipe 27235000 Instructions for use/assembly instructions

FORENO SOLITAIRE SLT73RMB quick start guide

FORENO

FORENO SOLITAIRE SLT73RMB quick start guide

manuals.online logo
manuals.online logoBrands
  • About & Mission
  • Contact us
  • Privacy Policy
  • Terms and Conditions

Copyright 2025 Manuals.Online. All Rights Reserved.