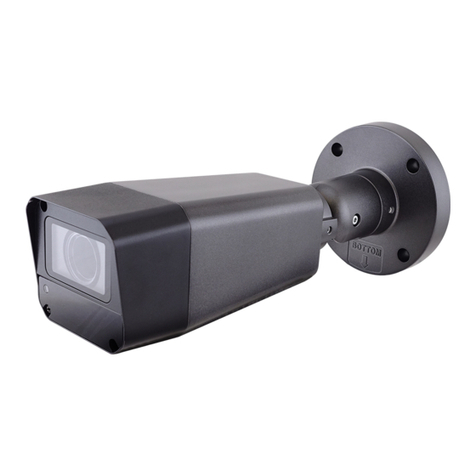
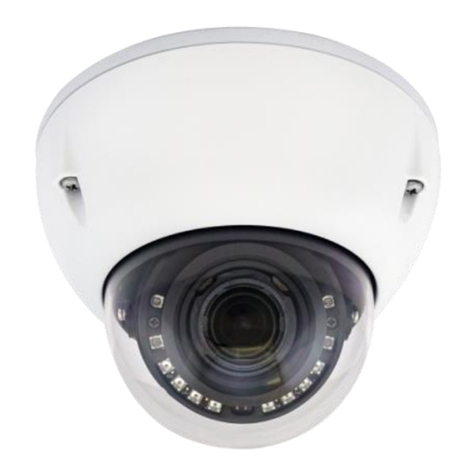
Ability VS12112 User manual

AI-Vue Camera
User Manual
VS1NL70 8M / VS1NN60 2M
VS6NLB0 8M / VS6NN60 2M
VS1NN70 / VS1NNL0 / VS12112 / VS12100 2M
Copyright ©Ability Enterprise Co., Ltd.
All rights reserved.
User Manual
Ver:02

ABILITY AI-Vue Camera
User's Manual - 1
Table of Contents
Overview.......................................................................................................................5
1. Read Before Use.........................................................................................5
2. Regulatory Information ...............................................................................5
1Connect the Camera ...........................................................................................6
1. Note ...............................................................................................................6
2. Single Camera .............................................................................................7
3. Multiple Camera ..........................................................................................7
2Web Interface........................................................................................................8
1. Log In ............................................................................................................8
2. Transport Layer Security..........................................................................10
3. User Permissions for Web/HTTPS.........................................................11
4. Auto Logout................................................................................................11
5. Auto play Policy .........................................................................................12
3Live View .............................................................................................................12
1. Overview.....................................................................................................12
2. Microphone.................................................................................................12
3. Volume ........................................................................................................13
4. Snapshot.....................................................................................................13
5. Full Screen .................................................................................................14
6. Zoom In & Zoom Out ................................................................................14
7. Focus...........................................................................................................15
8. Refresh Focus............................................................................................15
4Image & Image Parameters .............................................................................15
1. Image Adjustment .....................................................................................15
2. White Balance............................................................................................16
5Image & Image Configs.....................................................................................16
6Image & Exposure Mode ..................................................................................17
1. Create a ROI Rectangle...........................................................................17
7Image & Advanced Setting ...............................................................................18
1. Components...............................................................................................18
2. IR-Cut Filter Removal (ICR) ....................................................................19
3. Exposure.....................................................................................................19
4. Levels..........................................................................................................19
5. Navigator Viewer .......................................................................................19
6. Focus...........................................................................................................20
7. Save & Reset .............................................................................................20

ABILITY AI-Vue Camera
User's Manual - 2
8. Duplicate.....................................................................................................21
8Image & Schedule..............................................................................................22
1. Overview.....................................................................................................22
2. Camera Date & Time ................................................................................22
3. Year/Season Switch Control....................................................................22
4. Year Mode ..................................................................................................22
5. Season Mode.............................................................................................23
9System & Device ................................................................................................24
1. Camera Name............................................................................................24
2. Backup & Restore .....................................................................................24
3. Reboot.........................................................................................................24
4. SD Card ......................................................................................................25
5. Recording ...................................................................................................26
6. Date And Time ...........................................................................................26
7. Time Picker.................................................................................................26
10 System & Stream Configs.................................................................................26
1. Web Stream ...............................................................................................26
2. Main Camera Stream................................................................................26
3. Second Camera Stream...........................................................................27
11 System & Privacy Mask ....................................................................................27
1. Mask Status................................................................................................28
2. The Mask Rule...........................................................................................28
3. Priority of Overlay & Mask .......................................................................28
12 Overlay.................................................................................................................29
1. Stamp..........................................................................................................29
2. Overlay Preview ........................................................................................29
3. Basic Setting ..............................................................................................29
4. Add Photo...................................................................................................30
5. Position .......................................................................................................30
13 System & Audio ..................................................................................................30
1. Microphone.................................................................................................30
2. Speaker.......................................................................................................31
3. Synchronized with The Live View...........................................................31
14 System & Digital I/O...........................................................................................31
1. Digital Input ................................................................................................31
2. Digital Output.............................................................................................31
15 Network Basic.....................................................................................................32
1. Different Display Types.............................................................................32

ABILITY AI-Vue Camera
User's Manual - 3
2. Change Network Type ..............................................................................32
16 Network Advanced .............................................................................................33
1. Device Discovery.......................................................................................33
17 Network IEEE 802.1X........................................................................................33
1. How To Upload A File................................................................................33
2. Switch To EAP-TLS...................................................................................33
3. Switch To EAP-TTLS / PEAP ..................................................................33
4. Refresh........................................................................................................34
5. Reset Button ..............................................................................................34
18 Notification - Camera Log .................................................................................35
1. Setting (Default).........................................................................................35
2. Log List........................................................................................................35
3. Export..........................................................................................................36
19 Notification - Event Setting ...............................................................................36
1. Add New Event..........................................................................................36
2. Event List....................................................................................................37
3. Edit Event ...................................................................................................37
4. Delete the Event........................................................................................37
20 Notification - Trigger Source.............................................................................38
21 Notification - Notify Setting ...............................................................................38
1. Notify Method.............................................................................................38
2. How to Add Audio......................................................................................39
3. Test Serve...................................................................................................39
22 Storage ................................................................................................................39
1. File List........................................................................................................40
2. Delete The Files ........................................................................................40
3. Download the Filet ....................................................................................40
4. Refresh........................................................................................................40
23 Administration .....................................................................................................40
1. Firmware Update.......................................................................................40
2. Factory Reset.............................................................................................41
3. SSH Server ................................................................................................41
4. Port ..............................................................................................................41
5. Modify Password .......................................................................................41
6. Public Key File ...........................................................................................41
24 Password.............................................................................................................42
1. Change Password.....................................................................................42
2. Password Not Match.................................................................................43

ABILITY AI-Vue Camera
User's Manual - 5
Overview
1. Read Before Use
The Manual includes instructions for using and managing the Product.
Pictures, charts, images and all other information hereinafter are for
description and explanation only. The information contained in the Manual is
subject to change, without notice, due to firmware updates or other reasons.
Please find the latest version of this Manual at the Ability website
(http://www.abilitycorp.com.tw/).
The Network Camera is a network device and its use should be
straightforward for those who have basic networking knowledge. It is designed
for various applications including video sharing, general security/surveillance,
etc. The use of surveillance devices may be prohibited by law in your country.
The Network Camera is not only a high-performance web-ready camera but
can also be part of a flexible surveillance system. It is the user’s responsibility
to ensure that the operation of such devices is legal before installing this unit
for its intended use.
2. Regulatory Information
FCC Information
This equipment has been tested and found to comply with the limits for a Class A
digital device, pursuant to part 15 of the FCC rules.
This device compiles with FCC Rules Part 15. Operation is subject to the following
two conditions.
This device may not cause harmful interference, and
This device must accept any interference received, including interference
that may cause undesired operation.
These limits are designed to provide reasonable protection against harmful
interference when the equipment is operated in a commercial environment. This
equipment generates, uses, and can radiate radio frequency energy and, if not
installed and used in accordance with the instruction manual, may cause harmful
interference to radio communications. Operation of this equipment in a residential
area is likely to cause harmful interference in which case the user will be required to
correct the interference at his own expense.
EU Conformity Statement
This product and - if applicable - the supplied accessories too are marked with "CE"

ABILITY AI-Vue Camera
User's Manual - 6
and comply therefore with the applicable harmonized European standards listed
under the the EMC Directive 2014/30/EU, the RoHS Directive 2011/65/EU.
2012/19/EU (WEEE directive): Products marked with this symbol cannot be
disposed of as unsorted municipal waste in the European Union. For proper
recycling, return this product to your local supplier upon the purchase of equivalent
new equipment, or dispose of it at designated collection points. For more information
see: www. recyclethis.info
Safety
Power Supply : The input voltage should conform to IEC60950-1 standard: SELV
(Safety Extra Low Voltage) and the LPS (Limited Power Source). Refer to the
appropriate documentation for detailed information. DO NOT connect multiple
devices to one power adapter, to avoid over-heating or fire hazards caused by
overload. Make sure the plug is properly connected to the power socket.
When used with Power over Ethernet (PoE), the Power Sourcing Equipment PSE)
shall comply with IEEE 802.3af and Limited Power Source (LPS) according to clause
2.5 of IEC/EN/UL 60950-1 or annex Q of IEC/EN/UL 62368-1.
1 Connect the Camera
1. Note
Make sure the device in the package is in good condition and all the assembly
parts are included.
Please refer to Quick Start Guide for camera installation.

ABILITY AI-Vue Camera
User's Manual - 7
2. Single Camera
The IP segments, Subnet mask and default gateway must be same for both IP
camera and computer. Ensuring IP camera and computer are in the same
router
Enable DHCP in router. Accessing via Web Browser then login with default
account information. (user name: admin, password: AbAi.Camera1). DHCP is
the default network setting of camera
If routers fails to assign IP address by DHCP, the network setting will change to
static IPv4 IP address (https://192.168.0.11), find the camera and Login the
web browser with default account information and connect Camera.
3. Multiple Camera
Follow the instructions (1) to (2) in Single Camera. Unless a router fails to
aasign IP addresses by DHCP and camera network setting change to Static
IPv4 address, a unique IP address setting for each of cameras is required.

ABILITY AI-Vue Camera
User's Manual - 8
Find a camera (https://192.168.0.11) and login the web browser with default
account information and connect camera. Go to System, then choose Network,
you can change the IP address for the camera. Repeat this process until each
camera has a unique IP address.
2 Web Interface
1. Log In
In web browser, type the IP address of the Network Camera in address field
can enter the Login Screen.

ABILITY AI-Vue Camera
User's Manual - 9
Note:
This web will change dynamically to the appearance of a website, depending
on the screen size and orientation of the device being used to view it.
The dedault resolution is 1440px* 900px. Scale down/up is feasible from
1280px to 1920px,etc.
The web page could be opened by any browser, but full function and bug-fix
only on Google Chrome.
STEP 1
Click Sign in to login the camera web interface.
STEP 2
Since your camera is used for the first time, enter default user name as the user name,
and the password. ( See section 2.1 instruction (2) for Default User Name & Password )
STEP 3
At initial login to the device, the user will must be register new account.
The default account cannot login after new account (Administrator or User) is
registered.
Click on the words in the blue area (Account Rules) to see more information
about account rules.

ABILITY AI-Vue Camera
User's Manual - 10
For security reasons, the web will be locked for 300 seconds when login failed
for 3 times.
Username
Must be 5 to 16 characters, including alphanumeric characters.
Cannot begin with numbers.
Cannot be single character only (ex: aaaaa).
Cannot be default/bad usernames, including admin, opuser, users,
guest, mysql, administrator, oracle.
Cannot be the same as registered account username.
Password
Must be 5 to 16 characters, including alphanumeric characters.
Cannot begin with numbers.
Cannot be single character only (ex: aaaaa).
Cannot be default/bad usernames, including admin, opuser, users,
guest, mysql, administrator, oracle.
Cannot be the same as registered account username.
More Information
2. Transport Layer Security
TLS connection
Apply for HTTPS
Authentication
Apply for HTTPS, RTSP and ONVIF.

ABILITY AI-Vue Camera
User's Manual - 11
Web/HTTPS
Administrator / User / Operator
RTSP/ONVIF
Administrator / User / Operator / Anonymous
Web/HTTPS account username and password
Default one administrator account and one user account
Default administrator account: admin / AbAi.Camera1
Default operator account: opuser / AbOp.Camera1
Default user account: users / Edge.Camera1
3. User Permissions for Web/HTTPS
Administrator can access all web/camera resources
User can see live view web page only
Operator can access all network/camera resource
4. Auto Logout
For security reasons, the web will automatically log out after you have been
idle for 10 minutes (600 seconds).
The status of the reset counter is as follows.
When switching pages or any communication with camera
Click the refresh button ( )

ABILITY AI-Vue Camera
User's Manual - 12
5. Auto play Policy
For security reasons, browser may prevent web from auto play stream. In this case user
needs to click the play button ( ) to play the stream.
3 Live View
1. Overview
The aspect ratio of screen will be different according to video resolution on the
LiveView.
The Tool Bar is hidden after idle for 3 seconds, but it will be displayed when
the mouse cursor moves on the screen.
The setting area is enable only while the schedule mode is in default mode
(Year + All day) and it will be the same of the all day in the advanced setting
synchronously. Except when disable state.
2. Microphone
The Microphone Button( ) is only displayed when microphone has been
installed on local computer.

ABILITY AI-Vue Camera
User's Manual - 13
Click the Microphone Button to activate the talking feature while Microphone
status( ) on top right corner of the video and click it again to inactivate it.
The volume slider is hidden and the last volume setting will be remembered
when the Microphone button is inactive (Default).
The volume slider is displayed when the Microphone button is active. [Drag
the slider can adjust the Microphone volume in a range of 0~100 (Default: 50).
3. Volume
The volume slider is hidden and the last volume setting will be remembered
when the Speaker button is inactive (Default).
The volume slider is displayed when the Speaker button is active. [Drag the
slider can adjust the Speaker volume in a range of 0~100 (Default: 50)].
4. Snapshot
Click the Snapshot button( )will save current frame as a photo of the JPG
file and store it to the folder on your local computer directly.
The snapshot is named with a prefix “Snapshot_” and a date/time suffix
“yyyyMMdd_HHmmss” (Ex: Snapshot_20190915_080000).
There are two ways to close the notification:

ABILITY AI-Vue Camera
User's Manual - 14
Click [ OK ] button.
After 3 seconds.
5. Full Screen
Click the button( ) to enter full screen.
The Tool Bar is hidden after idle for 3 seconds, but it will be displayed when
the mouse cursor moves on the full screen.
It supports wheel slide controls zoom in and out in following ways:
When the mouse is placed on a standard screen.
When the screen is full.
6. Zoom In & Zoom Out
Only the Optical Zoom can be maintained when page is switched.

ABILITY AI-Vue Camera
User's Manual - 15
7. Focus
The Speed and Focus will be disabled when Continuous AF is On.
When the minimum or maximum value is reached, the value does not change
when the button is clicked.
8. Refresh Focus
Press to refresh the camera focus, which makes the camera to do zoom/focus
again.
4 Image & Image Parameters
1. Image Adjustment
The adjusting result will be displayed on Image Parameters Viewer
synchronously.
When the minimum or maximum value is reached, the value does not change
when the button (▲▼) is clicked.

ABILITY AI-Vue Camera
User's Manual - 16
When click the “Default” button, It will discard unsaved changes and reset to
default values.
2. White Balance
The “Color Temperature” can be set when “Auto WB Mode” is off.
The color temperature adjustment result should be displayed on viewer
synchronously.
5 Image & Image Configs
The rotate adjusting result will be displayed on viewer synchronously.
When the Power Line Frequency is auto , the camera will detect the current
environment is 50Hz or 60Hz, and Exposure Time will change accordingly.

ABILITY AI-Vue Camera
User's Manual - 17
6 Image & Exposure Mode
There are three Exposure Modes ( Multim Metering, Center Metering, ROI
Metering ) can be chosen.
It can create a rectangle for the metering range when ROI metering only.
1. Create a ROI Rectangle
It needs to create a rectangle for the metering range when using for the first
time or without setting a ROI rectangle.
Click on the screen to create the range of ROI and display the border in
Orange.
Click the delete button ( ) can delete the ROI rectangle.
The ROI Rectangle Rules
The available frame size is from 150x150 pixels to 600x600 pixels.
(Default: 150x150 pixels) It cannot be scaled further if it reaches the

ABILITY AI-Vue Camera
User's Manual - 18
minimum or the maximum rectangle size.
The ROI rectangle can be resized to a desired rectangle by dragging
the border. If the mouse cursor hovers over the rectangle or on the
rectangle border, display the border in Orange.
When the mouse cursor hovers the rectangle, change the mouse cursor
to “Move Cursor”. In this situation, the rectangle can be moved in the
Setting Window.
When the mouse cursor hovers over any part of rectangle border,
change the mouse cursor to “Resize Cursor”. The rectangle can be
resized to a desired rectangle by dragging the border.The function can
know the storage about storage for used capacity and total capacity.
7 Image & Advanced Setting
While in advanced setting webpage, the live view will be the result of applying all the
settings which user is tuning. The different settings according to different schedule will not
be applied while in advanced setting webpage
1. Components
Item Bar
Click the main item and list down to show more detailed settings. Only
one main item can be expanded at a time.
The expanded main item should be collapsed automatically before
expanding next one.

ABILITY AI-Vue Camera
User's Manual - 19
If there are too many settings in the item bar, a drop-down scroll bar will
be displayed. Other settings use a fixed range on the page.
2. IR-Cut Filter Removal (ICR)
When “Filter Mode” is selected Auto, the base on can be set.
Numbers of sub-tab to be set depends on the status of ICR filter mode and ICR
sync switch.
Filter Mode: Color / Monochrome / Auto_Light Sensor / Auto_DI ( Day )
3. Exposure
3 Modes - Auto / Manual / Priority
Please note that when any exposure mode is manual, disable “HDR”.
The maximum value must be equal to or bigger than the minimum value.
4. Levels
When the general settings is enable ( Digital WDR is On, HDR is On, Digital
Noise Reduction is 3D NR), ”Levels” can set different levels of settings.
5. Navigator Viewer
All setting values will be used in the image preview and displayed in the
navigation viewer.
Click the “Full Screen” button ( ) to enter full screen mode.
The ways to exit full screen mode is as follows:
Press the ESC key on your computer's keyboard.
Click the “Zoomout” button ( ).
The Tool Bar is hidden after idle for 3 seconds, but it will be displayed when the
mouse cursor moves on the full screen.
This manual suits for next models
7
Table of contents
Other Ability Security Camera manuals

Ability
Ability AI-Vue VS1NL70 User manual

Ability
Ability VS18211 User manual

Ability
Ability VS68210 User manual

Ability
Ability AI-Vue VS1NL70 User manual

Ability
Ability VS18200 User manual

Ability
Ability AI-Vue VS1NL70 User manual

Ability
Ability AI-Vue VS6NLB0 User manual

Ability
Ability VS18210 User manual

Ability
Ability VS68211 User manual

Ability
Ability AI-Eye VS18201 User manual