Absco Industries Assembly Instruction Manual
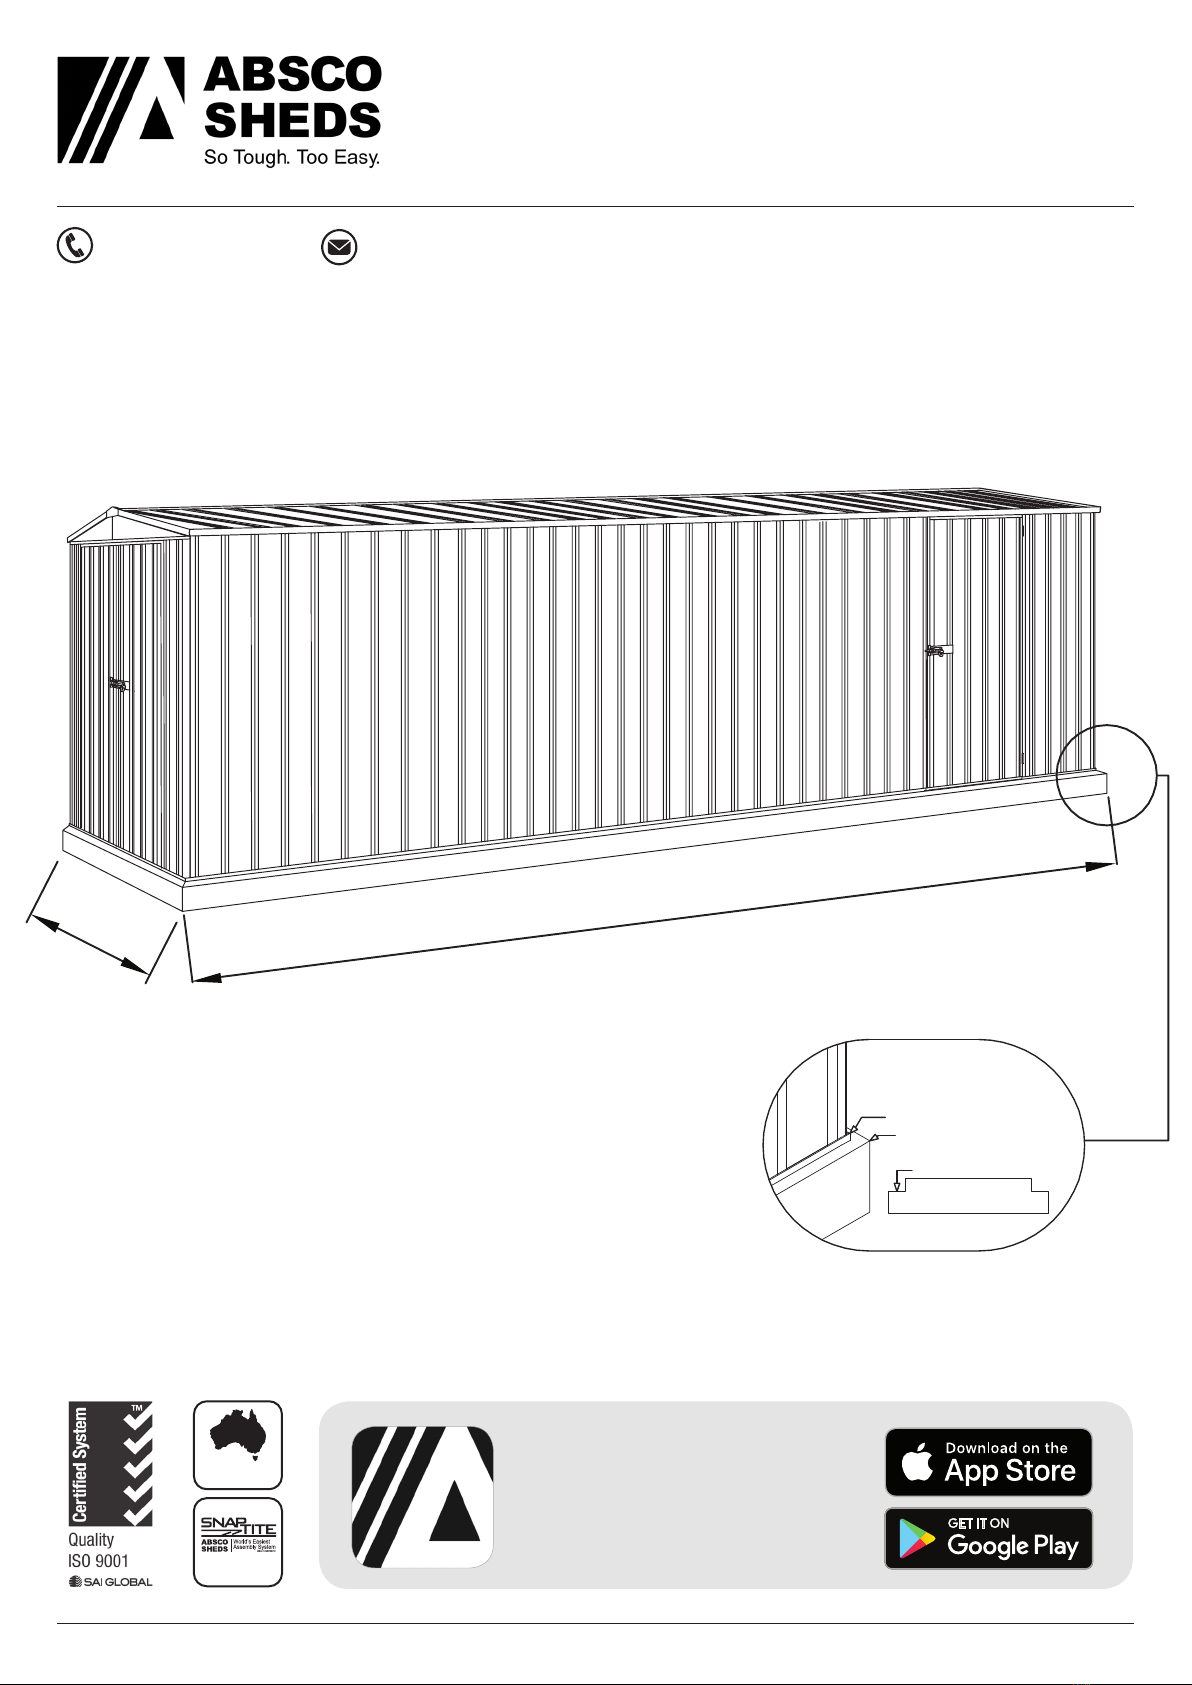
ABSCO UTILITY SHED
MODEL: 3060UTK
3.00mW x 5.96mD x 2.10mH
Model: 3060UTK 2/05/2019 1.2 10
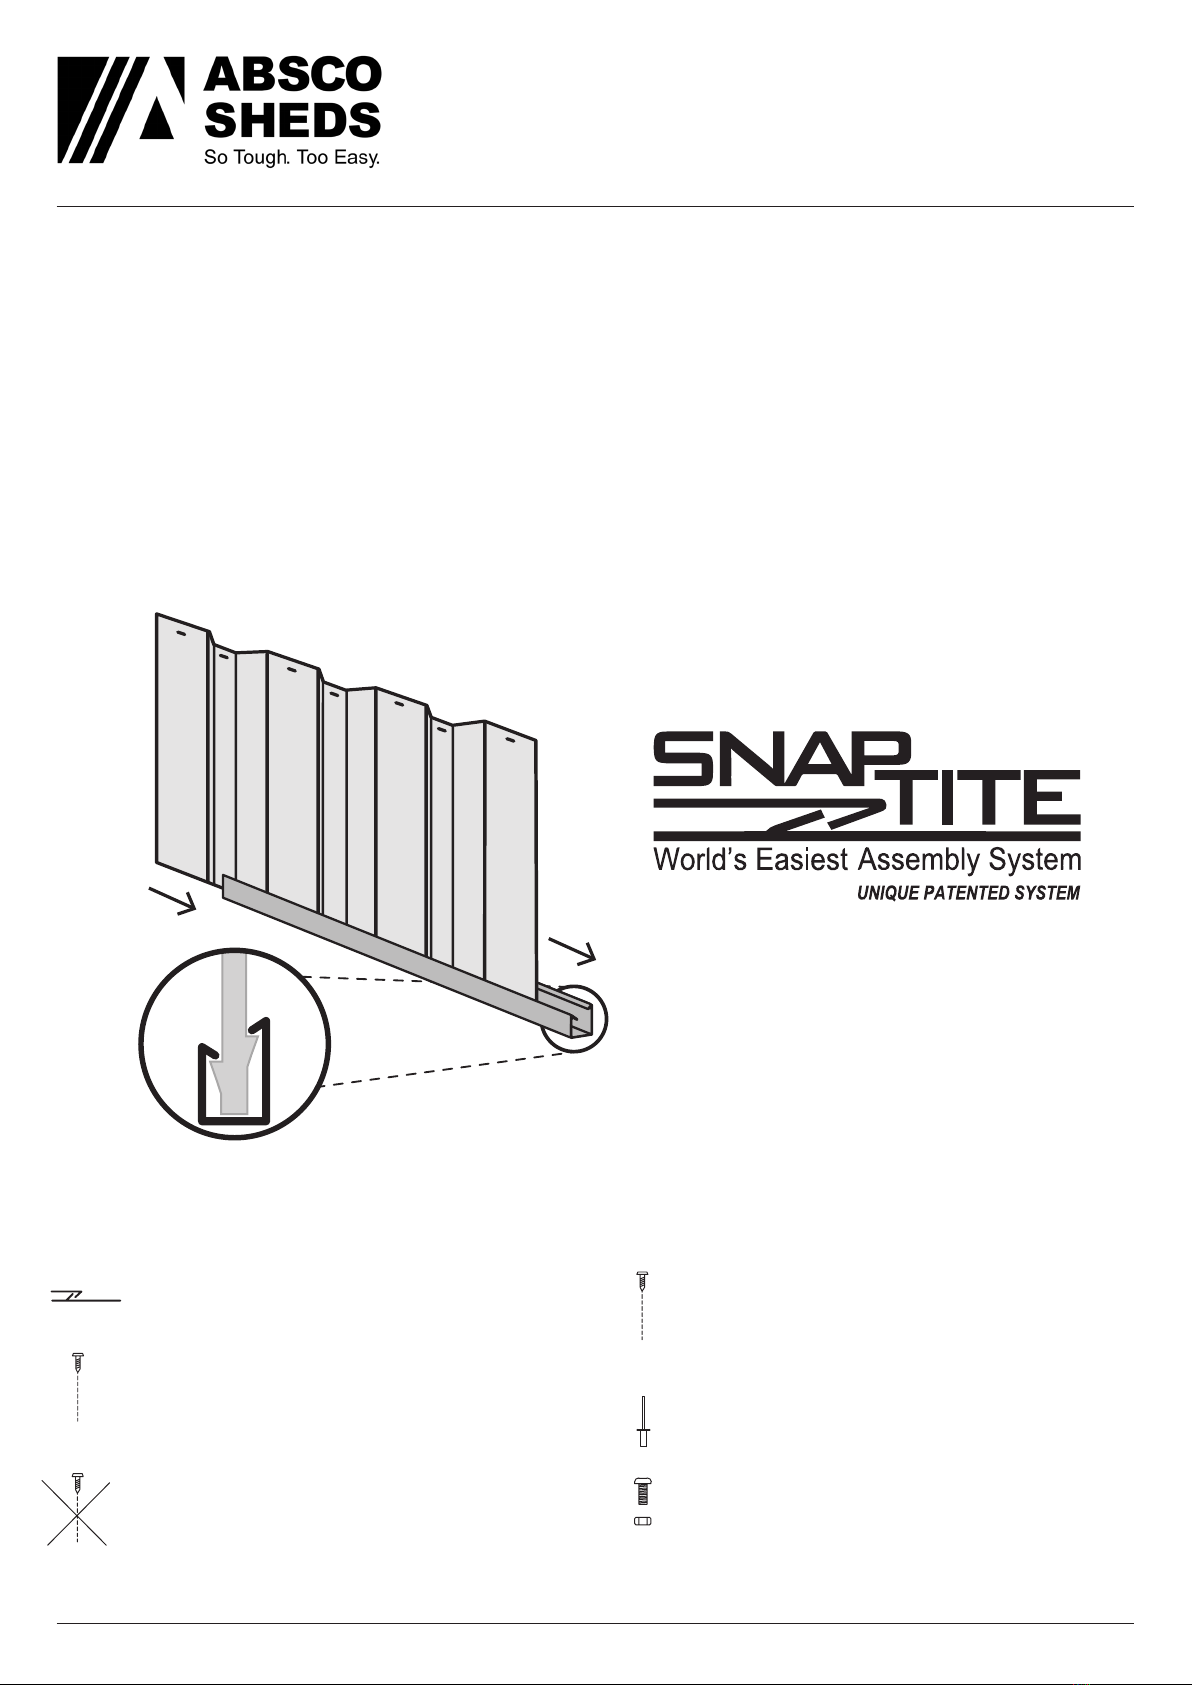
SNAPTiTE ASSEMBLY GUIDE
The Snaptite Assembly System locks end channels to all roof and wall sheets without the need for
tools and fasteners.
To assemble each panel, the perimeter channels are secured to the top and bottom of each panel.
Gently tap the channel over the SNAPTiTE lugs on the sheet, working along the sheet.
Each perimeter channel must finish flush with the edges of the sheets. Simply tap the channel along
the sheets until each end is neatly flush. If you need to remove channels from the panels, slide it off
from the side.
Channel locks the shed panel into
position without the need for screws!
FASTENING SYMBOLS
Secure channel to sheeting by SNAPTiTE
fastening method.
Join components together with one
screw at this location only, as some
channels have extra holes that are not
required for this model of shed.
Do not join components together at
this location yet, as the screws may
obstruct further assembly of the other
components.
Join components together by pre-drill-
ing the holes first. Use one component as
template to mark where the holes are and
drill with a 3mm drill bit.
3mm pop rivet
4mm nut and bolt set.
D
SNAP
T TE
i