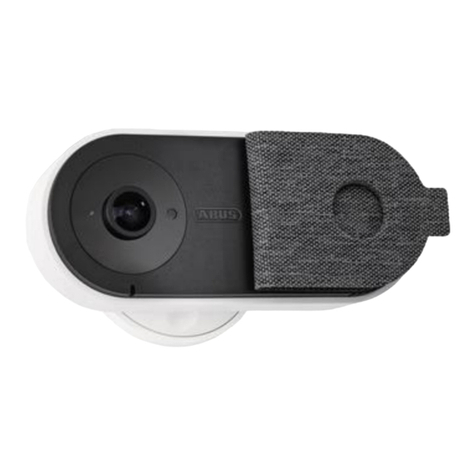
Abus PPIC90000 User manual

CÁMARA ABUS CON BATERÍA Y UNIDAD BASE
ABUS BATTERY CAM & BASE STATION
GUÍA RÁPIDA

2
Red Wi-Fi de 2.4 GHz con contraseña y cifrado.
2.4GHz Wi-Fi network with password and encryption.
El servicio de ubicación del dispositivo final debe estar activado.
The site service of the mobile end device must be activated.
La cámara solo puede utilizarse con la App2Cam Plus.
The camera can only be used in conjunction with the App2Cam Plus.
Máx. dos cámaras por unidad base y máx. 8 unidades base por App.
Max. two cameras per base station and max. 8 base stations per app.
Los siguientes caracteres especiales no están permitidos
para la introducción de la contraseña Wi-Fi.
The following special characters are not possible when allocating the Wi-Fi password.
REQUISITOS DEL SISTEMA
SYSTEM REQUIREMENTS
No son compatibles los router con una frecuencia de 5 GHz ni redes sin cifrado.
Routers with a 5GHz frequency and networks without encryption are not supported.
Aumento del alcance/intensidad de la señal
Es posible utilizar una unidad base adicional si dos cámaras asignadas a una unidad
base están demasiado alejadas entre sí, por ejemplo, en caso de grandes edificios.
En ese caso, se usará una segunda unidad base cerca de la segunda cámara y se
asignará la cámara a esa unidad base.
Increasing the range/signal strength
An additional base station can be used if, for example, two cameras assigned
to one base station are positioned too far apart in a larger building.
In this case, a second base station can be installed close to the second
camera and the camera can be assigned to this base station.

1
1
1
1
2
1
3
CONTENIDO DEL SUMINISTRO
SCOPE OF DELIVERY
Fuente de
alimentación USB
USB plug-in
powersupply
Ayuda para la
extracción de
latarjeta SD
Removal aid
for the SD card
Fuente de
alimentación USB
USB plug-in
powersupply
Soporte de pared
Wall bracket
Soporte de pared
Wall bracket
Cable micro USB
Micro USB cable
Cable micro USB
Micro USB cable
Material de
instalación
Installation material
Material de
instalación
Installation material
Fuente de
alimentación USB
USB plug-in
powersupply
Soporte de pared
Wall bracket
Cable micro USB
Micro USB cable
Ayuda para la
extracción de
la tarjeta SD
Removal aid
for the SD card
Ayuda para la
extracción de
la tarjeta SD
Removal aid
for the SD card
Material de
instalación
Installation material
Las baterías integradas de la cámara deben cargarse antes de la puesta en funcionamiento.
The integrated camera batteries must be charged before operation.
Cámara con batería ABUS Wi-Fi con unidad base (PPIC90000)
ABUS Wi-Fi battery cam with base station (PPIC90000)
Unidad base ABUS Wi-Fi para cámara con batería (PPIC90010)
ABUS Wi-Fi base station for battery cam (PPIC90010)
Kit de 2 cámaras con batería ABUS Wi-Fi con unidad base (PPIC90200)
ABUS Wi-Fi battery cam 2-set with base station (PPIC90200)
Cámara con batería adicional ABUS Wi-Fi (PPIC90520)
ABUS Wi-Fi additional battery cam (PPIC90520)
2
2
1
1 1
1
1
1 11
1 1 1
1 1

4
CÁMARA
CAMERA
Parte delantera
Front
Parte trasera
Rear
*Frecuencia de radio: 2,4 GHz (802.11 b/g/n) Potencia de emisión máx. 20 dBm
*Wireless frequency: 2.4GHz (802.11b/g/n) max. transmission power 20dBm
El LED indica el estado de carga
LED signals the charge level
Fotocelula
Photo sensor
Objetivo
Lens
Micrófono
Microphone
PIR
Sensor
PIR
Sensor LED de luz blanca
White light LED
Altavoces
Loudspeaker
Antena interior*
Internal antenna*
Rosca de 1/4" para el soporte
1/4“ thread for the mount
Tecla ON/OFF y EMPAREJAMIENTO
ON/OFF and PAIRING button
Conexión micro USB
Micro USB connection
Cubierta
Cover

5
Tecla Reset
Reset button
Tecla de emparejamiento
Pairing button
Para la grabación, es necesaria una tarjeta Micro SD (máx. 128 GB de capacidad de
memoria). Para introducir y extraer la tarjeta SD, es necesario desconectar la unidad
base de la interfaz USB. Al introducirla, la tarjeta SD encaja de forma audible.
Para la extracción, se incluye una herramienta de extracción.
A standard micro USB card (max. 128GB storage capacity) is required for recording.
Thebasestation must be disconnected from the USB interface in order to insert
and remove theSDcard. The SD card audibly snaps into place when fully inserted.
The provided removal aid can be used to remove the card.
UNIDAD BASE
MAIN UNIT
Ranura para tarjeta microSD (máx. 128 GB)
Micro SD card slot (max. 128GB)
LED de estado
Status LED
Tarjeta Micro SD opcional
Optional micro SD card
Herramienta
de extracción
Removal aid

6
ÁREA DE DETECCIÓN DEL SENSOR
COVERAGE AREA OF THE SENSOR
El área de detección del sensor de movimiento integrado (PIR) está limitado a 8 m.
La cámara "ve" a las personas fuera de esa zona y las muestra en la imagen en directo,
perono se activa la grabación. La altura de montaje recomendada para una instalación
optima es de 2 m, con un ángulo de inclinación de 12,5°.
The coverage area of the integrated motion sensor (PIR) is limited to 8m.
Persons located outside of this range are “seen” by the camera and shown
on the live image but do not trigger a recording. The ideal installation
recommendation is a 2 m installation height and an inclination angle of 12.5°.
Altura de montaje (m) y ángulo de inclinación (°)
Installation height (m) and inclination angle (°)
Alcance del sensor de
movimiento (m)
Range of the motion
sensor (m)
Alcance del sensor de movimiento de 8m máx.
Max. 8m range of the motion sensor
Imagen en directo, pero sin activación
Live image but no trigger
REC °REC
112°
Ángulo de
inclinación (°)
Inclination angle (°)
8 m4-5 m
2m | 12,5°
2m | 12.5°
1,5m | 0°
1.5m | 0°
máx.6m | 50,0°
max. 6m | 50.0°

7
ELEMENTOS DE VISUALIZACIÓN
Y FUNCIONAMIENTO
OPERATION AND DISPLAY ELEMENTS
Tecla ON/OFF y PAIRING
ON/OFF and PAIRING button
Tecla Reset
Reset button
LED
Tecla de
emparejamiento
Pairing button
Restablecer los ajustes de fábrica:
Mantener la tecla pulsada durante
5 s hasta que el LED rojo parpadee.
Resetting to factory settings:
Press and hold the button for
5seconds until the red LED ashes.
Encender la cámara:
Pulsar brevemente la tecla una vez.
Switching on the camera:
Press the button once brie y.
Función de emparejamiento:
Pulsar brevemente latecla 3 veces.
Pairing function:
Press the button three times brie y.
Apagar la cámara:
Mantener la tecla pulsada durante 5 segundos.
Switching o the camera:
Press and hold the button for 5seconds.
La unidad base solo se puede utilizar con corriente eléctrica activa.
The base station can only be operated with an active power supply.
Disposición de conexión (emparejamiento):
Mantener la tecla pulsada durante
3 s, hasta que el LED azul parpadee.
Connection readiness (pairing):
Press and hold the button for
3seconds until theblue LED ashes.

8
La cámara también se puede utilizar sin soporte
de pared, colocándola en una superficie plana.
Para ello, es importante prestar atención a los
siguientes puntos:
·La posición de la cámara no está fija y
se puede mover involuntariamente,
cambiando el área de detección.
·Los objetos grandes entre la cámara y la
unidad base pueden influir en la transmisión.
·La cámara debe colocarse lo más al borde
de la superficie posible, para evitar reflejos
entre la cámara y la superficie de colocación.
·Ningún objeto debe cubrir el campo
visual de la cámara.
·La colocación en estanterías de cristal
puede provocar reflejos molestos
durante la grabación.
The camera can also be set up without a wall
bracket on a at surface. The following aspects
must be observed here:
·The position of the camera is not xed
during setup and could be accidentally
shi ed, thus changing the recording area.
·Large objects located between the
camera and the base station could
impact the transmission.
·Where possible, the camera should be
positioned unobstructed at the edge of
the setup surface in order to prevent light
re ections between the camera and the
setupsurface.
·The camera‘s eld of vision must
not be obstructed by objects.
·Positioning the camera on a glass shelf could
lead to interfering re ections during recording.
MONTAJE DE LA CÁMARA
CAMERA INSTALLATION
Montaje de la cámara sin soporte de pared
Installing the camera without a wall bracket

1 3
2
9
Taladrar los agujeros de fijación
(es necesario un taladro de
6mm) en la pared con ayuda
del patrón de taladros y fijar
la placa trasera con el material
de montaje incluido.
Drill xing holes (6mm drill
required) onto the at wall
surface with the aid of the
drilling template and fasten
the back panel using the
installation material provided.
Colocar la articulación de
rótula, colocar la cobertura
y apretar. A continuación,
colocar el anillo de fijación
y apretar ligeramente.
Insert the ball joint, position
thecover and tighten. Then
position the xing ring and
tighten gently.
Atornillar la cámara y orientarla
hacia el área de detección
deseada. Apretar el anillo
de fijación para asegurar
la cámara en esa posición.
Unscrew the camera and
align it according to the
desired recording area.
Tighten the xing ring in
order to secure the camera
in this position.
Articulación de rótula
Ball joint
Placa trasera
Back panel
Cubierta
Cover
Anillo de
fijación
Fixing ring
Plantilla de
perforación
Drilling template
Montaje de la cámara con soporte de pared
Installing the camera with a wall bracket

App
- App2Cam Plus -
1
2
10
INSTALACIÓN DE LA APLICACIÓN
INSTALLATION APP
Inicie la aplicación App2Cam
Plus y seleccione el símbolo
de Más para iniciar el proceso
de programación.
Start the App2Cam Plus and
select the plus to start the
programming process.
Instale la aplicación App2Cam Plus
Install the App2Cam Plus
iOS
Apple App Store
Android
Google Play Store
Paso 1 – Instalar el software App2Cam Plus
S t e p 1 – I n s t a l l t h e A p p 2 C a m P l u s s o w a r e
Las siguientes imágenes se han extraído de la aplicación de iOS.
The following gures were taken from the iOS app.

3 4
5
11
PROGRAMAR EL SISTEMA
PROGRAMMING SYSTEM
Seleccione "Nuevo
dispositivo" para la
primera instalación.
Select „new device“
for the initial
installation.
Seleccione la
"Cámara con
batería" para
la instalación.
Select the „battery
camera“ for the
installation.
Escanee el código QR en la
parte trasera de la unidad
base. Conecte la unidad base
a la fuente de alimentación
USB y enchufe esta a la
corriente.
Scan the QR code on the back
of the base station. Then
connect the base station to
the USB power supply unit
and plug it into a socket.
Escanear el código QR
Scan the QR code
Conectar la unidad
base yenchufar
Connect the base station
andplug into a socket
Paso 2 – Seleccionar la unidad base y la cámara
Step 2 – Select the base station and camera
Para una puesta en funcionamiento óptima, es
necesario activar los servicios de ubicación en losajustes.
The site services must be activated in the settings for optimal operation.

7.2
7.1
6
Home
12
Seleccione su
red doméstica
e introduzca la
contraseña.
Select your home
network here and
enter the password.
Después de 45 segundos, la unidad base está
lista para usar en cuanto se oiga la orden de
voz "Listo para conectar a la red".
A continuación, conecte su smartphone al nombre
de red de la lista indicada en el que la unidad
base debe programarse.
The base station is ready for use a er 45seconds,
as soon as the voice command „Ready to connect
to the network“ is emitted.
Please then connect your smartphone to the
network on the displayed list in which the
base station should be programmed.
Esperar 45 segundos
Wait 45 seconds
Introduzca la contraseña
de la red Wi-Fi (ver la
sección "Requisitos del
sistema | Caracteres
especiales"). Si no se
muestra la red correcta,
puede volver atrás
seleccionando "Otra red".
Enter the Wi-Fi password
here (see section „System
requirements | Special
characters“). If the right
network is not displayed,
you can go back by
selecting „other network“.
Confi guración de iOS
iOS setup
Confi guración de Android
Android setup
Paso 3 – Conectar la unidad base a la Wi-Fi
Step 3 – Connect the base station to the Wi-Fi
Ver los requisitos del sistema "Red Wi-Fi 2.4 GHz" y "Caracteres especiales".
See system requirements „2.4GHz Wi-Fi network“ and „special characters“.

98
13
La aplicación transmite
los datos Wi-Fi a la
unidad base por sonido,
la distancia máxima entre
el smartphone y la unidad
base es de 30 cm. Pulse
"Enviar la información
por sonido ahora".
The app transmits the Wi-Fi
data to the base station via
sound; the maximum per-
missible distance between
the smartphone and the
base station is 30cm. Press
“Send sound information
now”.
Ajuste el volumen
de su smartphone
al menos al 70%.
Desplazarse hacia la
izquierda para mostrar
el siguiente paso.
Set the volume of
yoursmartphone to
at least 70%. Swipe
to the le in order to
view the next step.
Ajustar el volumen de reproducción del smartphone en un 70% aprox.
Set the output volume of the smartphone to approx. 70%
Máx. 30 cm de distancia
Max. 30 cm gap
Comunicación entre la aplicación (smartphone) y la unidad base
Communication between the app (smartphone) and the base station
Transmisión de sonido solo en entornos en silencio.
Los ruidos ambientales interfieren en el proceso.
Only transmit sound in a quiet environment.
Surrounding noises will disturb the process.

10
1 0.1
14
Tras la transmisión correcta,
esperar 120 segundos
Wait 120 seconds a er a
successful transmission
La unidad base emite la orden de
voz "Información de red recibida".
Para volver a transmitir el sonido,
pulse en "Volver a enviar". Sila
transmisión se ha realizado
correctamente, la unidad base está
programada y se reinicia, lo que
puede tardar hasta 120 segundos.
The base station emits the voice
command „Network information
received“. To transmit the sound
again, click on „Send again“. Once
the transmission is successful, the
base station is programmed and
will restart, this could take up to
120seconds.
Si el proceso de programación no se
efectúa correctamente, puede utilizar
también la "Instalación alternativa".
If the sound transmission was
unsuccessful, you can also use the
„Alternative installation“.
En el manual de instrucciones de la cámara encontrará otros pasos de la "Instalación alternativa".
You can nd additional steps for the „Alternative installation“ in the operating instructions.

12
11
15
Mantener pulsada
durante 3 segundos
Press and hold for
3 seconds
Pulsar brevemente
3 veces
Press 3 times briey
Paso 4 – Asignar la cámara a la unidad base
Step 4 – Assign the camera to the base station
Es posible utilizar una unidad base adicional si dos cámaras asignadas a una unidad base
están demasiado alejadas entre sí, por ejemplo, en caso de grandes edificios. En ese caso,
se usará una segunda unidad base cerca de la segunda cámara y se asignará la cámara a
esa unidad base. Una unidad base puede tener conectadas hasta dos cámaras. La aplicación
admite hasta 8 unidades base.
An additional base station can be used if, for example, two cameras assigned to one base
station are positioned too far apart in a larger building. In this case, a second base station
can be installed close to the second camera and the camera can be assigned to this base
station. Two cameras can be operated from one base station. Up to 8 base stations are
supported by theapp.
La entrega de fábrica del kit de cámaras (con una o dos cámaras), la(s) cámara(s)
ya está(n) programada(s) para esta unidad base. El paso 4 se puede saltar.
In the case of camera sets (with one or two cameras) delivered from the factory, the camera(s)
is/are already programmed for this base station. Step 4 can therefore be skipped.
Presione la tecla de emparejamiento durante
al menos 3 segundos, hasta que el LED azul
parpadee. Se reproducirá la orden de voz
"Listo para la conexión de la cámara". Si la
cámara ya está programada en una unidad
base, bórrela de la lista antes.
Press and hold the pairing button for at least
3seconds until the blue LED ashes. The voice
command „Ready for camera connection“ is
emitted. If the camera is already programmed
in a base station, please delete it from the list
in advance.
Conecte la cámara. Pulse el símbolo de conexión
brevemente 3 veces para programar la cámara.
Si la conexión se ha realizado correctamente,
se reproducirá la orden de voz "Conexión a
la cámara realizada correctamente".
Switch on the camera. Press the activation
symbolbriey 3times in order to programme
thecamera. If the connection is successful,
thevoice command „Camera connection
completed successfully“ is emitted.

13
16
Haga clic en la imagen de la
cámara en la vista general para
iniciar la imagen en directo.
Click on the camera image in the
overview to start the live view.
14
Durante la primera instalación, es necesario
cambiar el código de seguridad de fábrica 123456.
Se recomienda una combinación de números,
letras mayúsculas y minúsculas.
During the initial installation, the factory
default security code 123456 must be changed.
We recommend using a combination of numbers
and letters in lower and uppercase.
Paso 5 – Adaptar los ajustes
Step 5 – Customise the settings

15
17
1) Icono de ajustes abajo
1) Settings symbol bottom
2) Icono de ajustes arriba
2) Settings icon top
Para realizar más ajustes en la
unidad base y la cámara, haga clic
en el 1) símbolo de ajuste abajo y,
a continuación, en el 2) icono de
ajustes en la imagen de la cámara.
In order to con gure additional
settings for the base station and
camera, click on the 1) Settings
symbol at the bottom and then
on the 2) Settings icon in the
camera image.
16
Durante la primera puesta en funcionamiento, es necesario
modificar la contraseña de administrador. Indique la
contraseña de fábrica "123456" y active "Inicio de sesión
automático" para guardar la contraseña en el dispositivo
final. La contraseña debe tener 8 caracteres, con una
combinación de números, letras mayúsculas y minúsculas.
The admin password must be changed during commissioning.
Enter the factory default password „123456“ and activate „auto-
registration“ in order to save the password on the end device.
The password must consist of 8 characters – a combination of
numbers as well as lower and uppercase letters.

17
18
Encontrará más información y ayuda en akku-cam.abus.com
You can nd additional information and help at akku-cam.abus.com
Ha realizado la instalación
correctamente. Ahora, ya tendrá
acceso a su cámara y a distintos
ajustes en el campo de menú
inferior.
You have successfully completed
the installation. You now have
access to your camera and various
settings in the bottom menu eld.
Paso 6 – Finalizar la instalación
Step 6 – Complete the installation

19
Las capturas de pantalla e iconos mostrados se han extraído de la aplicación de iOS.
Podrían existir ligeras variaciones en inscripciones, distribuciones o funciones en dispositivos Android.
The screenshots and icons shown here are from the iOS app.
There may be some deviations in the labels, design or functionality when using Android devices.
La alarma está activa
Al detectar movimiento,
la cámara graba y envía
notificaciones (push o e-mail).
Alarm is active
The camera records when motion
is detected and sends noti cations
(push or e-mail).
La alarma está desactivada
La cámara muestra la imagen en
directo pero no realiza ninguna
acción adicional en caso de
detectar movimiento.
Alarm is deactivated
The camera displays a live view
but does not carry out any other
actions when motion is detected.
Función de
intercomunicador
Usando el micrófono del
terminal móvil puede
intercomunicarse a través
de la cámara. Mantenga
el símbolo pulsado
para activar la función
de intercomunicador.
Encuanto suelte el símbolo,
latransmisión se desactiva.
Intercom function
You can use the microphone
of the mobile end device to
communicate through the
camera intercom. Press and
hold the symbol in order
to activate the intercom
function. The transmission is
deactivated as soon as you
release the symbol.
Crear captura
de pantalla
Create a
screenshot
Activar/desactivar
audio
Enable/disable
audio output
Iniciar grabación
manual
Start manual
recording
Cambio entre cámara 1 y
cámara 2
Switch between
camera1 and camera 2
Las funciones de imagen en directo de App2Cam Plus
Functions of the App2Cam Plus live view
FUNCIONES DE APP2CAM PLUS
APP2CAM PLUS FUNCTIONS

Si necesita más ayuda, puede contactar con nuestro equipo de soporte: [email protected]
Our Support Team will be happy to help you with any further questions: [email protected]
ABUS | Security Center GmbH & Co. KG
abus.com
Linker Kreuthweg 5
86444 Affing
Germany
Tel. / Phone: +49 8207 959 90-0
Fax / Fax: +49 8207 959 90-190
abus.com/products/
PPIC90000
abus.com/products/
PPIC90010
abus.com/products/
PPIC90200
abus.com/products/
PPIC90520
Eine alternative Inbetriebnahme sowie detaillierte Informationen zum jeweiligen
Produkt erhalten Sie in der Bedienungsanleitung erhältlich auf der ABUS Internetseite.
Vous trouverez une alternative de mise en service ainsi que des informations détaillées
sur le produit concerné dans le manuel d’utilisation disponible sur le site Internet ABUS.
Een alternatieve ingebruikname en gedetailleerde informatie vindt u in de
gebruikershandleiding op de ABUS-website.
Per imformazioni su un attivazione alternativa o sui dettagli del prodotto,
consultare le istruzioni per l‘uso disponibili sul nostro sitro ww.abus.com.
An alternative installation option as well as detailed information on the respective
product can be found in the operating instructions available on the ABUS website.
Alternativ idrifttagning samt detaljerede oplysninger findes i
betjeningsvejledningen, som findes på ABUS-hjemmesiden.
Informacje dotyczące alternatywnych sposobów uruchomienia oraz dodatkowe
szczegóły dotyczące poszczególnych produktów znajdują się winstrukcji obsługi,
którą można pobrać na stronie internetowej ABUS.
En el manual de instrucciones disponible en la página web de ABUS podrá consultar
una puesta en funcionamiento alternativa, así como información más detallada.
Alternativ idrifttagning samt detaljerad information finns i bruksanvisningen
som kan hämtas på ABUS-webbsidan.
Other manuals for PPIC90000
7
Table of contents
Other Abus Security Camera manuals

Abus
Abus PPIC32020 User manual

Abus
Abus TVCC74000 User manual

Abus
Abus TV7230 User manual

Abus
Abus TVIP31000 User manual

Abus
Abus IPCA54581B User manual

Abus
Abus HDCC35500 User manual

Abus
Abus HDCC33500 User manual

Abus
Abus TVCC51000 User manual

Abus
Abus HDCC32561 User manual

Abus
Abus TVIP91 Series User manual

Abus
Abus PPIC90000 User manual

Abus
Abus HDCC31500 User manual

Abus
Abus CASA20550 User manual

Abus
Abus IPCS64531 User manual

Abus
Abus PPIC91000 User manual

Abus
Abus HDCC72550 User manual

Abus
Abus IPCA22500 User manual

Abus
Abus TVHD50000 User manual

Abus
Abus IPCB72515A User manual

Abus
Abus TVIP20000 User manual