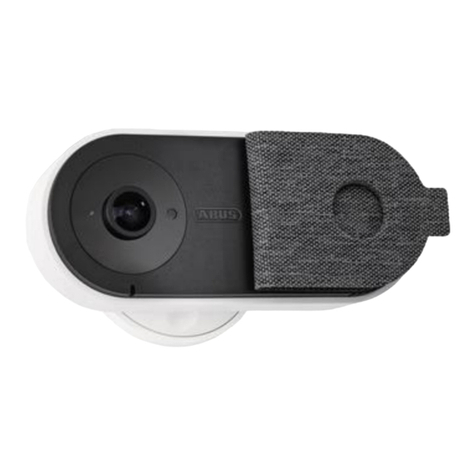
Abus PPIC90000 User manual

CAMÉRA ABUS AVEC BATTERIE INTÉGRÉE ET STATION
DE BASE / ABUS BATTERY CAM & BASE STATION
MANUEL D’UTILISATION
SIMPLIFIÉ

2
Réseau Wi-Fi 2,4 GHz avec mot de passe et cryptage.
2.4GHz Wi-Fi network with password and encryption.
Le service de localisation de l’appareil terminal mobile doit être activé.
The site service of the mobile end device must be activated.
La caméra peut uniquement être utilisée en liaison avec App2Cam Plus.
The camera can only be used in conjunction with the App2Cam.
Max. deux caméras par station de base et 8 stations de base par application.
Max. two cameras per base station and max. 8 base stations per app.
Les caractères spéciaux suivants ne sont pas autorisés lors de l’attribution du mot depasse Wi-Fi.
The following special characters are not possible when allocating the Wi-Fi password.
CONFIGURATION MINIMALE REQUISE
SYSTEM REQUIREMENTS
Les routeurs avec une fréquence de 5 GHz ainsi que les réseaux sans cryptage ne sont pas pris en charge.
Routers with a 5GHz frequency and networks without encryption are not supported.
Augmentation de la portée / de la force du signal
Une station de base supplémentaire peut être utilisée lorsque les positions de deux caméras
aectées à une station de base sont trop éloignées dans le cas de grands objets par exemple.
Dans ce cas, une deuxième station de base est utilisée à proximité de la deuxième caméra
et la caméra aectée à cette station de base.
Increasing the range/signal strength
An additional base station can be used if, for example, two cameras assigned to one base station
are positioned too far apart in a larger building. In this case, a second base station can be
installed close to the second camera and the camera can be assigned to this base station.

1
1
1
1
2
1
3
CONTENU DE LA LIVRAISON
SCOPE OF DELIVERY
Bloc secteur USB
USB plug-in
power supply
Auxiliaire de retrait pour
la carte SD
Removal aid for the
SDcard
Bloc secteur USB
USB plug-in
power supply
Fixation murale
Wall bracket
Fixation murale
Wall bracket
Câble micro-USB
Micro USB cable
Câble micro-USB
Micro USB cable
Matériel de
montage
Installation
material
Matériel de
montage
Installation
material
Bloc secteur USB
USB plug-in
power supply
Fixation murale
Wall bracket
Câble micro-USB
Micro USB cable
Auxiliaire de
retrait pour
la carte SD
Removal aid
for the SD card
Auxiliaire de
retrait pour
la carte SD
Removal aid
for the SD card
Matériel de
montage
Installation
material
Les accumulateurs intégrés de la caméra doivent être chargés avant la mise en service.
The integrated camera batteries must be charged before operation.
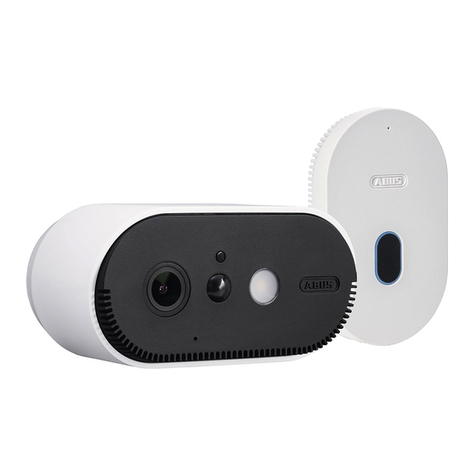
Caméra Wi-Fi ABUS avec batterie intégrée et station de base (PPIC90000)
ABUS Wi-Fi battery cam with base station (PPIC90000)
Station de base Wi-Fi ABUS pour caméra avec batterie intégrée (PPIC90010)
ABUS Wi-Fi base station for battery cam (PPIC90010)
Caméra Wi-Fi ABUS avec batterie intégrée et station de base (PPIC90200) (lot de 2)
ABUS Wi-Fi battery cam 2-set with base station (PPIC90200)
Caméra Wi-Fi ABUS avec batterie intégrée supplémentaire (PPIC90520)
ABUS Wi-Fi additional battery cam (PPIC90520)
2
2
1
1 1
1
1
1 11
111
1 1

4
CAMÉRA
CAMERA
Face avant
Front
Face arrière
Rear
*Fréquence radio 2,4 GHz (802.11 b/g/n) Puissance d’émission max. 20 dBm
*Wireless frequency: 2.4GHz (802.11b/g/n) max. transmission power 20dBm
DEL signalant l'état de chargement
LED signals the charge level
Photodétecteur
Photo sensor
Objectif
Lens
Microphone
Microphone
PIR
Capteur
PIR
Sensor
LED à lumière blanche
White light LED
Haut-parleur
Loudspeaker
Antenne intérieure*
Internal antenna*
Filetage 1/4‘‘ pour support
1/4“ thread for the mount
Touche Marche/ Arrêt et PAIRING
ON/OFF and PAIRING button
Port micro-USB
Micro USB connection
Couvercle
Cover

5
Touche Reset
Reset button
Touche d’appariement
Pairing button
Une carte microSD usuelle (avec une capacité de mémoire allant jusqu’à 128Go) est
nécessaire pour un enregistrement. Pour la mise en place et le retrait de la carte SD,
lastation de base doit être séparée de l’interface USB. Lors de la mise en place, la carte
SD s'enclenche de manière audible. Pour le retrait, l’outil de retrait joint est disponible.
A standard micro USB card (max. 128GB storage capacity) is required for recording.
Thebasestation must be disconnected from the USB interface in order to insert
and remove the SDcard. The SD card audibly snaps into place when fully inserted.
The provided removal aid can be used to remove the card.
STATION DE BASE
MAIN UNIT
Logement de carte micro-SD (max. 128Go)
Micro SD card slot (max. 128GB)
LED d’état
Status LED
Carte micro-SD optionnelle
Optional micro SD card
Auxiliaire de
retrait
Removal aid

6
PORTÉE DE DÉTECTION
DU DÉTECTEUR
COVERAGE AREA OF THE SENSOR
La portée de détection du détecteur de mouvement intégré (PIR) est limitée à 8 m.
Les personnes se trouvant hors de cette zone sont certes «vues» par la caméra et
représentées sur les images en direct, mais ne déclenchent aucun enregistrement.
La recommandation pour un montage optimal est la suivante : hauteur de
montage de 2 m et angle d’inclinaison de 12,5°.
The coverage area of the integrated motion sensor (PIR) is limited to 8m.
Persons located outside of this range are “seen” by the camera and shown
on the live image but do not trigger a recording. The ideal installation
recommendation is a 2 m installation height and an inclination angle of 12.5°.
Hauteur de montage (m) et angle d’inclinaison (°)
Installation height (m) and inclination angle (°)
Portée du détecteur de
mouvement (m)
Range of the motion
sensor (m)
Portée max. de 8 m du détecteur de mouvement
Max. 8m range of the motion sensor
Image en direct, mais pas de résolution
Live image but no trigger
REC °REC
112°
Angle d’inclinaison (°)
Inclination angle (°)
8 m4-5 m
2 m | 12,5°
2m | 12.5°
1,5 m | 0°
1.5m | 0°
max.6 m | 50,0°
max. 6m | 50.0°

7
ELÉMENTS DE COMMANDE
ET D’AFFICHAGE
OPERATION AND DISPLAY
ELEMENTS
Touche Marche/ Arrêt et PAIRING
ON/OFF and PAIRING button
Touche Reset
Reset button
LED
Touche
d’appariement
Pairing button
Réinitialiser sur les réglages d’usine :
Maintenez la touche pendant 5s
jusqu’à ce que la LED rouge clignote.
Resetting to factory settings:
Press and hold the button for
5seconds until the red LED ashes.
Activation de la caméra :
Appuyez brièvement 1x sur le bouton.
Switching on the camera:
Press the button once brie y.
Fonction d’appariement :
Appuyez brièvement 3x sur le bouton.
Pairing function:
Press the button threetimes brie y.
Désactiver la caméra :
Appuyez sur le bouton pendant 5 s.
Switching o the camera:
Press and hold the button for 5seconds.
La station de base peut uniquement être mise en service
en présence d’une alimentation électrique active.
The base station can only be operated with an active power supply.
Prêt pour la connexion (Pairing) :
Maintenez la touche pendant 3s
jusqu’à ce que la LED bleue clignote.
Connection readiness (pairing):
Press and hold the button for
3seconds until theblue LED ashes.

8
La caméra peut également être installée sans
xation murale sur une surface plane.
Les points suivants doivent être respectés :
·Lors de la mise en place, la position de la
caméra n’est pas xée et peut être déplacée
involontairement, modi ant ainsi la portée
dedétection.
·Des objet de grande taille entre la caméra
et la station de base peuvent perturber la
transmission.
·La caméra doit être placée aussi librement
que possible au niveau de l’arête de la surface
d'installation a n d’éviter les ré exions
lumineuses entre la caméra et la surface.
·Le champ de vision de la caméra ne doit pas
être masqué par des objets.
·Le positionnement sur des étagères en
verre peut être à l’origine de ré exions
perturbatrices lors de l’enregistrement.
The camera can also be set up without
a wall bracket on a at surface.
The following aspects must be observed here:
·The position of the camera is not xed
during setup and could be accidentally
shi ed, thus changing the recording area.
·Large objects located between the
camera and the base station could
impact the transmission.
·Where possible, the camera should be
positioned unobstructed at the edge of
the setup surface in order to prevent light
re ections between the camera and the
setupsurface.
·The camera‘s eld of vision must
not be obstructed by objects.
·Positioning the camera on a glass
shelf could lead to interfering
re ections during recording.
INSTALLATION DE LA CAMÉRA
CAMERA INSTALLATION
Installation de la caméra sans fi xation murale
Installing the camera without a wall bracket
1 3
2
9
Percer des trous de xation
(foret de 6 mm nécessaire) à
l’aide d’un gabarit de perçage
dans la surface plane du mur,
puis xer la plaque arrière à
l’aide du matériel de montage
joint.
Drill xing holes (6mm drill
required) onto the at wall
surface with the aid of the
drilling template and fasten
the back panel using the
installation material provided.
Installer un joint à rotule,
mettre le couvercle en place
et tourner. Installer ensuite
la bague de xation puis
serrer légèrement.
Insert the ball joint, position
thecover and tighten. Then
position the xing ring and
tighten gently.
Visser la caméra et la diriger sur
la zone de détection souhaitée.
Serrer la bague de xation a n
de bloquer la caméra dans cette
position.
Unscrew the camera and align
it according to the desired
recording area. Tighten the
xing ring in order to secure
the camera in this position.
Joint à rotule
Ball joint
Plaque
arrière
Back panel
Couvercle
Cover
Bague de
xation
Fixing ring
Gabarit de
perçage
Drilling template
Installation de la caméra avec fi xation murale
Installing the camera with a wall bracket

App
- App2Cam Plus -
1
2
10
INSTALLATION APP
INSTALLATION APP
Démarrez App2Cam Plus et
sélectionnez le Plus pour
démarrer le processus de
programmation.
Start the App2Cam Plus and
select the plus to start the
programming process.
Installez App2Cam Plus
Install the App2Cam Plus
iOS
Apple App Store
Android
Google Play Store
Etape 1 – Installer le logiciel App2Cam Plus
S t e p 1 – I n s t a l l t h e A p p 2 C am P l u s s o w a r e
Les illustrations suivantes sont issues de l’application iOS.
The following gures were taken from the iOS app.

3 4
5
11
PROGRAMMATION SYSTÈME
PROGRAMMING SYSTEM
Sélectionnez
«Nouvel appareil»
pour la première
installation.
Select „new device“
for the initial
installation.
Sélectionnez la
«caméra sur
batterie» pour
l’installation.
Select the „battery
camera“ for the
installation.
Scannez le QR code au dos de
la station de base. Raccordez
ensuite la station de base
à l’alimentation USB puis
branchez dans une prise.
Scan the QR code on the back
of the base station. Then
connect the base station to
the USB power supply unit
and plug it into a socket.
Scanner leQR code
Scan the QR code
Raccordez la station de base
et branchez dans une prise
Connect the base station
and plug into a socket
Etape 2 – Sélectionnerla station de base et la caméra
Step 2 – Select the base station and camera
Pour une mise en marche optimale, les services de
localisation doivent être activés dans lesparamètres.
The site services must be activated in the settings for optimal operation.

7.2
7.1
6
Accueil / Home
12
Sélectionnez votre
réseau et entrez le
mot de passe.
Select your home
network here and
enter the password.
La station de base est encore opérationnelle
pendant 45 secondes après l’émission de la
commande vocale «prêt pour la connexion
auréseau».
Veuillez ensuite connecter votre smartphone au
réseau (dont le nom gure dans la liste), dans
lequel la station de base doit être programmée.
The base station is ready for use a er 45seconds,
as soon as the voice command „Ready to connect
to the network“ is emitted.
Please then connect your smartphone to the
network on the displayed list in which the
base station should be programmed.
Patienter
45 secondes
Wait 45 seconds
Entrez ici le mot de passe
Wi-Fi (voir paragraphe
«Con guration minimale
requise | Caractères
spéciaux»). Si le réseau
a ché n’est pas le bon,
vous pouvez le réinitialiser
en sélectionnant
«Autreréseau».
Enter the Wi-Fi password
here (see section „System
requirements | Special
characters“). If the right
network is not displayed,
you can go back by
selecting „other network“.
Confi guration iOS
iOS setup
Confi guration Android
Android setup
Etape 3 – Raccorder la station de base au Wi-Fi
Step 3 – Connect the base station to the Wi-Fi
Voir con guration minimale requise «Réseau Wi-Fi 2,4 GHz» et « Caractères spéciaux».
See system requirements „2.4GHz Wi-Fi network“ and „special characters“.

98
13
L’application transfère de
manière sonore les données
Wi-Fi à la station de base,
l’écart maximal entre le
smartphone et lastation de
base ne doit pas dépasser
30 cm. Appuyez sur
«Envoyer maintenant des
informations sonores».
The app transmits the Wi-Fi
data to the base station
via sound; the maximum
permissible distance
between the smartphone
and the base station
is 30cm. Press “Send
sound information now”.
Réglez le volume de
votre smartphone sur
70% min. Balayer vers
la gauche pour a cher
l’étape suivante.
Set the volume of
yoursmartphone to
at least 70%. Swipe
to the le in order to
view the next step.
Régler le volume de lecteur du smartphone sur env. 70 %
Set the output volume of the smartphone to approx. 70%
Écart max. 30 cm
Max. 30 cm gap
Communication entre l’application (smartphone) et la station de base
Communication between the app (smartphone) and the base station
Transfert du son uniquement dans les environnements
non bruyants. Les bruits ambiants perturbent le processus.
Only transmit sound in a quiet environment. Surrounding noises will disturb the process.

10
1 0.1
14
Patienter 120 secondes après la
réussite de la transmission
Wait 120 seconds a er a
successful transmission
La station de base émet la
commande vocale «Informations
réseau reçues». Pour transmettre
à nouveau le son, cliquez sur
«Envoyer à nouveau». Lorsque la
transmission a réussi, la station de
base est programmée et redémarre,
cela peut durer jusqu’à 120 secondes.
The base station emits the voice
command „Network information
received“. To transmit the sound
again, click on „Send again“. Once
the transmission is successful, the
base station is programmed and
will restart, this could take up to
120seconds.
En cas d’échec de la transmission
sonore, vous pouvez également
utiliser l’« installation alternative ».
If the sound transmission was
unsuccessful, you can also use
the „Alternative installation“.
Vous trouverez les autres étapes de «l’installation alternative» dans le manuel d’utilisation.
You can nd additional steps for the „Alternative installation“ in the operating instructions.

12
11
15
Appuyez pendant 3 s
Press and hold for
3 seconds
Appuyez brièvement 3x
Press 3 times briey
Etape 4 – Aecter la caméra à la station de base
Step 4 – Assign the camera to the base station
Une station de base supplémentaire peut être utilisée lorsque les positions de deux caméras
aectées à une station de base sont trop éloignées dans le cas de grands objets par exemple.
Dans ce cas, une deuxième station de base est utilisée à proximité de la deuxième caméra
et lacaméra aectée à cette station de base. Deux caméras peuvent être utilisées sur une
station de base. Jusqu’à 8 stations de base sont prises en charge par l’application.
An additional base station can be used if, for example, two cameras assigned to one base
station are positioned too far apart in a larger building. In this case, a second base station
can be installed close to the second camera and the camera can be assigned to this base
station. Two cameras can be operated from one base station. Up to 8 base stations are
supported by theapp.
Dans le cas de la livraison départ usine du kit de caméras (avec une ou deux caméras), la/ les
caméra(s) sont déjà programmées pour cette station de base. L’étape 4 peut être ignorée ici.
In the case of camera sets (with one or two cameras) delivered from the factory, the camera(s)
is/are already programmed for this base station. Step 4 can therefore be skipped.
Appuyez sur la touche d‘appariement pendant
au moins 3secondes jusqu’à ce que laLED bleue
clignote. La commande vocale «prêt pour la
connexion caméra» est émise. Si la caméra est
déjà programmée dans une station de base,
veuillez l’eacer préalablement de la liste.
Press and hold the pairing button for at least
3seconds until the blue LED ashes. The voice
command „Ready for camera connection“ is
emitted. If the camera is already programmed
ina base station, please delete it from the list
inadvance.
Activez la caméra. Appuyez brièvement 3x sur le
symbole d’activation pour programmer la caméra.
Lorsque la connexion a été établie, la commande
vocale «Connexion caméra terminée avec succès»
est émise.
Switch on the camera. Press the activation
symbolbriey 3times in order to programme
thecamera. If the connection is successful,
thevoice command „Camera connection
completed successfully“ is emitted.

13
16
Cliquez maintenant sur l’image caméra
dans l’aperçu a n de démarrer l’image
endirect.
Click on the camera image in the
overview to start the live view.
14
Lors de la première installation, le code
de sécurité 123456 réglé en usine doit être
modi é.
Il est recommandé d’utiliser une combinaison
de chi res, de majuscules et de minuscules;
During the initial installation, the factory
default security code 123456 must be changed.
We recommend using a combination of
numbers and letters in lower and uppercase.
Etape 5 – Adapter les réglages
Step 5 – Customise the settings

15
17
1) Symbole de réglage en bas
1) Settings symbol bottom
2) Icône de réglage en haut
2) Settings icon top
Pour e ectuer d’autres réglages sur la
station de base et la caméra, cliquez sur
le 1) symbole de réglage en bas puis sur
l’ 2) icône de réglage sur l’a chage de
la caméra.
In order to con gure additional settings
for the base station and camera, click
on the 1) Settings symbol at the bottom
and then on the 2) Settings icon in the
camera image.
16
Le mot de passe administrateur doit être modi é lors
de lapremière mise en service. Entrez le mot de passe
d’usine«123456» et activez «Connexion automatique»
pour enregistrer le mot de passe sur l’appareil terminal.
Le mot de passe doit être composé de 8 caractères (chi res,
majuscules etminuscules).
The admin password must be changed during commissioning.
Enter the factory default password „123456“ and activate „auto-
registration“ in order to save the password on the end device.
The password must consist of 8 characters – a combination of
numbers as well as lower and uppercase letters.

17
18
Vous trouverez de plus amples informations et de l’aide sur akku-cam.abus.com
You can nd additional information and help at akku-cam.abus.com
Vous avez terminé l’installation
avecsuccès ! Vous pouvez maintenant
accéder à votre caméra et à diérents
réglages dans le champ de menu
inférieur.
You have successfully completed the
installation. You now have access to
your camera and various settings in
the bottom menu eld.
Etape 6 – Terminer l’installation
Step 6 – Complete the installation

19
Les captures d’écran et les icônes présentées sont issues de l’application iOS.
Les textes, l’agencement et le fonctionnement des appareils Android peuvent varier légèrement.
The screenshots and icons shown here are from the iOS app.
There may be some deviations in the labels, design or functionality when using Android devices.
L’alarme est active
La caméra enregistre dès qu’un
mouvement est détecté et envoie
une noti cation (push ou e-mail).
Alarm is active
The camera records when motion
is detected and sends noti cations
(push or e-mail).
L’alarme est désactivée
La caméra a che une image
en direct, mais n’e ectue
aucune action lorsqu’un
mouvement est détecté.
Alarm is deactivated
The camera displays a live view
but does not carry out any other
actions when motion is detected.
Interphone
Vous pouvez utiliser le
microphone du terminal
mobile pour communiquer
avec la caméra. Maintenez
le symbole appuyé a n
d’activer l’interphone.
Latransmission est
désactivée dès que vous
relâchez le symbole.
Intercom function
You can use the microphone
of the mobile end device to
communicate through the
camera intercom. Press and
hold the symbol in order
to activate the intercom
function. The transmission
is deactivated as soon as
you release the symbol.
Créer une
capture d’écran
Create a
screenshot
Activer/ Désactiver
la sortie audio
Enable/disable
audio output
Démarrer
l’enregistrement manuel
Start manual recording
Commutation entre la
caméra 1 et la caméra 2
Switch between camera
1 and camera 2
Les fonctions de App2Cam Plus avec a ichage en direct
Functions of the App2Cam Plus live view
FONCTIONS APP2CAM PLUS
APP2CAM PLUS FUNCTIONS

Pour toute aide supplémentaire, notre équipe d’assistance se tient à votre disposition : support@abus-sc.com
Our Support Team will be happy to help you with any further questions: [email protected]
ABUS | Security Center GmbH & Co. KG
abus.com
Linker Kreuthweg 5
86444Ang
Allemagne
Tél./ Phone: +49 8207 959 90-0
Fax/ Fax: +49 8207 959 90-190
info.[email protected]
abus.com/products/
PPIC90000
abus.com/products/
PPIC90010
abus.com/products/
PPIC90200
abus.com/products/
PPIC90520
Eine alternative Inbetriebnahme sowie detaillierte Informationen zum jeweiligen
Produkt erhalten Sie in der Bedienungsanleitung erhältlich auf der ABUS Internetseite.
Vous trouverez une alternative de mise en service complet ainsi que des informations détaillées
sur le produit concerné dans le manuel d’utilisation disponible sur le site Internet ABUS.
Een alternatieve ingebruikname en gedetailleerde informatie vindt u in de
gebruikershandleiding op de ABUS-website.
Per imformazioni su un attivazione alternativa o sui dettagli del prodotto,
consultare le istruzioni per l‘uso disponibili sul nostro sitro ww.abus.com.
An alternative installation option as well as detailed information on the respective
product can be found in the operating instructions available on the ABUS website.
Alternativ idritagning samt detaljerede oplysninger ndes i
betjeningsvejledningen, som ndes på ABUS-hjemmesiden.
Informacje dotyczące alternatywnych sposobów uruchomienia oraz dodatkowe
szczegóły dotyczące poszczególnych produktów znajdują się winstrukcji obsługi,
którą można pobrać na stronie internetowej ABUS.
En el manual de instrucciones disponible en la página web de ABUS podrá consultar
una puesta en funcionamiento alternativa, así como información más detallada.
Alternativ idritagning samt detaljerad information nns i bruksanvisningen
som kan hämtas på ABUS-webbsidan.
Other manuals for PPIC90000
7
This manual suits for next models
3
Table of contents
Other Abus Security Camera manuals

Abus
Abus HDCC63550 User manual

Abus
Abus HDCC73550 User manual

Abus
Abus TVIP62500 User manual

Abus
Abus IPCB34 Series User manual

Abus
Abus TVCC91500 User manual

Abus
Abus eyseo TV7144 User manual

Abus
Abus eyseo TVCC50010 User manual

Abus
Abus IPCB62520 User manual

Abus
Abus PPIC42520 User manual

Abus
Abus TVAC19100C User manual

Abus
Abus IPCA52010 User manual

Abus
Abus Eyseo TV7220 User manual

Abus
Abus IPCA22500 User manual

Abus
Abus IPCS28581A User manual

Abus
Abus TVCC12010 User manual

Abus
Abus IPCS84511 User manual

Abus
Abus HDCC32502 User manual

Abus
Abus TVCC50011 User manual

Abus
Abus TVCC40010 User manual

Abus
Abus PPIC34520 User manual