5
There are two dosing mode in the Orion —manual mode and auto mode. To choose
between modes, long press the Power button and the display will show the current mode
of operation. Rotate the dial to toggle between modes.
Manual Dosing Mode
This is the default mode of dosing.
1. Select a preset by rotating the dial. Adjust the preset value by short pressing the Power
button and rotate the dial. Short press the Power button to confirm.
2. Press the Dose button, and the Orion will begin dosing until desired weight is reached
within +/- 0.5g (Solid Green LED will light to indicate an accurate dose).
3. At the end of dosing, you may press the Dose button several times to ‘Pulse’. Pressing
the Dose button to add a few more beans as needed.
4. Press the Power button to return to dosing mode.
‘Pulse’ in Manual dosing mode
The Orion has a pulse function that adds a few beans to the dose manually at the end of
each dose. To pulse (add) a few more beans at the end of each dose, simply press the
Dose button. If one press doesn’t drop any beans, you can press it multiple times until the
desired weight is reached.
Automatic Dosing Mode
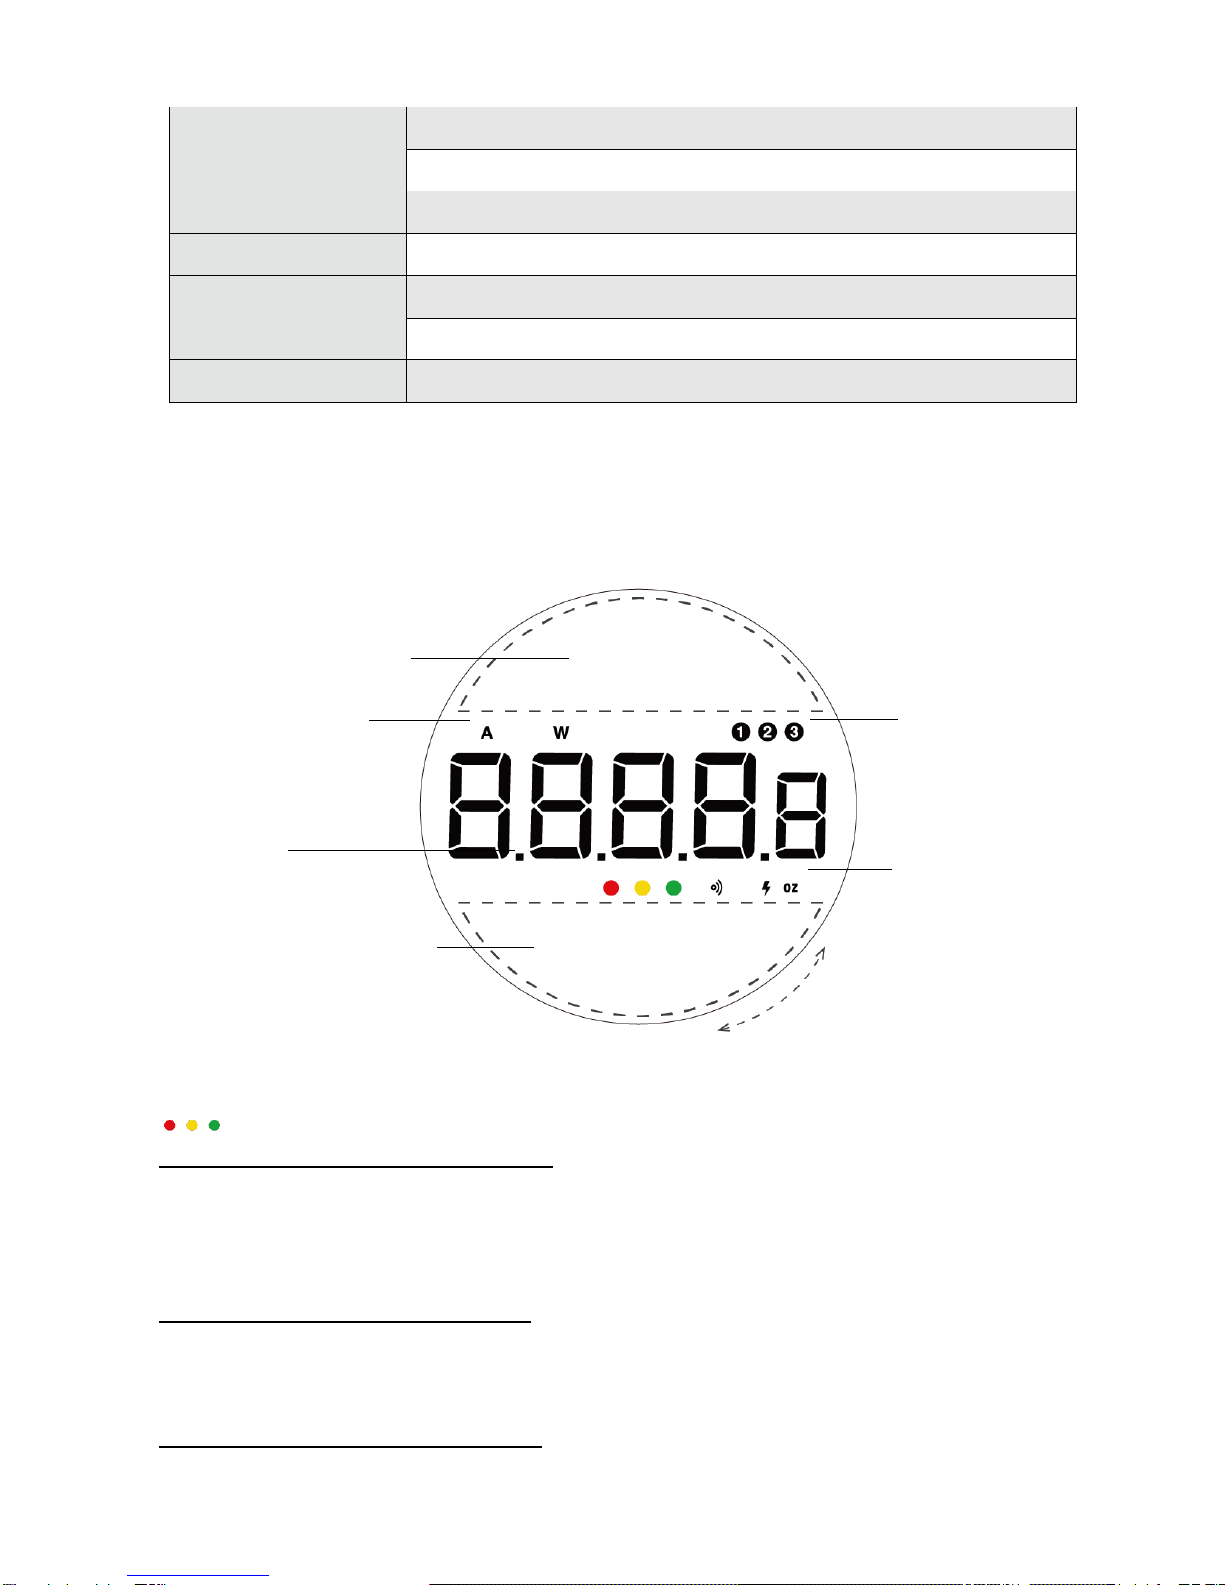
There will be an ‘A’ indicator on the top left corner of the display when in automatic dosing
mode. The auto dosing mode is designed to dose automatically whenever a container is
placed on the Orion platform. When the display shows ‘Ready,’ it means the Orion is in
auto dosing mode and any container placed on top of the platform will automatically dose
to the target weight.
1. Switch to Automatic dosing mode by long pressing the Power button and selecting the
auto mode with the dial. Press Power button again to confirm.
2. Select a preset or adjust a preset weight.
3. Press the Dose button to start automatic dosing, the display will show [ READY ].
4. To start the first dose, press the Dose button again to start dosing.