manuals.online logo
Brands
  1. Home
  2. •
  3. Brands
  4. •
  5. Access Lighting
  6. •
  7. Lighting Equipment
  8. •
  9. Access Lighting 20291LEDDLP User manual

Access Lighting 20291LEDDLP User manual

This manual suits for next models

1

Other Access Lighting Lighting Equipment manuals

Access Lighting 20419LEDDLP User manual

Access Lighting

Access Lighting 20419LEDDLP User manual

Access Lighting TaskWorks Flex 72002LEDD User manual

Access Lighting

Access Lighting TaskWorks Flex 72002LEDD User manual

Access Lighting NAUTICUS 20292LEDDLP User manual

Access Lighting

Access Lighting NAUTICUS 20292LEDDLP User manual

Popular Lighting Equipment manuals by other brands

Life 39.9F70020C quick start guide

Life

Life 39.9F70020C quick start guide

EuroLite LED ML-20 user manual

EuroLite

EuroLite LED ML-20 user manual

LIGMAN OD-50141 installation manual

LIGMAN

LIGMAN OD-50141 installation manual

Home Accents Holiday 1002461144 instructions

Home Accents Holiday

Home Accents Holiday 1002461144 instructions

Experia IRiS Ripple Light instruction manual

Experia

Experia IRiS Ripple Light instruction manual

Erco Gecko Mounting instructions

Erco

Erco Gecko Mounting instructions

Inter-lux ZTA.100.Surface Installation and maintenance instructions

Inter-lux

Inter-lux ZTA.100.Surface Installation and maintenance instructions

Whelen Engineering Company TN Series installation guide

Whelen Engineering Company

Whelen Engineering Company TN Series installation guide

IKEA BJÖRKSPIREA manual

IKEA

IKEA BJÖRKSPIREA manual

Toolland PM 6640 instruction manual

Toolland

Toolland PM 6640 instruction manual

GTD GTD-LP200 user manual

GTD

GTD GTD-LP200 user manual

LIVARNO home 1105-W-UK manual

LIVARNO home

LIVARNO home 1105-W-UK manual

ProLights EclPar IPMFC user manual

ProLights

ProLights EclPar IPMFC user manual

Velvet EVO Series user manual

Velvet

Velvet EVO Series user manual

IDTOLIGHT GENT installation instructions

IDTOLIGHT

IDTOLIGHT GENT installation instructions

MAYTONI S35 installation manual

MAYTONI

MAYTONI S35 installation manual

MaxLite MLFP14DP4535 user manual

MaxLite

MaxLite MLFP14DP4535 user manual

SLV Elektronik 550621 instruction manual

SLV Elektronik

SLV Elektronik 550621 instruction manual

manuals.online logo
manuals.online logoBrands
  • About & Mission
  • Contact us
  • Privacy Policy
  • Terms and Conditions

Copyright 2025 Manuals.Online. All Rights Reserved.

CERTIFICATION:
cULus WET
NO.
20291LEDDLP
IMPORTANT SAFETY INSTRUCTIONS
MESURES DE SECURITE A RESPECTURE
Before assembling your ACCESS LIGHTING fixture, please make sure that
you carefully read through this instruction sheet. Save this instruction sheet
and refer to it when additions to or changes in the fixture
configuration are made.
Lisez attentivement ce manuel d’instructions. Enregistrer cette feuille
d'instructions et de s'y référer lorsque les ajouts ou changements dans
la configuration de montage sont faites.
CONSULT A QUALIFIED ELECTRICIAN TO ENSURE CORRECT BRANCH
CIRCUIT CONDUCTOR.
CONSULTER UN ELECTRICIEN QUALIFIE POUR VOUS ASSURER QUE LES
CONDUCTEURS DE LA DERIVATION SONT ADEQUATS
THIS PRODUCT MUST BE INSTALLED IN ACCORDANCE WITH THE APPLICABLE
INSTALLATION CODE BY A PERSON FAMILIAR WITH THE CONTSTRUCTION
AND OPERATION OF THE PRODUCT AND THE HAZARDS INVOLVED.
CE PRODUIT DOIT ETRE INSTALLE SELON LE CODE D’INSTALLATION PERTINENT, COLLECTION
APPLICATION MODEL NO.
PAR UNE PERSONNE QUI CONNAIT BIEN LE PRODUIT ET SON FONCTIONNEMENT
AINSI QUE LES RISQUES INHERENTS
NOTE: The important safeguards and instructions that appear in this
manual are not meant to cover all possible conditions and situations that
may occur. It must be understood that common sense, caution and care,
are factors that can’t be built into any product. These factors must be
supplied by the person(s) caring for and operating the fixture.
Read all instructions
Do not install this fixture in hazardous locations.
N'installez pas cet appareil dans des emplacements dangereux.
Do not install any fixture assembly closer than 6 inches from any
curtain or similar combustible material.
Laisser une distance d’au moins 6 pouces entre ce luminaire et la toute
surface combustible.
"WARNING Risk of Fire and Electric Shock."
“CAUTION: Risque d’ Incendie et de Choc Electriques.”
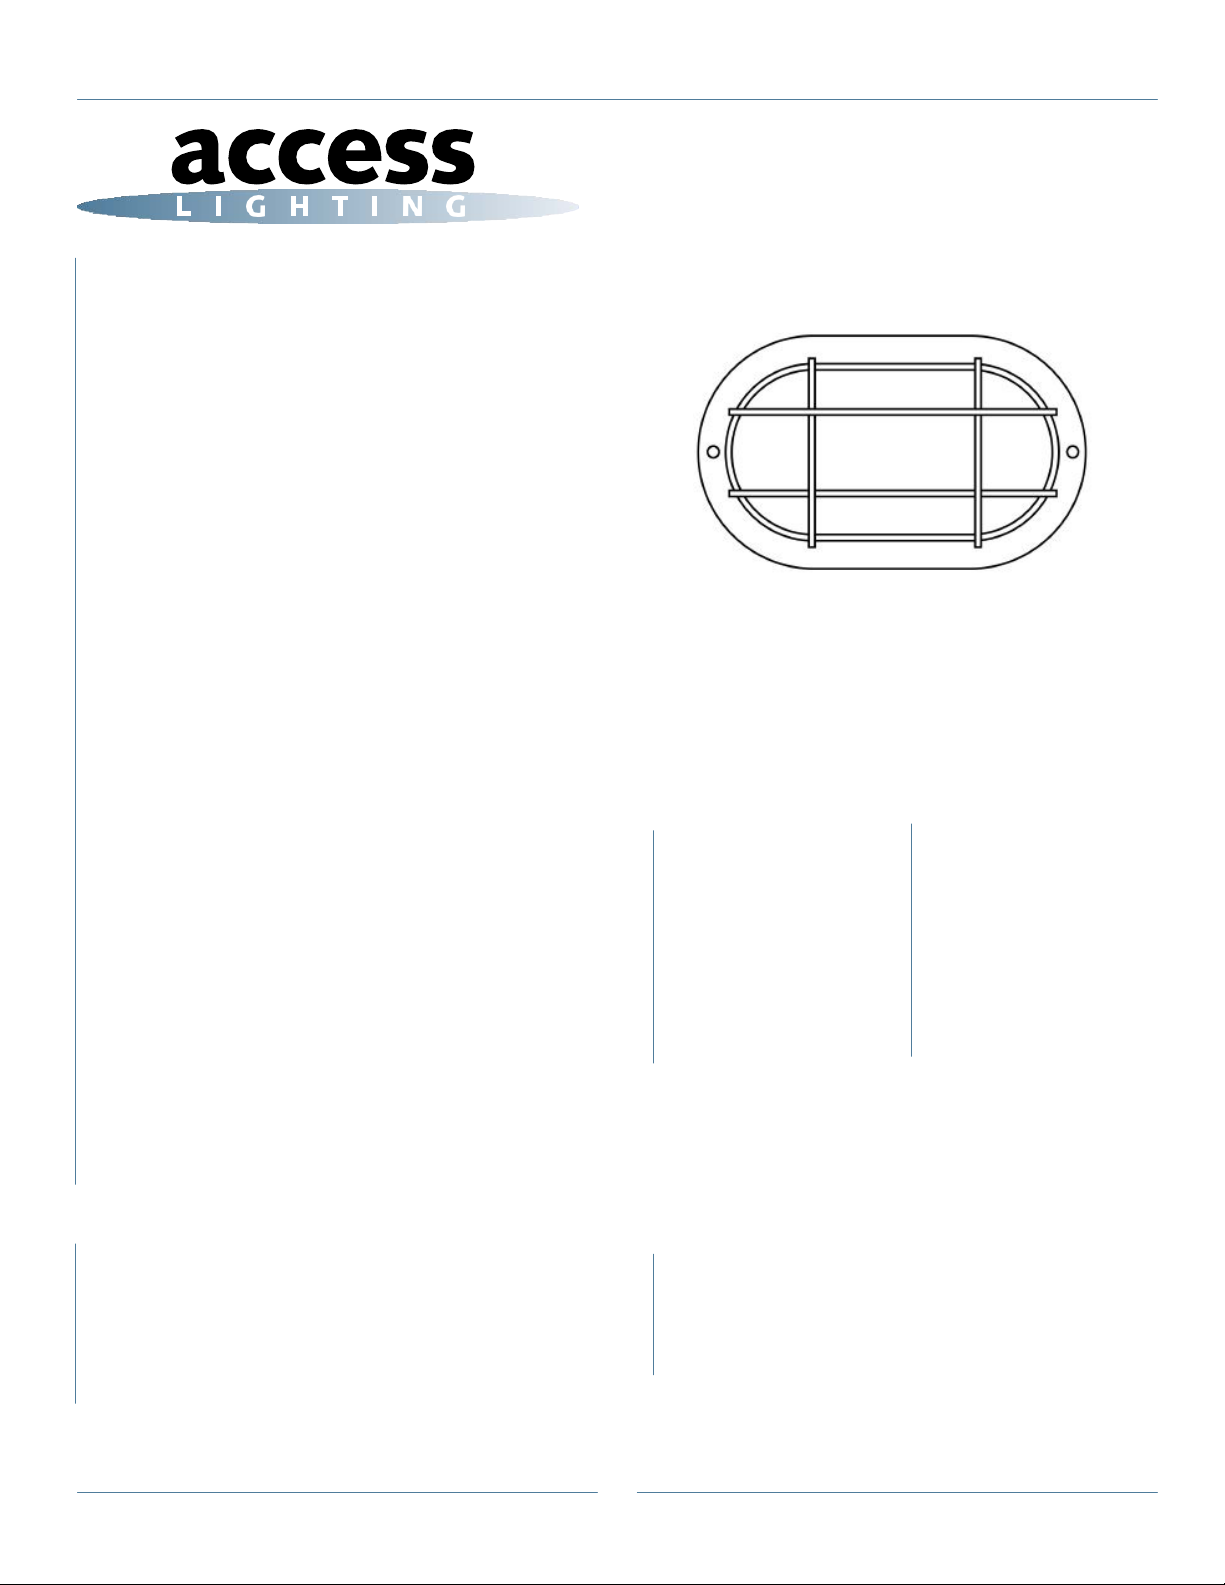
WHAT WE PROVIDE
•
Crossbar
•
Mounting Hardware
•
Canopy with Socket
•
1 x Glass Shade and
decorative guard
•
1 x A19 E-26 LED
bulb
WHAT YOU NEED
•Screwdriver
•Wire Cutters
•Wiring Supplies as Specified
by Electrical Code
GENERAL INFORMATION
All electrical connections must be in accordance with all ordinances,
Local and the U.S. National Electrical Codes (NEC). These fixtures are
intended for mounting to a standard 4” metal octagon outlet box.
The box must be directly supported by the building structure and U.L.
Recognized.
STEP BY STEP INSTRUCTIONS
Before starting your installation disconnect the Power by turning off the
Circuit Breaker or by removing the fuse at the fuse box. Just turning the
light off at the light switch is not sufficient to prevent electrical shock.
1
NAUTICUS
Wall or Ceiling
20291LEDDLP
CERTIFICATION:
cULus
WET
NO.
20291LEDDLP
1
PREPARE FIXTURE
If there is an existing fixture remove it.
Expose the supply wires from the outlet box.
Secure the crossbar to the J-box with the supplied
screws. Ensure that the additional screws face downward.
CONNECT THE WIRES
Gently pull the supply wires. Connect the black
supply wire to the black fixture wire. Secure with
the supplied wire nuts. Connect the white supply
wire to the white fixture wire. Secure with the
supplied wire nuts. Attach
the green J-Box wire around green hexagonal head screw
or connect it to the green supply grounding wire of the fixture.
Secure all wires with U.L. Certified electrical tape (not
supplied). Tuck all wires carefully into the J-Box.
MOUNT THE CANOPY
Fit the fixture canopy up to the crossbar. Insert the
hanging screws into the designated holes in the
canopy. Secure with the supplied thumb screws.
2
2
3
CERTIFICATION:
cULus WET
NO.
20292LEDDLP
INSERT THE BULB
Insert the supplied bulb.
DO NOT EXCEED THE MAXIMUM WATTAGE
AS STATED ON THE WARNING LABEL.
SECURE THE GLASS SHADE
Hold the glass shade and the decorative guard up to the
canopy and secure with the supplied screws
.
*This fixture is wet location rated. In order to ensure
that moisture does not enter the outlet box and cause
a short circuit, clear caulking should be used to seal
the space between the fixture mounting bracket and
the wall. Ensure that a space is left at the bottom to
allow the escape of moisture. It is recommended that
Indoor/Outdoor Silicon Sealant be used for this
purpose**
RESTORE THE ELECTRICITY AND
CHECK THE OPERATION OF YOUR
NEW ACCESS LIGHTING FIXTURE
3
CAUTION
Please ensure that the fitting is cool and
switched
off before replacing the
bulb.
DO
NOT use bulbs that might exceed
the
maximumwattage,statedoncautionlabel.
4
5
6
Dimmable fixture - see attached list for compatible dimmer switches.
VER: 18.8.1