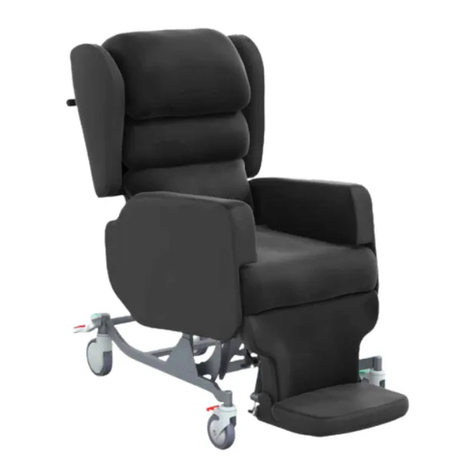
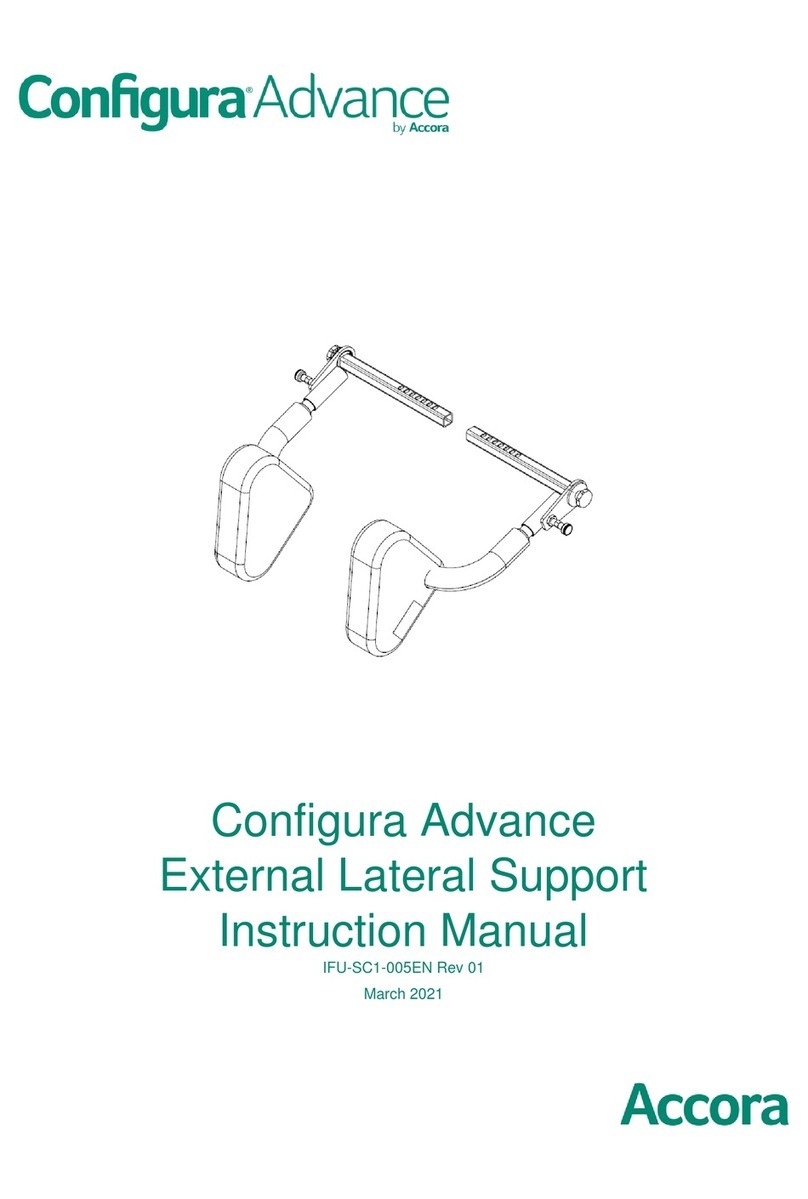
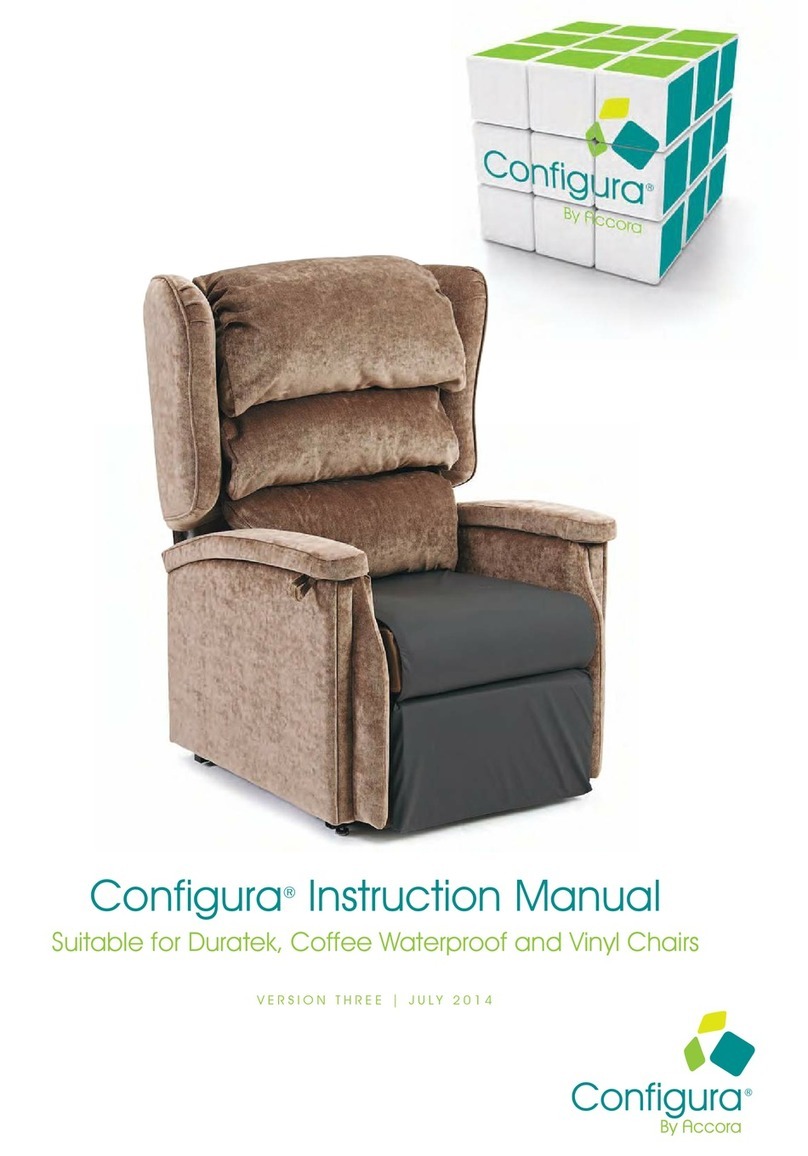
Accora Configura Care User manual

Configura
®
Care Instruction Manual
Care
V E R S I O N T W O | J U N E 2 0 1 2
For manual and electric versions
CONC_B_005 Configura Care manual:Layou 1 30/7/12 17:40 Page 1

2© Accora Configura® assessmen helpline: 01223 206110 | [email protected] | www.configura.uk.com
Contents
Introduction 3
Chair set-up 3
Important safety information 3
Size 4
Pressure 4
Castellated 4
Visco (std) 4
Visco el 4
Cushionair 4
Self Supply 4
Posture 5
Multi-adjustable Pillow Backrest (std) 5
Lateral Supports under the pillows 5
Lateral Support Backrest 5
Adjustable Lateral Support System 5
Profiled 5
Extras 6
Footplate 6
Legrest Extension 6
Identification 6
Assessment 6
Adjusting the seat width 6
Adjusting the seat depth 7
Changing the pressure cushions 7
Changing the backrest cushions 7
Changing the headrest 8
Removing filling from the Multi-adjustable Pillow Backrest 8
How to lock the castors 8
Elevating the legrest (manual only) 9
Elevating the legrest (electric only) 9
Fitting the footplate 9
Fitting the legrest extension 9
How to charge the battery (electric only) 10
How to tilt the chair (manual only) 10
How to tilt the chair (electric only) 10
Replacing the side piece 10
Replacing the cover on the side piece 11
Replacing the seat base 11
Replacing the Tilt-in-space gas strut (manual only) 11
Replacing the legrest elevation gas strut (manual only) 11
Replacing the Tilt-in-space activation lever (manual only) 11
Replacing the legrest elevation activation lever
(manual only) 12
Replacing the Tilt-in-space Bowden cable (manual only) 12
Replacing the legrest elevation Bowden cable
(manual only) 12
Replacing the Tilt-in-space actuator (electric only) 12
Replacing the legrest actuator (electric only) 12
Replacing the handset (electric only) 12
Replacing the Control Box (electric only) 13
Upholstery care 13
Regulations 13
Cleaning recommendations 15
Weight and dimensions 15
uarantee 15
Contact details 15
CONC_B_005 Configura Care manual:Layou 1 30/7/12 17:40 Page 2

3
Introduction
These instructions apply to the Configura®Care
chair by Accora.
Please read them carefully before setting up and
using the chair and keep them in a safe place for
future reference.
These instructions include details of the
performance of the chair. If the chair malfunctions,
shows signs of damage or excessive wear, or
otherwise feels unsuitable, please take it out of
service and contact your supplier immediately.
Configura®Care is designed to be configured
to suit a range of different size, pressure and
posture requirements.
Warning: o not allow chil ren
or animals to play with or near
the chair.
Chair set-up
The chair configuration is selected by a healthcare
professional using the Configura®Care Interactive
Assessment form. If extra parts are required, they
can be ordered separately from Accora.
For a copy of the Configura®Care Interactive
Assessment form or for a Parts and Accessories
Manual, please email configura@accora.uk.com
Important safety information
■Do not allow children or animals to play with or
near the chair.
■Do not ‘ride’ on the push handles or subject them
to abnormal load.
■Do not try and stand on the legrest or footplate.
■Make sure the user’s feet are not touching the
floor when the chair is moved.
■Always apply the brakes on the castors before
transferring from or to the chair.
■The Chair must never be used in vehicles for
client transportation.
■Do not move the chair if the charging lead is
connected to the chair and the mains power
supply.
Weight capacity: 160kg max.
User groups
Accora classifies Configura®Care as a configurable
seating solution for varied and changing user needs.
The ability to configure the size, pressure and posture
requirements allows the chair to be used for many
different user requirements. It is particularly suitable
for Equipment Loan Store use as the chair can easily
be re-issued.
We strongly recommend that anybody issuing
Configura®Care has attended a Configura®Care
Product Training Session. For details of these courses,
contact [email protected].com
Configura®Care should be selected for
users:
■With neurological conditions who need to
maintain a good, midline posture.
■With conditions affecting their abdomen which
makes upright sitting uncomfortable.
■Who require a wide range of positions for different
activities through the day.
■With progressive conditions whose risk of
developing pressure damage will increase.
■Who have skeletal issues (such as kyphosis) and
require adjustment of support in the backrest.
Configura®Care is designed to offer the right size
and to accommodate pressure care and postural
requirements for different users. Configura®Care can
accommodate moderate postural requirements but
is not suitable for users that lean to one side heavily
or have fixtures such as pronounced ‘windsweeping’,
fixtures or pelvic obliquity. It is also not suitable for
users who have severe involuntary movements.
Configura®Care is suitable for users with neurological
conditions such as MS, MND, Dementia and
Parkinson’s etc.
The suitability and effectiveness of these features are
dependent on correct chair set up, which is
dependent on three key elements:
■Seat to footplate height
■Seat width
■Seat depth
Configura®Care should be regularly checked to
ensure the set-up is correct and it is working as
intended for the user.
CONC_B_005 Configura Care manual:Layou 1 30/7/12 17:40 Page 3

4© Accora Configura® assessmen helpline: 01223 206110 | [email protected] | www.configura.uk.com
Configura®Care can be adjusted to four different sizes. By changing parts, the chair can be adjusted in width and
depth.
Configura®Care can be adjusted in width by Configura®Care can be adjusted in
changing the armrests. The seat width can depth by fitting a Depth Adjustment Kit.
be adjusted to: The depths are:
To adjust the seat to footrest length, adjust the legrest length using the spring loaded adjustment pin. This can be
adjusted from 400mm to 530mm.
Configura®Care has five cushion options:
Pressure
P
R
E
S
S
U
R
E
ize
S
I
Z
E
Castellated
Standard foam, pressure reducing cushion for users who do not have pressure issues or who
cannot tolerate Visco foam. 20 stone weight limit.
Visco (std)
Heat sensitive memory foam moulds to the user providing maximum support and pressure
reduction. Suitable for users who are at risk of pressure damage. 25 stone weight limit.
ViscoGel
High specification Visco cushion with Castellated Visco surface and silicon gel to offer
excellent pressure reduction. 20 stone weight limit.
Cushionair portable
Powered alternating air cushion which provides excellent comfort, stability and pressure
relief.
400mm
450mm (std)
500mm
550mm
460mm
510mm (std)
560mm
elf upply
Chair supplied without a cushion.
CONC_B_005 Configura Care manual:Layou 1 30/7/12 17:40 Page 4

5
Multi-adjustable Pillow Backrest (std)
Each pillow is height adjustable and the filling can be customised to the
user. Offering mild to moderate postural support, the Multi-adjustable Pillow
Backrest is highly effective for users with a kyphosis or a scoliosis.
Posture
P
O
S
T
U
R
E
Configura®Care has different options for posture management:
Lateral upport underneath the backrest pillows
Lateral supports to fit underneath the backrest pillows to provide lateral support combined with the
comfort and adjustability of the Multi-adjustable pillow backrest.
Lateral upport Backrest
The Lateral Support Backrest encourages a midline sitting position and
is suitable for users who require increased lateral support. Users with
neurological conditions (including MS) will benefit from the firm but
comfortable support.
Adjustable Lateral upport ystem
Flat foam backrest with adjustable Velcro lateral support system.
Excellent for providing more aggressive lateral support and mild positioning.
Profiled Headrest
Suitable for users with reduced head control.
CONC_B_005 Configura Care manual:Layou 1 30/7/12 17:40 Page 5

6© Accora Configura® assessmen helpline: 01223 206110 | [email protected] | www.configura.uk.com
Identification
Each Configura®Care has an ID number on the base frame. This number must be quoted in any
correspondence with Accora.
Assessment
An individual assessment of the user’s needs is essential prior to issuing Configura®Care. Assessment should
be carried out by a competent healthcare professional with in-depth knowledge and training on seating
requirements. We also strongly recommend regular product training from Accora to ensure the prescriber is
up-to-date with the features of the chair. Healthcare professionals should use Configura®Care Assessment Form
to help with their assessment.
Adjusting the seat width
Remove the existing armrests by releasing the Velcro. Replace
with different armrests to give desired width. Configura®Care is
fitted as standard with armrests which give a seat width of
450mm. Seat widths of 400mm, 500mm and 550mm can be
achieved by fitting other armrests. Please see the Part &
Accessories Manual for more details. Please note the armrests
can be fitted on the right or left of the chair (i.e. they are not
handed.)
Extras
Footplate
Provides support for two feet and reduces risk of foot drop. Includes Visco
and Vapour Permeable fabric. Most effective when user's knees are flexed.
Legrest Extension
Extends length of legrest to provide full support for user's calf when knees are
extended.
Pelvic trap
This is NOT for restraint.
CONC_B_005 Configura Care manual:Layou 1 30/7/12 17:40 Page 6

7
Adjusting the seat depth
Remove the cushions from the backrest. Attach the Depth
Adjustment Kit with the Velcro at the top as shown. Re-attach the
two bottom cushions to the depth adjustment kit on the Velcro
tabs provided. The top cushion fits as normal on the Velcro tab at
the top of the backrest. Ensure the cushions are firmly fixed on the
Velcro tabs provided.
Changing the pressure cushions
For static cushions
The cushion is attached to the seat base with Velcro. Simply remove
the existing cushion and place new cushion on the Velcro tabs.
For Cushionair
The Cushionair cushion requires a separate power supply to operate
the electric pump. When installing the Cushionair cushion, ensure the
pipes are routed correctly through the back of the chair in the
middle, to avoid them catching or crushing. Also ensure that the
power leads and pipes are positioned so they are clear of any
walkways etc to minimise the risk of tripping. Test the pump and
cushion to ensure it inflates correctly before use.
The weight capacity for the Cushionair is 160kg.
THE CHAIR MUST NOT BE MOVED WHILE PLUGGED INTO MAINS ELECTRICAL SUPPLY.
Changing the backrest cushions
Remove the cushions and fix the new backrest
ensuring it is firmly secured on the Velcro tabs
provided. This is important when using the Depth
Adjustment Kit.
The cushions and Depth Adjustment Kit can be
moved up and down on the Velcro tabs to
accommodate different postural requirements.
Always ensure the cushions are firmly fixed on the
Velcro tabs before use. Filling can also be removed
from the ‘Multi-adjustable Pillow Backrest’ as described below. Please note that filling should not be removed
from the ‘Lateral Support Backrest.’
When removing cushions, fold the Velcro flaps on the cushions back so that filling and dust does not get caught
in the Velcro.
Use caution when using the lateral support backrest with the dual motor tilt-in-space mechanism as it introduces
shear forces.
CONC_B_005 Configura Care manual:Layou 1 30/7/12 17:40 Page 7

8© Accora Configura® assessmen helpline: 01223 206110 | [email protected] | www.configura.uk.com
Changing the headrest
Remove the top pillow from the backrest and replace with Profiled
Headrest. Filling can be added or removed from the headrest as
required.
Removing filling from the Multi-adjustable Pillow Backrest
This is sometimes required to accommodate postural
requirements such as a kyphosis. Remove the cushion from the
backrest and undo the zip at the back of the cushion. Remove
the filling from the white internal bag as required and re fasten the
zip on the cushion, ensuring that no filling is caught in the zip.
Remember that the cushions take a few weeks to mould to the
user so avoid taking out too much filling on initial set-up.
How to lock the castors
When the chair is in the desired position, locate the castors. The
brake lever is on top of the castors. Press down on the end of the
lever with your foot. To unlock, ease the lock back up.
CONC_B_005 Configura Care manual:Layou 1 30/7/12 17:40 Page 8

9
Elevating the legrest (manual only)
The legrest elevation is controlled by the lever located on the right
hand side panel. Pull this lever out and the legrest will start to rise. It
may be necessary to manually lift the legrest towards its
maximum elevation.
To lower the legrest, pull the lever out and
the legrest will return to its lowered position.
It may be necessary to push the legrest
down if the user has weak or light lower
legs.
Elevating the legrest (electric only)
Press the appropriate button on the handset to move the legrest to the desired position.
Fitting the Footplate
Elevate the legrest to the fullest extent (this may be difficult when
the user is in the chair). Insert the male end of the Footplate into
the female bracket on the underside of the legrest. Use the spring-
loaded adjustment pin to adjust the footplate to the desired
length.
Fitting the Legrest Extension
Elevate the legrest to the fullest extent (this may be difficult when
the user is in the chair). Insert the male end of the legrest extension
into the female bracket on the underside of the legrest. Use the
spring-loaded adjustment pin to adjust the footplate to the
desired length.
L
E
V
E
R
A
D
J
U
S
T
S
F
O
O
T
R
E
S
T
CONC_B_005 Configura Care manual:Layou 1 30/7/12 17:40 Page 9

10 © Accora Configura® assessmen helpline: 01223 206110 | [email protected] | www.configura.uk.com
How to charge the battery (electric only)
The tilt functions on the Care Electric are powered by a rechargeable battery. The battery must be charged
regularly so as to ensure consistent operation of the chair and good battery life. Recharge frequently and
before any reduction in function is noticed. To charge, plug the charger into a mains socket and the charging
lead into the socket on the handset.
How to tilt the chair (manual only)
Configura®Care has Tilt-in-space with allows the user to recline
without adjusting the angle of the hips. This is operated by pulling
the lever on the handlebar and exerting upward or downward
pressure on the handlebar as required.
Always warn the user before you adjust the angle of the chair.
Note: Han lebar lever is on the right han si e.
How to tilt the chair (electric only)
Press the appropriate button on the handset to tilt the chair to the desired position.
Possibility of Entrapment!
There is a possibility of entrapment between the front of the chair and the metal sub frame.
Ensure feet or any other objects are kept clear of this area when the chair is being tilted.
Replacing the side piece
Remove the backrest and seat base cushions to give easy access
to side piece. Undo all the bolts securing the side piece to the
metal sub-frame. Take new side piece and replace bolts into sub-
frame.
L
E
V
E
R
T
I
L
T
S
C
H
A
I
R
CONC_B_005 Configura Care manual:Layou 1 30/7/12 17:40 Page 10

11
Replacing the cover on the side piece
Remove cover on the side piece from the wooden side piece by
releasing the velcro. Attach the new cover, starting at the bottom
front corner making sure the cover is pulled tight.
Replacing the seat base
Carefully turn the chair on its side. Remove the legrest assembly from the seat base by removing fixing screws.
Remove all the bolts fixing the wooden seat base to the main frame. Fit new seat base, re-fit fixing bolts and
attach legrest assembly to the seat base taking care not to cross-thread or strip the screws.
Replacing the Tilt-in-space gas strut (manual only)
Disconnect the locating pin on the Bowden cable from the bottom of the gas strut. You may find a pair of pliers
useful to hold the locating pin while you disconnect it from the gas strut.
Undo the nuts connecting the gas strut to the main frame. Remove the gas strut and fit new one. Re-fit the bolts
to connect the new gas strut to the main frame. Re-connect the Bowden cable to the bottom of the gas strut. If
necessary, re-tension the Bowden cable using a screwdriver and pliers to tighten or loosen it from the locating
pin at the bottom of the gas strut.
Replacing the legrest elevation gas strut (manual only)
Disconnect the locating pin on the Bowden cable from the bottom of the gas strut. You may find a pair of pliers
useful to hold the locating pin while you disconnect it from the gas strut.
Undo the nuts connecting the gas strut to the main frame. Remove the gas strut and fit new one. Re-fit the bolts
to connect the new gas strut to the main frame. Re-connect the Bowden cable to the bottom of the gas strut. If
necessary, re-tension the Bowden cable using a screwdriver and pliers to tighten or loosen it from the locating
pin at the bottom of the gas strut.
Replacing the Tilt-in-space activation lever (manual only)
Disconnect the Bowden cable from the bottom of the gas strut. You may find a pair of pliers useful to hold the
locating pin while you disconnect it from the gas strut. Remove the Bowden cable from the activation lever. Use
a lubricant and a screwdriver to remove the grip from the handlebar. Fit new activation lever. Re-fit handlebar
grip using lubricant if necessary. Secure and tighten activation lever and re-connect Bowden cable – first to the
activation lever then to the bottom of the gas strut.
If necessary, re-tension the Bowden cable using a screwdriver and pliers to tighten or loosen it from the locating
pin at the bottom of the gas strut.
CONC_B_005 Configura Care manual:Layou 1 30/7/12 17:40 Page 11

12 © Accora Configura® assessmen helpline: 01223 206110 | [email protected] | www.configura.uk.com
Replacing the legrest elevation activation lever (manual only)
Disconnect the Bowden cable from the bottom of the gas strut. You may find a pair of pliers useful to hold the
locating pin while you disconnect it from the gas strut. Remove the Bowden cable from the activation lever.
Unscrew the activation lever from the side piece. Fit new activation lever. Secure and tighten activation lever and
re-connect Bowden cable – first to the activation lever then to the bottom of the gas strut.
If necessary, re-tension the Bowden cable using a screwdriver and pliers to tighten or loosen it from the locating pin
at the bottom of the gas strut.
Replacing the Tilt-in-space Bowden cable (manual only)
Disconnect the locating pin on the Bowden cable from the bottom of the gas strut. You may find a pair of pliers
useful to hold the locating pin while you disconnect it from the gas strut. Then disconnect the Bowden cable from
the activation lever. Re-fit the new Bowden cable – first to the activation lever, then to the bottom of the gas strut.
If necessary, re-tension the Bowden cable using a screwdriver and pliers to tighten or loosen it from the locating pin
at the bottom of the gas strut.
Replacing the legrest elevation Bowden cable (manual only)
Disconnect the locating pin on the Bowden cable from the bottom of the gas strut. You may find a pair of pliers
useful to hold the locating pin while you disconnect it from the gas strut. Then disconnect the Bowden cable from
the activation lever. Re-fit the new Bowden cable – first to the activation lever, then to the bottom of the gas strut.
If necessary, re-tension the Bowden cable using a screwdriver and pliers to tighten or loosen it from the locating pin
at the bottom of the gas strut.
Replacing the Tilt-in-space actuator (electric only)
Remove the two bolts and nuts holding the actuator in place. The top nut is difficult to get to, so a small ratchet
spanner will be needed. Fit the new actuator to the brackets ensuring the nyloc nuts are tightened such that there is
still movement on the pivot points. Plug the cable into the control box, fold spare cable and clip to the main frame.
Replacing the legrest actuator (electric only)
Remove the two bolts and nuts holding the actuator in place. Remove the plug from the control box. Fit the new
actuator to the brackets ensuring the nyloc nuts are tightened such that there is still movement on the pivot points.
Plug the cable into the control box, fold spare cable and clip to the main frame.
Replacing the handset (electric only)
Remove backrest cushions. Remove plug from control box and pull cable through from above the seat base.
Pass new handset cable through gap between seat base and backrest and plug into control box. Route cable up
backrest behind cushions and hook handset on to handle bar. Cable may be routed either side of backrest as
required. Refit cushions.
CONC_B_005 Configura Care manual:Layou 1 30/7/12 17:40 Page 12

13
Replacing the Control Box (electric only)
The control box is mounted underneath the seat base. There are two sealed batteries inside the box. To replace
these batteries, remove the top of the box by releasing the four plastic clips. Disconnect the battery connections
and replace the batteries. To remove the complete control box, remove the four screws holding the box to the
underside of the seat base.
Upholstery care
■Small dust and dirt particles can increase wear and tear of the fabric and dull the surface appearance,
therefore we recommend that you brush the chair regularly using a soft brush or lightly vacuum.
■Accora cannot be held responsible for any damage caused by cleaning.
■The chair should not be exposed to direct sunlight for long periods of time as this will cause your upholstery to
fade. If your furniture is positioned where it is exposed to sunlight for prolonged periods, ensure any curtains
and blinds are drawn for protection.
■Ensure your furniture is protected from sharp objects or buckles as these may cause the fabric to snag. If this
occurs do not pull the thread, carefully trim it with scissors.
■Do not allow animals onto the chair as their claws may cause damage to the fabric. Animals also have a
degree of oil in their coats, and this may transfer to the upholstery causing premature wear.
■The armrests are designed for resting of arms only. Do not sit on them as this could cause structural damage
to the product.
Regulations
Vapour permeable fabric (on seat base an legrest)
Composition Black fabric
COATIN 125 g/m2
FABRIC 130 g/m2
TOTAL 255 g/m2 ± 20 g/m²
TEN ILE TRENGTH according standard : I O 1421
daN/ 5 cm
Warp > 45
daN/ 5 cm
Weft > 24
ELONGATION
Warp > 175%
Weft > 290%
TEAR TRENGTH according standard : I O 4674
daN/ 5 cm
Warp > 2,7
daN/ 5 cm
Weft > 3,0%
CORROSIVE
Caution!
The batteries in the Care Electric contain corrosive material.
CONC_B_005 Configura Care manual:Layou 1 30/7/12 17:40 Page 13

14 © Accora Configura® assessmen helpline: 01223 206110 | [email protected] | www.configura.uk.com
ELONGATION AT 30N TEN ILE TRENGTH
Warp > 25%
Weft > 70%
HYDRO TATIC HEAD according standard : I O 1420
> 200cm
HYDROLY I according Jungle test
after 3 weeks : no loss of quality
FLEX RE I TANCE according standard : I O 5402
at 200000 : no loss of quality
I TREATED
FIRE RESISTANT BS 7175 Crib 5 Centexbel rapport 46643 (29/07/05)
ANTI BACTERIE Sanitized Clariant Benelux (licence nr. 1231.99)
WATERVAPORPERMEABILITY according standard : A TM 96-66
500 g/m2 - 24 h at 38°C
Centexbel rapport 46644 (27/07/05)
BIOCOMPTABILITY according standard : 10.993-10
Report : LEMI/MARTILLAC - non allergic
Stan ar foam
The standard foam used in the chair (Kovafoam CME-3025) has been tested at FIRA International Limited and
successfully satisfied the requirements from:
Schedule 1 part 1 of the Furniture and Furnishings (fire) (safety) regulations 1988, amended 1989 and 1993
(based on BS 5852; 1982 part 2). Report reference: TFFLF16293
Visco foam
The Visco foam on the Configura®meets the requirement of the furniture and furnishings (fire) (safety) regulations
1988.
Fabric for removable si e covers
Design name: Various
Manufacturer: Panaz
Collection: Cadet Contempory
Quality: WW901 – WW904 Cadet Contempory
Composition: coating: 98% PVC 2% PU, substrate: 67% polyester 33% cotton
Weight: 720 /M²
Width: 137CM
Suitable applications: contract upholstery vinyl
Market sector: healthcare, leisure
Abrasion: 100,000+ Martindale abrasion rubs
Colour fastness: 5+
Flammability: BS582 PART 2 SOURCE 5 (CRIB)
EN1021.1/2
NFPA 260
Main frame black fabric
Composition: 94% PVC, 6% Polycotton
Abrasion: 40,000+ Martindale abrasion rubs
Width: 140cm
Flammability: crib 5
CONC_B_005 Configura Care manual:Layou 1 30/7/12 17:40 Page 14

15
Weight and dimensions
Guarantee
The warranty period for Configura®Care is 12 months, covering parts only. Any issues regarding warranty should be
addressed in the first instance to your provider. To report a problem, please contact us on the details below.
Contact details
Accora Ltd., Charter House, Barrington Road, Orwell, Cambridge S 8 5QP
T: 01223 206110, F: 01223 206120, E: configura@accora.uk.com
Weight (please note these are approximate)
Complete chair 58kg
Dimensions (please note these are approximate)
In normal sitting
Height 122cm
Width 70cm
Depth 115cm
Backrest height from seat base 80cm
Floor to top of arms 76cm
Arm height from seat base 20cm
In tilt
Height 110cm
Width 70cm
Depth 120cm
Cleaning recommen ations:
■Clean and care for the fabric on a regular basis and it will maintain its condition and appearance. Most
stains can be removed by wiping clean.
■The new generation of Microfibre cleaning cloths are extremely effective without soap for general care and
maintenance.
■Wipe clean regularly with a damp cloth to remove dust particles and light soiling.
■Remove spillages promptly (within 15 minutes) with and absorbent dry cloth.
■For general soling, use a soft brush with care to avoid abrasive damage to surface and tepid soapy water
(non-alkaline). Rinse clean with clear water. Dry with an absorbent cloth.
■Bodily fluids should be removed promptly (within 15 minutes) with cold water then cleaned as above.
■Extreme soiling/infection control use a 5% Sodium Hypochlorite (Bleach) solution.
■Do not machine wash or dry clean.
■Do not apply other chemicals such as polish, solvents or stain removers.
CONC_B_005 Configura Care manual:Layou 1 30/7/12 17:40 Page 15

CONC|B|005
DeliverConfigure Adjust Recycle Training
Charter House
Barrington Road
Orwell
Cambridge
S 8 5QP
T: 01223 206100
F: 01223 206120
www.accora.uk.com
Registered to ISO 9001:2008
CONC_B_005 Configura Care manual:Layou 1 30/7/12 17:40 Page 16
Table of contents
Other Accora Indoor Furnishing manuals
Popular Indoor Furnishing manuals by other brands

Riverside Furniture
Riverside Furniture Castlewood 33591 Assembly instructions

IKEA
IKEA NORNAS Instruction

Epoch Design
Epoch Design GA-OS-MC-NB Assembly instructions

ROBERTO FIORE
ROBERTO FIORE Cabinets To Go OC3390SD Assembly instructions

Style selections
Style selections HOWELL MR-WG 2694547 installation manual

Workrite Ergonomics
Workrite Ergonomics Sierra Privacy Panel Assembly instructions