Accu-Chek Softclix User manual

Instructions for Use
The ACCU-CHEK Softclix lancet device uses ACCU-CHEK
Softclix lancets to obtain a drop of blood from the finger-
tip. The penetration depth can be selected to match any
type of skin.
This cap is for fingertip
testing only
The clear cap is for testing
on sites other than the fin-
gertip. Do not use the clear
cap for fingertip testing
Note: The ACCU-CHEK Softclix cap was not designed
to be replaced after each use. The ACCU-CHEK
Softclix lancet device is intended for use by a single
person and is not suitable for use where testing dif-
ferent persons with the same device may lead to
infections.
Selecting the Depth of Penetration
The ACCU-CHEK Softclix device penetration depth may be
adjusted by using the Comfort Dial feature to enable you
to get a sufficient drop of blood.
The ACCU-CHEK Softclix device offers 11 penetration
depth options. The penetration depth is 0.8 mm at the
first setting and increases by 0.15 mm with each setting.
The settings are shown on the cap by the numbers 1 to 5
with additional levels marked with dots to enable you to
precisely adjust to your individual skin type.
The number or dot, which
appears in the center of
the semi-circular cutout
on the ejector, shows the
depth of penetration
selected.
Note: If you are using the ACCU-CHEK Softclix device for
the first time, start by selecting 1 or 2 to see if the
amount of blood obtained is enough to perform a test.
To select a desired depth, turn the Comfort Dial so that
the center of the semi-circular cutout on the ejector
points to the appropriate number or dot.
Select a new depth of
penetration by turning
the cap. The cap will
snap into a new position,
preventing any accidental
change of the penetration
depth.
• Select the first setting, 0.5, for the smallest depth of
penetration, and the last setting, 5.5, for the greatest
depth of penetration.
• Select 0.5 to 1.5 for softer-than-average skin, 2 to 3.5 for
average skin, and 4 to 5.5 for harder-than-average or
calloused skin.
Performing a Fingerstick
Pull off the cap of the
lancet device. If there is
already a lancet in the
device, remove it by
sliding the ejector forward.
Refer to the section called
Removing the Lancet.
Release ButtonEjectorCap with Comfort Dial
Depth Selection
Plunger
Protective Cover
Lancet
Penetration
Depth (mm)
0.80
0.95
1.10
1.25
1.40
1.55
Setting
0.5
1
1.5
2
2.5
3
3.5
4
4.5
5
5.5
1.70
1.85
2.00
2.15
2.30
Setting Penetration
Depth (mm)

Removing the Lancet
To remove the lancet,
pull off the cap of the
ACCU-CHEK Softclix
device.
Slide the ejector forward.
The lancet will release.
To avoid infection, use a new lancet each time you
perform a fingerstick. Dispose of the lancet in a puncture-
proof container with a lid, such as an empty coffee can.
Helpful Tip to Performing a Fingerstick
The best place to prick the fingertip is on the side
because it has the best blood supply, yet allows for the
least painful fingerstick. Any finger may be used for a
fingerstick.
Firmly insert a new ACCU-CHEK Softclix lancet in the
lancet holder until it snaps into place.
Twist the protective cap
on the lancet several
times and pull gently to
remove it.
Put the cap back onto the
lancet device. The cap only
fits when the notch on the
cap is aligned with the
center of the semi-circular
cutout on the ejector.
Select the desired depth of penetration by turning the
Comfort Dial so that the center of the semi-circular cutout
on the ejector points to the appropriate number or dot. The
higher the number, the greater the depth of penetration.
Then, press the plunger on the end of the device all the
way down, and you will hear a “click.” When the device is
ready, you will see a yellow dot appear and remain in the
center of the clear release button.
Now, wash your hands in warm soapy water and warm
the fingers to increase blood flow. If you are using alcohol
wipes, make sure your finger is completely dry before
continuing.
Grasp your finger near the area to be pricked and gently
massage for three seconds.
Keeping your hand down,
press the tip of the
ACCU-CHEK Softclix device
firmly against the side of
your fingertip. Press the
release button to stick
your fingertip, then gently
squeeze until you get a
small sample of blood.
Apply the drop to the test strip you are using.
I
mmediately remove used lancet. To avoid accidental
injury, do not store lancet in device.

What Do I Need to Know About Forearm
Testing?
Testing on sites other than the fingertip is referred to as
alternative site testing (AST). Before performing an alter-
native site test, refer to your test strip insert or owner’s
booklet to determine if forearm testing is supported by
your blood glucose monitoring system. It is important to
note that there is a delay, or lag time, in the delivery of
blood glucose to alternative sites when compared to fin-
gertips. Therefore, there is a potential for a significant dif-
ference between fingertip and AST results. The length of
delay, or lag time, is strongly impacted by lifestyle, foods
eaten, or any other event having impact on blood glucose
levels. We strongly recommend that people considering
AST understand the following:
• AST is not recommended during periods of rapid
decreases or increases in blood glucose levels.
• AST is not recommended for people with a history of
recurrent hypoglycemia, who suspect that their blood
glucose is extremely low, or who are unaware of
hypoglycemic events.
• Studies show that AST results immediately before a meal
and near bedtime are more similar to fingertip results.
• Never ignore symptoms that may be due to low or high
blood glucose.
If the AST reading does not match how you feel, perform a
fingertip test to confirm your results. If your blood glucose
still does not reflect the way you feel, contact your doctor. Do
not change your treatment decisions based only on a single
result. For more information on AST please contact 1-800-
858-8072. Please consult your physician if you are consider-
ing using sites other than fingers for obtaining a sample of
blood for testing. Please refer to your test strip insert or
owner’s booklet to determine if your blood glucose monitor-
ing system is appropriate for AST.
Wash the alternative site with warm water.
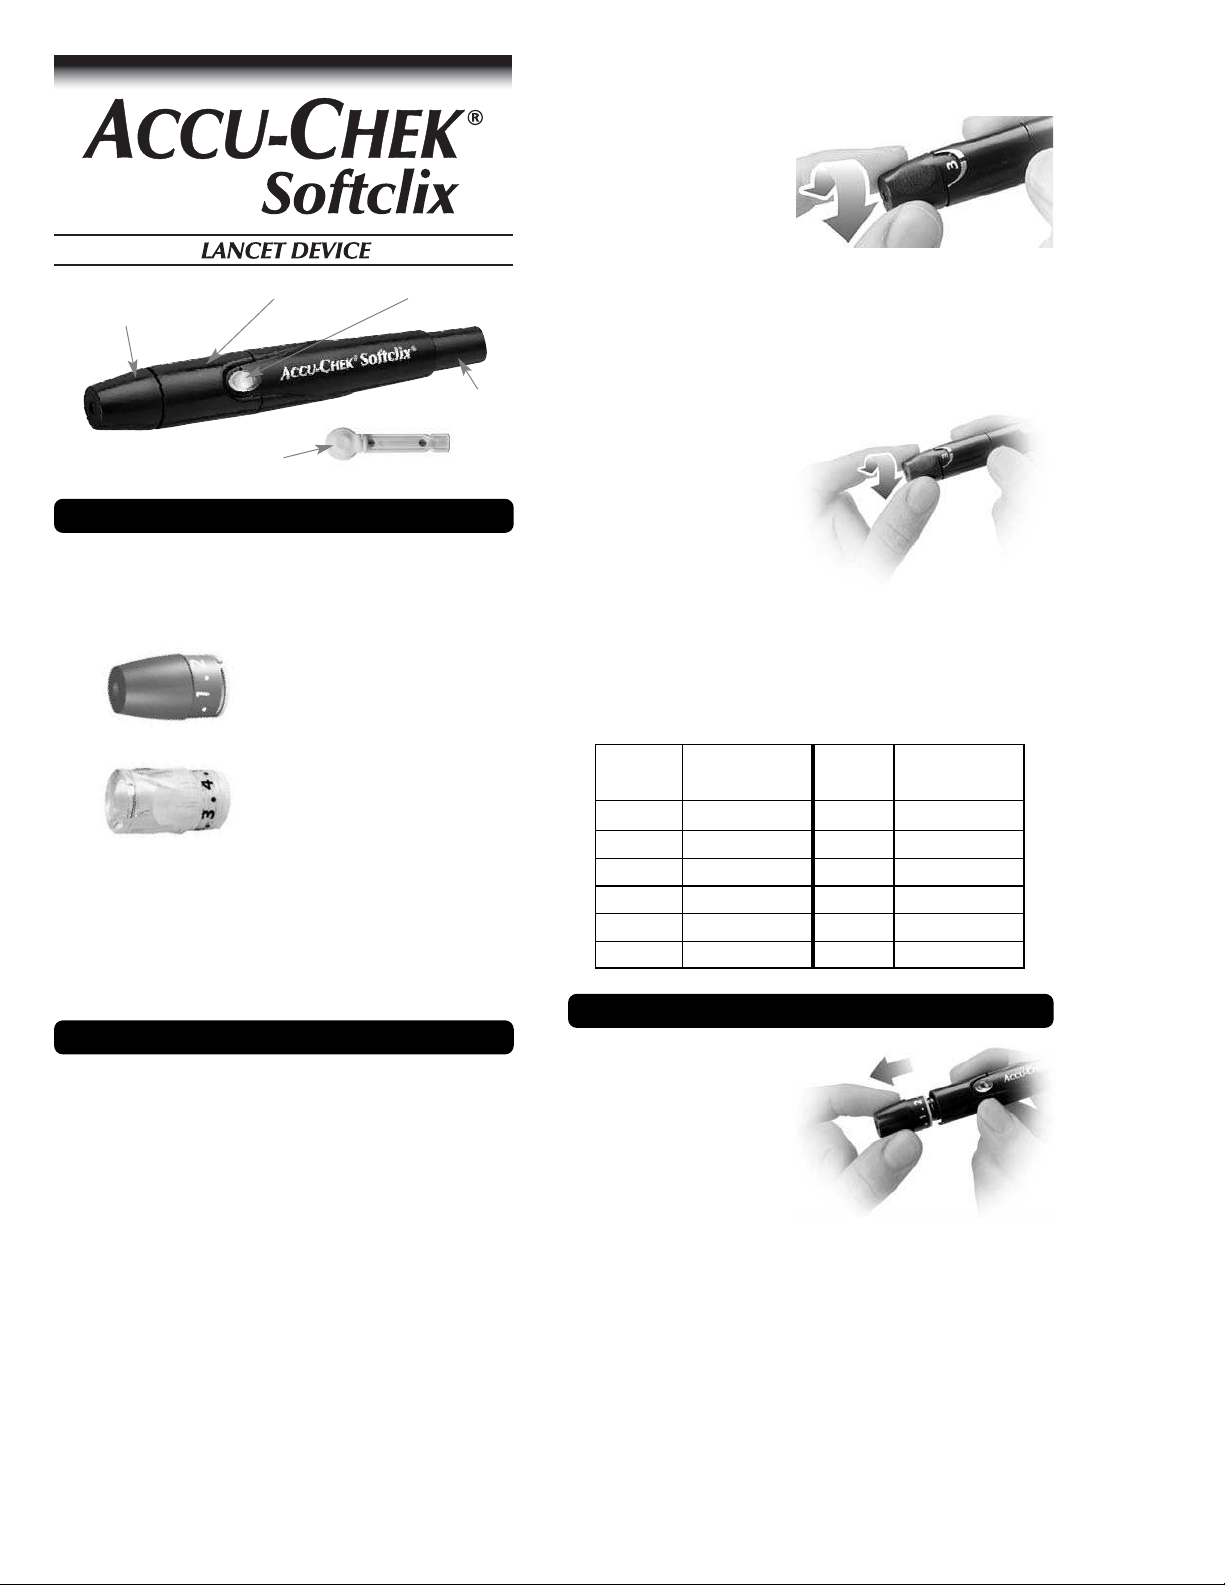
Make sure you are using the clear cap specially designed
for alternative site testing with the ACCU-CHEK Softclix
lancet device.
Adjust the clear cap to the highest setting.
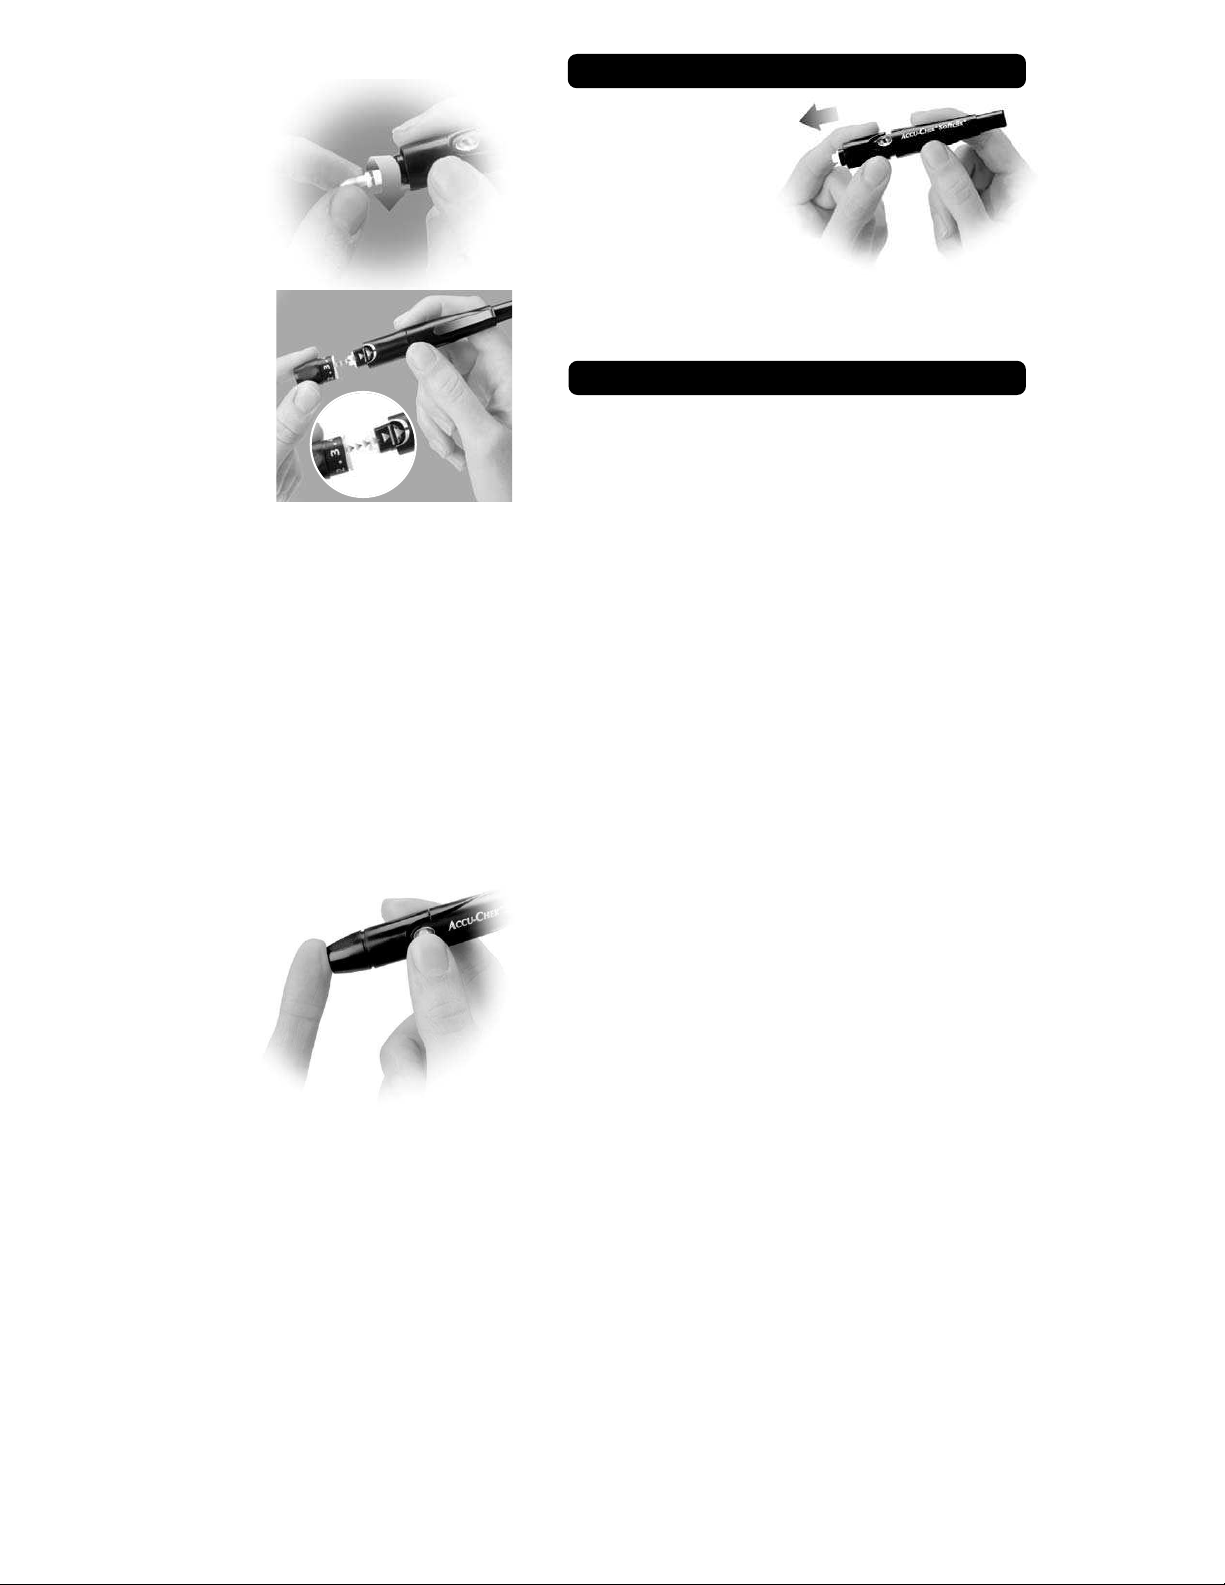
Press and hold the lancet device against a fleshy area on
the alternative site. Press the release button and continue
to apply steady pressure to the site.
Don’t be afraid to apply a lot of pressure to the area with
the lancet device to get a good blood drop.
Cleaning and Disinfecting the
ACCU-CHEK Softclix Device
To clean the ACCU-CHEK Softclix device, use a mild dish-
washing liquid and a soft cloth. DO NOT place the entire
device under water. Do not use bleach. At least once a week,
disinfect the cap after cleaning by placing it in 70% alcohol
(isopropyl) for 10 minutes. Allow the cap to air-dry after
disinfecting.
ACCU-CHEK Softclix Lancets
Only ACCU-CHEK Softclix brand lancets should be used with the
ACCU-CHEK Softclix device.
The ACCU-CHEK Softclix lancets are manufactured so that accurate
penetration is assured when a new depth is selected.
Other manuals for Softclix
5
Other Accu-Chek Personal Care Product manuals
Popular Personal Care Product manuals by other brands

HOFFEN
HOFFEN SFB-8111B quick start guide

Profilio
Profilio ECONOMY RAISED TOILET SEAT user manual

medi
medi CIRCAID CLASSIC-FLEX quick start guide

Orliman
Orliman SITLIVE OSL1220 Use and maintenance instructions

Max-Ability
Max-Ability Pressalit 2000 user guide

Luminess Air
Luminess Air EVERYDAY Getting started guide