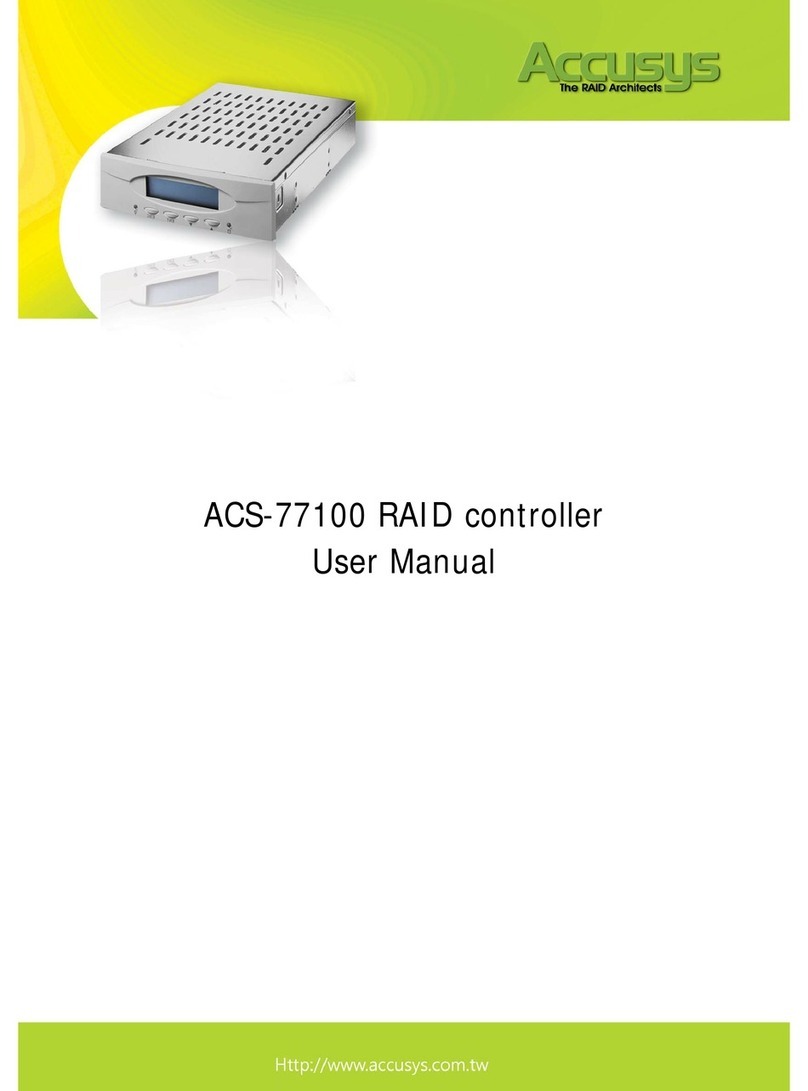
Accusys ACS-7630 User manual

Preface
1
P
P
Pr
r
re
e
ef
f
fa
a
ac
c
ce
e
e
Notice
Product features and specifications described in this manual are subject to change without
notice.
The manufacturer shall not be liable for any damage, or for the loss of information resulting
from the performance or use of the information contained herein.
Trademarks
Accusys and the names of Accusys products and logos referenced herein are either
trademarks and/or service marks or registered trademarks and/or service marks of Accusys,
Inc.
Microsoft, Windows, Windows NT, MS-DOS are either trademarks or registered trademarks of
Microsoft Corporation. Intel and Pentium are registered trademarks of Intel Corporation.
Other product and company names mentioned herein may be trademarks and/or service
marks of their respective owners.
All contents of this manual are copyrighted by Accusys, Incite information contained herein is
the exclusive property of Accusys, Inc. and shall not be copied, transferred, photocopied,
translated on paper, film, electronic media, or computer-readable form, or otherwise
reproduced in any way, without the express written permission ofAccusys Inc.
© Copyright 2004Accusys, Inc.
All rights reserved.
This manual version 2.0a

Accusys 7630
2
About this manual
Intended user
This manual is designed and written for users of the ACS-7630 RAID controller. The user
should ideally be familiar with RAID planning and data storage operations and have
experience in electronic or computer engineering.
Organization of the manual
This manual consists of the following sections:
Chapter 1: Introduction provides details of key features, checklists of package contents
and user requirements, and an overview of the controller box and its features.
Chapter 2: Before you begin contains all the information you need to decide whether to
set up a RAID 0 or RAID 5 array and lists important pre-installation notices.
Chapter 3: Setting up the controller guides you through process of installing ACS-7630
in a system or externally and explains how to replace drives.
Chapter 4: Initializing the array explains how to launch the automatic initialization
process.
Chapter 5: Formatting tells you how partitionand format the array so that your system can
start using it.
Appendix A: FAQ helps you deal with encountered problems in the form of Q&A.
Appendix B: Glossary defines relevant technical terms used in this manual.
Appendix C: Specifications list technical specification of ACS-7630.
Appendix D: Regulatory Information provides information of related certification and
standards.
Appendix E: Contact Us lists contact details ofAccusys business units around the world.

Preface
3
Using this manual
This guide contains all the information you need to set up and start using your RAID controller
and to monitor its performance in real time. The setup process will follow these steps:
Prepare: Familiarize yourself with the features and capabilities of
ACS-7630 (Chapter 1)
Decide whether to set up a RAID 0 or RAID 5 array
(Chapter 2)
Configure: Set the RAID and Master / slave configurations
(Chapter 3)
Install: Attach the necessary cables and either mount the
controller box inside your system or set up the controller
box externally (Chapter 3)
Initialize: Initialize the array (Chapter 4)
Format: Partition the array to enable your computer’s operating
system to begin using it (Chapter 5)
Format the array (Chapter 5)
When you have reached this point, your RAID controller will be ready for use. To get the most
from ACS-7630, you should also set up the ACSView GUI on your system. With this browser
you can monitor the statusof your array at any time and from any computer on your LAN. You
will find full installation instructions and information on the monitoring capabilities ofACSView
in the ACS-7630 ACSView User’s Manual.Ask your vendor for details.

Accusys 7630
4
Guide to Conventions
Important information that users should be aware of is indicated with the following icons:
This icons indicates the existence of a potential hazard that could result in
personal injury, damage to your equipment or loss of data if the safety
instruction is not observed.
This icon indicates useful tips on getting the most from your RAID controller.
Important terms, commands and programs are put in Boldface font.
Screen text is given in screen font.

Table of Contents
5
T
T
Ta
a
ab
b
bl
l
le
e
e
o
o
of
f
f
C
C
Co
o
on
n
nt
t
te
e
en
n
nt
t
ts
s
s
PREFACE....................................................................................................................... 1
NOTICE....................................................................................................................... 1
TRADEMARKS ............................................................................................................ 1
ABOUT THIS MANUAL................................................................................................. 2
Intended user........................................................................................................ 2
Organization of the manual ................................................................................. 2
USING THIS MANUAL.................................................................................................. 3
GUIDE TO CONVENTIONS ........................................................................................... 4
CHAPTER 1 - INTRODUCTION ................................................................................ 7
OVERVIEW ................................................................................................................. 7
KEY FEATURES........................................................................................................... 8
Hard drive hot swapping ..................................................................................... 8
Automatic drive rebuilding .................................................................................. 8
MAKING SURE YOU HAVE EVERYTHING...................................................................... 8
What's in the box.................................................................................................. 8
What else you need............................................................................................... 8
FAMILIARIZING YOURSELF WITH THE CONTROLLER ................................................... 9
Overview.............................................................................................................. 9
Front view............................................................................................................ 9
Rear view ........................................................................................................... 10
CHAPTER 2 - BEFORE YOU BEGIN...................................................................... 11
PRE-INSTALLATION PLANNING ................................................................................. 11
Introduction to RAID levels ............................................................................... 11
RAID 0 ............................................................................................................... 12
RAID 5 ............................................................................................................... 13
PRE-INSTALLATION NOTICES.................................................................................... 14
CHAPTER 3 - SETTING UP THE CONTROLLER................................................ 15
INSTALLATION FLOWCHART..................................................................................... 15
SETTING CONFIGURATIONS ...................................................................................... 16
RAID 0 configuration......................................................................................... 16
RAID 5 configuration......................................................................................... 16
Master configuration ......................................................................................... 17
Slave configuration............................................................................................ 17

Accusys 7630
6
Cable select configuration................................................................................. 17
MOUNTING CONTROLLER BOX.................................................................................. 18
Mounting controller box in system..................................................................... 18
Installing controller box externally.................................................................... 18
LOADING DRIVES IN THE CONTROLLER BOX ............................................................. 19
Fixed connector drive carrier............................................................................ 20
Cable connector drive carrier............................................................................ 21
REMOVING /REPLACING A DRIVE ............................................................................. 22
Swapping drives................................................................................................. 22
What if a disk fails?............................................................................................ 22
Removing a drive from a fixed connector drive carrier..................................... 22
Removing a drive from a cable connector drive carrier.................................... 23
CHAPTER 4 - INITIALIZING THE ARRAY.......................................................... 24
CHAPTER 5 - FORMATTING .................................................................................. 26
PARTITIONING THE ARRAY ....................................................................................... 26
FORMATTING THE ARRAY......................................................................................... 27
APPENDIX A - FAQ.................................................................................................... 28
APPENDIX B - GLOSSARY....................................................................................... 29
APPENDIX C - SPECIFICATIONS.......................................................................... 31
APPENDIX D - REGULATORY INFORMATION................................................. 32
APPENDIX E - CONTACT US .................................................................................. 33
ACCUSYS,INC.......................................................................................................... 33
ACCUSYS U.S.A., INC. ............................................................................................. 33
ACCUSYS GERMANAY.............................................................................................. 33
ACCUSYS KOREA,INC.............................................................................................. 33
ACCUSYS CHINA,INC............................................................................................... 34

Chapter 1 – Introduction
7
C
Ch
ha
ap
pt
te
er
r
1
1
I
I
In
n
nt
t
tr
r
ro
o
od
d
du
u
uc
c
ct
t
ti
i
io
o
on
n
n
This chapter introduces the features and capabilities of
ACS-7630.
You will find:
A full introduction to your ACS-7630 controller
Details of key features
A checklist of package contents
A checklist of what else you need to start installation
An overview of the controller box and its features, including
connectors, LEDs and jumpers
Overview
Congratulations on your selection of the Accusys 7630 (ACS-7630). The ACS-7630 is a
high-performance and extremely flexible RAID (Redundant Array of Independent/Inexpensive
Disks) controller. RAID is a storage technology used to improve the processing capabilities of
a storage system, providing a combination of reliability and performance.
The ACS-7630 is the ultimate approach to a flexible RAID solution. It can manage two
different RAID levels (0 and 5), with three IDE disks in a single RAID group. With a
cost-effective IDE approach, supporting Ultra DMA mode, the ACS-7630 strips data to three
disk drives simultaneously, and delivers optimized performance, comparable to more costly
SCSI based solutions.
Featuring intelligent online recovery, the ACS-7630 lets you hot swap a failed drive: data will
automatically be rebuilt to the new drive without any system down time. If a RAID 5 array
exists and one IDE disk drive fails, data is secured by the other drives, and an alarm sounds to
alert you. RAID 5 rebuild will proceed automatically (during power on) assoon as you lock the
disk carrier. If a RAID 0 array fails, there is no way to recover the data of the RAID system. You
should proceed by reconfiguring the new RAID with a new IDE disk.
The ACS-7630 Controller Box features a user-friendly rack design that lets you easily install
three drives. Each drive carrier supports a one-inch high 3.5-inch form factor drive. Security is
provided by a key-locking system that prevents unauthorized access to each disk drive.

Accusys 7630
8
Key features
The ACS-7630 supports the following features:
Automatic on-line rebuilding
Drives are hot swappable
Supports RAID level 0 and 5
Can be configured as master or slave IDE drive
Host transparent and OS independent
Fan cooler (Ball bearing type)
Supports 3 IDE hard drives
Key locking to prevent unauthorized access to the disk drives
Requires no software drive or add-in card
Audible alarm on drive failure
Hard drive hot swapping
Hot Swapping allows for the removal and installation of disk drives without the need to power
down the system while ACS-7630 is configured as a RAID 5 array.
Automatic drive rebuilding
If a member drive in a RAID 5 array is replaced on-line, the controller will automatically start to
rebuild data to the new drive.
Making sure you have everything
What's in the box
Some vendors may ship certain components as standard, while other vendors treat the same
component as optional. In its most basic configuration, your package should include the
following:
ACS-7630 Controller Box
ACS-7630 Controller User’s Manual
Three disk drive carriers with key locks
Disk drive mounting screws
Two keys for drive carriers (identical)
What else you need
In order to setup a working system the following user-supplied items are required:
System with IDE/ATA Interface
Case with two half-height 5 ¼” drive bays with front bezel access
One IDE channel cable connector
One free power supply connector
One 3-pin RS232 cable connector (data connection for GUI interface, if required)

Chapter 1 – Introduction
9
Familiarizing yourself with the controller
Overview
The Controller Box has three drive carriers, accessed from the front.
The sides of the box each featurea guide rail channel and mounting screw holes to enable
the box to be secured inside a computer case.
The connectors and jumpers are located on the rear panel.
Front / Drive carriers
Guide rail channel
Holes for mounting screws
Rear / Connectors & jumpers
Front view
Three Drive Carriers
Disk Activity Indicators
Drive Carrier Lock
Each drive carrier can hold a one-inch high 3.5-inch form factor IDE disk drive. This makes it
easy to hot swap a drive in the event of a failure, without affecting the status of the remaining
drives.
Drive Carrier Lock – Unlocked
orientation
Drive Carrier Lock – Locked
orientation
Green Disk Activity Indicator
Amber Disk Activity Indicator
Red Disk Activity Indicator

Accusys 7630
10
Disk Activity Indicators
These indicators show the status of each individual disk drive.
Indicator Disk Activity
Green Disk drive is properly installed and locked
Amber Disk drive is being accessed
Red Disk drive is not present, is not properly
installed, is unlocked, or disk has failed
Red Flashing Disk drive is rebuilding data
In the event that a drive fails, the Red indicator turns on and an alarm sounds. You can turn off
the alarm by unlocking the drive carrier.
The drive carrier lock acts as an On/Off switch for the drives and
provides security by preventing non-key holders from accessing the
drives.
To lock each carrier, insert the key and turn it in a clockwise
direction. To unlock a carrier, turn the key in a counterclockwise
direction.
Rear view
Master/Slave configuration
jumper pins
RAID level configuration jumper
pins
Jumper head
Connector for IDE 40-pin
interface cable
Power connector
3-pin RS232 connector (Terminal
port)
Cooling fan vent
The settings for the master / slave and RAID configuration jumpers are described in
Chapter 3.
The IDE cable is the route used for reading and writing to the array.
The power connector supplies power to the controller box.
The 3-pin RS-232 cable is used for remote monitoring of ACS-7630. The RS-232 port is
configured with DTE and PC compatible pin assignments.
The cooling fan inside the controller box provides air circulation for the disk drives.

Chapter 2 – Before you begin
11
C
Ch
ha
ap
pt
te
er
r
2
2
B
B
Be
e
ef
f
fo
o
or
r
re
e
e
y
y
yo
o
ou
u
u
b
b
be
e
eg
g
gi
i
in
n
n
This chapter contains includes all the information you need to
decide which RAID level to use and to prepare for installation.
You will find:
A full introduction to and comparison of RAID levels 0 and 5
Important notices on the safe operation and installation of
ACS-7630
Pre-installation planning
Introduction to RAID levels
The ACS-7630 can support the following RAID levels: 0 and 5. Which is the right level for you?
The answer depends on the application it is used for.
RAID Level 0 offers high transfer rates, and is ideal for large blocks of data where speed is of
importance. Computer Aided Design, Graphics, Scientific Computing, Image and Multimedia
applications are all good examples. If one drive in a RAID 0 array fails however, the data on
the whole array is lost.
RAID Level 5 arrays offer high I/O transaction rates, and are the ideal choice when used with
on-line transaction processing applications, such as those used in banks, insurance
companies, hospitals, and all manner of office environments. These applications typically
perform large numbers of concurrent requests, each of which makes a small number of disk
accesses. If one drive in a RAID 5 array fails, the lost data can be rebuilt from data on the
functioning disks.
Further information on RAID concepts can be found inAppendix B, Glossary.

Accusys 7630
12
RAID 0
RAID 0 links each drive in the array as one huge drive. Storage capacity is determined by the
smallest drive in the array. That capacity is then applied to format all other drives in the array.
If using a 40 GB, 60 GB, and 50 GB drive in a RAID 0 array, your system will see one huge
drive of 120 GB (40 GB×3).
RAID 0 offers double or more performance under sustained data transfers when one drive per
ATAport is used. In such a configuration, unlike SCSI, ATAdrives are always available to the
system. SCSI requires more management of the SCSI bus.
RAID 0: Striped disk array without fault tolerance
Characteristics: Recommended use:
RAID 0 implements a striped disk array, the data
is broken down into blocks and each block is
written to a separate disk drive.
I/O performance is greatly improved by spreading
the I/O load across many channels and drives.
Fastest and most efficient array type but offers no
fault-tolerance.
Storage capacity = (No. of disks) × (capacity of
smallest disk)
Video production and
editing
Image editing
Pre-press
applications
Any application
requiring high
bandwidth
Arrangement of data blocks saved on a Level 0 RAID

Chapter 2 – Before you begin
13
RAID 5
RAID 5 uses a mathematical expression that compares data from two drives and calculates a
third piece of data called “parity”. Should one of the drives fail, parity data can be used to
rebuild the failed data. Under RAID 5, parity data is stored across all drives in the array. This
maximizes the amount of storage capacity available from all drives in the array while still
providing data redundancy.
RAID 5: Independent data disks with distributed parity blocks
Characteristics: Recommended use:
Each entire data block is written on a data disk.
Parity for blocks in the same rank is generated
on Writes, recorded in a distributed location and
checked on Reads.
Highest Read data transaction, medium Write
data transaction rate.
Relatively low ratio of ECC (Parity) disks to data
disks means high efficiency (compared to other
RAID levels).
Good aggregate transfer rate.
Storage capacity = (No. of disks – 1) × (capacity
of smallest disk)
File and application
servers
Database servers
WWW, E-mail and News
servers
Intranet servers
Most versatile Raid level
Arrangement of data and parity blocks saved on a Level 5 RAID

Accusys 7630
14
Pre-installation notices
Before starting any kind of hardware installation, please ensure that all power
switches have been turned off and all power cords disconnected to prevent
personal injury and damage to the hardware.
To avoid overheating, ACS-7630 should be installed in a well-ventilated area
and in such a way that sufficient airflow is maintained across the controller
chips.
Static electricity can damage electronic components. To guard against such
damage:
Work in a static-free environment
Wear a grounded anti-static wrist strap
Store uninstalled components in anti-static bags
Handle PCBs by their edges and avoid touching chips and connectors.
Environmental requirements: Temperature: 5-44C
Humidity: 10-95%, non-condensing
Altitude: Sea level to 10,000 ft

Chapter 3 – Setting up the controller
15
C
Ch
ha
ap
pt
te
er
r
3
3
S
S
Se
e
et
t
tt
t
ti
i
in
n
ng
g
g
u
u
up
p
p
t
t
th
h
he
e
e
c
c
co
o
on
n
nt
t
tr
r
ro
o
ol
l
ll
l
le
e
er
r
r
This chapter explains how to:
Set RAID level on controller box
Set master, slave or cable configuration on controller box
Install the RAID controller in a system or externally
Load hard drives into ACS-7630
Swap drives
Installation flowchart
Installation of ACS-7630 is simple. This chapter will lead you though the following steps:
Use jumpers to set the RAID level (0 or 5) and master or
slave (or cable select) status
When the controller is fully configured, connect a power and
IDE cable and install it either in a system or externally.
When the controller is installed, load a hard drive into each
of the drive carriers
Configure
controller
Install
controller
Load hard
drives

Accusys 7630
16
Setting configurations
The RAID (level 0 or 5) and master / slave configurations are set manually by placing jumper
heads on the nine jumper pins on the rear of the controller box.
Master/Slave configuration
jumper pins
RAID level configuration jumper
pins
RAID 0 configuration
1. Make sure the power is turned off.
2. Make sure the six RAID configuration
jumper pins are clear of any jumper
caps.
RAID 5 configuration
1. Make sure the power is turned off.
2. Place two jumper caps over the central
and left pairs of RAID configuration
jumper pins.

Chapter 3 – Setting up the controller
17
Master, slave and cable select settings enable your computer to distinguish
two IDE/ATA devices operating on the same channel. In this case, the settings
distinguish ACS-7630 from your computer’s hard disk drive.
It makes little difference which setting you use, but if using master or slave,
you must make sure that the two devices’ settings are different. So, if the HDD
is configured as the master drive, ACS-7630 should be configured as slave,
and vice versa. If using cable select, both devices must use cable select.
Master configuration
1. Make sure the power is turned off.
2. Place one jumper cap over the central
and right master/slave configuration
jumper pins.
Slave configuration
1. Make sure the power is turned off.
2. Place one jumper cap over the central
and left master/slave configuration
jumper pins.
Cable select configuration
1. Make sure the power is turned off.
2. Ensure the three master/slave
configuration jumper pins are clear of
any jumper caps.

Accusys 7630
18
Mounting controller box
The ACS-7630 controller box can be installed inside a computer case or set up externally.
This section describes both procedures.
Turn off and disconnect all electrical power from the system before beginning
installation.
Mounting controller box in system
The ACS-7630 controller box fits into the space of two half-height 5¼-inch drive bays.
1. Remove the cover and front bezel from the
system case.
2. Feed a power cable through the
opening.
3. Feed a 40-pin IDE cable through the
opening.
4. Connect the two cables to the connectors
on the rear of the controller box.
5. If planning to use the ACSView GUI to
monitor the status of your RAID, you
should also connect a 3-pin RS-232 cable
to the terminal on the controller box.
6. Insert the controller box into the bay, and
secure it in place with the screws provided.
(If your case uses guide rails to install
5¼-inch devices, you can use them on the
controller box.)
Installing controller box externally
The ACS-7630 may also be set up outside a computer case and connected to a system via
the ACS-2720 IDE to IEEE 1394 converter board. The ACS-2720 (supplied separately) has
two ports allowing simultaneous access to the RAID by two hosts.
If planning to use the ACSView GUI to monitor the status of your RAID, you should also
connect a 3-pin RS-232 cable to the terminal on the controller box.

Chapter 3 – Setting up the controller
19
Loading drives in the controller box
We recommend that you use one of the following hard disk brands: Fujitsu,
IBM, Maxtor, Quantum, or Seagate.
All three hard disks should be configured as Master.
There are two types of drive carrier available:
1. Fixed IDE connector
Drive Carrier
Fixed IDE Connector
Power Connector
2. Cable IDE connector
Drive Carrier
Cable IDE Connector
Power Connector

Accusys 7630
20
Fixed connector drive carrier
The ACS-7630 should be fitted with three hard disk drives (HDDs). Load each drive into a
drive carrier as follows:
1. Unlock the drive carrier and slide it out of
the controller box.
2. Place the disk drive in the drive carrier, so
that the power and IDE connectors are
lined up with the connectors inside the
carrier.
3. Connect the power connector to the disk
drive first, then carefully push the disk
drive so that the drive’s IDE connector is
seated securely into the IDE connectors in
the disk carrier.
4. Push the power connector into the drive
connected to ensure it is firmly secured.
5. Secure the disk drive by screwing it to the
drive carrier case.
6. Slide the loaded disk drive carrier into the
ACS-7630 Controller Box and lock it.
The disk carrier connector at the back of each controller box disk carrier slot
can be damaged if the disk carrier is not properly aligned when inserted.
Insert the disk carrier gently to avoid damage.
Table of contents
Other Accusys Computer Hardware manuals
Popular Computer Hardware manuals by other brands

Fibocom
Fibocom H330SS Hardware user manual

IEI Technology
IEI Technology KINO-PV-D4253-R10 Quick installation guide

NXP Semiconductors
NXP Semiconductors JN5148 Reference manual

Cypress Semiconductor
Cypress Semiconductor CY7C1392BV18 Specification sheet

Conrad
Conrad AKASA AK-FN066-BK operating instructions

Noctua
Noctua NF-A12x15 PWM user manual