Acer CastMaster Touch WPS2 Manual

Acer CastMaster Touch WPS2
Web Setting Manual

2
Introduction
Thanks for choosing Acer CastMaster Touch.
Acer CastMaster Touch allows users to instantly switch projector input, reducing
waiting time between multi-person rotation presentations at meetings, which
reduces meeting time and increases meeting efficiency.
Acer CastMaster Touch is available on a variety of platforms and supports Android
and iOS through additional external wireless A/V receivers (Miracast receiver,
Chromecast, and Apple TV). Through the HDMI or USB Type C (DP alt mode) output
of Windows and Mac system, it’s plug-and-project with direct cable connection.
There’s no need for driver installation and no additional training, significantly
improving the projector efficiency at enterprises, education, or conferences.
Configure your CastMaster Touch via the web page
CastMaster Touch users may configure the device via a web browser interface,
which enhances user experience. On CastMaster Touch's web management page,
customers may customize settings.

3
Start Configuring your CastMaster Touch
To access the web management page with CastMaster Touch, please follow the
following instructions, connecting your phone or laptop to CastMaster Touch.
CasterMaster supports 5GHz WiFi only. If the mobile device has 5GHz Wi-Fi wireless
connection, CastMaster Touch can also be found and connected through the WPS_XXX
SSID in the mobile device's wireless network menu.
1. Connect via computer
1.1 Connect CastMaster Touch to an external power supply.
1.2 Connect CastMaster Touch to an external display via HDMI port. Once the
steps above are completed, the standby screen below will appear on the
external display.
1.3 Users may see the required information for connection at the upper middle
of the standby screen: the SSID.
1.3.1 SSID: Select the correct SSID in the device's Wi-Fi list.
1.3.2 The default password is the same as the SSID name. Connect the
device to the CastMaster Touch.

4
1.4 Once connected, open your web browser, entering the IP address at the URL
bar. The IP address will appear at the top left corner. Please note that the IP
cited below is for reference only, which may vary depending on the device.
1.5 Web Login Page will appear once it's successfully connected.
1.5.1 Username: the default is "admin".
1.5.2 Password: Input the password and enter the CastMaster Touch web
interface. The default is "admin".

5
Web management page
The user will see all the function buttons in the left half of the page and the upper
right language menu.
1. Language
Support English, Simplified Chinese, and Traditional Chinese.
2. Home
2.1 Press the Home button for system information, wireless network details, and
wireless network settings (bottom right)

6
2.2 Click on Wireless for the CastMaster Touch settings and the RF settings
menu. You may rename the SSID of the Wi-Fi connection and change the
password.
2.2.1 In the RF setting, the transmission power can be changed between
1 and 6 (level 6 is the strongest). In a working network environment,
each increment increases the signal strength by 1 to 3 dBm.
Moderately reduced strength can avoid mutual interference between
adjacent wireless devices in the same frequency band.

7
2.2.2 Under Channel, CastMaster Touch is preset to Auto so that
CastMaster Touch can automatically select the RF channel with
the best performance in the initial setup. When the wireless
environment changes frequently, and the WPS performance is weak,
it is recommended to manually select the wireless channel for 5GHz
allocation and improve the situation of severe mutual interference.
After making all the wireless network settings, press OK to continue.
3. Pairing (refer to the quick start guide for pairing with physical keys)
Press the Pairing button for pairing and pairing status.

8
3.1 Connect the HDMI and USB port of the CastMaster Touch transmitter input
to the corresponding port at the notebook.
3.2 When the CastMaster Touch transmitter is successfully connected to the
notebook, the LED on the transmitter will flash in red.
3.3 Click on Pairing on the web management interface will pair the transmitter
to the receiver in control.
3.4 When the transmitter and the receiver are successfully paired, the LED
indicator on the transmitter will remain green.
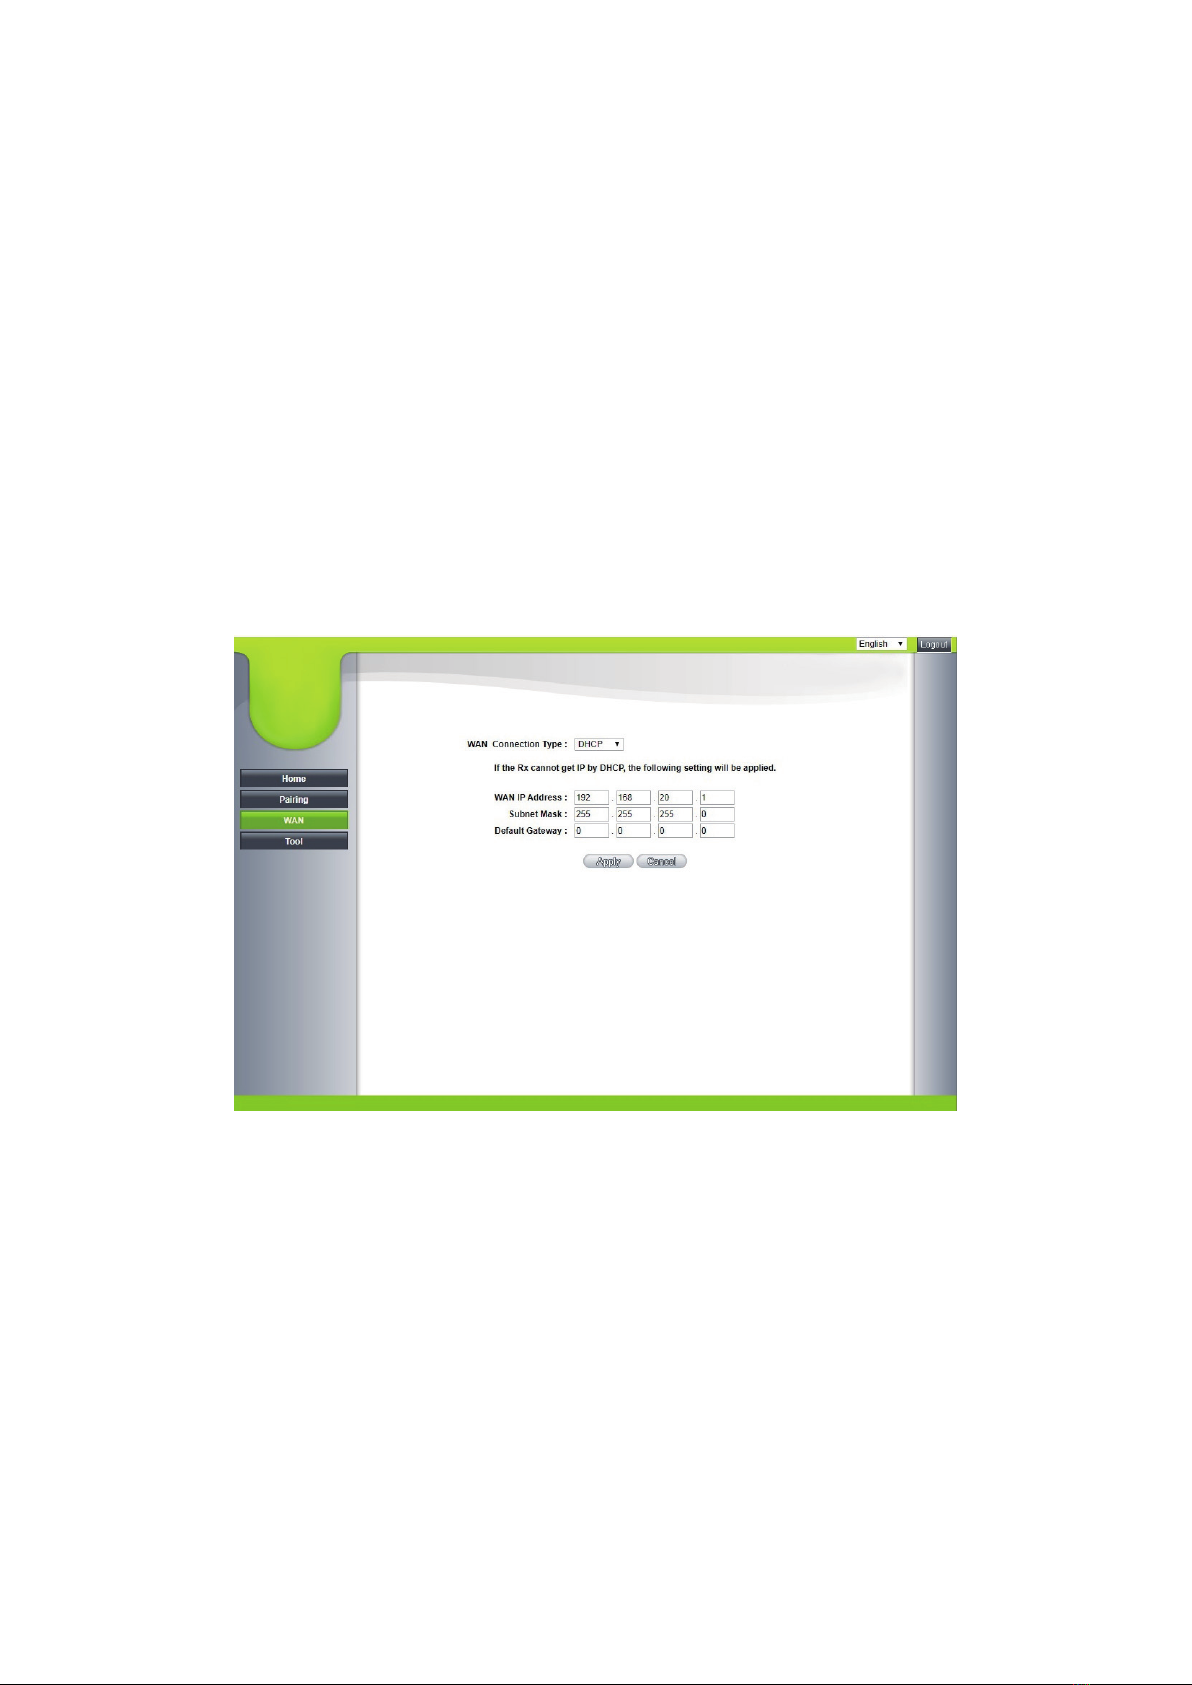
4. WAN
Click on WAN for the default WAN IP address of the receiver. The default
connection type is DHCP. Get the IP address of the network DHCP server. If you
want to change the WAN IP address, select Static IP under WAN. After the WAN IP
address is altered, press OK.
5. Tools
Click on Tools to adjust the Wireless Options, Firmware Updates, Start Image,
Configurations, Password, and Reboots.
5.1 Wireless Options
Depending on the complexity of the environment, wireless options can be
altered here. The default setting is high-performance.

9
5.1.1 High performance: For environments requiring high video quality.
5.1.2 Low interference: For environments with high interference to
maintain Wi-Fi transmission stability and video quality.
5.2 Auto Projection
5.2.1 Auto: Auto Projection will be activated when only one transmitter is
paired and connected successfully.
5.2.2 Force On: Auto Projection will be activated only the first transmitter is
connected, despite the multiple transmitters are paired.
5.2.3 Force Off: Auto Projection is deactivated.

10
5.3 Firmware Updates
Before any firmware update, please acquire instructions for the upgrade on
the official website. Download and install the latest firmware.
5.3.1 You can select between Receiver Firmware Update or Transmitter
Firmware Update. Click on Select File and select the file to upgrade.
5.4 Start Image
This function is available to replace the factory Guide and Idle images, click
to select the file as well as the file to be replaced.

11
5.5 Configurations
The configuration backup has all configuration settings for the receiver but
does not include the hostname, SSID and wireless password settings, and
the pairing status. Under Configurations, you can choose to import profiles,
export profiles, and restore factory settings.
5.6 Password
The login password of the web management page can be altered here.

12
5.7 Restart
The receiver can be rebooted here. The standby mode and automatic
restart can also be setup. Under standby mode, when the transmitter is
idle, and there's no video output for a preset time, the receiver enters the
standby mode. Subsequently, the receiver HDMI port has no video output
to the display, and the display can also enter the standby state. When the
transmitter acknowledges video output, the receiver will resume to working
state and project the video after a specific time.
Table of contents
Other Acer Projector Accessories manuals