Freecall for service 07 3272 7010 www.bfe.net.au
Part List
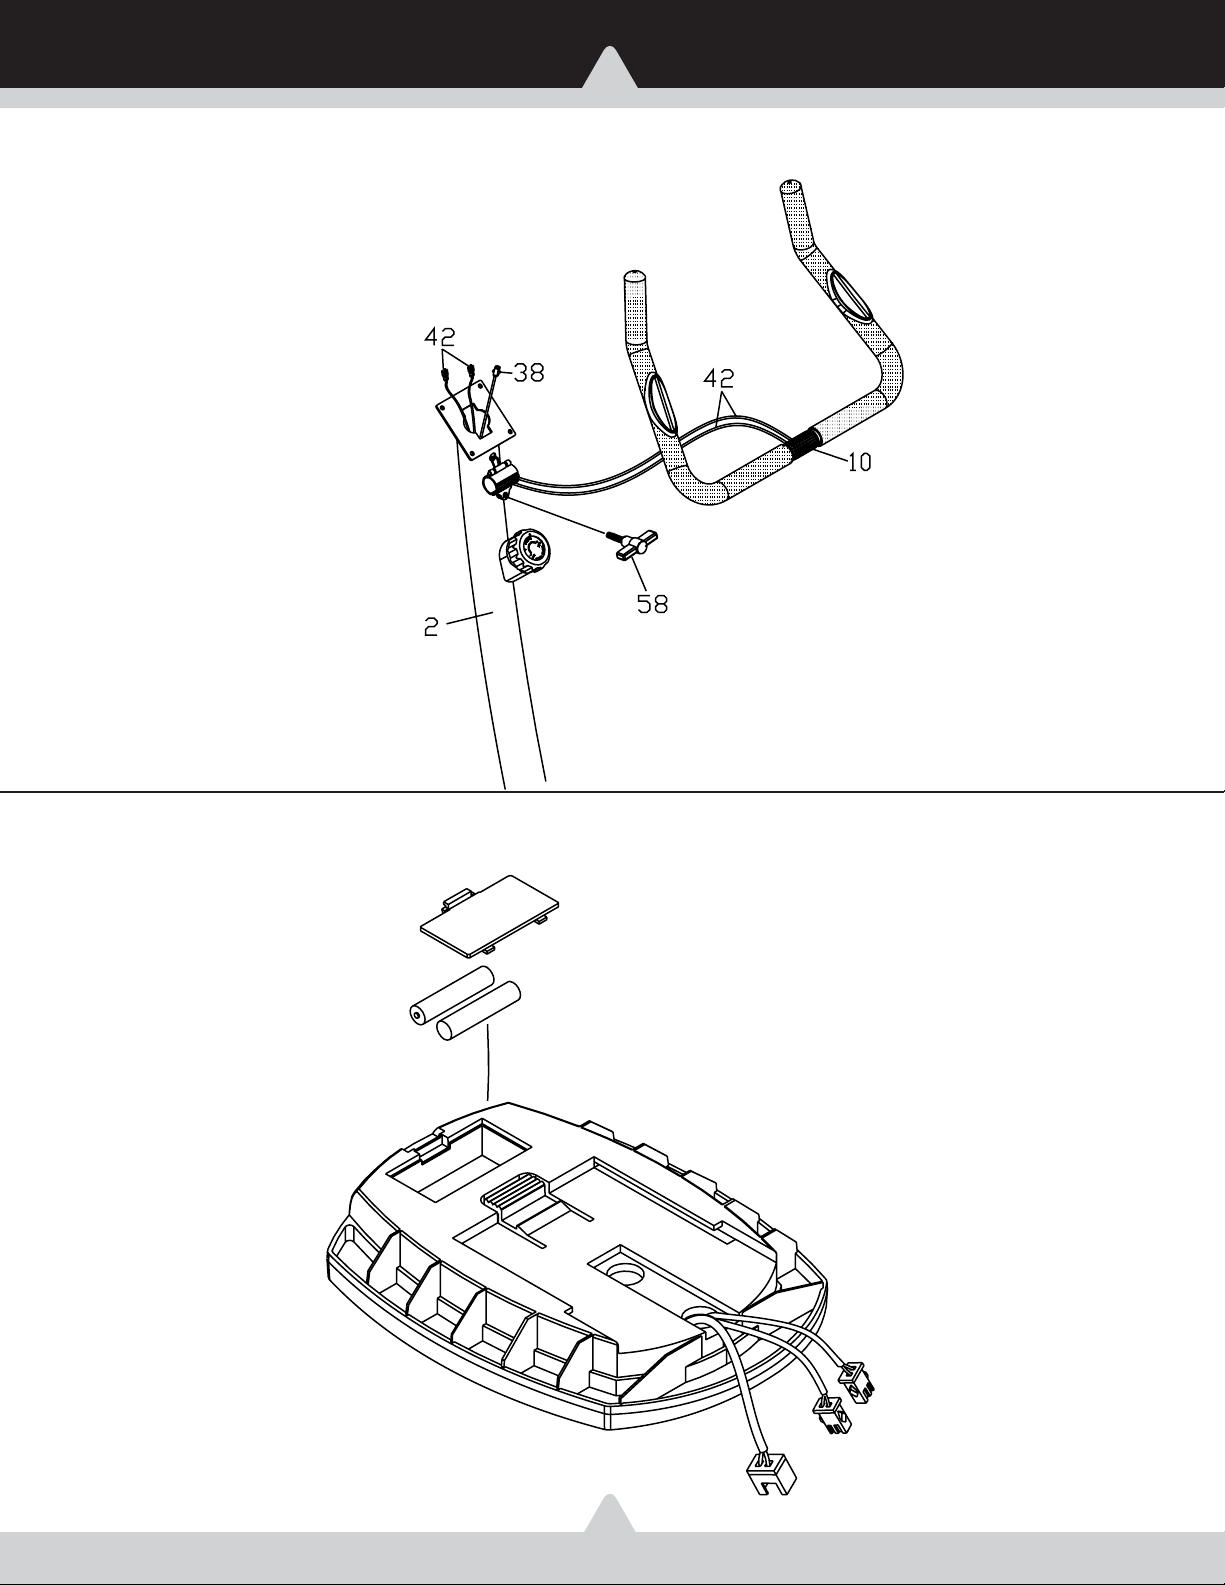
4
ITEM Q’TY PART NAME ITEM Q’TY PART NAME
11 Main Frame Assembly 36 1 Sensor Wire With Sensor
21 Console Tube 37 2 TP 3x8mm Screw
31 Seat Post 38 1 Extension Wire
41 Front Foot Tube 39 1 Tension Cable Bracket
4A 1 Rear Foot Tube 40 1 M5x50mm Screw
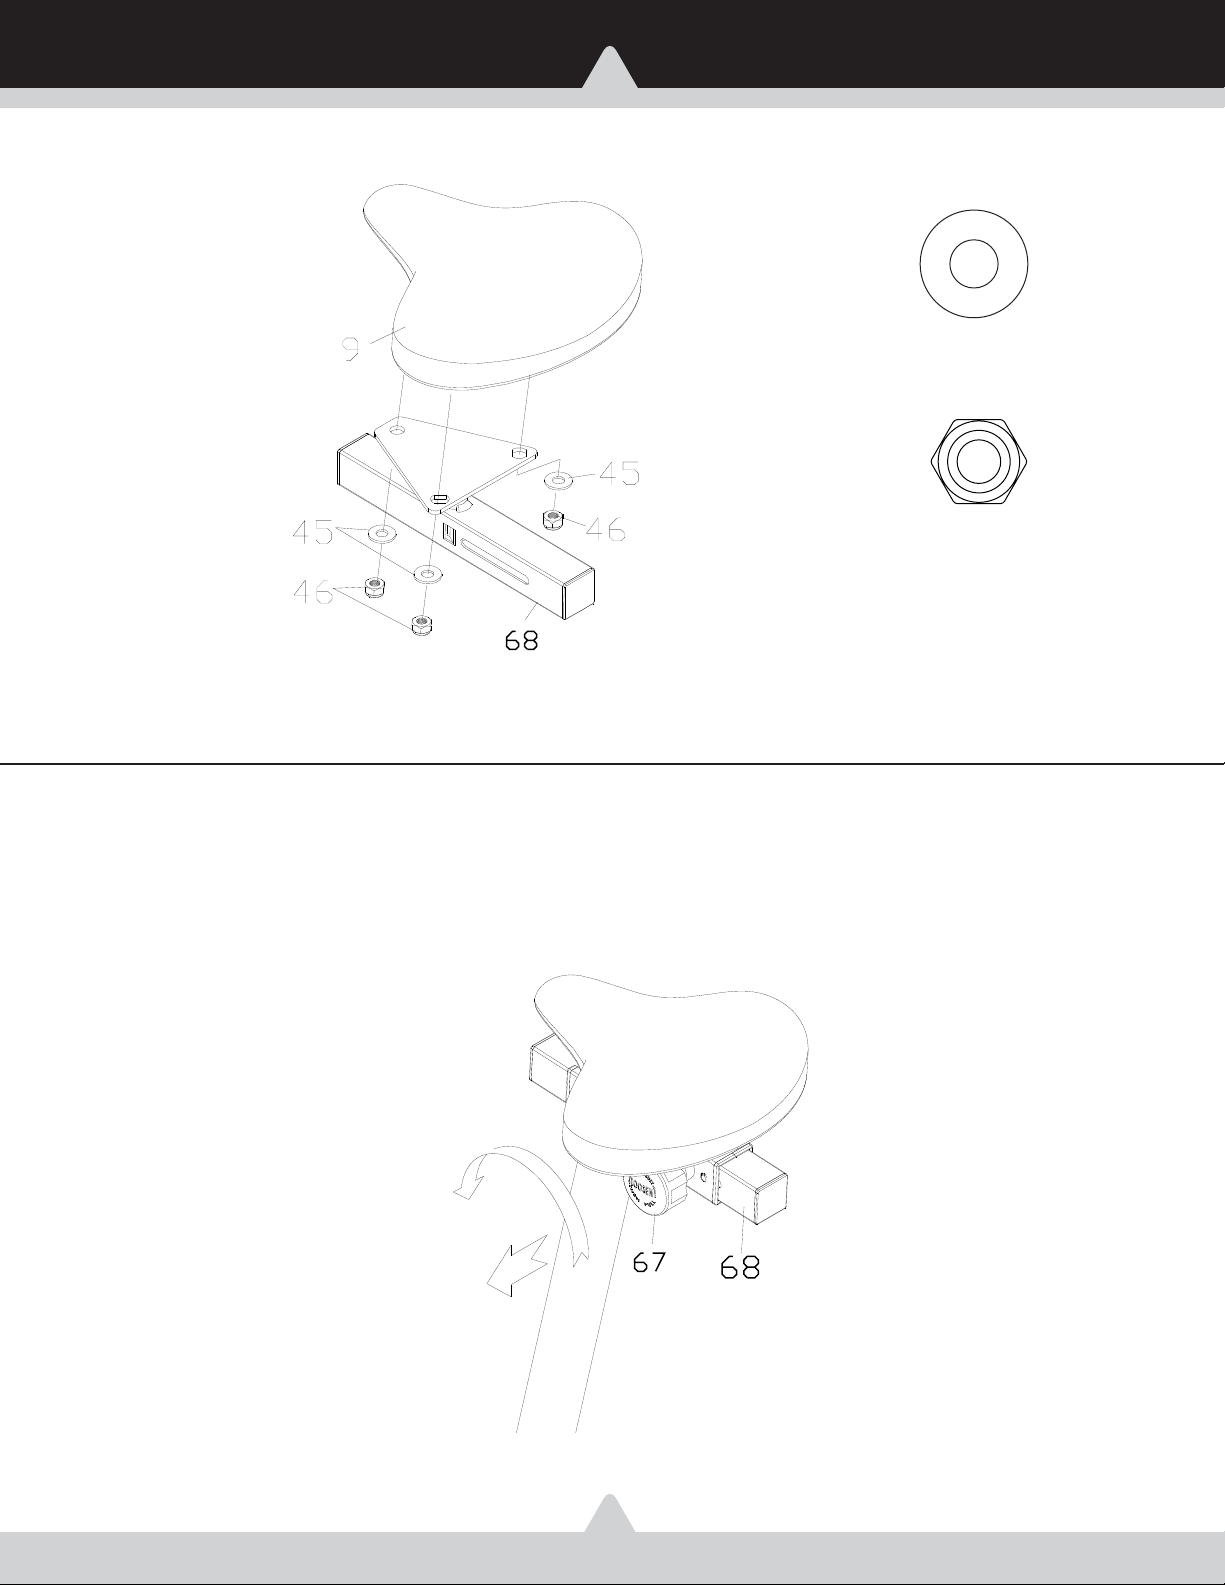
51 Locking Knob (31mmL) 41 2 Handlebar Sleeve
61 Pulley 42 2 Hand Pulse Sensor w/ Wire
71 Mag Brake 43 4 M5x10mm Metal Screw
81 Tension Knob Assembly 44 2 1” Ball Plug
91 Seat Pad 45 3 M8x19mm Washer
10 1 Pulse Handlebar 46 3 8mm Locknut
11 1 Bottom Left Housing 47 1 Seat Post Round Bushing
12 1 Bottom Right Housing 48 4 M8x15mm Hex Head Screw
13 2 Transportation Wheel 49 4 M8x18mm Curved Washer
14 1 Monitor 50 2 Crank Shaft Nut
15 2 Foot Cap 51 3 M17x22x1mm Washer
16 4 M8x65mm Carriage Bolt 52 1 Left Crank
17 2 #6003 Precise Bearing 53 1 Right Crank
18 1 Magnet 54 2 Crank Central Cap
19 1 M8x12.5x10.5L Spacer 55 2 M10xP1.25R Cap Nut
20 3 Eyebolt 6x40mm 56 4 TP 4x16mm Screw
21 4 M6 Hex Nut 57 6 TP 5x30mm Screw
22 1 Spring 58 1 Locking Pin
23 1 Idler Pulley 59 1 Console Tube Plastic Ring
24 1 M8x20mm Screw 60 4 8mm Nut Cap
25 1 M8 Locknut (Thick) 61 2 TP 4x12mm Screw
26 1 M8 Locknut (Thin) 62 2 Round End Cap
27 5 M8x19mm Washer 63 1 Seat Post Plastic Ring
28 1 Belt TensionBracket 64 1 Pulley Axle
29 1 M8x30mm Hex Head Screw 65 4 6mm Locknut
30 1 Left Pedal 66 4 M6x16 Hex Head Screw
30A 1 Left Pedal Strap 67 1 Locking Knob(22L)
31 1 Right Pedal 68 1 Seat Adjusting Slider
31A 1 Right Pedal Strap 69 2 38x45mm Rear Inner Bushing
32 1 V-Belt 70 1 38x45mm Left Inner Bushing
33 2 M10x19mm Washer 71 1 38x45mm Right Inner Bushing
34 2 Adjustment Channel 72 2 38x38mm Plastic Inner Plug
35 2 3/8"x26mm Cap Nut


 Service manual")