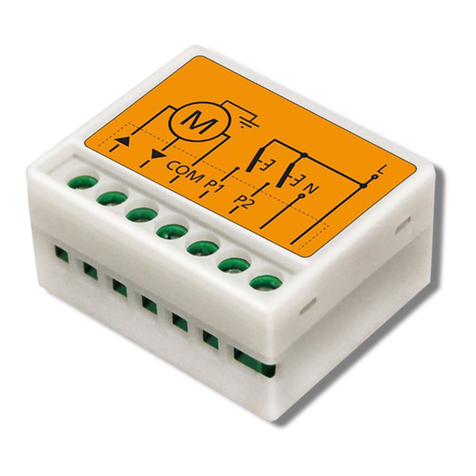
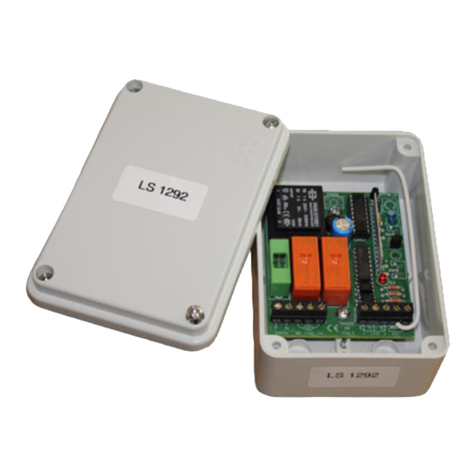
ACM UNIVERSAL2 User manual

IL 535
EDIZ. 20/04/2020
UNIVERSAL2
UNIVERSAL3
CENTRALE RADIO PER L’AUTOMAZIONE DI SERRANDE MOTORIZZATE
RADIO CONTROL UNIT FOR THE AUTOMATION OF MOTORISED SHUTTERS
CENTRALE RADIO POUR L’AUTOMATISATION DE VOLETS ROULANTS MOTORISÉS
CENTRALITA DE RADIO CONTROL PARA LA AUTOMATIZACIÓN DE PERSIANAS
MOTORIZADAS
1 2 3 4 5 6
1 2
L N
PROG
L1
L2
3 4 5 8
+
12Vdc
-
910 11 12
MOTEUR
LAMPO
FERMETURE
F = 5A (230V) / 10A (115V)
OUVERTURE
COMMUN
PHOTOCELLULE
COMMUN
DEBUTER
UNIVERSAL2

1 2 3 4 5 6
1 2
PROG
3 4 5 6 7 8
+
12Vdc
-
910 11 12 13 14 15
MOTEUR
FERMETURE
OUVERTURE
COMMUN
PHOTOCELLULE
COMMUN
DEBUTER
OUVERTURE
ARRET
FERMETURE
L N
L1
L2
F = 5A (230V) / 10A (115V)
UNIVERSAL3

ITALIANO
- 3 -
CARATTERISTICHE TECNICHE
Alimentazione: 230V~ 50/60 Hz / 115V~ 50/60 Hz
Contatti relè: 16A 250V~
Tempo funzionamento: max. 150 secondi
Tempo di chiusura automatica: programmabile max. 3 minuti
Programmazione codici radio: autoapprendimento
Numero max di trasmettitori memorizzabili: 30
Frequenza: 433.92 MHz
Sensibilità: maggiore di -100 dBm
Campo di ricezione: standard 70 mt
Antenna: incorporata
Temperatura di funzionamento: -10 ÷ 60° C
Fusibile: 5A (230V) / 10A (230V)
COLLEGAMENTI ELETTRICI
CON.1
1. Ingresso linea 230/115 Vac (Fase)
2. Ingresso linea 230/115 Vac (Neutro)
CON.2
3. Uscita motore chiude
4. Uscita motore apre
5. Uscita motore comune
6. Uscita lampeggiante (solo UNIVERSAL3)
7. Uscita lampeggiante (solo UNIVERSAL3)
CON.3
8. Uscita alimentazione servizi +12 Vdc
9. Uscita alimentazione servizi -12 Vdc
10. Ingresso dispositivo di sicurezza, fotocellula (NC)
11. Ingresso GND comune
12. Ingresso pulsante apre-chiude (NA)
13. Ingresso pulsante apre (solo UNIVERSAL3)
14. Ingresso pulsante stop (solo UNIVERSAL3)
15. Ingresso pulsante chiude (solo UNIVERSAL3)
NOTE:
• Non essendo la centrale dotata di alcun dispositivo di
sezionamento in riferimento alla alimentazione 230Vac
prevedere sempre un sezionatore idoneo.
• Gli ingressi normalmente chiusi (NC) devono essere
ponticellati se non usati
mAVVERTENZE IMPORTANTI
LA CENTRALE OGGETTO DI QUESTO MANUALE È CONCEPITA
PER IL COMANDO E AZIONAMENTO DI MOTORI ATTI AD
AUTOMATIZZARE SERRANDE AVVOLGIBILI.
IL COSTRUTTORE FIN DA ORA DECLINA OGNI
RESPONSABILITÀ PER DANNI A PERSONE O COSE DOVUTI
AD UN USO IMPROPRIO DEL DISPOSITIVO, ALLA NON
OSSERVANZA DELLE INDICAZIONI QUI PRESENTI O AD
UN’ERRATA INSTALLAZIONE.
Non è pertanto consentita l’installazione della centrale prima di
avere letto attentamente il seguente manuale di istruzioni.
L’installazione deve essere realizzata solamente da personale
tecnico qualificato nel campo di applicazione del dispositivo in
oggetto.
Analoghe considerazioni valgono per le fasi programmazione e
per eventuali interventi manutentivi che si rendessero necessari.
• Durante il cablaggio l’apparecchiatura non deve essere
alimentata.
• L’impiego di questa apparecchiatura deve seguire e rispettare
rigorosamente le norme tecniche di riferimento.
• L’installazione e/o la manutenzione deve essere eseguita
solo da personale qualificato nel rispetto delle disposizioni
legislative vigenti.
• Il costruttore non può essere considerato responsabile per
eventuali danni causati da uso improprio e/o irragionevole.
• Una errata installazione o un uso errato del prodotto può
compromettere la sicurezza dell’impianto, tutti i materiali
presenti nell’imballo non devono essere lasciati alla portata dei
bambini in quanto,fonti di pericolo.
DI SEGUITO VENGONO ELENCATE LE NORME DI
RIFERIMENTO VIGENTI IN TERMINI DI NORMATIVE EUROPEE:
Direttiva macchine 89/392 CEE / EN 60204-1 (Sicurezza del
macchinario, equipaggiamento elettrico delle macchine, parte
1: regole generali. EN 12445 (Sicurezza nell’uso di chiusure
automatizzate, metodi di prova). EN 12453 (Sicurezza nell’uso di
chiusure automatizzate, requisiti).
DICHIARAZIONE UE DI
CONFORMITÀ
Il fabbricante ACM International srl con sede in
Via Oros 2/g, 00071 Pomezia (Rm) Italy
dichiara che i prodotti: UNIVERSAL2, UNIVERSAL3
sono conformi ai requisiti essenziali fissati dalle seguenti direttive:
• 2014/30/UE (Direttiva EMC)
• 2014/35/UE (Direttiva Bassa Tensione)
• 2014/53/UE (Direttiva Radio)
• Direttiva ROHS3 2015/863/CE
Pomezia, 05/04/2020
Il rappresentante legale di ACM International srl
Alfredo Lanzoni

ITALIANO
- 4 -
FUNZIONAMENTO
Funzionamento a 1 tasto:
Il primo impulso (da trasmettitore o da pulsante a bassa tensione)
comanda l’apertura fino allo scadere del tempo di funzionamento.
Il secondo impulso comanda la chiusura del serramento. Se si
invia un impulso prima dello scadere del tempo di funzionamento,
la centrale effettua l’arresto del moto. Un ulteriore comando
determina la ripresa del moto in senso opposto.
Funzionamento a 3 tasti:
• Un impulso tramite il Tasto1 del trasmettitore o da morsettiera
(Ouverture): comanda l’apertura fino allo scadere del tempo di
funzionamento. Un impulso prima dello scadere del tempo di
funzionamento, non ha effetto.
• Un impulso tramite il Tasto2 del trasmettitore o da morsettiera
(Fermeture): comanda la chiusura fino allo scadere del tempo
di funzionamento. Un impulso prima dello scadere del tempo
di funzionamento, non ha effetto.
• Un impulso tramite il Tasto3 del trasmettitore memorizzato o
da morsettiera (Arret): ferma il motore
1 2
3 4
Chiusura automatica :
La centrale permette di richiudere il serramento (quando è
sul finecorsa di apertura) in modo automatico senza l’invio
di comandi supplementari. La scelta di questo modo di
funzionamento è descritta nel modo di programmazione del
tempo di chiusura automatica.
DISPOSITIVO DI SICUREZZA
La centrale permette l’alimentazione ed il collegamento di
fotocellule/coste pneumatiche.
L’intervento nella fase di apertura non viene considerato, nella
fase di chiusura provoca l’inversione del moto. Questo ingresso
(CON2 10-11) se non utilizzato deve essere ponticellato.
SELEZIONE OPZIONI
1 Selezione Timer / Auto closing
ON Chiusura automatica con temporizzatore
OFF Chiusura automatica disattivata
2 Timer di programmazione
ON Programmazione tempo di funzionamento (1 OFF)
Programmazione tempo di pausa (1 ON)
OFF Programmazione tempo di funzionamento disabilitata
3 Programmazione via radio: NON ABILITATA
ON Programmazione via radio nuovi trasmettitori abilitata.
OFF Programmazione via radio disabilitata
4 Uomo Presente
ON Per realizzare la chiusura, è necessario tenere premuto il
pulsante del trasmettitore o il pulsante alternativo.
Se non si mantiene premuto la manovra si arresta
OFF Funzionamento normale
5 Funzionamento dell’ingresso FOTO/EDGE
NOTA: la funzione EDGE non è al momento
abilitata)
ON Funzionamento come fotocellula/costa
OFF Funzionamento come fotocellula
6 Ingresso STOP (solo UNIVERSAL3)
ON Ingresso NC (Normalmente Chiuso)
OFF Ingresso NA (Normalmente Aperto)
APRE CHIUDE
NESSUNA
FUNZIONE
STOP

ITALIANO
- 5 -
APPRENDIMENTO DEL TEMPO DI PAUSA
ATTENZIONE: la procedura può essere avviata solo quando
la serranda è a riposo, dopo aver concluso il ciclo; non è
necessario che il finecorsa in chiusura sia aperto.
TRAMITE TASTO START
1. Chiudere la serranda, non è il caso che in finecorsa in chiusura
sia aperto
2. Posizionare i DIP 1 e 2 su ON
3. Premere il pulsante START da morsettiera: il buzzer si attiva per
1 secondo confermando l’attivazione della procedura
4. Premere nuovamente il pulsante START da morsettiera
quando il tempo trascorso corrisponde con quello desiderato
per la PAUSA: il LED e il buzzer si attivano per confermare la
memorizzazione dei dati
TRAMITE TRASMETTITORE
1. Chiudere la serranda, non è il caso che in finecorsa in chiusura
sia aperto
2. Posizionare i DIP 1 e 2 su ON
3. - Funzionamento a 1 Tasto
Premere il tasto del trasmettitore che è stato memorizzato:
il buzzer si attiva per 1 secondo confermando l’attivazione
della procedura
- Funzionamento a 3 Tasti
Premere il tasto APRE del trasmettitore che è stato
memorizzato: il buzzer si attiva per 1 secondo
confermando l’attivazione della procedura
4. - Funzionamento a 1 Tasto
Premere nuovamente il tasto del trasmettitore quando il
tempo trascorso corrisponde con quello desiderato per
la PAUSA: il LED e il buzzer si attivano per confermare la
memorizzazione dei dati
- Funzionamento a 3 Tasti
Premere il tasto CHIUDE del trasmettitore quando il
tempo trascorso corrisponde con quello desiderato per
la PAUSA: il LED e il buzzer si attivano per confermare la
memorizzazione dei dati
NOTA: non vengono accettati comandi via radio o da
morsettiera fino a quando il DIP 2 viene posizionato su OFF
APPRENDIMENTO DEL TEMPO DI
FUNZIONAMENTO
ATTENZIONE: la procedura può essere avviata solo quando
la serranda è chiusa
TRAMITE TASTO START
1. Chiudere la serranda
2. Posizionare il DIP1 su OFF e il DIP 2 su ON
3. Premere il pulsante START da morsettiera: il buzzer si attiva per
1 secondo confermando l’attivazione della procedura
4. Il motore si attiva in apertura
5. Raggiunta la posizione di finecorsa in apertura il motore si
ferma
6. Premere il pulsante START da morsettiera: il motore si attiva in
chiusura
7. Raggiunta la posizione di finecorsa in chiusura il motore
si ferma: il LED e il buzzer si attivano per confermare la
memorizzazione dei dati
TRAMITE TRASMETTITORE
1. Chiudere la serranda
2. Posizionare il DIP1 su OFF e il DIP 2 su ON
3. - Funzionamento a 1 Tasto
Premere il tasto del trasmettitore che è stato memorizzato:
il buzzer si attiva per 1 secondo confermando l’attivazione
della procedura
- Funzionamento a 3 Tasti
Premere il tasto APRE del trasmettitore che è stato
memorizzato: il buzzer si attiva per 1 secondo
confermando l’attivazione della procedura
4. Il motore si attiva in apertura
5. Raggiunta la posizione di finecorsa in apertura il motore si
ferma
6. - Funzionamento a 1 Tasto
Premere nuovamente il tasto del trasmettitore: il motore si
attiva in chiusura
- Funzionamento a 3 Tasti
Premere il tasto CHIUDE del trasmettitore: il motore si
attiva in chiusura
7. Raggiunta la posizione di finecorsa in chiusura il motore
si ferma: il LED e il buzzer si attivano per confermare la
memorizzazione dei dati
RESET
Per riportare i parametri della centrale alle impostazioni di
fabbricazione procedere come segue:
1. Togliere alimentazione alla centrale
2. Impostare i DIP 1-3 su OFF e i DIP 2-4 su ON
3. Rimuovere i collegamenti sul morsetto 11 (COMUNE)
4. Ripristinare l’alimentazione: il LED e il buzzer si attivano per
confermare la cancellazione dei dati
5. Ripristinare i collegamenti sul morsetto 11 e la posizione dei
DIP come prima della procedura

ITALIANO
- 6 -
MEMORIZZAZIONE DEI
TRASMETTITORI
La memorizzazione dei trasmettitori può essere eseguita
per il funzionamento ad 1 tasto o a 3 tasti (vedi paragrafo
FUNZIONAMENTO).
NOTA: un trasmettitore che viene memorizzato per il
funzionamento a 1 Tasto non può essere memorizzato
anche per il funzionamento a 3 tasti e viceversa.
1. Premere il pulsante PROG fino a quando il buzzer si attiva
2. Rilasciare il pulsante: il led si accende e rimane acceso per 4
secondi per indicare che la centrale è pronta per memorizzare i
trasmettitori
3. - Funzionamento a 1 Tasto: premere il pulsante del
trasmettitore: il led lampeggia ed il buzzer si attiva per
indicare la memorizzazione dei codici
- Funzionamento a 3 Tasti: premere contemporaneamente
i tasti 1 e 3: il led lampeggia ed il buzzer si attiva per
indicare la memorizzazione dei codici. I tasti saranno
memorizzati con le seguenti funzioni
4. Memorizzare tutti i trasmettitori desiderati
5. Dopo 2 secondi senza ricevere nessun codice la centrale esce
automaticamente dalla procedura: il led si spegne e il buzzer
emette due brevi segnali acustici
CANCELLAZIONE DI TUTTI I
TRASMETTITORI
Premere il pulsante PROG per 6 secondi: il led lampeggia e il
buzzer emette un breve segnale acustico per indicare che i codici
sono stati cancellati.
INDICAZIONE MEMORIA ESAURITA
Quando la centrale ha memorizzato il numero massimo di
trasmettitori, tentando di memorizzare un nuovo codice la
centrale segnala l’anomalia tramite dei lampeggi del led e dei
segnali acustici del buzzer per 10 secondi, quindi esce dalla
procedura di programmazione.

ENGLISH
- 7 -
TECHNICAL SPECIFICATIONS
Power supply: 230V ~ 50/60 Hz / 115V ~ 50/60 Hz
Relay contacts: 16A 250V ~
Operating time: max. 150 seconds
Automatic closing time: programmable max. 3 minutes
Radio code scheduling: self-learning
Max number of stored transmitters: 30
Frequency: 433.92 MHz
Sensitivity: greater than -100 dBm
Reception range: standard 70 m
Antenna: built-in
Working temperature: -10 to 60°C
Fuse: 5A (230V) / 10A (230V)
ELECTRICAL CONNECTIONS
CON.1
1. 230/115 Vac line input (Phase)
2. 230/115 Vac line input (Neutral)
CON.2
3. Close motor output
4. Open motor output
5. Common motor output
6. Flashing output (UNIVERSAL3 only)
7. Flashing output (UNIVERSAL3 only)
CON.3
8. Services power supply output +12 Vdc
9. Services power supply output -12 Vdc
10. Safety device input, photocell (NC)
11. Common GND input
12. Open-close button input (NA)
13. Open button input (UNIVERSAL3 only)
14. Stop button input (UNIVERSAL3 only)
15. Close button input (UNIVERSAL3 only)
NOTE:
• Since the control unit is not equipped with any circuit
breaker for the 230Vac power supply, always provide for
a suitable circuit breaker.
• Normally closed (NC) inputs must be bridged if not used
mIMPORTANT WARNINGS
THE CONTROL UNIT DESCRIBED IN THIS MANUAL IS DESIGNED
FOR THE CONTROL AND OPERATION OF MOTORS SUITABLE TO
AUTOMATE ROLLING SHUTTERS.
THE MANUFACTURER DECLINES ALL RESPONSIBILITY FOR
DAMAGE TO PERSONS OR THINGS DUE TO IMPROPER USE
OF THE DEVICE, FAILURE TO OBSERVE THE INDICATIONS
HEREIN, OR INCORRECT INSTALLATION.
Hence, installation of the unit is not permitted before the
following instructions in this manual have been read thoroughly.
The installation must be conducted only by technical personnel
who is duly qualified to handle the device in question.
Similar considerations apply to the scheduling phases and to any
maintenance interventions that may be necessary.
• During wiring, the equipment must be completely
disconnected from the mains.
• The use of this equipment must strictly follow and respect the
reference technical standards.
• Installation and/or maintenance must be carried out only by
qualified personnel in compliance with applicable regulations.
• The manufacturer cannot be held responsible for any damage
caused by improper and/or unreasonable use.
• Incorrect installation or improper use of the product can
compromise the safety of the system; packaging materials
must not be left within reach of children as they are a source
of danger.
REFERENCE STANDARDS IN FORCE IN EUROPEAN
REGULATIONS ARE LISTED BELOW:
Machinery Directive 89/392 EEC / EN 60204-1 (Safety of
machinery, electrical equipment of machines, part
1. General rules EN 12445 (Safety in use of power operated
doors, test methods). EN 12453 (Safety in the use of
automated closing devices, requirements).
EU DECLARATION OF CONFORMITY
The manufacturer ACM International srl with headquarters in
Via Oros 2 / g, 00071 Pomezia (Rm) Italy
declares that the products: UNIVERSAL2, UNIVERSAL3
comply with the essential requirements established by the
following directives:
• 2014/30/UE (EMC Directive)
• 2014/35/UE (Low Voltage Directive)
• 2014/53/UE (Radio Directive)
• Directive ROHS3 2015/863/CE
Pomezia, 05/04/2020
The legal representative of ACM International srl
Alfredo Lanzoni

ENGLISH
- 8 -
OPERATION
1-button operation:
The first pulse (from the transmitter or low-voltage button)
controls the opening until the operating time has elapsed. The
second pulse controls the shutter closing. If a pulse is sent before
the operating time has elapsed, the control unit stops the motion.
A further command determines the resumption of motion in the
opposite direction.
3-key operation:
• One pulse from Key 1 of the transmitter or from the terminal
board (opening): controls opening until the operating time
has elapsed. Pulses before the operating time lapses have no
effect.
• One pulse from Key 2 of the transmitter or from the terminal
board (closing): commands closing until the operating time
has elapsed. Pulses before the operating time lapses have no
effect.
• One pulse from Key 3 of the stored transmitter or from the
terminal board (stop): stops the motor
1 2
3 4
Automatic closing:
The control unit allows closing the shutter (when it is on the
opening limit switch) automatically without sending additional
commands. The choice of this operating mode is described in the
scheduling mode of the automatic closing time
SAFETY DEVICE
The control unit allows the power supply and the connection of
photocells/pneumatic edges.
In the opening phase, the intervention is disregarded; in the
closing phase, it reverses the motion. This input (CON2 10-11)
must be bridged if unused.
OPTION SELECTION
1 Timer/Auto closing selection
ON Automatic closing with timer
OFF Automatic closing disabled
2 Scheduling timer
ON Operating time scheduling (1 OFF)
Pause time scheduling (1 ON)
OFF Operating time scheduling disabled
3 Radio-based scheduling: DISABLED
ON Radio-based scheduling of new transmitters enabled.
OFF Radio-based scheduling disabled
4 Operator Presence
ON For closing, the transmitter button or the alternative
button must be pressed and held.
If the button is released, the maneuver stops
OFF Normal operation
5 Operation of the PHOTO/EDGE input
NOTE: the EDGE function is not currently enabled)
ON Operation as photocell/edge
OFF Operation as photocell
6 STOP input (UNIVERSAL3 only)
ON NC input (Normally Closed)
OFF NO input (Normally Open)
OPEN CLOSE
NO FUNCTIONSTOP

ENGLISH
- 9 -
LEARNING THE PAUSE TIME
ATTENTION: the procedure can be started only when the
shutter is at rest, after having completed the cycle; the
closing limit switch need not be open.
USING THE START BUTTON
1. Close the shutter, so that the limit switch is not open upon
closing
2. Set DIP 1 and 2 to ON
3. Press the START button on the terminal board: the buzzer is
activated for 1 second, confirming the start of the procedure
4. Press the START button on the terminal board again when the
elapsed time matches that of the desired PAUSE: the LED and
the buzzer activate to confirm data storage
USING THE TRANSMITTER
1. Close the shutter, so that the limit switch is not open upon
closing
2. Set DIP 1 and 2 to ON
3. - 1-key operation
Press the key of the transmitter that has been stored: the
buzzer is activated for 1 second, confirming the start of
the procedure
- 3-key operation
Press the OPEN key of the transmitter that has been
stored: the buzzer is activated for 1 second confirming the
start of the procedure
4. - 1-key operation
Press the transmitter key again when the elapsed time
matches the desired PAUSE time: the LED and the buzzer
are activated to confirm data storage
- 3-key operation
Press the CLOSE key on the transmitter when the elapsed
time matches that of the desired PAUSE: the LED and the
buzzer are activated to confirm data storage
NOTE: radio or terminal block commands are not accepted
until DIP 2 is set to OFF
LEARNING THE OPERATION TIME
ATTENTION: the procedure can only be started when the
shutter is closed
USING THE START BUTTON
1. Close the shutter
2. Set DIP1 to OFF and DIP 2 to ON
3. Press the START button on the terminal board: the buzzer is
activated for 1 second, confirming the start of the procedure
4. The motor starts on opening
5. When the opening limit switch is reached, the motor stops
6. Press the START button on the terminal board: the motor
starts upon closing
7. When the closing limit switch position is reached, the motor
stops: the LED and the buzzer are activated to confirm data
storage
USING THE TRANSMITTER
1. Close the shutter
2. Set DIP1 to OFF and DIP 2 to ON
3. - 1-key operation
Press the key of the transmitter that has been stored: the
buzzer is activated for 1 second, confirming the start of
the procedure
- 3-key operation
Press the OPEN key of the transmitter that has been
stored: the buzzer is activated for 1 second confirming the
start of the procedure
4. The motor starts on opening
5. When the opening limit switch is reached, the motor stops
6. - 1-key operation
Press the transmitter key again: the motor starts upon
closing
- 3-key operation
Press the CLOSE key on the transmitter: the motor starts
upon closing
7. When the closing limit switch position is reached, the motor
stops: the LED and the buzzer are activated to confirm data
storage
RESET
To reset the control unit parameters to the factory settings,
proceed as follows:
1. Remove power on the control panel
2. Set DIP 1-3 to OFF and DIP 2-4 to ON
3. Remove the connections on terminal 11 (COMMON)
4. Restore the power supply: the LED and the buzzer are
activated to confirm the deletion of data
5. Restore the connections on terminal 11 and the position of
the DIPs as before the procedure

ENGLISH
- 10 -
STORAGE OF TRANSMITTERS
The storage of transmitters can be performed for 1-key or 3-key
operation (see OPERATION paragraph).
NOTE: a transmitter that is stored for 1-key operation
cannot be stored also for 3-key operation and vice versa.
1. Press the PROG button until the buzzer activates
2. Release the button: the LED lights up and stays on for 4
seconds to indicate that the control unit is ready to store the
transmitters
3. - 1-key operation:
press the transmitter button: the LED flashes and the
buzzer is activated to indicate the storage of the codes
- 3-key operation:
press keys 1 and 3 simultaneously: the LED flashes and the
buzzer is activated to indicate the storage of codes. Keys
will be stored with the following functions
4. Store all desired transmitters
5. After 2 seconds without receiving any code, the control unit
automatically exits the procedure: the LED turns off and the
buzzer emits two short acoustic signals
CANCELLATION OF ALL TRANSMITTERS
Press the PROG button for 6 seconds: the LED flashes and the
buzzer emits a short acoustic signal to indicate that the codes
have been cancelled.
OUT OF MEMORY INDICATION
When the control unit has stored the maximum number of
transmitters, by attempting to store a new code, the control unit
signals the anomaly by means of LED flashes and buzzer acoustic
signals for 10 seconds, then exits the program.

FRANÇAIS
- 11 -
CARACTÉRISTIQUES TECHNIQUES
Alimentation : 230V~ 50/60 Hz/115V~ 50/60 Hz
Contacts de relais : 16A 250V ~
Durée de fonctionnement : max. 150 secondes
Durée de fermeture automatique : programmable max. 3
minutes
Programmation des codes radio :auto-apprentissage
Nombre maximum d’émetteurs mémorisables : 30
Fréquence : 433,92 MHz
Sensibilité : supérieure à -100 dBm
Portée de réception : standard 70 m
Antenne : intégrée
Température de fonctionnement : - 10 ÷ 60 °C
Fusible : 5A (230V)/10A (230V)
BRANCHEMENTS ÉLECTRIQUES
CON.1
1. Entrée ligne 230/115 Vac (phase)
2. Entrée ligne 230/115 Vac (neutre)
CON.2
3. Sortie moteur fermeture
4. Sortie moteur ouverture
5. Sortie moteur commune
6. Sortie clignotante (UNIVERSAL3 uniquement)
7. Sortie clignotante (UNIVERSAL3 uniquement)
CON.3
8. Sortie alimentation services + 12 Vdc
9. Sortie alimentation services - 12 Vdc
10. Entrée dispositif de sécurité, cellule photoélectrique (NC)
11. Entrée GND commune
12. Entrée bouton ouverture-fermeture (NA)
13. Entrée bouton ouverture (UNIVERSAL3 uniquement)
14. Entrée bouton arrêt (UNIVERSAL3 uniquement)
15. Entrée bouton fermeture (UNIVERSAL3 uniquement)
REMARQUES :
• Étant donné que la centrale n’est dotée d’aucun
dispositif de déconnexion de l’alimentation 230 Vac, il
faut toujours prévoir un interrupteur de déconnexion
adapté.
• Les entrées normalement fermées (NC) doivent être
pontées si elles ne sont pas utilisées
mRECOMMANDATIONS
IMPORTANTES
LA CENTRALE RADIO DÉCRITE DANS LE PRÉSENT MANUEL
SERT À COMMANDER ET À FAIRE FONCTIONNER LES MOTEURS
D’AUTOMATISATION DE VOLETS ROULANTS.
LE FABRICANT DÉCLINE DÈS À PRÉSENT TOUTE
RESPONSABILITÉ POUR LES DOMMAGES AUX PERSONNES
OU AUX BIENS DÉCOULANT D’UNE UTILISATION IMPROPRE
DU DISPOSITIF, DE LA NON-OBSERVATION DES INDICATIONS
ICI PRÉSENTES OU D’UNE INSTALLATION INCORRECTE.
Par conséquent, il est interdit de procéder à l’installation de la
centrale avant d’avoir lu attentivement le présent mode d’emploi.
L’installation ne doit être effectuée que par du personnel
technique qualifié dans le domaine d’application du dispositif en
question.
De telles considérations sont également applicables pour les
phases de programmation et pour les éventuelles interventions de
maintenance nécessaires.
• Pendant le câblage, l’alimentation de l’appareil doit être
coupée.
• L’utilisation de cet appareil doit respecter et se conformer
strictement aux normes techniques de référence.
• L’installation et/ou la maintenance doivent être effectuées
uniquement par du personnel qualifié dans le respect des
dispositions légales en vigueur.
• Le fabricant ne peut être tenu responsable des éventuels
dommages causés par une utilisation incorrecte et/ou
déraisonnable.
• Une mauvaise installation ou une utilisation impropre du
produit peut compromettre la sécurité de l’installation. Aucune
partie du matériel fourni dans l’emballage ne doit être laissée
à la portée des enfants, car elle présente un risque potentiel.
LES NORMES DE RÉFÉRENCE EN VIGUEUR DANS LE CADRE
DES RÉGLEMENTATIONS EUROPÉENNES SONT ÉNUMÉRÉES
CI-DESSOUS :
Directive machines 89/392 CEE/EN 60204-1 (Sécurité des
machines - Équipement électrique des machines, partie 1 : règles
générales. EN 12445 (Sécurité à l’utilisation des portes motorisées,
méthode d’essai). EN 12453 (Sécurité à l’utilisation des portes
motorisées - Prescriptions).
DÉCLARATION UE DE CONFORMITÉ
Le fabricant ACM International srl, ayant son siège social a:
Via Oros 2 / g, 00071 Pomezia (Rm) Italie
déclare que les produits: UNIVERSAL2, UNIVERSAL3
respecter les exigences essentielles établies par les directives
suivantes:
• 2014/30/UE (Directive EMC)
• 2014/35/UE (Directive Basse tension)
• 2014/53/UE (Directive Radio)
• Directive ROHS3 2015/863/CE
Pomezia, 05/04/2020
Le représentant dûment habilité ACM International srl
Alfredo Lanzoni

FRANÇAIS
- 12 -
FONCTIONNEMENT
Fonctionnement à 1 touche :
La première impulsion (de l’émetteur ou du bouton basse
tension) commande l’ouverture jusqu’à l’expiration de la durée de
fonctionnement. La deuxième impulsion commande la fermeture
du volet. Si une impulsion est envoyée avant la fin de la durée
de fonctionnement, la centrale arrête le mouvement. Une autre
commande détermine la reprise du mouvement dans le sens
opposé.
Fonctionnement à 3 touches :
• Une impulsion via la touche 1 de l’émetteur ou depuis le
bornier (Ouverture) : commande l’ouverture jusqu’à la fin de
la durée de fonctionnement. Une impulsion avant la fin de la
durée de fonctionnement n’a aucun effet.
• Une impulsion via la touche 2 de l’émetteur ou depuis le
bornier (Fermeture) : commande la fermeture jusqu’à la fin de
la durée de fonctionnement. Une impulsion avant la fin de la
durée de fonctionnement n’a aucun effet.
• Une impulsion via la touche 3 de l’émetteur mémorisé ou
depuis le bornier (Arrêt) : arrête le moteur
1 2
3 4
Fermeture automatique :
La centrale vous permet de fermer le volet (lorsqu’il est sur
la fin de course d’ouverture) automatiquement sans l’envoi
de commandes supplémentaires. Le choix de ce mode de
fonctionnement est décrit dans le mode de programmation de la
durée de fermeture automatique.
DISPOSITIF DE SÉCURITÉ
La centrale permet l’alimentation électrique et le raccordement de
photocellules/rebords pneumatiques.
L’intervention en phase d’ouverture n’est pas envisagée,
alors qu’en phase de fermeture, elle provoque l’inversion du
mouvement. Cette entrée (CON2 10-11) doit être pontée si elle
n’est pas utilisée.
SÉLECTION DES OPTIONS
1 Sélection minuterie/Fermeture automatique
ON Fermeture automatique avec minuterie
OFF Fermeture automatique désactivée
2 Minuterie de programmation
ON Programmation de la durée de fonctionnement (1 OFF)
Programmation de la durée de pause (1 ON)
OFF Programmation de la durée de fonctionnement
désactivée
3 Programmation par radio : NON ACTIVÉE
ON Programmation par radio de nouveaux émetteurs
activée.
OFF Programmation par radio désactivée
4 Homme présent
ON Pour effectuer la fermeture, le bouton de l’émetteur ou
le bouton alternatif doit être maintenu enfoncé.
S’il n’est pas maintenu enfoncé, la manœuvre s’arrête
OFF Fonctionnement normal
5 Fonctionnement de l’entrée PHOTO/EDGE
REMARQUE : la fonction EDGE n’est pas activée
actuellement)
ON Fonctionnement comme cellule photoélectrique/rebord
OFF Fonctionnement comme cellule photoélectrique
6 Entrée STOP (UNIVERSAL3 uniquement)
ON Entrée NC (normalement fermée)
OFF Entrée NA (normalement ouverte)
OUVERTURE FERMETURE
AUCUNE
FONCTION
ARRÊT

FRANÇAIS
- 13 -
APPRENTISSAGE DE LA DUREE DE
PAUSE
ATTENTION : la procédure ne peut être lancée que lorsque le
volet est au repos, après avoir terminé le cycle ; il n’est pas
nécessaire que la fin de course de fermeture soit ouverte.
PAR TOUCHE START
1. Fermer le volet, la fin de course de fermeture ne doit pas être
ouverte
2. Mettre les DIP 1 et 2 sur ON
3. Appuyer sur le bouton START du bornier : le buzzer est activé
pendant 1 seconde, confirmant l’activation de la procédure
4. Appuyer à nouveau sur le bouton START du bornier lorsque le
temps écoulé correspond au temps nécessaire à la PAUSE : la
LED et le buzzer sont activés pour confirmer la mémorisation
des données
PAR TRANSMETTEUR
1. Fermer le volet, la fin de course de fermeture ne doit pas être
ouverte
2. Mettre les DIP 1 et 2 sur ON
3. - Fonctionnement à 1 touche
Appuyer sur la touche du transmetteur qui a été
mémorisé: le buzzer s’active pendant 1 seconde,
confirmant l’activation de la procédure
- Fonctionnement à 3 touches
Appuyer sur la touche OUVERTURE du transmetteur qui
a été mémorisé : le buzzer s’active pendant 1 seconde,
confirmant l’activation de la procédure
4. - Fonctionnement à 1 touche
Appuyer à nouveau sur la touche de l’émetteur lorsque
le temps écoulé correspond à celui souhaité pour la
PAUSE : la LED et le buzzer s’activent pour confirmer la
mémorisation des données
- Fonctionnement à 3 boutons
Appuyer sur le bouton FERMETURE de l’émetteur lorsque
le temps écoulé correspond à celui souhaité pour la
PAUSE : la LED et le buzzer s’activent pour confirmer la
mémorisation des données
REMARQUE : les commandes par radio ou depuis le bornier
ne sont acceptées que lorsque DIP 2 est en position OFF
APPRENTISSAGE DE LA DUREE DE
FONCTIONNEMENT
ATTENTION : la procédure ne peut être lancée que lorsque le
volet est fermé
PAR TOUCHE START
1. Fermer le volet
2. Mettre le DIP1 sur OFF et le DIP2 sur ON
3. Appuyer sur le bouton START du bornier : le buzzer est activé
pendant 1 seconde, confirmant l’activation de la procédure
4. Le moteur s’active à l’ouverture
5. Lorsque la position de fin de course à l’ouverture est atteinte
le moteur s’arrête
6. Appuyer sur le bouton START du bornier : le moteur active la
fermeture
7. Lorsque la position de fin de course à la fermeture est atteinte,
le moteur s’arrête : la LED et le buzzer sont activés pour
confirmer la mémorisation des données
PAR TRANSMETTEUR
1. Fermer le volet
2. Mettre le DIP1 sur OFF et le DIP2 sur ON
3. - Fonctionnement à 1 touche
Appuyer sur la touche du transmetteur qui a été
mémorisé: le buzzer s’active pendant 1 seconde,
confirmant l’activation de la procédure
- Fonctionnement à 3 touches
Appuyer sur la touche OUVERTURE du transmetteur qui
a été mémorisé : le buzzer s’active pendant 1 seconde,
confirmant l’activation de la procédure
4. Le moteur s’active à l’ouverture
5. Lorsque la position de fin de course à l’ouverture est atteinte
le moteur s’arrête
6. - Fonctionnement à 1 touche
Appuyer à nouveau sur le bouton du transmetteur : le
moteur active la fermeture
- Fonctionnement à 3 touches
Appuyer sur la touche FERMER du transmetteur : le
moteur active la fermeture
7. Lorsque la position de fin de course à la fermeture est atteinte,
le moteur s’arrête : la LED et le buzzer sont activés pour
confirmer la mémorisation des données
RÉINITIALISER
Pour rétablir les paramètres par défaut de la centrale, procéder
comme suit :
1. Couper l’alimentation de la centrale
2. Régler DIP 1-3 sur OFF et DIP 2-4 sur ON
3. Retirer les raccordements du bornier 11 (COMMUN)
4. Rétablir l’alimentation : la LED et le buzzer sont activés pour
confirmer la suppression des données
5. Rétablir les raccordements sur la borne 11 et la position des
DIP comme avant la procédure

FRANÇAIS
- 14 -
MEMORISATION DES TRANSMETTEURS
La mémorisation des transmetteurs peut être effectuée
pour un fonctionnement à 1 ou 3 touches (voir paragraphe
FONCTIONNEMENT).
REMARQUE : un transmetteur mémorisé pour un
fonctionnement à 1 touche ne peut pas être mémorisé
également pour un fonctionnement à 3 touches et vice
versa.
1. Appuyer sur le bouton PROG jusqu’à ce que le buzzer s’active
2. Relâcher le bouton : la LED s’allume et reste allumée
pendant 4 secondes pour indiquer que la centrale est prête à
mémoriser les transmetteurs
3. - Fonctionnement à 1 touche : appuyer sur le bouton du
transmetteur : la LED clignote et le buzzer est activé pour
indiquer la mémorisation des codes
- Fonctionnement à 3 touches : appuyer simultanément
sur les touches 1 et 3 : la LED clignote et le buzzer est
activé pour indiquer la mémorisation des codes. Les
touches seront mémorisées avec les fonctions suivantes
4. Mémoriser tous les transmetteurs souhaités
5. Après 2 secondes sans recevoir de code, la centrale quitte
automatiquement la procédure : la LED s’éteint et le buzzer
émet deux courts signaux acoustiques
ANNULATION DE TOUS LES
TRANSMETTEURS
Appuyer sur le bouton PROG pendant 6 secondes : la LED clignote
et le buzzer émet un bref signal acoustique pour indiquer que les
codes ont été annulés.
INDICATION DE MEMOIRE
INSUFFISANTE
Lorsque la centrale a mémorisé le nombre maximum de
transmetteurs, en tentant de mémoriser un nouveau code, la
centrale signale l’anomalie au moyen de clignotements de la LED
et de signaux sonores du buzzer pendant 10 secondes, puis sort
de la procédure de programmation.

ESPAÑOL
- 15 -
CARACTERÍSTICAS TÉCNICAS
Fuente de alimentación: 230 V~ 50/60 Hz / 115 V ~ 50/60 Hz
Contactos de relé: 16 A 250 V ~
Tiempo de funcionamiento: máx. 150 segundos
Tiempo de cierre automático: programable máx. en 3 minutos
Programación de códigos de radio: autoaprendizaje
Número máx. de transmisores memorizables: 30
Frecuencia: 433,92 MHz
Sensibilidad: mayor de -100 dBm
Alcance de recepción: estándar 70 m
Antena: incorporada
Temperatura de funcionamiento: -10 ÷ 60 °C
Fusible: 5 A (230 V) / 10 A (230 V)
CONEXIONES ELÉCTRICAS
CON.1
1. Entrada de línea 230/115 Vac (Fase)
2. Entrada de línea 230/115 Vac (Neutro)
CON.2
3. Salida del motor - cierre
4. Salida del motor - apertura
5. Salida del motor - común
6. Salida intermitente (solo UNIVERSAL3)
7. Salida intermitente (solo UNIVERSAL3)
CON.3
8. Salida de alimentación de servicios +12 Vdc
9. Salida de alimentación de servicios -12 Vdc
10. Entrada del dispositivo de seguridad, fotocélula (NC)
11. Entrada GND común
12. Entrada de botón de apertura-cierre (NA)
13. Entrada de botón de apertura (solo UNIVERSAL3)
14. Entrada del botón de parada (solo UNIVERSAL3)
15. Entrada de botón de cierre (solo UNIVERSAL3)
NOTAS:
• Dado que la centralita no está equipada con ningún
dispositivo de corte en relación con la alimentación de
230 Vac, tenga previsto siempre un dispositivo de corte
adecuado.
• Las entradas normalmente cerradas (NC) deben
puentearse si no se usan.
mADVERTENCIAS IMPORTANTES
LA CENTRALITA OBJETO DE ESTE MANUAL ESTÁ DISEÑADA PARA
EL CONTROL Y OPERACIÓN DE MOTORES ADECUADOS PARA
AUTOMATIZAR PERSIANAS ENROLLABLES.
EL FABRICANTE DECLINA TODA RESPONSABILIDAD POR
DAÑOS A PERSONAS U OBJETOS DEBIDOS A UN USO
INAPROPIADO DEL DISPOSITIVO, AL INCUMPLIMIENTO
DE LAS PRESENTES INDICACIONES O A UNA INSTALACIÓN
INCORRECTA.
Por lo tanto, no se permite la instalación de la centralita antes de
haber leído atentamente el siguiente manual de instrucciones.
La instalación debe ser realizada solo por personal técnico
cualificado en el campo de aplicación del dispositivo en cuestión.
Se aplican consideraciones similares a las fases de programación y
a los eventuales trabajos de mantenimiento que fueran necesarios.
• Durante el cableado, el equipo no debe estar conectado a la
red.
• El uso de este equipo debe seguir y cumplir estrictamente las
normas técnicas de referencia.
• Tanto la instalación como el mantenimiento deben ser
realizados solamente por personal cualificado de acuerdo con
la legislación en vigor.
• El fabricante no se hace responsable de los posibles daños
causados por un uso inadecuado o poco razonable del
dispositivo.
• Una instalación inadecuada o un mal uso del producto pueden
comprometer la seguridad de la instalación; no se debe dejar
al alcance de los niños ninguno de los materiales presentes en
el embalaje, ya que pueden ser peligrosos.
A CONTINUACIÓN SE ENUMERAN LAS NORMAS DE
REFERENCIA VIGENTES EN EL MARCO DE LA NORMATIVA
EUROPEA:
Directiva sobre máquinas 89/392 CEE/EN 60204-1 (Seguridad
de las maquinaria, equipo eléctrico de las máquinas, parte 1:
reglas generales.EN 12445 (Seguridad de utilización de cierres
automatizados, métodos de prueba).EN 12453 (Seguridad en el
uso de cierres automatizados, requisitos).
DECLARACIÓN UE DE CONFORMIDAD
El fabricante ACM International srl con sede en
Via Oros 2 / g, 00071 Pomezia (Rm) Italia
Declara que los productos: UNIVERSAL2, UNIVERSAL3
Cumplir con los requisitos esenciales establecidos por las
siguientes directivas:
• 2014/30/UE (Directiva EMC)
• 2014/35/UE (Directiva de baja tensión)
• 2014/53/UE (Directiva de radio)
• Directiva ROHS3 2015/863/CE
Pomezia, 05/04/2020
El representante legal de ACM International srl
Alfredo Lanzoni

ESPAÑOL
- 16 -
FUNCIONAMIENTO
Funcionamiento con 1 botón:
El primer impulso (desde el transmisor o el botón de bajo
voltaje) controla la apertura hasta que finalice el tiempo de
funcionamiento.El segundo impulso controla el cierre de la
persiana.Si se envía un impulso antes de que haya transcurrido el
tiempo de funcionamiento, la centralita detiene el movimiento.Un
comando adicional determina la reanudación del movimiento en
la dirección opuesta.
Funcionamiento con 3 botones:
• Un impulso a través del botón 1 del transmisor o desde la
placa de terminales (Ouverture/Apertura): controla la apertura
hasta que haya transcurrido el tiempo de funcionamiento.Un
impulso antes de que finalice el tiempo de ejecución no tiene
ningún efecto.
• Un impulso a través del botón 2 del transmisor o desde la
placa de terminales (Fermeture/Cierre): controla el cierre
hasta que haya transcurrido el tiempo de funcionamiento.Un
impulso antes de que finalice el tiempo de ejecución no tiene
ningún efecto.
• Un impulso a través del botón 3 del transmisor memorizado o
desde la placa de terminales (Arrêt/Parada): detiene el motor
1 2
3 4
Cierre automático:
La centralita permite cerrar la persiana (cuando está en el final del
recorrido de apertura) automáticamente y sin enviar comandos
adicionales.La elección de este modo de funcionamiento aparece
descrita en el modo de programación del tiempo de cierre
automático.
DISPOSITIVO DE SEGURIDAD
La centralita permite la alimentación y la conexión de fotocélulas/
líneas neumáticas.
No se considera una intervención en la fase de apertura; en la fase
de cierre provoca la inversión del movimiento.Si no se utiliza esta
entrada (CON2 10-11), debe puentearse.
SELECCIÓN DE OPCIONES
1 Selección de temporizador/cierre automático
ON Cierre automático con temporizador
OFF Cierre automático desactivado
2 Temporizador de programación
ON Programación del tiempo de funcionamiento (1 OFF)
Programación del tiempo de pausa (1 ON)
OFF Programación del tiempo de operación deshabilitada
3 Programación por radio: NO HABILITADA
ON Programación por radio de nuevos transmisores
habilitada.
OFF Programación por radio deshabilitada
4 Hombre presente
ON Para realizar el cierre, se debe mantener presionado el
botón del transmisor o el botón alternativo.
Si no se mantiene presionado, la maniobra se detiene
OFF Funcionamiento normal
5 Funcionamiento de entrada FOTO/EDGE
(NOTA: la función EDGE no está habilitada
actualmente)
ON Funcionamiento como fotocélula/línea
OFF Funcionamiento como fotocélula
6 Entrada STOP (solo UNIVERSAL3)
ON Entrada NC (normalmente cerrada)
OFF Entrada NA (normalmente abierta)
APERTURA CIERRE
NINGUNA
FUNCIÓN
STOP

ESPAÑOL
- 17 -
APRENDIZAJE DEL TIEMPO DE PAUSA
ATENCIÓN: el procedimiento puede iniciarse solo cuando la
persiana está en reposo, después de haber completado el
ciclo; no es necesario que el interruptor de límite de cierre esté
abierto.
A TRAVÉS DEL BOTÓN START
1. Cierre la persiana, no funciona si el interruptor de límite de
cierre está abierto
2. Configure DIP 1 y 2 en ON
3. Presione el botón START en el tablero de terminales: el
zumbido se activa durante 1 segundo, confirmando la
activación del procedimiento
4. Presione el botón START del tablero de terminales nuevamente
cuando el tiempo transcurrido corresponda con el deseado
para la PAUSA: el led y el zumbido se activan para confirmar
que se han memorizado los datos
A TRAVÉS DEL TRANSMISOR
1. Cierre la persiana, no funciona si el interruptor de límite de
cierre está abierto
2. Configure DIP 1 y 2 en ON
3. - Funcionamiento con 1 botón
Presione el botón del transmisor que se ha memorizado:
el zumbido se activa durante 1 segundo, confirmando la
activación del procedimiento
- Funcionamiento con 3 botones
Pulse el botón ABRIR del transmisor que ha sido
memorizado: el zumbido se activa durante 1 segundo
confirmando la activación del procedimiento
4. - Funcionamiento con 1 botón
Presione nuevamente el botón del transmisor cuando el
tiempo transcurrido corresponda al tiempo deseado para
la PAUSA: el led y el zumbido se activan para confirmar
que los datos han sido memorizados
- Funcionamiento con 3 botones
Presione el botón CERRAR en el transmisor cuando el
tiempo transcurrido corresponda al tiempo deseado para
la PAUSA: el led y el zumbido se activan para confirmar
que los datos han sido memorizados
NOTA: los comandos por radio o desde la placa de terminales
no se aceptan hasta que DIP 2 esté colocado en modo OFF
APRENDIZAJE DEL TIEMPO DE
FUNCIONAMIENTO
ATENCIÓN: el procedimiento solo puede iniciarse cuando la
persiana está cerrada
A TRAVÉS DEL BOTÓN START
1. Cierre la persiana
2. Configure DIP1 en OFF y DIP 2 en ON
3. Presione el botón START en el tablero de terminales: el
zumbido se activa durante 1 segundo, confirmando la
activación del procedimiento
4. El motor se activa para la apertura
5. Cuando se alcanza la posición del interruptor de límite de
apertura, el motor se detiene
6. Presione el botón START en el tablero de terminales: el motor
comienza a cerrarse
7. Cuando se alcanza la posición del interruptor de límite de
cierre, el motor se detiene: el led y el zumbido se activan para
confirmar que se han memorizado los datos
A TRAVÉS DEL TRANSMISOR
1. Cierre la persiana
2. Configure DIP1 en OFF y DIP 2 en ON
3. - Funcionamiento con 1 botón
Presione el botón del transmisor que se ha memorizado:
el zumbido se activa durante 1 segundo, confirmando la
activación del procedimiento
- Funcionamiento con 3 botones
Pulse el botón ABRIR del transmisor que ha sido
memorizado: el zumbido se activa durante 1 segundo
confirmando la activación del procedimiento
4. El motor se activa para la apertura
5. Cuando se alcanza la posición del interruptor de límite de
apertura, el motor se detiene
6. - Funcionamiento con 1 botón
Presione nuevamente el botón del transmisor: el motor se
activa para el cierre
- Funcionamiento con 3 botones
Presione nuevamente el botón CERRAR del transmisor: el
motor se activa para el cierre
7. Cuando se alcanza la posición del interruptor de límite de
cierre, el motor se detiene: el led y el zumbido se activan para
confirmar que se han memorizado los datos
REINICIO
Para devolver los parámetros de la centralita a la configuración de
fábrica, proceda de la siguiente manera:
1. Desconecte la centralita de la red eléctrica
2. Configure DIP 1-3 en OFF y DIP 2-4 en ON
3. Retire las conexiones del terminal 11 (COMÚN)
4. Restaure la conexión a la red: el led y el zumbido se activan
para confirmar la eliminación de los datos
5. Restaure las conexiones en el terminal 11 y la posición de los
DIP como estaban antes del procedimiento

ESPAÑOL
- 18 -
MEMORIZACIÓN DE TRANSMISORES
La memorización de los transmisores se puede realizar para
el funcionamiento con 1 o 3 botones (consulte la sección
FUNCIONAMIENTO).
NOTA: un transmisor que se memoriza para el
funcionamiento con 1 botón no puede memorizase también
para el funcionamiento con 3 botones, y viceversa.
1. Presione el botón PROG hasta que se active el zumbido
2. Suelte el botón: el led se ilumina y permanece encendido
durante 4 segundos para indicar que la centralita está lista
para memorizar los transmisores
3. - Funcionamiento con 1 botón: presione el botón del
transmisor: el led parpadea y se activa el zumbido para
indicar que los códigos se han memorizado
- Funcionamiento con 3 botones: presione los botones 1 y
3 simultáneamente: el led parpadea y se activa el zumbido
para indicar que los códigos se han memorizado. Los
botones se memorizarán con las siguientes funciones
4. Memorice todos los transmisores que desee
5. Después de 2 segundos sin recibir ningún código, la centralita
sale automáticamente del procedimiento: el led se apaga y el
zumbido emite dos señales acústicas cortas
CANCELACIÓN DE TODOS LOS
TRANSMISORES
Presione el botón PROG durante 6 segundos: el led parpadea y
el zumbido emite una breve señal acústica para indicar que los
códigos han sido cancelados.
INDICADOR DE MEMORIA LLENA
Cuando la centralita ha memorizado el número máximo de
transmisores, al intentar memorizar un nuevo código, la centralita
indica la anomalía por medio de destellos led y señales acústicas
del zumbido durante 10 segundos; a continuación, sale del
procedimiento de programación.


ACM International srl
This manual suits for next models
1
Table of contents
Languages:
Other ACM Control Unit manuals
Popular Control Unit manuals by other brands

Emerson
Emerson SAPAG 8400 Series Installation and maintenance instruction

Afag
Afag GMQ 32/RM 16 Assembly and operating instructions

Flashcut CNC
Flashcut CNC 401A Hardware guide

Samson
Samson 3510 Mounting and operating instructions

Watts
Watts LF70A Series instructions

SpinCore Technologies
SpinCore Technologies PulseBlasterESR-PRO-200-cPCI owner's manual