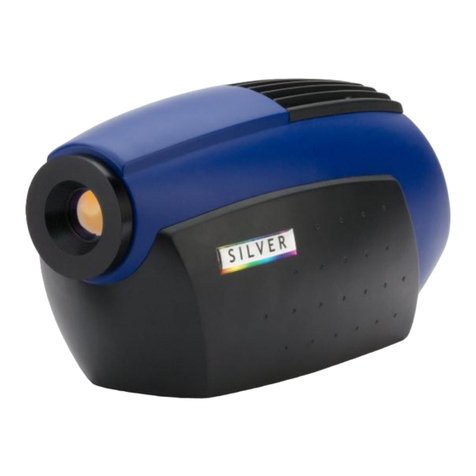
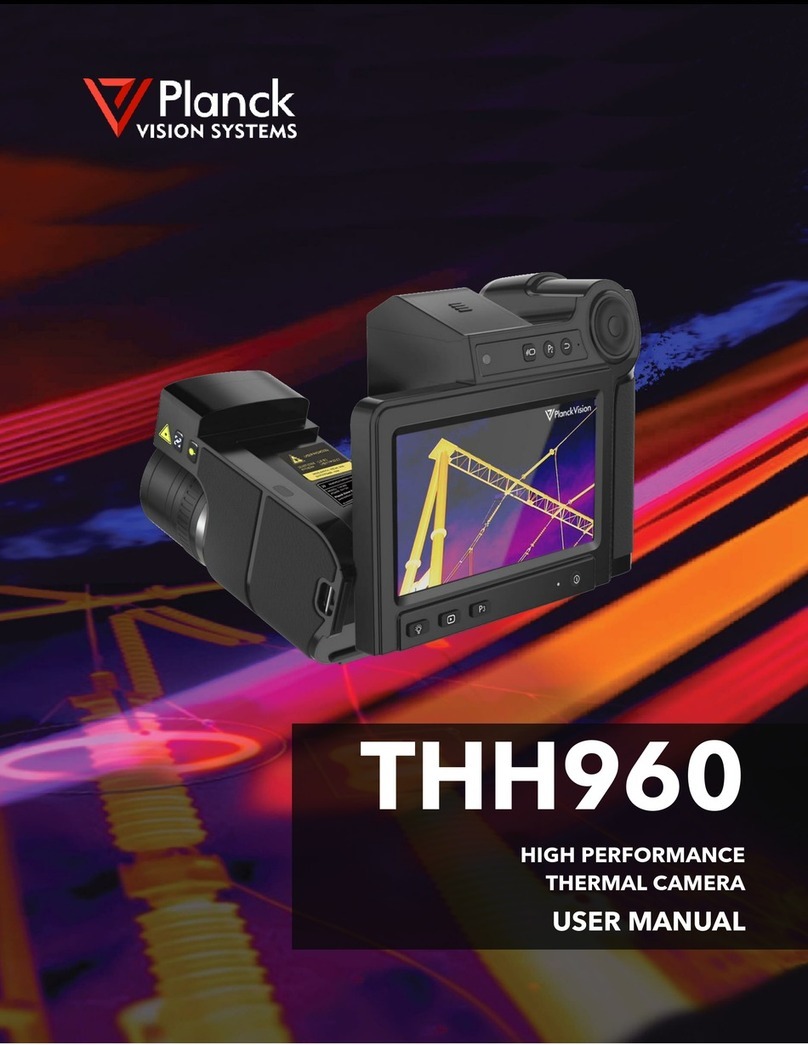
ADA INSTRUMENTS TemPro VISION User manual

TemPro VISION 1
Operating manual
TemPro VISION
Thermal imager
MEASUREMENT FOUNDATION

TemPro VISION
2
Description
Thermal imager TemPro VISION is designed to measure surface temperature and visualize temperature distribu-
tion on the surface of investigated object by noncontact method. The product allows to capture visible and infrared
images along with measured/additional data and store them on memory card for subsequent data analysis and to
generate reports. The function of marking of hot/cold spot temperature simplies the process of taking
measures.
Specications
Display color LCD display 2,5"
Resolution of infrared image (methods of math-
ematical approximation)
120х120 pixels*
Visible light image resolution 300,000 pixels
Detector size 60х60 pixels
Field of view 20×20°
Thermal sensitivity 0.15°
Temperature range -20 °С …+300 °С
Accuracy ±2%/ ±2 °С /±3,6 °F
Emissivity 0.1-1.0
Image frequency 6 HZ
Spectral band 8-14 um

TemPro VISION 3
Focus mode xed
Color palette Ironbow, Rainbow, Rainbow High
Contrast, Grayscale (white hot) and
Grayscale (black hot)
File format bmp
Image storage Micro SD
Аutomatic switch off after 12 minutes of inactivity
Working temperature -5 °С…+40 °С / 23°F ...104°F
Storage temperature -20 °С…+55 °С / -4°F...131°F
Relative humidity 10%...80%
Electromagnetic Compatibility CE EN61326-1:2006
Power supply 4 x 1,5 V AA
Battery life 6h
Weight 310 gr
Dimensions 223×88×65mm
* Hight resolution of IR image is achieved by the data processing from the detector with the help of the methods of mathemat-
ical approximation. Usage the methods of mathematical approximation allows to make the professional diagnoatic to detect
the leakage and prevent damages and wastes.

TemPro VISION
4
Features
1. Infrared lens
2. Visual camera
3. LED brightness
4. Image capture
5. Battery cover
6. Tripod mount 1/4’’
7. Keypad:
up / down / left / right
8. Select button
9. Menu button
10. Color LCD display
11. Memory card slot

TemPro VISION 5
Time and date setting
Image store
LCD backlight
Units of temperature
Temperature of reective background
Available space on memory card
Color palette
Emissivity
Function of marking hot/cold spot
temperature
Product temperature
Menu

TemPro VISION
6
Open the battery cover: unlock the retainer screw. Insert the batteries.
Observe the polarity. Put the battery cover. Screw the retainer screw.
Operation
Press and hold button (MENU) for 5 seconds to turn on or turn off the meter. Switch on the instrument.
Then press and hold button (MENU) for 1 second to enter thre menu. Only ve options are showen on the
display at one time. Press buttons (7) to scroll functions through the display menu. Press button (MENU)
again to return to the normal measurement mode.
Select the function in the menu and press button (SELECT). Press button (7) to select the necessary
setting. Press button (SELECT) to exit setting mode.
Measurements
The temperature measurement of the center area is shown
at the top of the display. The emissivity setting is also shown
at the top of the display. When the hot and cold markers are
turned on, move the product until the hot or cold spot coin-
cides with the middle measurement area. Point the product at
an object that is likely to be hotter or colder than its surround-
ings for best results.
Insert / replace batteries
Center
Cold
Hold spot

TemPro VISION 7
Backlight
Enter Menu. Press buttons (7) to select Backlight function. Press button (SELECT) to enter Backlight mode.
Press button (7) to adjust the level of the backlight. After the adjustment is made, press button (SELECT) to
exit this mode. Default level of brightness is 50%.
LED backlight
Press and hold button (4) for 5 sec to switch on the brightness function.
Color palette
Correctly selected color palette provides more correct and informative image.
1. Grayscale Palette offers an equal, linear presentation of colors for best presentation of detail.
2. The High Contrast palette is used in situations with high thermal contrast for increased color contrast
between the high temperatures and low temperatures.
3. The Ironbow and Rainbow palettes offer a mixture of the High Contrast and Grayscale palettes.
Grayscale (white hot) Grayscale (black hot)
Rainbow High contrast
Ironbow

TemPro VISION
8
Reected Background Temperature
The background temperature can be set between 0°C ~ 36 °C. Compensation for reected background
temperature is set in the Background tab. Very hot objects or very cold objects can affect the apparent
temperature and measurement accuracy of the target or object, especially when surface emissivity is low.
Adjustment of the reected background temperature can make the temperature measurement better in
many situations.
Marking of hot/cold spot temperature
Press button (MENU) to enter the menu. Press button (7) to choose hot and cold markers. Press button (SE-
LECT), then press button (7) to turn the mode on/off. When this mode is turned off, the user can concentrate
on the single measurement pixels.
Display modes
Press buttons left-right (7) to adjust display mode from 0% to 100%.
0% 25% 50% 75% 100%

TemPro VISION 9
Date and time setting
Press button (MENU) to enter the menu mode. Press buttons up-down (7) to choose
the Time. Press buttons right-left (7) to set data and time. Press buttons up-down to
change the value. After making the setting, press button (MENU) to exit the menu.
Image capture and storage
In the measuring mode press and hold trigger (4). There will be a message on the
display to save or not the image. Press button (MENU) to save the image. Press
button (SELECT) to cancel the image. If memory card is not installed or full, you will
see «NO SD» or «FULL » on the display.
Display stored images
Press button (MENU) to enter the menu mode. Press buttons up-down (7) to
choose the image from the list. To view the next (previous) image, press buttons right-left (7) to choose the
le with the image. Press button up (7) to delete the current image. Press button (MENU) to conrm this
action. Press button (SELECT) to cancel the deletion. Press button (MENU) to exit this mode.
Emissivity
Press button (MENU) to enter the menu. Press buttons up-down (7) to choose the emissivity module. Press
button (SELECT) to enter the emissivity adjusting mode, Press buttons up-down (7) to set the emissivity
value. After the adjustment is made, press button (SELECT) to exit this mode.
Hour
Year MonthDay
Minute

TemPro VISION
10
All objects emit thermal energy. Emitted energy quantity depends on the surface temperature and object emis-
sivity. The product can measure emission on the surface of object and calculate object temperature. Objects with
different surfaces but with the same temperature can emit different quantity of thermal energy. Many objects (e.g.
coated metal, wood, water, skin and texture) possess high emissivity (0,9 and more), and emit more energy than
glossy surfaces and uncoated metal, because their emissivity is less than 0,6. Adjustment of emissivity helps to
take this feature into consideration and minimize inaccuracy of temperature measurement.
Emissivity
Material Emissivity Material Emissivity Material Emissivity
Aluminium 0.30 Carbon 0.85 Sand 0.90
Asphalt 0.90 - 0.98 Ice 0.96 - 0.98 Rubber 0.95
Concrete 0.95 Snow 0.83 Timber 0.94
Leather 0.95 Human skin 0.98 Textiles 0.94
Ceramic 0.9 - 0.95 Glass 0.90 - 0.95 Lead 0.50
Copper 0.50 Iron oxides 0.78 - 0.82 Marble 0.94
Brick 0.90 Lacquer 0.80 - 0.95 Cloth (black) 0.98
Frozen food 0.90 Plastic 0.85 - 0.95 Plaster 0.8 0 - 0.90
Hot food Paper 0.70 - 0.94 Water 0.92 - 0.96

TemPro VISION 11
Emissivity
Material Emissivity Material Emissivity Material Emissivity
Aluminium 0.30 Carbon 0.85 Sand 0.90
Asphalt 0.90 - 0.98 Ice 0.96 - 0.98 Rubber 0.95
Concrete 0.95 Snow 0.83 Timber 0.94
Leather 0.95 Human skin 0.98 Textiles 0.94
Ceramic 0.9 - 0.95 Glass 0.90 - 0.95 Lead 0.50
Copper 0.50 Iron oxides 0.78 - 0.82 Marble 0.94
Brick 0.90 Lacquer 0.80 - 0.95 Cloth (black) 0.98
Frozen food 0.90 Plastic 0.85 - 0.95 Plaster 0.8 0 - 0.90
Hot food Paper 0.70 - 0.94 Water 0.92 - 0.96
Warranty
This product is warranted by the manufacturer to the original purchaser to be free from defects in material and workman-
ship under normal use for a period of two (2) years from the date of purchase.
During the warranty period, and upon proof of purchase, the product will be repaired or replaced (with the same or similar
model at manufactures option), without charge for either parts of labour.
In case of a defect please contact the dealer where you originally purchased this product. The warranty will not apply to
this product if it has been misused, abused or altered. Without limiting the foregoing, leakage of the battery, bending or
dropping the unit are presumed to be defects resulting from misuse or abuse.
Exceptions from responsibility
The user of this product is expected to follow the instructions given in operators’ manual.
Although all instruments left our warehouse in perfect condition and adjustment the user is expected to carry out periodic
checks of the product’s accuracy and general performance.
The manufacturer, or its representatives, assumes no responsibility of results of a faulty or intentional usage or misuse
including any direct, indirect, consequential damage, and loss of prots.
The manufacturer, or its representatives, assumes no responsibility for consequential damage, and loss of prots by any
disaster (earthquake, storm, ood ...), re, accident, or an act of a third party and/or a usage in other than usual condi-
tions.
The manufacturer, or its representatives, assumes no responsibility for any damage, and loss of prots due to a change of
data, loss of data and interruption of business etc., caused by using the product or an unusable product.
The manufacturer, or its representatives, assumes no responsibility for any damage, and loss of prots caused by usage
other thsn explained in the users’ manual.
The manufacturer, or its representatives, assumes no responsibility for damage caused by wrong movement or action due
to connecting with other products.

WARRANTY DOESN’T EXTEND TO FOLLOWING CASES:
1. If the standard or serial product number will be changed, erased, removed or wil be unreadable.
2. Periodic maintenance, repair or changing parts as a result of their normal runout.
3. All adaptations and modications with the purpose of improvement and expansion of normal sphere of
product application, mentioned in the service instruction, without tentative written agreement of the expert
provider.
4. Service by anyone other than an authorized service center.
5. Damage to products or parts caused by misuse, including, without limitation, misapplication or nrgligence
of the terms of service instruction.
6. Power supply units, chargers, accessories, wearing parts.
7. Products, damaged from mishandling, faulty adjustment, maintenance with low-quality and non-standard
materials, presence of any liquids and foreign objects inside the product.
8. Acts of God and/or actions of third persons.
9. In case of unwarranted repair till the end of warranty period because of damages during the operation of
the product, it’s transportation and storing, warranty doesn’t resume.
For more information you can visit our website WWW.ADAINSTRUMENTS.COM

WARRANTY CARD
Name and model of the product ________________________________________________
Serial number ________________date of sale_______________________
Name of commercial organization _____________________stamp of commercial organization
Warranty period for the instrument explotation is 24 months after the date of original retail purchase.
During this warranty period the owner of the product has the right for free repair of his instrument in case of manufacturing defects.
Warranty is valid only with original warranty card, fully and clear lled (stamp or mark of thr seller is obligatory).
Technical examination of instruments for fault identication which is under the warranty, is made only in the authorized service center.
In no event shall manufacturer be liable before the client for direct or consewuential damages, loss of prot or any other damage which
occur in the result of the instrument outage.
The product is received in the state of operability, without any visible damages, in full completeness. It is tested in my presence. I have
no complaints to the product quality. I am familiar with the conditions of qarranty service and i agree.
purchaser signature _______________________________
Before operating you should read service instruction!
If you have any questions about the warranty service and technical support contact seller of this product

Руководство по эксплуатации
TemPro VISION
Электронное устройство для измерения температуры в ИК спектре
MEASUREMENT FOUNDATION

TemPro VISION 15
Электронное устройство для измерения температуры в ИК спектре
Назначение прибора
Электронное устройство для измерения температуры в ИК спектре (прибор) ADA TemPro VISION
предназначен для измерения и визуализации распределения температур на поверхностях объекта
исследования бесконтактным методом. Прибор позволяет фиксировать видимое и инфракрасное (ИК)
изображения вместе с измеренными/дополнительными данными и сохранять их на карте памяти для
последующего анализа полученных данных, а также составления отчетов. Режим выделения точек с
максимальной и минимальной температурами упрощает работу.
Технические характеристики
Дисплей Цветной ЖК-дисплей, 2,5 дюйма
Разрешение ИК изображения
(технология математической аппроксимации)
120х120 пикс.*
Разрешение видимого изображения 300,000 пикс.
Размер детектора 60х60 пикс.
Угол обзора/ минимальное фокусное
расстояние
20×20°
Температурная чувствительность 0.15°
Диапазон температурных измерений -20 °С …+300 °С
Точность ±2%/ ±2 °С /±3,6 °F
Коэффициент теплового излучения 0.1-1.0
Частота обновления кадра 6 Гц
Спектральный диапазон 8-14 мкм

TemPro VISION
16
Фокусное расстояние Фиксированное
Цветовые палитры Горячий металл, радуга, высококонтрастная
радуга, Градация серого (горячий белый) и
Градация серого (горячий черный)
Формат файлов изображений bmp
Карта памяти Micro SD
Автоматическое отключение через 12 мин
Рабочая температура -5 °С…+40 °С
Температура хранения -20 °С…+55 °С
Относительная влажность 10%...80%
Электромагнитная совместимость CE EN61326-1:2006
Источник питания 4 x 1,5 V AA
Время работы элементов питания 6 ч
Вес 310 гр
Размеры 223×88×65мм
* Высокое разрешение ИК изображения достигается путем обработки данных от детектора с помощью метода
матиматической аппроксимации (methods of mathematical approximation). Применение математической обработки
данных позволяет специалистам проводить профессиональную диагностику, в целях локализации утечек и
предупреждения повреждений и потерь.

TemPro VISION 17
Features
1. ИК линзы
2. Камера
3. Подсветка
4. Триггер
5. Крышка батарейного отсека
6. Резьба крепления прибора на штатив 1/4’’
7. Кнопки управления:
вверх / вниз / влево / вправо
8. Кнопка Выбрать
9. Кнопка Меню
10. Цветной ЖК-дисплей
11. Слот карты памяти

TemPro VISION
18
Установка времени
Количество сохраненных изображений
Установка подсветки дисплея
Установка еденицы измерения температуры
Температура окружающей среды
Свободное место на карте памяти
Цветовая палитра
Коэффициент теплового излучения
Выделение точек с максимальной/
минимальной температурой
Температура прибора
Меню

TemPro VISION 19
Установка /замена элементов питания
Откройте батарейный отсек: выкрутите фиксирующий винт.
Установите элементы питания, соблюдая полярность. Установите крышку батарейного отсека
обратно. Закрутите фиксирующий винт.
Работа с прибором
Нажмите и удерживайте кнопку (MENU) в течение 5 секунд, чтобы включить/выключить прибор.
После того, как прибор включится, нажмите и удерживайте кнопку (MENU) одну секунду, чтобы войти
в меню функций. На дисплее отображаются пять функций. Нажимайте кнопки (7), чтобы прокрутить
фунуции меню. Нажмите на кнопку (MENU), чтобы вернуться в нормальный режим измерения.
Выберите нужную функцию в меню и нажмите кнопку (SELECT). нажимайте кнопку (7) , чтобы выбрать
нужную установку. Нажмите кнопку (SELECT), чтобы выйти из режима.
Измерения
Температура измерения центральной части отображается в верхней части дисплея.
Установленный коэффициент излучения отображается в верхней части дисплея.
Когда указатели горячей и холодной температур
включены, водите прибором до тех пор,
пока горячее и холодные места не совпадут
в центре площади измерения. Для более
достоверного результата направьте прибор на
объект, температура которого выше или ниже
температуры окружающей среды.

TemPro VISION
20
Подсветка
Зайдите в меню. С помощью кнопок (7) выберите функцию Подсветка. Нажмите кнопку (SELECT),
чтобы войти в режим Подсветка. Нажимайте кнопку (7), чтобы натсроить уровень подсветки. Когда
настройка будет закончена, нажмите на кнопку (SELECT), чтобы выйти из этого режима. Заводской
уровень подсветки 50%.
Светодиодная подсветка
Нажмите и удерживайте кнопку (4) в течение 5 секунд, чтобы включить функцию светодиодной
подсветки.
Цветовая палитра
Правильно подобранная цветовая палитра позволит получить более четкое и информативное
изображение:
1. Градация серого представляет собой оптимальную линейную цветовую презентацию для лучшего
отображения деталей.
2. Высококонтрастная цветовая палитра используется в тех ситуациях, когда требуется показать
тепловой контраст между низкой и высокими температурами.
3. Горячий металл и палитра радуги представляют собой комплекс цветов высокой контрастности и
палитру Градация серого.
Градация серого (теплый белый) Градация серого (теплый черный)
Радуга Высокий контраст
Горячий металл
Table of contents
Languages:
