7. Quick reset and reboot
Quick reset:Used to reset the decoding service, typically to make modified
parameters take effect immediately or to decode exceptions. The current decoding
service is briefly interrupted during a quick reset and requires approximately 3S.
Reboot:To decode the device to perform a hot restart, try the device restart if the
device is not functioning well and still does not resolve the issue through a quick
reset. The device restart takes about 1 minute to restart, and in some cases, a
device restart may require a cold restart, i.e. unplugging the decoder first.
8. Restore factory settings
If the user modifies the parameters to cause the device to not function properly,
the device factory settings can be restored so that the device's configuration is
restored to the factory default value.
There are two ways to restore factory settings:
1)Manage the "System Settings" - "Recover Factory Settings" function of the WEB
interface
2)Device RESET button.
Pressing the RESET button for 5 seconds on the device, and the device will
restore to factory settings, it will take about 30s.
When factory settings are restored, the following parameters are restored to the
default:
Login username admin, password recovery to admin;
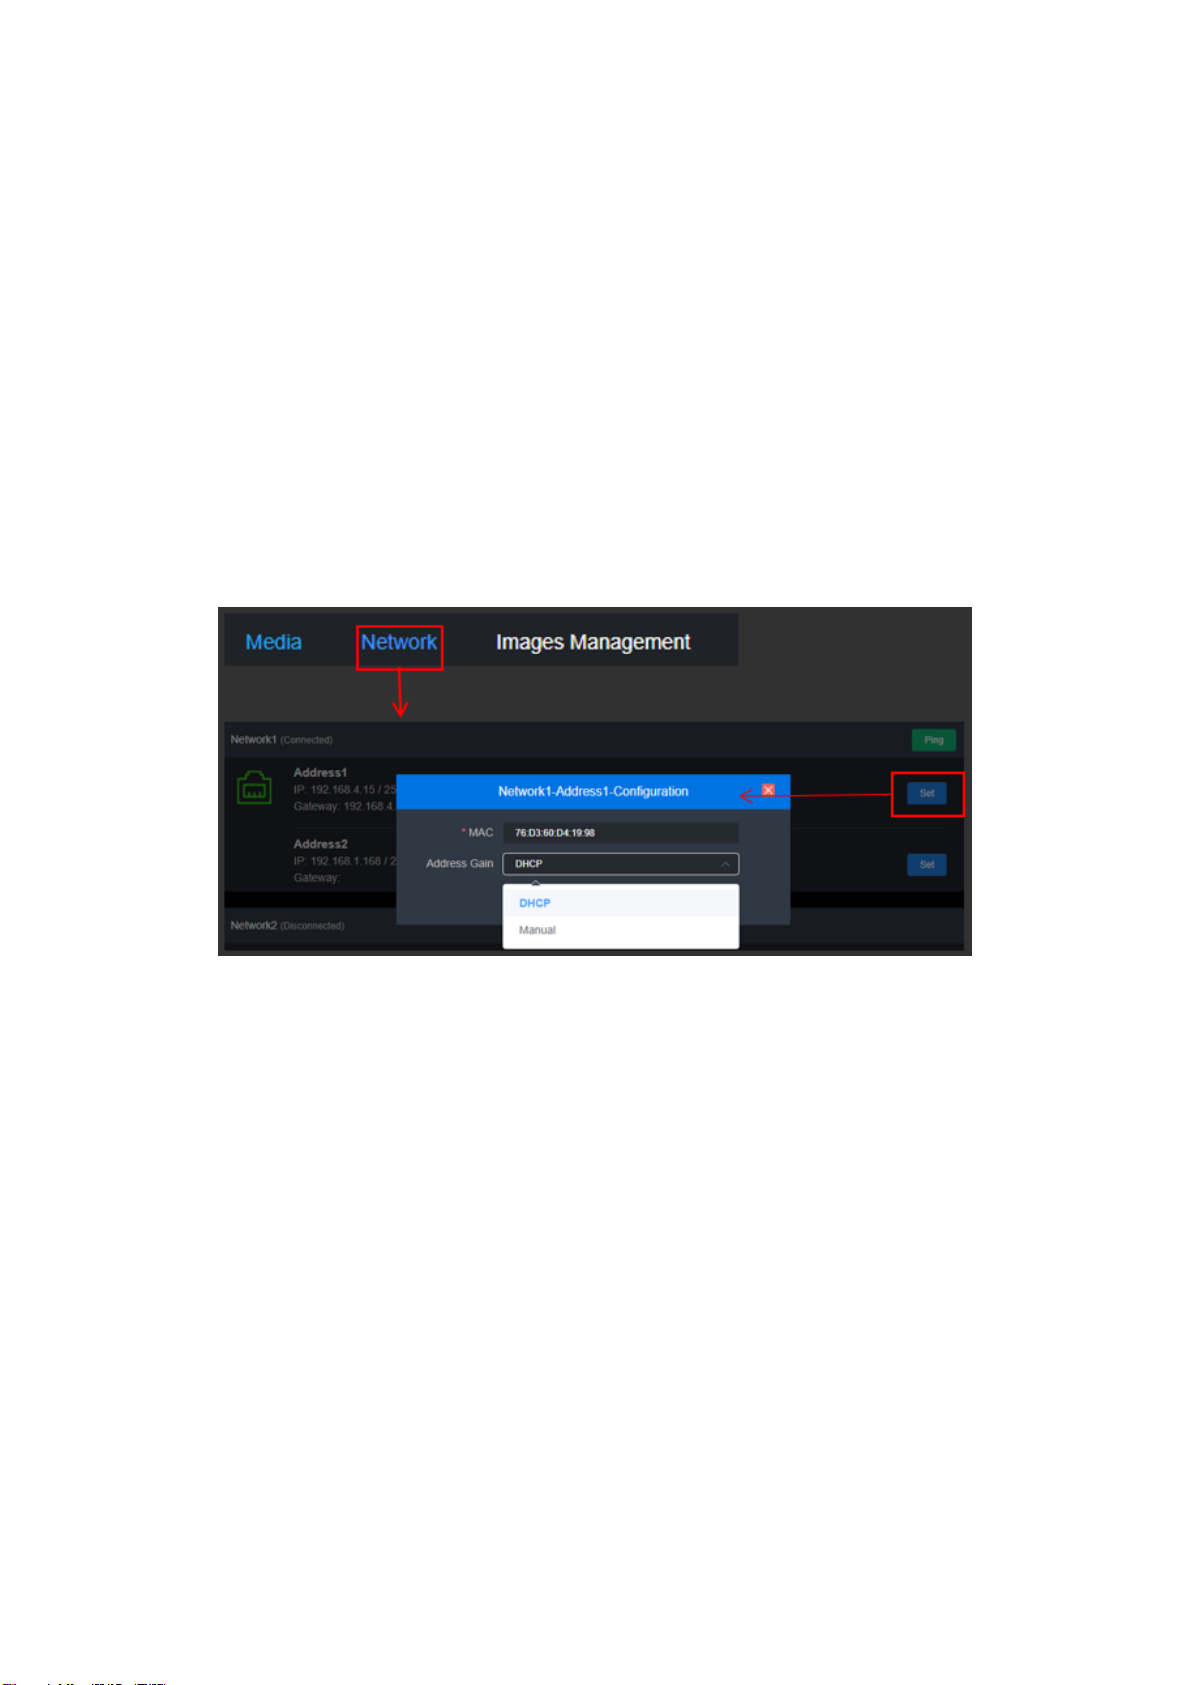
IP address will be restored to default: gate 1 IP 192.168.1.168, mask 255.255.255.0;
Gate 2 IP 192.168.2.168, mask 255.255.255.0;
All set decoding parameters and parameter configurations are restored to factory
defaults.
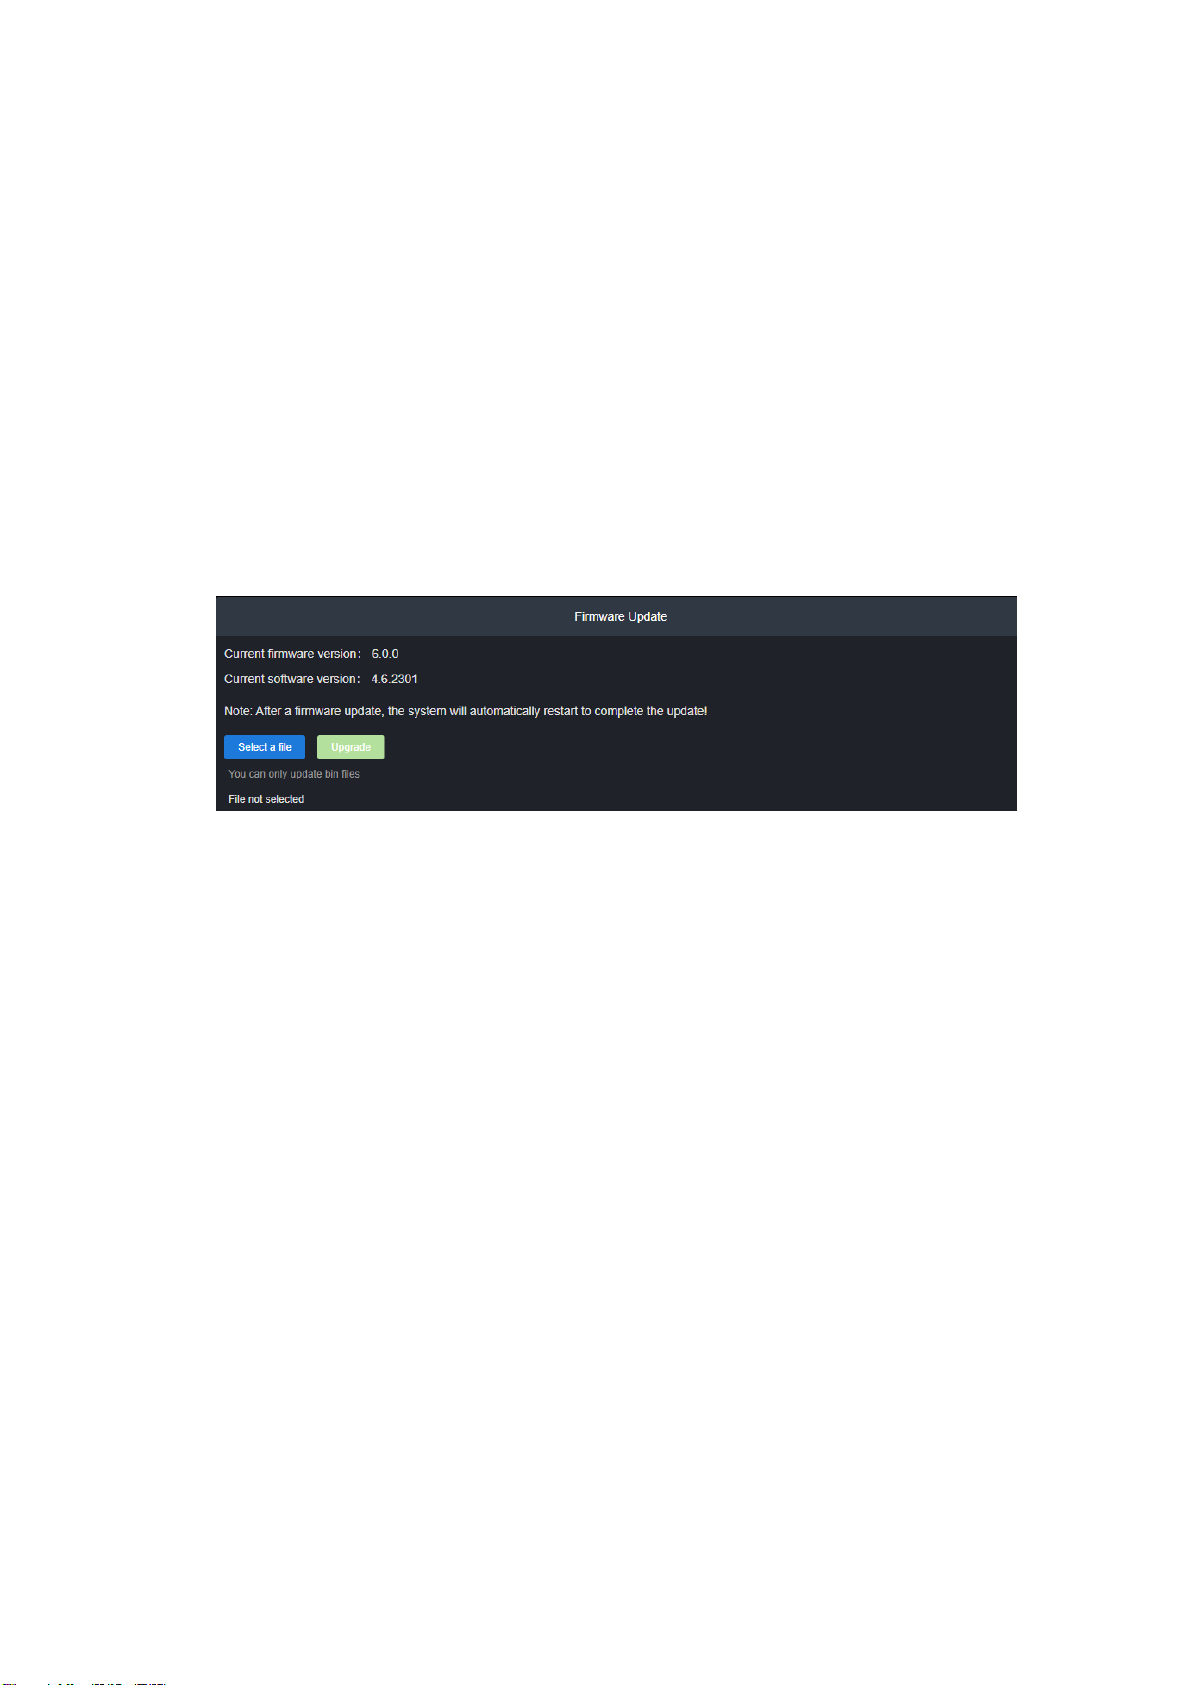
9. Firmware upgrade