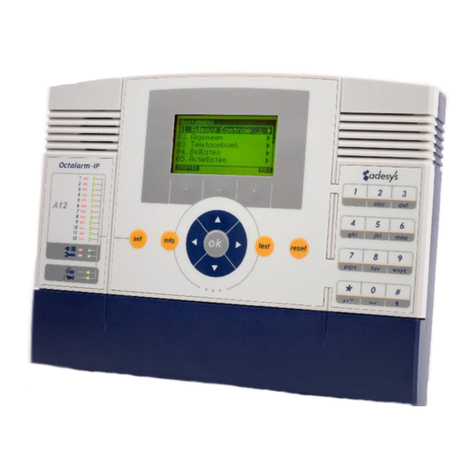
Adesys Octalarm-IP User manual

Handleiding Octalarm-IP | versie 07-2020
User manual Octalarm-IP
Pin codes
The Octalarm-IP is given the following two pin
codes in factory:
Administrator 1111
Installer 9999
Replace these with codes of your own choice
during installation or turn off the use of pin
codes in menu option General.

Adesys B.V. | Wateringen
User manual Octalarm-IP | version 11-2021
NOTIFICATION:
Linking to Adésys Control Centre (ACC) no longer possible!
The Adésys Control Centre, ACC for short, was built in 2008 to enable line monitoring and
remote setting of the Octalarm-IP alarm dialler. The application has now become
obsolete, making it increasingly difficult for Adésys to keep this reporting centre working.
For this reason, the ACC has been switched off as of 1 July 2021.
Alternative for remote setting
All to internet linked Octalarm-IP alarm diallers can be easily configured with a PC or
laptop:
•with the configuration program IP-prog (see www.adesys.nl/en/service/downloads
for free download);
•with IP address alarm dialler via local company network / web browser.
Considerable gain in time when programming compared to setting on the
device itself
Excellent overview of all functions
Setting and reading the alarm dialler
View log (with all events)
View alarm status

Adesys B.V. | Wateringen
User manual Octalarm-IP | version 11-2021
Contents
1. General ..................................................................................................................................... 4
1.1 Checking the delivery ............................................................................................................................... 4
1.2 Basic rules for safe alerts......................................................................................................................... 5
1.3 Environment............................................................................................................................................... 5
1.4 Guarantee and liability............................................................................................................................. 5
2. Principle of telephone alarms ................................................................................................ 6
2.1 Alarm Sequence Diagram ........................................................................................................................ 7
3. Concepts and terms................................................................................................................. 8
3.1 Personal pin and users’ roles................................................................................................................. 8
3.2 How the Octalarm-IP works..................................................................................................................... 8
3.2.1 Alarm process ............................................................................................................................................ 8
3.2.2 Alarm principle........................................................................................................................................... 9
3.2.3 Procedure when an alarm becomes active .......................................................................................... 9
3.2.4 Example alarm setting............................................................................................................................ 11
3.3 Telephone book....................................................................................................................................... 12
3.4 Call list .......................................................................................................................................................13
3.5 Action list .................................................................................................................................................. 14
3.6 Inputs.........................................................................................................................................................15
4. Front panel ............................................................................................................................. 16
5. Programming ......................................................................................................................... 18
5.1 Programming methods .......................................................................................................................... 18
5.2 Saving and copying preferences........................................................................................................... 18
5.3 The convenience of manufacturer’s settings ..................................................................................... 18
5.4 QuickStart mode for fast and easy set up .......................................................................................... 19
6. Complete setting procedure/step-by-step plan .................................................................. 21
6.1 Preparations for configuration ............................................................................................................. 21
6.1.1 When setting is done with IP-prog ....................................................................................................... 21
6.1.2 When setting up with PC or laptop (web browser) ........................................................................... 21
6.2 Step 1: Setting language, location name, date and time.................................................................. 22
6.3 Step 2: enter alarm receivers in the Telephone book......................................................................... 23
6.4 Step 3: compiling a Call list .................................................................................................................... 25
6.5 Step 4: compiling an Action list............................................................................................................. 26
6.6 Step 5: configuring inputs...................................................................................................................... 28
6.7 Step 6: configuring outputs ................................................................................................................... 30
6.8 Step 7: settings for alarms during system malfunctions.................................................................. 31
6.9 Step 8: settings for local alarms............................................................................................................ 32
6.10 Step 9: setting connections (PSTN, GSM, ethernet)........................................................................... 33
6.11 Step 10: setting preferred networks (alarm receivers)..................................................................... 35
7. Application example.............................................................................................................. 36
8. Testing an resetting............................................................................................................... 38
8.1 Sending test reports ...............................................................................................................................38
8.2 What you should do if an alarm is activated (resetting)................................................................... 38
8.3 Reset with SMS to Octalarm-IP (only with GSM model).................................................................... 38
8.4 Requesting alarm status via SMS (only with GSM model)................................................................ 38
8.5 Switching outputs with voice response............................................................................................... 39
8.6 Switching outputs with SMS (only with GSM model) ........................................................................ 39
8.7 Reset by means of the reset button on the front panel of the Octalarm-IP................................. 39

Adesys B.V. | Wateringen
User manual Octalarm-IP | version 11-2021
9. Login to the dialler via the Internet..................................................................................... 40
9.1 Setting with PC or laptop with IP-prog.................................................................................................40
9.2 Setting with standard web browser on PC or laptop with IP address device...............................40
10. Update-procedure.................................................................................................................. 41
10.1 With IP-prog (without connection to the internet) ............................................................................41
11. Installation and mounting .................................................................................................... 42
11.1 Switching the Octalarm-IP on and off ..................................................................................................42
11.2 Recommendations ..................................................................................................................................42
11.2.1 Alarm reporting by telephone using internet telephony (VoIP)......................................................42
11.2.2 Octalarm-IP in combination with an ADSL modem...........................................................................43
11.2.3 Octalarm-IP in combination with VoIP.................................................................................................44
11.3 Enclosure...................................................................................................................................................45
11.3.1 To Open.....................................................................................................................................................45
11.3.2 Releasing the retaining catch ................................................................................................................45
11.3.3 Wall mounting..........................................................................................................................................45
11.4 Connecting inputs ...................................................................................................................................46
11.4.1 Alarm inputs .............................................................................................................................................46
11.4.2 Connecting via Sensorbus......................................................................................................................47
11.5 Connecting outputs/local alarm ...........................................................................................................48
11.5.1 Output functions .....................................................................................................................................48
11.5.2 Manufacturer’s settings for outputs ....................................................................................................48
11.6 Connecting external communication...................................................................................................49
11.6.1 Analogue telephone line ........................................................................................................................49
11.6.2 Connecting ethernet (UTP) and/or internet........................................................................................50
11.6.3 Positioning the optional GSM module.................................................................................................50
11.6.4 Inserting the SIM card.............................................................................................................................51
11.7 Mains failure and battery.......................................................................................................................51
11.7.1 Mains failure.............................................................................................................................................51
11.7.2 Mains failure report ................................................................................................................................51
11.7.3 Battery empty warning ...........................................................................................................................51
11.7.4 Automatic battery check ........................................................................................................................51
11.7.5 Testing and changing the battery.........................................................................................................52
12. Error reports and system malfunctions............................................................................... 53
13. Logbook .................................................................................................................................. 54
13.1 Reading the logbook on the alarm dialler...........................................................................................54
14. Features and technical data ................................................................................................. 56
14.1 Features of the Octalarm-IP (type dependent) ..................................................................................56
14.2 Technical data ..........................................................................................................................................56
15. Summary of all settings ........................................................................................................ 58

Adesys B.V. | Wateringen
Page 4 | Back to contents User manual Octalarm-IP | version 11-2021
1. General
The Octalarm-IP is an alarm system that detects malfunctions and calamities in both
manned and unmanned installations and processes and forwards them via the
telephone. There are various optical and acoustic options on site for reporting the
malfunctions. The options for forwarding via telephone lines include both mobile and
fixed telephones, service groups or combinations of these.
There are two different Octalarm-IP series: the A line (the most comprehensive versions)
and the B line. This manual describes the installation, setting up and use of the A line.
Certain functions are not available for the B line.
A report to a telephone uses either a standard voice message or a message that the user
records themselves. The text for reports by SMS can be determined by the user as can
the desired action, diallers and reset procedures.
Because connecting and setting up are of a technical nature and require technical
knowledge of the alarms connected, it is recommended that the Octalarm-IP should be
installed and set up by an electrical technician.
We recommend that you read this manual carefully in order to be able to make the best
use of the Octalarm’s application options.
1.1 Checking the delivery
Check the packaging for damage. Contact your supplier immediately if the delivery is
damaged or incomplete upon receipt.
The delivery includes:
•Octalarm-IP
•this user manual
•telephone cable with plug (only with PSTN-version)
•any accessories that may have been ordered.
The Octalarm-IP model number can be checked by pressing the info button after
switching on.
Used pictograms
A number of pictograms are used in this manual. They have the following meanings:
You will find a small, black block with a number such as 3 next to some of the
steps in this manual. These numbers refer to further explanation and tips that
can be found below the steps in the programming procedure that you are
working on. These references contain important information and it is
recommended that they be consulted regularly.
3

Adesys B.V. | Wateringen
User manual Octalarm-IP | version 11-2021 Back to contents | Page 5
1.2 Basic rules for safe alerts
•Always ensure that a number of telephone numbers have been programmed
•Use speech as much as possible.
•Only use SMS alarm messages for non-critical alarms. Telecom providers do not
guarantee the reception time for SMS messages.
•Use a reset procedure to confirm receipt of an alarm.
•Set alarm delay and reset times as short as possible.
•Make regular tests to ensure that the alarm chain is functioning correctly.
•Ensure that the authorisations for operating and resetting the Octalarm-IP have been
arranged.
•Ensure that there is reliable overvoltage protection for any peripheral equipment that
may be present. The Octalarm-IP has built-in overvoltage protection.
•Ensure that the emergency power supply is monitored for any peripheral equipment
that may be present.
•When the Octalarm-IP has been set up to report via the internet, the Security DSL
splitter or a separate overvoltage protection should be used to protect the internet
modem if possible.
NB: Adésys can supply both the monitored emergency power supply and the Security DSL
splitter.
1.3 Environment
This product has an NiMH battery If the product has to be replaced at the end of
its working life, do not dispose of it with the household rubbish out of
consideration for the environment. You can return the appliance to your supplier
or dispose of it at a suitable recycling depot.
1.4 Guarantee and liability
Every Octalarm-IP undergoes a series of extensive tests at Adésys prior to dispatch.
Adésys also gives a two year guarantee. The guarantee becomes invalid if:
•the defect is caused by gross negligence or incompetent installation;
•the appliance has been repaired and/or altered without Adésys’ permission;
•it is established that the serial number has been removed or damaged.
Adésys accepts no liability whatsoever for consequential damage caused by
incompetent use of and/or malfunctions in the Octalarm-IP.

Adesys B.V. | Wateringen
User manual Octalarm-IP | version 11-2021 Back to contents | Page 7
2.1 Alarm Sequence Diagram
Alarm
Action
Choose number of a
telephone or service
group
Occupied or not?
Action
Forward report code or
spoken message
Reset by calling back
set?
Action
Wait to be called back
Called back on time?
Report correctly reset?
Action
Select the same number
or the following one
Exceeded the set
number of repeats?
End of report procedure. (If an input contact remains
active, the report procedure will be started again.)
yes
no
yes
yes
no
no
no
yes
no
yes

Adesys B.V. | Wateringen
Page 8 | Back to contents User manual Octalarm-IP | version 11-2021
3. Concepts and terms
3.1 Personal pin and users’ roles
Roles have been introduced to the control structure because not everyone can have
access to all the Octalarm-IP functions due to administration and safety reasons. Each
Role has Its own set of authorisations. This means that each Role gives access to specific
set up functions. There are four Roles. The table below shows which Roles have access to
which functions.
Roles (menu in italic are QuickStart menus)
Installer Administrator
Assistant
administrator Only reset
Pin 9999
Pin 1111
Pin ….
Pin ….
Reset
Reset
Reset
Reset
General
General
Telephone book
Telephone book
Telephone book
Call lists
Call lists
Call lists
Action lists
Action lists
Inputs
Inputs
Outputs
System malfunctions
System malfunctions
Local alarms
Local alarms
Connections
Alarm receivers
Manufacturer’s
settings
TIP: Don’t forget to replace the standard pin with your own personal pin!
The use of pin codes can be turned off in option menu General. This allows access to the
alarm dialler and resetting alarms without pin. For safety reason the use of pin codes is
highly recommended though.
3.2 How the Octalarm-IP works
3.2.1 Alarm process
The Octalarm-IP software is based on alarms. In addition, SMS messages without callback
action can be sent as notification messages.
During the configuration of notification messages, an incorrect setting is often made
intuitively by placing several notification messages together in one call list.

Adesys B.V. | Wateringen
User manual Octalarm-IP | version 11-2021 Back to contents | Page 9
This is an incorrect configuration!
In short, this means that the correct configuration for notification messages is: for every
notification message without a call back action, a “own” call list must be created
and configured.
The Octalarm-IP can alarm to:
•fixed and mobile phones by means of voice or text messages (SMS);
•reporting centres (ARA.
Depending on the Octalarm-IP model, communication takes place via:
•GSM / PSTN speech
•GSM / PSTN data (SMS)
•Ethernet (ARA-IP)
The medium and any back-up medium (s) for which the alarms or notification go through
can be set using the Alarm receivers menu.
3.2.2 Alarm principle
Basic settings for successful alarming:
When programming the alarms, data has to be entered in four of the Octalarm-IP’s basic
components:
•Telephone book
•Call list(s)
•Action list(s)
•Inputs
The default list (factory setting) is the action list “Urgent alarm dial out” and the call list
“Default call list”. In the "Standard call list", the "Whole phone book" with the phone
book items "Installer" and "User" is selected.
If the telephone book items “Installer” and / or “User” are provided with settings, the
basic settings of the alarm detector are already ready.
3.2.3 Procedure when an alarm becomes active
Input becomes active:
when an input becomes active, the action list configured at this input will be started.
Start action list:
an action list can contain 1 or more call lists. These call lists are processed in sequence, so
they are processed one after the other.
Start call list:
a call list can contain 1 or more phonebook entries. The 1st phone book entry from the
list is started. When a phone book entry has been successfully completed, the call list
Telephone book
Call list
Action list
Input

Adesys B.V. | Wateringen
Page 10 | Back to contents User manual Octalarm-IP | version 11-2021
stops and so other phone book entries in this call list are NOT called up. Pay attention!
Sending an text message without a call back is always successful.
If several call lists are configured in the action list, the next call list is started. This means
that multiple people and / or systems can be called when an input becomes active.
If a phonebook entry from the call list cannot be completed successfully, the next
phonebook entry from the call list is recalled.
Successful completion of a phone book entry:
a phone book entry has been successfully completed if for example:
•an SMS has been sent that does not require a call back (Attention!A call list
therefore stopswith these items);
•an SMS has been sent requiring the user to text or call back, and the user has actually
done this;
•an alarm has been confirmed via the DTMF voice response menu;
•de text “ok” is received in a reply message.
Call different persons for different entrances:
if a different person or system is to be called at input 1 than at input 2, this can be
achieved by using different action lists per input.

Adesys B.V. | Wateringen
User manual Octalarm-IP | version 11-2021 Back to contents | Page 11
3.2.4 Example alarm setting
Two inputs are in use on an alarm dialler. Input 1 detects that the water pump has
stopped and input 2 detects that the generator has failed. When the water pump has
stopped, the water pump technicians must be called. If the generator fails, the generator
technicians are called and the supplier of the generator is texted. When there is a water
pump and / or generator malfunction, the boss of the mechanics must be informed by
text message.
The configuration now looks like this:
Input
Action lists
Call lists
Telephone book
entry
water pump_failure
water pump_action
sms_boss
boss_mechanics
call_water pump_
mechanics
wpm_piet (if Piet
does not answer,
call Jan)
wpm_jan
generator_failure
generator_action
sms_boss
boss_mechanics
call_generator_mec
hanics
genm_klaas (if
Klaas does not
answer, call Kees)
genm_kees
sms_supplier
supplier
Alarm notification via SMS
Based on the previous information, 1 call list with 1 telephone book entry must be
configured per notification.

Adesys B.V. | Wateringen
Page 12 | Back to contents User manual Octalarm-IP | version 11-2021
3.3 Telephone book
Name
Pin
Type of report
Role
Call back
…
…
telephonic
installer
no
Tel/SMS no.
SMS
administrator
Yes
ARA
ass.
administrator
Call back time
ARA via IP
Only reset
…
SMS exchange report to
… minutes
…
none
send message
All receivers for alarm reports are included here. The Telephone Book shows who
receives a report and how this is done:
•via a telephone call;
•via an SMS message;
•a message from the ARA-pro reporting centre (Adésys B.V.) via telephone connection;
•a message from the ARA-pro reporting centre (Adésys B.V.) via intranet / VPN.
Each receiver in the Telephone Book is also given their own pin so that each user can be
recognised in the logbook later.
In addition to this, the Telephone Book shows the authorisation that each receiver has.
Each receiver is given a ‘role’ that gives access to a number of specific settings. Among
other things this means that users only see the functions that they can actually affect.
This requires that the user in question also has exclusive knowledge of the settings that
he/she has been assigned.
You can find more information about compiling a Telephone Book in paragraph 6.3 Step
2: enter alarm receivers in the Telephone book .

Adesys B.V. | Wateringen
User manual Octalarm-IP | version 11-2021 Back to contents | Page 13
3.4 Call list
Call list name
Priority
Report to
Number of reports
…
very high
…
…
high
…
report delay
average
…
none
low
…
1 minute
very low
…
2 minutes
…
5 minutes
…
10 minutes
A Call List contains the people (receivers) who have to be paged in the event of an alarm
and also contains a dialling sequence for receivers from the Telephone Book. In addition
to this, receivers in the Telephone Book can be grouped in a Call List. When, for example,
the first receiver gives no response within a set time the Octalarm-IP will select the
following receiver. Specific receivers can also be prioritised. You can find more
information about compiling a Call List in paragraph 6.4 Step 3: compiling a Call list.

Adesys B.V. | Wateringen
Page 14 | Back to contents User manual Octalarm-IP | version 11-2021
3.5 Action list
Name
Local
alarm
Call list on
activation Call list on reset
When there is
no reset
… off
… …
do not
repeat
on
… …
continue
repeating
…
…
repeat time
…
…
… minutes
…
…
repeat
…
…
… x
time window
off
alt. call list on activation
alt. call list on reset
block the report
…
…
use alternative call list
…
…
…
…
block start time/alt. call list
block stop time/alt. call
list
weekend = night time
mode
.. : .. : ..
.. : .. : ..
yes
no
An alarm input is linked to an Action List which shows how the local alarms and telephone
alarms should be carried out. An Action List includes which Call Lists have to be used,
whether the Octalarm-IP should give a local report and also which alternative Call Lists
should be used during the night and at weekends for example. You can find more
information about compiling Action Lists in paragraph 6.5 Step 4: compiling an Action list.

Adesys B.V. | Wateringen
User manual Octalarm-IP | version 11-2021 Back to contents | Page 15
3.6 Inputs
Name
Input type
Contact type
Connect via
Action list
…
contact
input
open when idle
(NO)
immediately
…
ext. reset
key
closed when idle
(NC)
sensorbus
active as
reset when
when status changes
sec. stable
sec. stable
stop action list
…
finish action list
text when
active
voice message when
active text on reset
voice message on
reset
…
recorded/standard
…
recorded/standard
The actual alarm enters via an Input. An Action List starts when an Input is activated. Each
Input can be allocated to a different Action list which makes it possible for a specific
destination to receive the alarm depending on which input is activated. You can find more
information about setting up the inputs in paragraph 6.6 Step 5: configuring inputs.

Adesys B.V. | Wateringen
Page 16 | Back to contents User manual Octalarm-IP | version 11-2021
4. Front panel
1 Function key F1, F2 and F3
The three function keys below the display
are allocated specific functions depending
on the screen’s content.
2 Cursor keys
The cursor keys enable you to navigate
through the different menus. Depending
on the page chosen, the OK key is used to
confirm choices and go to the following
page.
3 Speaker
The speaker is located behind the grill on
the right side of the front panel. It is used
for any local alarms.
4 Numeric keys
The numeric keys are used to enter
numbers and letters. This works in the
same way as a GSM telephone. For
example, in order to enter the ‘b’, the abc
key has to be pressed twice. Note that the
: character is entered with the * key when
entering times and that the # key serves
for capital letters.
5 Reset key
The Reset key is used to reset the alarm
after an alarm notification. The reset
function can also be allocated to one of
the inputs.
6 Test key
This is used for testing::
•Alarm inputs
•Local alarms
•Recorded messages (audio)
•Extended battery test.

Adesys B.V. | Wateringen
User manual Octalarm-IP | version 11-2021 Back to contents | Page 17
7 Info key
The Info key gives access to the alarm
dialler’s basic data. Among other things
you will find the dialler’s identification data
such as the serial number, the software
version and the IP number. The last is
particularly important when you want to
program the alarm dialler from a
computer. You can also use the IP number
to check if the alarm dialler has an
internet connection. If no IP number is
displayed you will not be able to access
the alarm dialler via the ethernet. You can
also access the logbook from this page
where you will find an overview of the
alarm report that have been made.
8 Alarm key
The Alarm key is used to activate and
deactivate inputs, turn off alarm
forwarding temporarily or permanently,
turn local alarms on or off and to indicate
whether or not an alarm report should be
made when there is a malfunction in the
mains voltage.
9 Alarm forwarding and buzzer
These two LEDs indicate if the forwarding
for the alarms and the alarm buzzer are
switched on.
10 System malfunctions
These two LEDs indicate if reports of the
mains voltage failure and system
malfunctions that arise are being
forwarded.
11 Input status
Depending on which type of alarm dialler
you have there will be two rows with 1, 2,
4, 8 or 12 LEDs. The row of red LEDs on
the left give the status of the input in
question. The LED is off when it is idle. If
the status changes the LED will flash for
the delay time that has been set. If the
input is active the red LED will stay on. The
green LEDs in the row on the right
indicates if status changes to the input in
question are being forwarded. When the
LED in question is out, nothing is being
forwarded, while the red LED in the row
on the left can still indicate that there is a
change to the input status.
12 Microphone
Models from the Octalarm A-range have a
microphone behind the grill on the left-
hand side of the front panel for recording
text when necessary for giving an alarm or
for the voice response system. Models
from the B-range do not allow recording
messages.
13 Display
All information that is required for
operating and programming the Octalarm-
IP appears on the central display. The
alarm dialler can be set more comfortably
and with a better understanding if this is
done via a computer that is connected to
the Octalarm-IP via the ethernet. No extra
software is needed to do this. Use can use
a standard web browser such as Microsoft
Internet Explorer® or Mozilla Firefox® for
this..

Adesys B.V. | Wateringen
Page 18 | Back to contents User manual Octalarm-IP | version 11-2021
5. Programming
5.1 Programming methods
Client settings can be made starting from the manufacturer’s settings. There are 3
methods for doing this:
•Setting via the keypad on the dialler itself;
•On-site settings via the UTP Ethernet connection on the device and a PC or laptop:
•If your Octalarm-IP is included in a (company) network, you can access your dialler
via one of the computers mentioned and a standard web browser such as
Microsoft® Internet Explorer, Mozilla® Firefox or Google Chrome. Start your web
browser and enter the dialler's IP address (found in the Info screen).
•If you connect your laptop directly, you must first start DHCP software such as the
program IP-prog which can be downloaded for free from
www.adesys.nl/en/service/downloads;
5.2 Saving and copying preferences
It is possible to download and save all settings, including the self-recorded speech
fragments, from a dialler. The saved file with (preferred) settings can also be loaded into
other Octalarm-IP. However, this is subject to the condition that this is a dialler of the
same type and with the same firmware version!
Log in to the dialler using a web browser or IP-prog. Go to the settings management
menu. Here the diallers settings can be saved or previously saved settings can be loaded.
5.3 The convenience of manufacturer’s settings
Pin
Two pin codes are used with the Octalarm-IP as standard:
•Administrator: 1111
•Installer: 9999
Pin codes can be turned off in menu option General.
Standard alarm procedure
When the alarm dialler is received directly from the supplier it will have been set up in
such a way that you only have to enter one or more numbers in the Telephone book in
order to be able to process alarms simply and correctly. All inputs are assigned to the
Standard Action List and the Standard Call list respectively, that involve all the telephone
numbers present in the memory with alarm reporting..
Deleting settings made / returning to manufacturer’s settings
It is possible to reset the Octalarm-IP to the manufacturer’s settings from any situation.
These form a good starting point for making client specific settings.

Adesys B.V. | Wateringen
User manual Octalarm-IP | version 11-2021 Back to contents | Page 19
5.4 QuickStart mode for fast and easy set up
After logging in to the alarm there is the option of QuickStart or Complete. QuickStart
directs you to a simplified set up procedure where the manufacturer's settings are used
for the menus that aren’t displayed. In such situations you will only see the following
menus:
01.ACC
The Adésys Control Centre (ACC) has been disabled since
1 July 2021.
02.General
This is where settings relating to language and time are
entered (see paragraph 6.2 Step 1: Setting language,
location name, date and time ). In this menu you can also
turn off the use of pin codes.
03.Telephone book
This is where the telephone numbers for Installers,
Administrators, Assistant Administrators and Service
Personnel who have to deal with alarm reports are
entered, Only reset.(see paragraph 6.3 Step 2: enter alarm
receivers in the Telephone book)
06.Inputs
This is where inputs are configured, including settings
such as open in idle (NO) or closed in idle (NC) and/or the
contacts are connected directly or via Sensorbus (see
paragraph 6.6 Step 5: configuring inputs).
99. Returning to
manufacturer’s settings
The alarm can also be reset to the manufacturer’s settings
in QuickStart mode (see paragraph 5.3 The convenience of
manufacturer’s settings).
Only setting up these menus creates an alarm system in which all inputs are linked to a
standard action list and a standard call list.
In the event of an alarm, the standard Action list leads to the following actions:
•start the buzzer of the Octalarm-IP;
•turn on the external buzzer and flashing light;
•start the standard call list without delay.
The standard Call list results in the following call actions:
•calls the first person in the telephone book two times maximum and waits for reset;
•goes to idle after rest with automatic repetition after 1 hour;
•if there is no reset, it calls the second person two times maximum;
All telephone
numbers
Action list
All inputs
Call list
Other manuals for Octalarm-IP
1
Table of contents
Other Adesys Security System manuals

