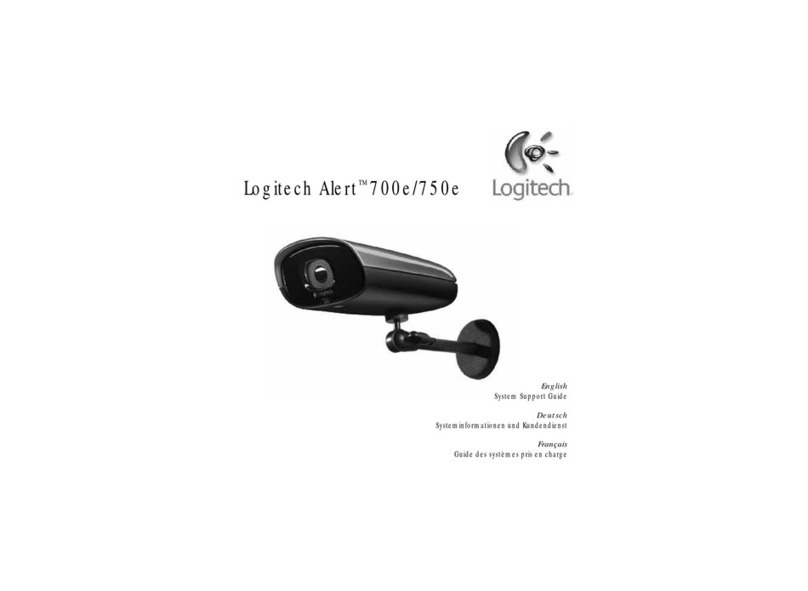
Logitech Alert 750n User manual

Getting started
with
Logitech
Alert
~
?SOn
(o'~
Logitech·
CD
Legal
Warning
Cer
tain
uses of
security
camera
products
and
audio
devices. such as
employee
monitoring.
surrep
t
itious
viewing
and
record
i
ng
of
images
and/or
audio,
or
the
use.
publication
or
dist
r
ib
u-
tion
of
image
and/or
audio
record
ings. are
prohibited
or
restricted
by
country.
st
ate
and
local
laws
1
Logitech
Alert
Camera
2
Software
install CD 5
Mounting
accessories 9
Suct
i
on
cup
Be sure
to
comply
with
the
laws in
your
count
r
y.
state.
and
l
ocality
when
using
Log1tech
Ale
rt
products
and
6
Camera
power
supply
10
Cable
extender
3
Power
supply
cab
le
(yellow
t
ips)
7 N
etwork
adapter
11
System Requirements Guide
Master System PC 4
Desktop
stand
8
Network
adap
ter
cable
(blue
tips)
1 Install
Software
2 Plug in
Network
Adapter
Q)
Internet
access
is
required for installation.
When
p
rompted
to
plug
in the
network
adapter
1) Plug
one
end
of
the
blue
cab
le
connector
into
the
network
adapter.
la)
Then,
plug
the
netwo
rk
ada
pt
er
into
the
power
outlet.
1)
Insert
the
Software
Install CD
and
follow
the
instructions
during
the
install.
• The
installer
will
check
for
the
latest
version
of
the
software.
Alternatively
,
you
can
download
the
latest
versi
on
at
www
.logitech.
com/downloads
.
2)
You
may
be
asked
to
reboot
the
PC.
3)
Logitech
Alert
Commander
software
will
op
en.
4)
The
First
Run
Wizard
will
guide
you
through
the
next
s
teps
of
setup.
4
Choose
Your
Camera
Location
On
a
desk
or
table
On
a
window
look
i
ng
in
Clean the
window's
surface and
the
inside
area
of
the
su
ction
cup
before
applyi
ng
it
to
the
window.
Periodically
pr
ess
the
suction
cup
against
the
glass
to
str
engthen
its
bond
to
the
window.
$I
Usi
ng
In-the-box
Accessories
You can use the mini-
suction
cup
and
cable wall clips to he
lp
r
out
e
the
power
supply
c
ab
le
(y
e
llow
con
n
ector)
along
the
win
dow's
edg
e
and
pr
ov
i
de
ad
di-
tional se
cu
rity
to
tha
t
came
ra.
CD
2)
Connect
the
ot
her
blue
cable
connec
t
or
1nto an
open
port
on
your
router.
Warning
Using
camera
to
look
out
a
window
Only use
for
non-n
i
ght
visi
on
applications
or
when
a
secondary
outdoor
lighting
source
is available.
Infrared
illuminat
ion
used
in
night
visi
on
cameras
cannot
penetrate
glass
and
can
adversely
af
fect
picture
quality
You
can
turn
off
night
vision in
the
Settings
> Camera>
Advanced>Night
Vision
Off
Before
you
begin
..
.
1)
Read all
instructions
before
beginning
the
installation
2)
Dunng
installation.
we
will
test
you
r
PC's firewall settings. If
prompted
to
al
low
Logitech
Alert
access
to
the
network,
you
should
always
answer
"Yes"
or
"Allow"
3 Plug in Your Camera
When
prompted
to
con
n
ect
you
r
came
r
a:
CD
Network
Adapter
I
Power
Supply
Install
Note
Caution
should
be
used
when
plugging
the
Log
itech Alert
network
adapter
or
camera
power
supply
into
a surge
protector.
power
strip,
extension
co
rd or U
PS
(u
n-interuptable
power
supply)
because
they
may
filter
. i
nterfe
re
with
or even
block
signal transmission.
To
eliminate
any potent1al 1ssues
we
r
ecommend
plugg1ng
the
net
wo
rk ad
apte
r
or
power
supply
directly
1nto
your
wall
outlet
Note:
Logitech
Alert
network
adapte
rs
and
power
supplies have
the
ir
own
built-in sur
ge
prot
ectors
1)
Remove
the
hatch
from
the
back
of
the
came
r
a.
la)
Pl
ug
the
yellow
cable
connecto
r into
the
port
l
b)
Use the
lock
slider
to
l
ock
the
connector
in
place
2)
Plug the yell
ow
cable
con
n
ecto
r into
the
powe
r
supply
p
ort.
2a)
Plug
the
power
su
pply
in
to
an
ou
tlet
near
the
PC
whe
re
the
software
is installed.
2.
0
..
~
1.1
Shortly
af
ter
con
n
ecting,
your
came
ra will
appear
in
Alert
Com-
mander
software.
You can
now
move
the
camera
to
its
desired
location
Wall/Ceiling
Mounting
Instructions
2b
2a
On
a wall
or
ceiling
The wall
mount
allows
you
to
easily fasten
your
camera
to
a
ce
i
ling
, wall.
or
flat
surface.
1)
St
art
by
pre-dr
illing
holes
into
the
wall
and
screwing
in the
mounting
base.
2a) Thread
the
ball jo1nt
into
the
camera.
OR
2b)
Place
the
ball
jo
i
nt
end
into
the
wall
mount
cl
amp
and
tighten,
using
the
win
g
nut
3)
Attac
h
the
camera
to
the
mounting
arm

Congratulations!
You
have
completed
the
basic
setup.
Reading
the
Diagnostic
LEDs
Mo
t
ion
LED
How
do
I
know
the
camera
is
recording?
•
Camera
is
ready
to
reco
rd
(Red)
D ·
Camera
is
reco
r
ding
(Red.
blinking)
Turning
Off
Motion
and
Di
agnostic
LEO
s
You
can
turn
o
ff
the
motio
n
and
diagnostic
LE
Os
in
the
Settings
>
Came
ras
>Came
ra >
Show
LED for.
See
F1
He
lp
for
instructions.
Troubleshooting
Camera
connection:
What
if
camer
a/v
i
deo
disappears?
1)
Tes
t
another
outlet
for
your camera. perhaps
one
closer
to
your
PC
2)
Verify
that
the
camera
powe
r
supply
and
the
network
bridge
are
plugged
direct
ly 1nto a
power
outlet
and
not
a
power
stnp
3)
Check
firewall set
tings
or
press
the
Fl key in
Commander
Software
for
addi
tional
help
4)
Go
to
Sett
i
ngs
>Came
r
as>
Add/Find
>
Find
Cameras.
5)
Reset
the
camera. See Inst
ructions
in "Camera Reset
Instruct
ions"
Camera
Diagnostic
LED
Which
LED
colors
indicate
"camera
is
working"?
e
Connected
to
Int
ernet
(Green)
e
Connected
to
Alert
Commander
(Purple)
e
Connected
to
Alert
Commander
&
Internet
(B
l
ue)
Upgrading
Firmware
(Wh
ite)
Camera
in stan
da
l
one
mode
(Yel
low)
Not
connected
to
Aler
t
commander
or
Interne
t
(Light
Blue)
How
to
access
your
cameras
away
from
home
...
The
Logitech
Alert
syst
em
includes
free
remote
viewin
g
th
at allows
you
to
see
live
video
fr
om
you
r
cameras.
Just
l
og
in
to
our
secure
site
at
ht
t
p://a
l
ert.log
i
tech.com
from
an
Interne
t
-connected
compute
r
or
use
our
smartphone
apps
fo
r i
Phone
·. iPad",
Andro
i
d'~
or
Bl
ackBerry
"
devices
Watch
from
anywhere-for
free
What
do
1
do
if
the
power
supply
cable
(yellow
connector)
is
too
short?
To
l
engthen,
eit
her
use
the
supplied
cable
extender
or
purchase
a
longer
ethernet
(CAT-5e) cable.
Longer
cables
are available
for
pu
rchase
at
www.log
i
tech
.
com/dvs/
(Accesso
ries)
~
/
/
~
Want
to
see
more
setup
tips?
Go
to
www.
l
ogi
t
ech.co
m
/s
e
curi
t
y/sup
p
or
t
Camera
Diagnostic
LED
Which
LED
colors
indicate
"camera
is
not
working"?
D
Camera
boot-up
failed •
(Red
blink
i
ng)
f")
microSD
card
read/write
failure-
No
microSD
card
•
(A
l
ternating
Red I Yellow,
blinking)
• See
Camera
Reset
Instructions
fo
r assistance
FAQs:
Find
More
Where
can
I
find
more
information?
Commander
Help
You
can
press
the
Fl
key
from
any
screen
1n
the
Alert
Commander
to
access
the
online
He
lp syst
em
~
Knowledge
Base
Troubleshooting
help
is available
at
www
.
logitech.com/support
Logitech
For
ums
Find
and
share
answers
and
best
practices
for
Alert
products
and
services
at
www.fo
r
ums.logitech.com
Cust
omer
Support
Call1.888.469.4543
Refer
to
System
Requirements
Guide
Power
Supply
1N
etwork
Powe
r
Supply
Network
Adapte
r
Diagnost
ic LEOs
Status
LEOs
(Top)
What
these
LEOs
tell
me:
What
these
LEOs
tell
me:
• Traffic
and
data
is
flowing
e
Link
to
Power
Supp
ly
(Green)
(Green)
e
Shows
network
tra
ffic
(Blu
e)
Camera
Reset
Instructions
With
the
camera
connec
ted
to
powe
r.
insert
a
paper
clip
into
the
reset
hole
l
ocated
on
t
he
back
of
the
camera
. Press
gent
l
y.
holding
for
5 seconds.
and
then release. Or,
go
to
Settings
>
Reboot/Rese
t > Reset
If the
came
ra
does
not
appear
after
reset.
go
to
Settings
>
Cameras
>Add/Find
>
Find
Cameras
If
the
camera
still
does
not
opera
t
e.
contact
technical
support
Resett
i
ng
the
came
ra
will
restore
the
came
ra
to
factory
settings
. However,
it
will
not
delete
video
reco
r
ded
on
the
mic
roSD
ca
re.
On/Off
switch
f
or
Powe
r
Su
pp
ly I
Network
Adapter
LEOs
How
do
I
turn
these
LEOs
off?
Use
the
switch
loca
t
ed
on
the side
of
the
power
supply
or
network
adap
ter
to
disable
these
diagnostic
LEOs
www
.l
ogitech.com
©
2012
Log,tech. A
ll
nghts
reserved. Logotech.
the
Logotech logo. and
other
Logotech
marks are owned
by
log1tech and may
be
regostered. All
other
trddemarks are
the
property
of
theor
re;pectove owners. Log1tech assumes no responso
billty
for
any errors
that may
appeH
on
th1s
manual. Information conta•ned
here1n
1s
subject
to
change
withoutnotoce


Log
itech Alert
TM
Customer Support
Questions?
LET US HELP YOU
(~
Logitech
·
If you have difficulties during installation,
contact
us.
E-MAIL
SUPPORT:
Visit
www.Logitech.com
and select
Support
>
Contact
us.
Fill
out
the
form.
We
will reply within
one
business day.
PHONE
SUPPORT
Call our toll-free
support
number
1
888.469.4543
(North
America)
we
off
er
fr
ee
support
If you
need
to
return a
product,
either
for refund or repairs,
contact
Logitech Technical
Support
first and
obtain
an
RMA
number.
©
2012
Logitech. All rights reserved. Logitech, the Logitech logo, and other Logitech marks are owned by
Logitech and may
be
registered. All other trademarks are the property
of
their respective owners. Logitech
assumes no responsibility for any errors that may appear
in
this manual. Information contained herein
is
subject
to
change
without
notice.
620-004229
.
002

(~
Logitech·
Logitech
Alert™
700n/750n
System
Requirements
&
Support
Guide

Contents
System
Requirements.
Product
Information.
Contact
Us
.....
.
FCC
Compliance
&
Advisory
Statement
Important
Safety
Information
...
AC
Powered
Product
Precautions.
Power
Supply
Precautions
. . . . .
Infrared
Illumination
LED
Notes
&
Warnings.
Logitech
Hardware
Product
Warranty
3
4
4
5
6
6
7
8
9

System
Support
Guide
System Requirements
Software
installation
requires an
Internet
connection.
Remote
viewing
requires a
PC
or
lntel-based
Mac
running
Flash®
Player,
which
is
a free
download.
CPU Speed: 2 GHz
Memory
(GB): 1
Display Resolution: 1024 x
720
or
higher
Hard Drive
(MB):
100
MB
for
software
and
minimum
of
500+
for
video
storage
Operating
System:
Microsoft
®
Windows
· Vista'", XP
Home
Edition, XP Pro,
or
XP
Media
Center
Edition,
Windows
E
7
PC
is
not
required
to
record
video. The
camera
includes
a 2 GB microSD™
card. The
amount
of
video
that
can
be
stored
on
a 2 GB
card
is
subject
to
the
amount
of
motion.
We
calculate
an
average
one
week
using
cameras in
typical
home
locations.
Upgrade
to
a
larger
microSD
card
(not
included)
to
get
months
of
on-camera
video
recording.
3

Logitech
Alert
Video
Security
System
For More Software & Product Information
Command
Center Help:
For
Software
and
Product
help,
setting
features
or
troubleshooting
tips, press
[Fl].
User Guide:
Addtional
software
manuals available
online
at
www.logitech.com/Support/Downloads.
Knowledge Base:
Browse
Tips
&
Tricks, FAQs,
or
access
the
Knowledge
Base
at
www.logitech.com/Support.
Logitech Alert website:
www.logitech.com
Customer forums:
forums.logitech.com
Contact
Us
Email support: Visit
www.Logitech.com
and
select
Support
>
Contact
Us.
Fill
out
our
online
email
form.
You will receive a
reply
within
one
business
day.
Phone
support:
Call
our
toll-free
support
number
1
888.469.4543.
If
you
need
to
return
a
product,
either
for
refund
or
repairs,
contact
Logitech
Technical
Support
first
and
obtain
an RMA number. Please see
the
contact
information
above.
4

System
Support
Guide
FCC Compliance and Advisory
Statement
This
hardware
device
complies
with
Part
15
of
the
FCC Rules.
Operation
is
subject
to
the
following
two
conditions:
1)
this
device
may
not
cause
harmful
interference,
and
2)
this
device
must
accept
any
interference received,
including
interference
that
may
cause
undesired
operation.
This
equipment
has
been
tested
and
found
to
comply
with
the
limits
for
a Class B
digital
device,
pursuant
to
Part
15
of
the
FCC Rules. These limits are
designed
to
provide
reasonable
protection
against
harmful
interference
in a residential installation. This
equipment
generates. uses.
and
can radiate radio
frequency
energy
and.
if
not
installed
or
used in
accordance
with
the
instructions.
may
cause
harmful
interference
to
radio
communications.
Howeve~.
there
is
no
guarantee
that
interference will
not
occur
in a
particular
installation. If this
equipment
does
cause
harmful
interference
to
radio
or
television
reception,
which
can
be
determined
by
turning
the
equipment
off
and
on.
the
user
is
encouraged
to
try
to
correct
the
interference
by
one
or
more
of
the
following
measures:
1)
reorient
or
relocate
the
receiving antenna: 2) increase
the
separation
between
the
equipment
and
the
receiver: 3)
connect
the
equipment
to
an
outlet
on
a
circuit
different
from
that
to
which
the
receiver
is
connected:
4)
consult
the
dealer
or
an
experienced
radio/TV
technician
for
help.
Any
changes
or
modifications
not
expressly
approved
by
the
party
responsible
for
compliance
could
void
the
user's
authority
to
operate
the
equipment
Where
shielded
interface
cables have
been
provided
with
the
product
or
specified
additional
components
or
accessories
elsewhere
defined
to
be
used
with
the
installation
ofthe
product
they
must
be
used
in
order
to
ensure
compliance
with
FCC regulations.
IC
Statement.
Corded
product
This Class B
digital
apparatus
complies
with
Canadian ICES-003.
UL Testing. Your
product
is
UL tested: use it
only
with
UL
tested
devices.
For
Product
Safety, EMC
and
RF
related verbiage,
go
to
http://www.logitech
.
com/
compliance.
Compliance. For
compliance
information.
to
to
http://www.logitech.com/compliance.
5

Logi
t
ech
Alert
Vid
eo
Security
System
AC Powered Products:
Important
Safety
Information
lA)~
CAUTION ELECTRIC SHOCK
HAZARD
• Install
in
accordance
with
the
manufacturer's
instructions.
•
Do
not
use this
device
near water.
• Maintain a
minimum
distance
of
at
least 6 inches
around
device
for
sufficient
ventilation.
•
Ventilation
should
not
be
impeded
by
covering
the
ventilation
openings
with
items, such as newspapers,
table
clothes
, curtains, etc.
• Place
apparatus
in a stable
location
so
it
will
not
fall causing
product
damage
or
bodily
harm.
•
No
open
flame
sources, such
as
lighted
candles,
should
be
placed
on
or
near
the
device.
•
Do
not
install near
any
heat sources such
as
radiators,
heat
registers, stoves,
or
other
device
that
produce
heat.
•
Protect
the
power
cord
from
being
walked
on
or
pinched
particularly
at
plugs,
convenience
receptacles, and
the
point
where
they
exit
from
the
apparatus.
•
Only
use
attachments/accessories
specified
by
the
manufacturer.
• Refer all
servicing
to
qualified
service personnel. Servicing
is
required
when
the
device
has
been
damaged
in
any
way, such
as
power-supply
cord
or
plug
is
damaged,
liquid
has been spilled
or
objects
have fallen
into
the
device,
the
device
has been
exposed
to
rain
or
moisture,
does
not
operate
normally,
or
has been
dropped.
6

System
Support
Guide
WARNING: TO REDUCE THE RISK
OF
FIRE OR ELECTRIC SHOCK,
DO
NOT
EXPOSE THE ALERT
CAMERA
TO RAIN OR MOISTURE.
UL Safety: Your
product
has been UL tested. It should only
be
used with
other
UL
I
isted devices.
*
Logitech
Alert
Camera
is
intended
for
indoor
use only.
POWER
SUPPLY
WARNING
Your
pr9duct
has a
power
supply
so please
follow
these safety guidelines:
• The
power
supply
is
for
indoor
use only.
• Use
the
power
supply
that
comes
with
your
product;
do
not
use
any
other
power
supply.
•
Do
not
use
power
supply
with
any
other
product
except
the
Alert
camera.
•
Do
not
use a
damaged
power
supply
or
attempt
to
repair
one
that
is
damaged.
•
Do
not
immerse
the
power
supply
in
water
or
subject
it
to
physical abuse.
• Inspect
the
power
supply
regularly
for
damage
to
its cable, plug,
and
body.
7

L
ogitech
Al
ert
Vide
o Secu
rit
y Sy
st
em
Infrared
Illumination
LED
Notes
&
Warnings
*
During
illuminated
dark
scenes,
images
will
appear
to
be
black
and
white.
Some
materials
reflect
and
absorb
IR
light
differently
than
visible
light, so
some
illuminated
objects
may
appear
lighter
or
darker
than
expected.
The LEOs
used
in
the
camera
are "class
1"
infrared
radiating
devices
and
comply
with
the
International
Standards
EN
60825-1. Users
should
follow
the
proper
use rules below. Usage
other
than
specified
here
may
cause
hazardous
radiation
exposure.
*
Do
not
look
directly
at
the
camera
for
extended
periods
of
time.
Be
aware
that
the
beam
is
invisible
light
and
cannot
be
seen.
* Keep
it
out
of
reach
of
children.
*
Do
not
try
to
replace
or
repair
the
camera. The LED
components
are
not
user-
replaceable.
*
Wipe
the
protective
glass shield
over
the
lens
and
LEOs
periodically
with
a
clean,
soft
cloth.
*
Dispose
of
the
camera
according
to
the
laws
and
regulations
of
your
region.
For
example,
at
a
recycling
center
that
accepts
electronic
devices.
8

System
Support
Guide
Logitech Alert Product Limited
Warranty
Logitech warrants
that
your
Logitech hardware
product
shall be free
from
defects in material and
workmanship
for
one
(1)
year.
beginning
from
the
date
of
purchase. Except where prohibited
by
applicable
law,
this warranty
is
nontransferable and
is
limited
to
the original
purchaser. This warranty gives you specific legal rights, and you may also have
other
rights
that
vary
under
local laws.
Remedies
Logitech's entire liability and
your
exclusive
remedy
for any breach
of
warranty shall
be.
at
Logitech's option.
(1)
to
repair
or
replace the
hardware,
or
(2)
to
refund the price paid, provided
that
the hardware
is
returned to the
point
of
purchase
or
such
other
place
as
Logitech
may direct
with
a
copy
of
the sales receipt
or
dated
itemized receipt. Shipping and handling charges
may
apply
except where prohibited
by
applicable
law.
Logitech may,
at
its option. use
new
or
refurbished
or
used parts in
good
working
condition
to
repair
or
replace any
hardware product.
Any
replacement hardware
product
will be warranted
for
the remainder
of
the original
warranty
period
or
thirty
(30)
days, whichever
is
longer
or
for
any additional period
of
time
that
may
be
applicable in
your
jurisdiction.
This warranty does
not
cover problems
or
damage
resulting
from
(1)
accident. abuse. misapplication.
or
any unauthorized repair.
modification
or
disassembly;
(2)
improper
operation
or
maintenance, usage
not
in
accordance
with
product
instructions
or
connection
to
improper
voltage supply;
or
(3)
use
of
consumables. such
as
replacement batteries,
not
supplied
by
Logitech except where such
restriction
is
prohibited
by
applicable
law.
How
to
Obtain
Warranty
Support
Before
submitting
a
warranty
claim. we
recommend
you visit the
support
section at www.logitech.com
for
technical assistance. Valid
warranty claims are generally processed
through
the
point
of
purchase during the first
thirty
(30)
days after purchase; however. this
period
of
time
may vary
depending
on where you purchased
your
product-
please check
with
Logitech
or
the
retailer where you
purchased
your
product
for
details. Warranty claims
that
cannot
be processed
through
the
point
of
purchase and any
other
product
related questions should be addressed
directly
to
Logitech. The addresses and
customer
service
contact
information
for
Logitech can be
found
in
the
documentation
accompanying
your
product
and on the
web
at
www.logitech.com/support.
Limitation
of
Liability
LOGITECH SHALL NOT
BE
LIABLE FOR
ANY
SPECIAL, INDIRECT. INCIDENTAL
OR
CONSEQUENTIAL DAMAGES WHATSOEVER.
INCLUDING BUT NOT LIMITED
TO
LOSS
OF PROFITS. REVENUE OR DATA (WHETHER DIRECT OR INDIRECT) OR COMMERCIAL
LOSS
FOR BREACH OF
ANY
EXPRESS OR IMPLIED WARRANTY ON YOUR PRODUCT EVEN
IF
LOGITECH HAS BEEN ADVISED
OF THE POSSIBILITY OF SUCH DAMAGES. Some jurisdictions
do
not
allow the exclusion
or
limitation
of
special, indirect. incidental
or
consequential damages. so
the
above limitation
or
exclusion may
not
apply
to
you.
Duration
of
Implied Warranties
EXCEPT
TO
THE EXTENT PROHIBITED
BY
APPLICABLE LAW.
ANY
IMPLIED WARRANTY OR CONDITION OF MERCHANTABILITY
OR
FITNESS FOR A PARTICULAR PURPOSE
ON
THIS HARDWARE PRODUCT
IS
LIMITED
IN
DURATION
TO
THE DURATION OF THE
APPLICABLE LIMITED
WARRANTY
PERIOD FOR YOUR PRODUCT Some jurisdictions
do
not
allow limitations
on
how
long an implied
warranty lasts. so the above limitation may
not
apply
to
you.
National
Statutory
Rights
Consumers have legal rights
under
applicable national legislation governing the sale
of
consumer goods. Such rights are
not
affected
by
the warranties in this Limited
Warranty
.
No
Other
Warranties
No
Logitech dealer. agent.
or
employee
is
authorized
to
make any modification. extension.
or
addition
to
this warranty.
Logitech Address
Logitech Europe
SA.
ZJ
Moulin
du
Choc
D.
1122
Romanei/Morges. Switzerland
©
2012
Logitech. All rights reserved. Logitech,
the
Logitech logo, and
other
Logitech marks are
owned
by
Logitech
and
may
be
registered. All
other
trademarks are the
property
of
their respective owners. Logitech assumes no responsibility
for
any errors
that
may
appear
in
any manual
or
on this website. Information contained herein
is
subject
to
change
without
notice.
9

(~
Logitech
·
www.logitech.com
©
2012
Logitech.
All
rights
reserved.
Logitech,
the
Logitech
logo,
and
other
Logitech
marks
are
owned
by
Logitech
and
may
be
registered
. All
other
trademarks
are
the
property
of
their
respective
owners.
Logitech
assumes
no
responsibility
for
any
errors
that
may
appear
in
this
manual.
Information
contained
herein
is
subject
to
change
without
notice
.
620-004079.003

Other manuals for Alert 750n
2
Other Logitech Security System manuals