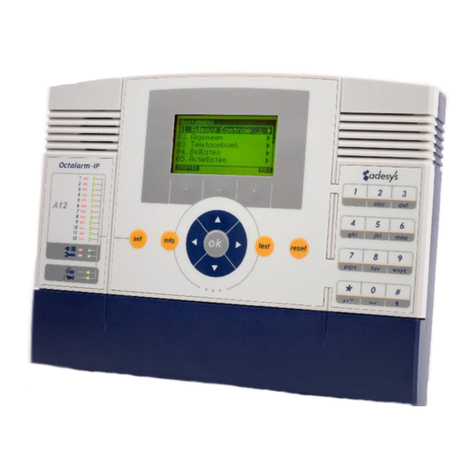
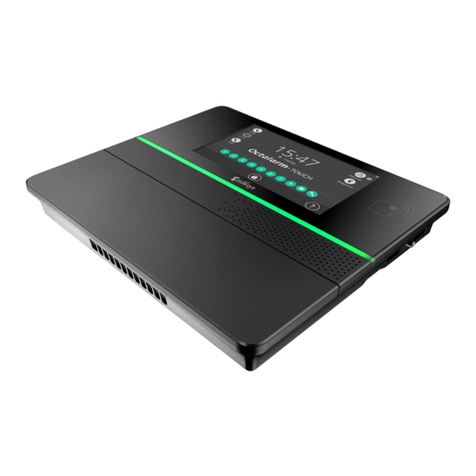
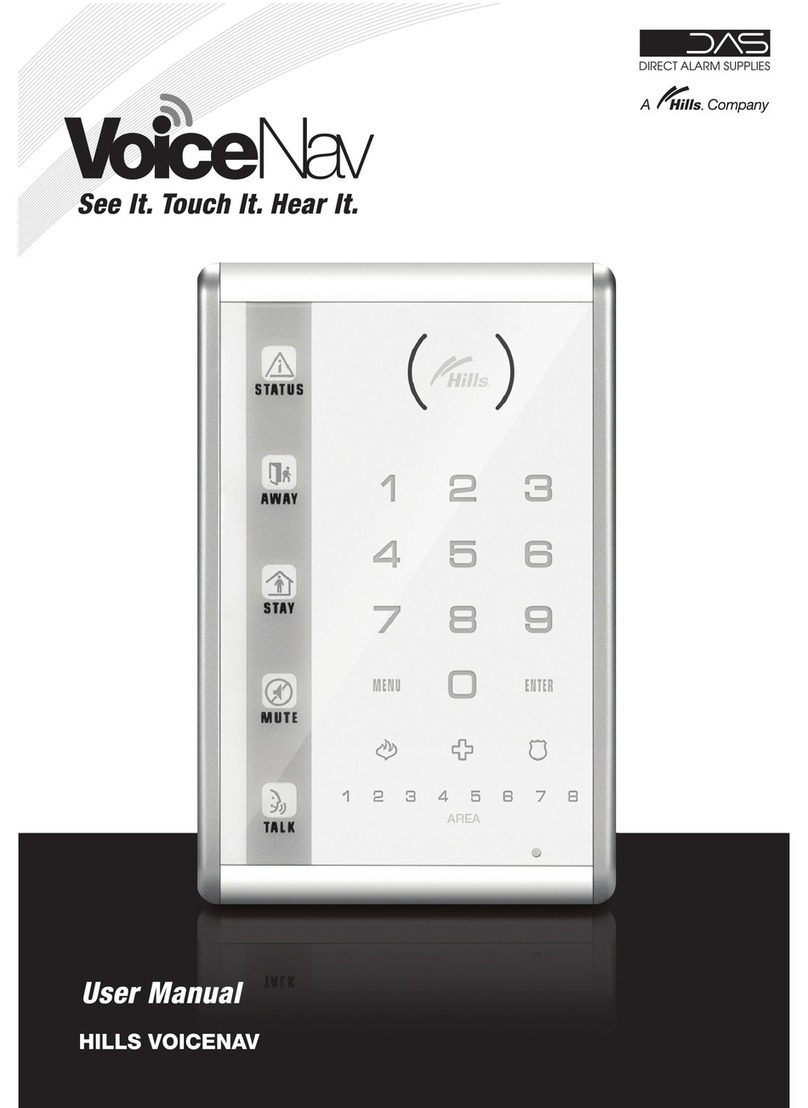
Adesys Octalarm-Touch User manual

MEASURING - ALERTING - CONNECTING
NL
Manual Octalarm-Touch
Version 09-2019

Page 2Manual Octalarm-Touch
Adesys B.V. | Wateringen
Index
1. Introduction 3
1.1. Safety rules and advice for regular testin alarms 3
1.2. Maintenance 3
1.3. Storage and transport 3
1.4. Faults and repair 3
1.5. Disposal 3
1.6. Guarantee and liaility 3
2. Installation 4
2.1. Mounting Octalarm-Touch 4
2.2. Connecting Octalarm-Touch 4
3. System properties further explained 5
3.1. Screen 5
3.2. Power 5
3.3. Batterij 5
3.4. PSTNconguration 6
3.5. GSM module 6
4. Setting up the device 6
4.1. Initial settings (onboarding) 6
4.2. Dashboard (start sreenm) 7
4.3. Changing settings 8
5. Contacts 8
5.1. Add and edit 8
5.2. Call lists 9
6. Alarms 10
6.1. Conguringinputs 10
6.1.1. Alarm settings (left side) 10
6.1.2. Link or create call list (right side) 11
6.2. Rotation of call interfaces 11
7. Settings 11
7.1. General 11
7.1.1. System information 11
7.1.2. Octalarm Connect 11
7.2. Display 12
7.2.1. System language 12
7.2.2. Time zone 12
7.2.3. Keyboard 13
7.2.4. Day schedule 13
7.2.5. Voice 13
7.3. System 13
7.3.1. Location name 13
7.3.2. Speaker 14
7.3.3. Outputs 14
7.3.4. Factory settings 14
7.3.5. Software update 14
7.4. Interfaces 15
7.4.1. GSM 15
7.4.2. PSTN 16
7.4.3. Country codes 16
7.4.4. VoIP 17
7.4.5. Email 18
7.4.6. Ethernet 19
7.4.7. Pager 19
7.4.8. Web portal 19
8. Log 20
9. Technicalspecications 21

Page 3Manual Octalarm-Touch | Back to index
Adesys B.V. | Wateringen
1. Introduction
1.1. Safety rules and advice for regular testin alarms
To use the Octalarm-Touch properly, please read and follow these safety rules:
• mount the device on a solid panel or wall;
• the Octalarm-Touch must be mounted below 2 meter height;
• protect the Octalarm-Touch against a surge by using a grounded power connection;
• do not use an outdoor ethernet connection directly, instead use a surge protected switch or router;
• use the Octalarm-Touch in an indoor setting, the device needs to be protected from direct weather
exposure;
• the operating temperature is 0°C ... 50°C. Using the Octalarm-Touch outside this temperature range
may result in damage;
• this equipment is not suitable for use in locations where children are likely to be present;
• the recycling and/or disposal will have to be done by following the guidelines stated in this quickstart.
Battery handling guide
• Only use the Adésys Octalarm-Touch type battery. There is a risk of explosion if the battery is replaced
by an incorrect type.
• Donotexposebatterytotemperatureover+85°Coranopename.
• Do not damage the unit by dropping, deforming, impacting, cutting or penetrating with a sharp object.
• Do not charge or discharge damaged battery.
• Keep the battery away from direct contact with liquids. Do not use if battery is wet or moist is visible;.
• The recycling and/or disposal will have to be done by following the guidelines stated in this quickstart.
Periodic testing of alarms
Octalarm-Touch has been developed and manufactured with great care. However, given the importance
of good alarms, it is recommended that you test the alarms regularly (e.g. once a week). This will not only
test the proper operation of the Octalarm-Touch, but also the telephone connections. An example of a
goodtestistobrieyremovethemainsplug,whichwillcauseapowerfailuretobecalledout.Seealso
chapter “5.1. Add and edit” under Contacts for more test options.
1.2. Maintenance
For an optimal use of the Octalarm-Touch the following maintenance rules must be applied:
• change the battery every 2 years;
• keep the screen clean of grease, water or dust;
• the calculated life expectancy is 10,64 year, replace the Octalarm-Touch when the life expectancy is
reached.
1.3. Storage and transport
• Storeandtransporttheproductonaatsurface.
• Theremustbenoammableorexplosivematerialsnearby.
• The temperature must be within the 0°C ... +85°C range.
• Do not store this product in a place exposed to direct sunlight.
• To ensure a correct internal clock time do not store for longer than a year.
1.4. Faults and repair
When a fault has occurred please contact Adésys service helpdesk. By opening the Octalarm-Touch the
warranty is void. Repairing the Octalarm-Touch is only allowed by Adésys appointed experts.
1.5. Disposal
The Octalarm-Touch is an electronic device. Electrical and electronic equipment should not be mixed with
general household waste. Please contact the installer or Adésys for more information.
When batteries are at their end-of-life they should be disposed separately from general household waste.
Please, dispose of batteries correctly at your local community waste collection or the recycling center.
Disposingofthebatteryinareorhotovencanresultinanexplosion.Crushingorcuttingofabattery
can also result in an explosion.
1.6. Guarantee and liaility
Every Octalarm-Touch undergoes a series of extensive tests at Adésys prior to dispatch. Adésys also gives
a two year guarantee.
The guarantee becomes invalid if:
• the defect is caused by gross negligence or incompetent installation;
• the appliance has been repaired and/or altered without Adésys’ permission;
• it is established that the serial number has been removed or damaged.

Page 4Manual Octalarm-Touch | Back to index
Adesys B.V. | Wateringen
Adésys accepts no liability whatsoever for consequential damage caused by incompetent use of and/or
malfunctions in the Octalarm-Touch.
2. Installation
2.1. Mounting Octalarm-Touch
Before connecting the Octalarm-Touch, the unit needs to be mounted on a wall or solid object. The
Octalarm-Touchcanbemountedbyrstplacingscrewsinthewallbeforeslidingthemountingholeson
the device over them. The screws must be capable of supporting at least 1360 grams.
2.2. Connecting Octalarm-Touch
To connect the Octalarm-Touch, the cables must be connected to the correct connection. These
connections can be recognized and distinguished by the connection sticker.
Connector description
1 Primary power (C5 connector)
2 PSTN Line in (RJ11)
3 PSTN phone (RJ11)
4USBportforrmwareupgrades
5 Ethernet RJ45 UTP
6 Relay contacts
7 Open-drain outputs
8 Inputs
9 RS485 data connection
10 Connector for battery
power line phone usb eth battery
p1no nc
p2no
A B
12V
1 2 3 4 5 6 7 8out
+12V
nc
1 2
relais
IO bus
RS485
gnd
power line phone usb eth battery
p1no nc
p2no
A B
12V
1 2 3 4 5 6 7 8out
+12V
nc
1 2
relais
IO bus
RS485
gnd
power line phone usb eth battery
p1no nc
p2no
A B
12V
1 2 3 4 5 6 7 8out
+12V
nc
1 2
relais
IO bus
RS485
gnd
power line phone usb eth battery
p1no nc
p2no
A B
12V
1 2 3 4 5 6 7 8out
+12V
nc
1 2
relais
IO bus
RS485
gnd
power line phone usb eth battery
p1no nc
p2no
A B
12V
1 2 3 4 5 6 7 8out
+12V
nc
1 2
relais
IO bus
RS485
gnd
power line phone usb eth battery
p1no nc
p2no
A B
12V
1 2 3 4 5 6 7 8out
+12V
nc
1 2
relais
IO bus
RS485
gnd
power line phone usb eth battery
p1no nc
p2no
A B
12V
1 2 3 4 5 6 7 8out
+12V
nc
1 2
relais
IO bus
RS485
gnd
power line phone usb eth battery
p1no nc
p2no
A B
12V
1 2 3 4 5 6 7 8out
+12V
nc
1 2
relais
IO bus
RS485
gnd
power line phone usb eth battery
p1no nc
p2no
A B
12V
1 2 3 4 5 6 7 8out
+12V
nc
1 2
relais
IO bus
RS485
gnd
power line phone usb eth battery
p1no nc
p2no
A B
12V
1 2 3 4 5 6 7 8out
+12V
nc
1 2
relais
IO bus
RS485
gnd
power line phone usb eth battery
p
1
no nc
p
2
no
A B
12V
1 2 3 4 5 6 7 8out
+12V
nc
1 2
relais
IO bus
RS485
gnd

Page 5Manual Octalarm-Touch | Back to index
Adesys B.V. | Wateringen
3. System properties further explained
3.1. Screen
Screen pictogram description
1 RFID reader location
2 Brand logo
The screen is made of glass with a touchscreen in the middle as seen in the picture above. Do not use
hard objects on the touchscreen as these will leave scratch marks and potentially couse it to become
inoperable.
To use RFID place an RFID tag within 10 mm of the RFID reader location.
3.2. Power
By placing the power cable in an S-shape around the
pull protector the power connection is protected
against unintentional removal. When replacing or
using a power supply cord not included by Adésys
the power supply cord must be according to IEC
60227-1.
3.3. Batterij
Placethebatteryonthebatteryatandsetittightly
with Velcro. Then close the connector.
Attention:
when using the wrong type of battery,
there is the possibility that this will cause damage to
it device or battery.
Battery compartiment description
1 Velco fastener
2 Battery connector location
3 Battery label
Battery label (Europe)

Page 6Manual Octalarm-Touch | Back to index
Adesys B.V. | Wateringen
3.4. PSTNconguration
There are 2 ways to connect the Octalarm-Touch to the PSTN:
• standalone;
• AdditionaltelephonedevicesonthesamePSTNline(Fax/CentralOceetc.).
The PSTN line can be connected to the Octalarm-
Touch’s RJ11 “Line In” connector. By doing so no
other device can interfere with the alarm device. In
case additional devices need to be connected to the
same PSTN line, it is very important that no other
device can occupy this line, when the Octalarm-
Touch has to call out an alarm message. Fax /
answeringmachines/centraloceequipmenthave
to be connected to the Phone (line out) connection.
When an alarm message has to be sent out, all other
PSTN devices are automatically disconnected from
thePSTNline,byswitchingotherelaycontactsto
Line Seize capability.
Caution:
VericationofLineSeizecapabilityshouldbemadeimmediatelyafterinstallation,andperiodically
thereafter, in order to ensure that this equipment can initiate a call even when other equipment
(telephone, answering system, computer modem, etc.) connected to the same line is in use.
3.5. GSM module
To use the GSM module, place a SIM-card in the GSM
module and slide the module into place.
The SIM card is placed on the bottom of the GSM
module. The module can then be pushed into the
GSM compartment until it clicks.
4. Setting up the device
4.1. Initial settings (onboarding)
Whenyouturnonthedeviceforthersttime,orafterrestoringthefactorysettings,followtheon-screen
instructions to set up your device:
1. Select the desired device language for:
• Text that is displayed on the device.
• Spoken alarm text.
See chapter “7.2.1. System language” for further information.
2. Select a region and country:
• The location you select determines the time
zone.;
See chapter “7.2.2. Time zone” for further information.
3. Select the desired keyboard.
See chapter “7.2.3. Keyboard” for further information.
4. Set the country code and any dial-out number
and/or lead digits.
See chapter “7.4.3. Country codes” for further information.
5. Change the default Octalarm name to a name that
can be used to distinguish the location.
See chapter “7.3.1. Location name” for further information.
6. Set the installer or administrator of the device:
• Completealleldsandfollowtheon-screen
instructions.
See chapter “5.1. Add and edit” under Contacts for further
information on the dierent contact roles.
Connection for antenna (SMA female).
Maximum applicable antenna gain: +8dBi

Page 7Manual Octalarm-Touch | Back to index
Adesys B.V. | Wateringen
7. optional: Activate the Octalarm Connect service.
If this fails (for example if the message ‘Portal not reachable’, ‘payment failed’ etc. is shown), use http://
portal.octalarm.com Chapter 7.1.2 contains more information on activating Octalarm Connect.
The initial setup is now completed. Pressing ‘Ready’ activates the Octalarm-Touch.
4.2. Dashboard (start sreenm)
Disabled (gray)
Active (red)
Idle (green)
Alarm status
Out of order (gray)
Malfunction (red)
In use (green)
Active (white)
Interface status
Present time
Current schedule
Log out
Contacts
Call lists
Alarms Settings Log
Types of messages on the dashboard:
1. Alarm message
Number of repetitions /
Repeat
/ Maximum number of repetitions
Date of occurance of alarm
Linked call list
Input number
and name
Waiting for...
Accepted
Busy calling...
Action
weekend
night
day
Timetable type
When you press on this message, there are two options:
• Buzzeroonly:
The buzzer is muted. When the Octalarm-Touch
does not record any activity for 10 minutes, the
buzzer will turn on again.
• Accept all alarms:
If you accept the alarm, the Octalarm-Touch
will not initiate a new alert for this alarm, until
the waiting time between repeats has expired.
More information about the waiting time can be
foundinchapter“6.1.Conguringinputs”.
(see C5) (see C6) (see C7) (see C8)

Page 8Manual Octalarm-Touch | Back to index
Adesys B.V. | Wateringen
2. Update availabe
• Press on this message to go to update menu.
• Run the new update.
The update process takes a few seconds, after which the system is restarted.
4.3. Changing settings
Contacts with the ‘Administrator’ or ‘Installer’ privilege can make changes using the ‘Change’ button. These
buttons are not visible for contacts with the ‘User’ privilege.
Adjusting settings
• On the relevant screen, press ‘Change’ (on the right, at the top or bottom of a scroll
list).
• Change the settings as desired.
• Press ‘Save’ (on the top right or at the bottom for changing a call list).
After pressing the ‘Save’ button, the changed settings are in use.
5. Contacts
5.1. Add and edit
• Click‘Add’tocreateacontactandllintheeldsbelow.
• Clickonacontactandthenclick‘Edit’toeditthecontact(seetheeldsandexplanationbelow).
Name
Enter a clear name; this name is visible in the log.
Interface language
The interface language is the language that this
contact sees after logging in; it is NOT the language
that the device uses for voice alarms.
See chapter “7.2.1. System language” for setting the alarm language.
Acceptance PIN
We recommend that you create a personal
acceptance PIN.
Log in
By placing a check mark, this contact is given the right to log in on the Octalarm-Touch. Next, you assign
an authorisation, a user name and password. You can also link a tag. The tag allows logging in without a
password.
There are 3 privileges:
1. User: view function. No changes can be made.
2. Installer: all privileges. All settings can be changed.
3. Administrator: all privileges. All settings can be changed.
The last installer or administrator cannot be changed to a user, because this would remove the possibility
to change the device settings.
Contact information
Use the ‘Add’ button to add call resources to reach this person:
• Telephone
• Email
• Pager
Aftercompletingallelds,press‘Save’intheupperrightcornertoaddthecontact.

Page 9Manual Octalarm-Touch | Back to index
Adesys B.V. | Wateringen
Test alert
It is recommended that you send a test alert to newly entered contacts or after modifying or adding the
contact information:
• Select the relevant contact.
Choose the alarm medium you want to test; there
are 4 possible status colours:
• Grey: No test alert
• Green: Test alert successful
• Blue: Test alert active
• Red: Test alert failed
• Choose the interface you want to use for the test
(GSM, SMS, VoIP, email).
The result of this test can be found in the log.
5.2. Call lists
By default, the phone numbers of new contacts are
placed in the ‘all contacts’ call list. This allows an
alarm to always alert. It is safer to make a call list that
matches your situation.
Creating a call list
• From the main screen (dashboard), go to
the contact screen.
• Press the ‘Call lists’button in the top
left.
• Press ‘Add’ to create a new call list.
• Enter a clear name. Some examples:
‘Urgent night’, Cultivation’ and
‘Technology’.
• Press ‘Add’.
• Select a contact.
• Select a call application.
• Check the acceptance time and the relevant
schedules (see the explanation below)
• If necessary, change the number of acceptances,
maximum number of attempts, and acceptance
time.
• Press ‘Save’.
Acceptance time
For Email, SMS and pager an acceptance time is used. This is the time period within which the contact can
call back or send a text message to the Octalarm-Touch.
The contact must call the mobile phone number of the Octalarm-Touch.
Day schedule: Day/night/weekend times
Here you can select according to which schedule the contact should receive an alert. If there is an alarm
while no contacts are on duty, a local alarm will be issued, until the next schedule starts. Weekends are
from Friday evening to Monday morning.
Number of acceptances
Multipleacceptancesareusedforveryurgentalarmsorifyouwanttoreceiveanoticationforevery
alarm.Foranotication,itisimportantthatthecheckmarkfortheacceptancetimeisremoved.

Page 10Manual Octalarm-Touch | Back to index
Adesys B.V. | Wateringen
6. Alarms
Time between repetitions
Number of repetitions
Weekend active
Night active
Day active
Call schedule
Active (red)
Idle (green)
Disabled (gray)
Alarm status
Teporarily disable this optionLinked call listName alarm and input number
System alarms
6.1. Conguringinputs
• In the navigation, select the alarm.
• Press ‘Change’.
On the left, the alarm settings are shown, and on
the right, a call list can be linked or created.
6.1.1. Alarm settings (left side)
In use: Enabled
By default, an alarm is enabled. If an alarm input will
not be used for an extended time, it is best to disable
it by removing the check mark.
Name
The name of an input is used in the log. Use a name that clearly indicates what the alarm is protecting.
The ‘Copy’ button is used to copy the name to the alarm text.
Alarm text
The alarm text is the text used in the alarm messages and in voice calls.
When you press the ‘Play’ button the Octalarm-Touch device speaks the alarm text. If the spoken text is
not clear, it is best to enter the alarm text phonetically.
Normal contact
Here you can set whether the alarm is open (Normally Open) or closed (Normally Closed) when at rest.
Message: When to raise the alarm
Here you can specify when this alarm must be initiated. For non-critical alarms you only want to receive on
weekdays, you can uncheck ‘‘At night’ and ‘During weekends’.
Delay before active
‘Delay before active’ is the number of seconds before an alarm will initiate the alarm procedure. By
default, it is set to 5 seconds. To prevent false alarms, some alarms may need to be set to a longer delay.
The maximum number of seconds is 3600 (=1 hour).
Delay after recover
‘Delay after recover’ is the number of seconds before an alarm is stopped. By default, it is set to 2 seconds.
Continue after recover
By default ‘Continue after recover’ is disabled. If ‘Complete list’ is checked and an alarm is recovered, the
Octalarm-Touch will continue to call until the alarm is accepted.
Repeat after acceptance
When a contact has entered the correct PIN or if the call list is complete, the alarm is accepted. The
Octalarm-Touch then runs the alarm procedure with the number of repetitions entered.

Page 11Manual Octalarm-Touch | Back to index
Adesys B.V. | Wateringen
Waiting time between repetitions
Between the number of repetitions the Octalarm-Touch waits the number of minutes you enter here.
Buzzer
Bydefault,thebuzzerisenabled.Ifyouuncheckthe‘Onuponalarm’eld,thebuzzer(andanyexternal
buzzer) will no longer be used for this alarm.
6.1.2. Link or create call list (right side)
• Select a call list by pressing the double arrows.
• Select the desired call list, or select ‘New...’.
• After selecting the desired call list, select ‘Save’
• After selecting ‘New...’ Select ‘Create’
• See chapter “5.2. Call lists” from the bullet ‘Enter a clear name’.
• Press ‘Save’ at the bottom.
6.2. Rotation of call interfaces
The Octalarm-Touch automatically rotates its interfaces when sending
out alarms. This allows the system to check if all interaces are still
working.
For example: After starting, when there is an alarm, the system
starts dialling out via GSM. After this call has been made, the system
automatically changes the order and for the next alarm the system will
use another communication interface.
7. Settings
7.1. General
7.1.1. System information
UnderSysteminformation,youcanndall
information for the Octalarm-Touch you may need
for maintenance of the Octalarm-Touch or when
contacting the help desk.
For the help desk you need the serial number and
the pairing code. The pairing code is a security code
that changes. There is therefore no point in making a
note of it.
7.1.2. Octalarm Connect
If you did not select Octalarm Connect during the onboarding, you can still activate it via the alarm device
or via the portal.
Activating Octalarm Connect
1. via the alarm dialler
• Go to ‘settings’.
• In the navigation, scroll to ‘Octalarm Connect’.
• Press ‘Add’.
• Enter the customer’s Email address.
The customer will now receive an activation email. Ask the customer to activate their subscription via the activation email.
• Enter the customer’s company details and VAT number.
• Pay via credit card.
The SIM card and VoIP calling are now active.

Page 12Manual Octalarm-Touch | Back to index
Adesys B.V. | Wateringen
2. Via the portal (https://portal.octalarm.com/)
• Using a web browser, go to portal.octalarm.
com.
• Create a company.
• Add a device by pressing the plus sign or press
‘Add device’.
• Press ‘Add’ next to ‘Subscribe to Octalarm
Connect’.
• Pressing ‘Add’ in the information window will
take you to Account | Octalarm Connect.
• In the Octalarm Connect window, you can
read and accept the terms, and then start the
checkout process.
• Follow the payment instructions.
The SIM card and VoIP/SIP calling are now active.
Why subscribe to Connect*?
* Octalarm Connect only works in Europe.
1. GSM and VoIP calling included; does not involve
any unexpected post-call costs.
2. Norewallinssues(VPN).
3. No manual email settings (SMTP).
4. Risk migration provided by the 24/7 secured dual
Adésys servers.
7.2. Display
7.2.1. System language
The system language is the language spoken and used in the alarm response. When you change the
systemlanguage,textwillbespokeninadierentlanguage.
Changing the System language
• Go to ‘Settings’.
• In the navigation, scroll to ‘system language’.
• Press ‘Change’.
• Selectthelanguageandpresstheag.
• Press ‘Save’.
Please note that the alarm texts will require extra
attention. These do not change automatically. See
chapter “6. Alarms” for information on changing
the alarm texts. It also contains information on
how to check what the texts sound like in the other
language.
7.2.2. Time zone
Ifyouwanttouseadierenttimezone,youcan
change it by changing the zone in the settings. The
time zone is implemented immediately. ‘Disable
temporarily’ and the log will automatically change
with the changed time zone.
Changing the time zone
• Go to ‘Settings’.
• In the navigation, scroll to ‘Time zone’.
• Press ‘Change’.
• Select the correct zone.
• Press ‘Save’.

Page 13Manual Octalarm-Touch | Back to index
Adesys B.V. | Wateringen
7.2.3. Keyboard
ItispossibletouseadierentkeyboardlayoutfortheOctalarm-Touch.Youcanchoosebetween:
• The international QWERTY layout (default).
• The QWERTZ layout for German-speaking and
Eastern European customers.
• The AZERTY layout for Belgian and French
customers.
Changing the keyboard
• Go to ‘Settings’.
• In the navigation, scroll to ‘Keyboard’.
• Press ‘Change’.
• Select the layout you want to use (see the
explanation above).
• Press ‘Save’.
7.2.4. Day schedule
If your company does not use a standard 9-5 working day, it is possible to adjust the day schedule by
changing the start time of the day and night schedule. The weekend starts on Friday after the day shift
and ends on Monday at the start of the day shift.
Changing the time
• Go to ‘Settings’.
• In the navigation, scroll to ‘Day schedule’.
• Press ‘Change’.
• Change the start of the day schedule as required.
• Change the start of the night schedule as required.
• Press ‘Save’.
It is not possible to change the weekend.
7.2.5. Voice
The voice used by the Octalarm-Touch can be set. If the used voice is not clear enough, another voice can
be set.
Changing the voice
• Go to ‘Settings’.
• In the navigation, scroll to ‘Voice’.
• Press ‘Change’.
• Sellect a voice.
• Press the Play button to test.
• Press ‘Save’.
Availablevoicesdierfromonelanguagetoanother.
7.3. System
7.3.1. Location name
The location name is important for quick and clear
alarm handling. The location name is used in the
alarm call, in the alarm message, and in the portal.
Changing the location name
• Go to ‘Settings’.
• In the navigation, scroll to ‘Location name’.
• Press ‘Change’.
• Press the location name.
• Change the name and press ‘Ready’.
• Press ‘Save’.

Page 14Manual Octalarm-Touch | Back to index
Adesys B.V. | Wateringen
7.3.2. Speaker
This window is used to adjust the speaker volume. With a minimum of 20% the general volume cannot be
muted completely. If you want to completely mute the system volume, you can set this using chapter “6.1.
Conguringinputs”.
If the buzzer is disabled at an input connection, the
external buzzer will not sound the alarm either.
Adjusting the speaker
• Go to ‘Settings’.
• In de navigation, scroll to ‘Speaker’.
• Press ‘Change’.
• Move the bar to the desired volume.
• Press ‘Save’.
7.3.3. Outputs
The Octalarm-Touch has two open drain output
connectors and two relay output connectors. These
can be set to function as:
• External buzzer
The output connector will respond in the same
way as the Octalarm-Touch buzzer. This means
that when the Octalarm-Touch buzzer is enabled,
the output connector is powered.
• Externalashlight
When the alarm is active, the output connector is
powered.
Overview of output connectors
Relay contact Max load 30VDC / 2A, 30VAC / 1A (resistive load)
Open drain output Max switching voltage 42V / 300mA
Max load current 350mA
Output voltage 12V / 120mA
Protection Short circuit, thermal
Changing output connectiors
• Go to ‘Settings’.
• In the navigation, scroll to ‘Outputs’.
• Press ‘Change’.
• Next, for both the relay outputs and for open collector, where applicable, select None | External buzzer
| Flash light
• Press ‘Save’.
7.3.4. Factory settings
The installer and the administrator can clear all settings of the Octalarm-Touch. This feature is useful
when, for example, the Octalarm-Touch is taken to another location. The log will not be deleted when the
system is reset to the factory settings.
Restoring the factory settings
• Go to ‘Settings’.
• In the navigation, scroll to ‘Factory settings’.
• Press ‘Restore’.
7.3.5. Software update
The software for the Octalarm-Touch is updated
continually. This may be to improve usage, to resolve
problems, or to add new options. It is important that
the Octalarm-Touch has the latest software version.
You can check if your Octalarm-Touch is up-to-date
under ‘Settings’ | ‘Software update’. This is also
whereyoucanndthereleasenotes,whichcontain
the changes in each version in the version history.

Page 15Manual Octalarm-Touch | Back to index
Adesys B.V. | Wateringen
Running a software update
• TheOctalarm-Touchautomaticallydownloadsthelatestsoftwareversionandnotiesyouonthestart
screen when the download is complete.
• Under ‘settings’ | ‘Software update’, a ‘Software update’ button is now visible.
• Press this button to start the update process, which takes about 20 seconds.
• The update process is completed with a reboot of the device.
After an update, it is recommended to run a test alert. See chapter “5.1. Add and edit” under Contacts for
information on how to run this test alert.
7.4. Interfaces
7.4.1. GSM
The Octalarm-Touch is supplied with a GSM module with a SIM card. For more information about the GSM
module, see chapter “3.5. GSM module”. The SIM card is disabled by default and can be activated during
onboarding. With this process the end user enables the Octalarm Connect service.
If you did not activate this service during the onboarding, you can still do so via the settings. You can read
more about this in chapter “7.1.2. Octalarm Connect”.
Using your own SIM card
If you do not plan to use your own SIM card, you can skip this section.
It is possible to use your own SIM card. Use the following procedure to do this:
• Remove the GSM module.
• Replace the SIM card with the SIM card of your
provider.
• Insert the GSM module and restart the system.
• Go to ‘Settings’.
• In navigation, scroll to ‘GSM’.
• Set the PIN and APN information by pressing
‘Change’.
These settings depend on your provider. For this information, please
refer to your system administrator and/or provider. You can use the
following form for this.
• Press ‘Save’.
GSM settings
GSM Component Enabled | Disabled*
* delete as appropriate. We strongly recommend
leaving the component enabled to ensure redundancy.
PIN PIN code Enabled | Disabled*
* delete as appropriate. If enabled, enter 4-8 digits
4-8 digit code
Mobile internet Data Enabled | Disabled**
* delete as appropriate
Network mode Auto
Set APN PDP type IPv4 | IPv6 | IPv4 & IPv6*
* delete as appropriate
APN type Statisch | Dynamisch*
* delete as appropriate
APN name
User name
Password
Authentication type PAP | CHAP | AUTO*
* delete as appropriate

Page 16Manual Octalarm-Touch | Back to index
Adesys B.V. | Wateringen
7.4.2. PSTN
Use the PSTN connection of the alarm device to connect an analogue line. Use of an ATA (Analogue
Telephone Adapter) is not recommended. Please note that if you do connect an ATA, the line voltage may
give an incorrect value. PSTN is enabled by default.
Turning PSTN o
• Go to ‘settings’.
• In the navigation, scroll to ‘PSTN’.
• Press ‘Change’.
• Uncheck ‘Component enabled’.
• Press ‘save’.
Changing settings
Whenworkingatalocationthatusesadiallingprex
or when no line voltage is used, it may be necessary
to adjust the settings:
• Go to ‘Settings’.
• In navigation, scroll to ‘PSTN’.
• Set the information by pressing ‘Change’.
These settings depend on your provider. For this information, please refer to your system administrator and/or provider. You can use the
following form for this.
• Press ‘Save’.
PSTN settings
PSTN settings Component Enabled | Disabled*
* delete as appropriate. We recommend to leave the component
enabled to ensure redundancy.
Diallingprex
Data Enabled | Disabled*
* delete as appropriate
Wait for dial tone Enabled | Disabled*
* delete as appropriate
Check line Enabled | Disabled*
* delete as appropriate
7.4.3. Country codes
We recommend using the international number format when entering a contact. For example: A Dutch
mobile number is entered as +31612345678, where +31 is the country code.
If the international format is not used or if a PSTN connection is used that does not support this format, it
is important that the correct country code is set. The Octalarm-Touch contains a list of default codes per
country. The country code can also be set manually.
Setting country code manually
• Go to ‘Settings’.
• In the navigation, scroll to ‘Country codes’.
• Set the data by pressing ‘Modify’.
You can use the following form for this.
• Press ‘Save’.
Country code settings
Default by country Country number 31
Dial out number 00
Leadingprex 0

Page 17Manual Octalarm-Touch | Back to index
Adesys B.V. | Wateringen
7.4.4. VoIP
Voice-over IP is a way to make a call via the Internet. The Octalarm-Touch uses the SIP protocol for this.
To use the 24/7 monitored Adésys servers, you must activate Octalarm Connect via the included SIM card.
For more information on this, see chapter “7.1.2. Octalarm Connect”.
Using your own SIP server
If you do not plan to use your own SIP server, you can skip this section.
To use your own SIP server, complete the following
steps:
• Go to ‘Settings’.
• In navigation, scroll to ‘VoIP’.
• Set the data by pressing ‘Modify’ and selecting
‘Own VoIP server’.
These settings depend on your provider. For this information, please
refer to your system administrator and/or provider. You can use the
following form for this.
• Press ‘Save’.
VoIP settings
VoIP Component Enabled | Disabled*
* delete as appropriate. We strongly recommend leaving the
component enabled to ensure redundancy.
Account Domain sip:
User name
SIP address sip:
Password
Caller ID
Advanced
RTP Start port sequence
End port sequence
RTP transport encryption Disabled | Optional | Mandatory*
* delete as appropriate
Signal encryption Disabled | TLS mandatory*
* delete as appropriate
NAT (Network Address
Translation) ICE Enabled | Disabled*
* delete as appropriate
STUN Enabled | Disabled*
* delete as appropriate. If enabled, Press ‘Add’ and note down STUN
server URL:
STUN server (URL)
TURN Enabled | Disabled*
* delete as appropriate. If enabled, press‘Add’and note down TURN
server details:
URL
User name
Password
Transport TCP | TLS | UDP*
* delete as appropriate
Network Port
Proxy ingeschakeld | uitgeschakeld*
* delete as appropriate. If enabled, press‘Add’and note down Proxy
server:
Proxy server
Transport protocol TCP | TLS | UDP*
* delete as appropriate

Page 18Manual Octalarm-Touch | Back to index
Adesys B.V. | Wateringen
7.4.5. Email
When using Octalarm-Connect, email is set to Octalarm-Connect by default. For this purpose, the system
uses the mobile Internet and the Ethernet connection.
Using your own SMTP server
If you do not plan to use your own SMTP server, you can skip this section.
To use your own SMTP server, complete the
following steps:
• Go to ‘Settings’.
• In navigation, scroll to ‘Email’.
• Set the data by pressing ‘Change’ and selecting
‘Own SMTP server’.
These settings depend on your provider. For this information, please
refer to your system administrator and/or provider. You can use the
following form for this.
• Press ‘Save’.
Email settings
Email Component Enabled | Disabled*
* delete as appropriate. We strongly recommend leaving the
component enabled to ensure redundancy.
SMTP server Own SMTP server
SMTP settings SMTP server address
SSL Enabled | Disabled*
* delete as appropriate
SMTP port
Authentication Enabled | Disabled*
* delete as appropriate
User name
Password

Page 19Manual Octalarm-Touch | Back to index
Adesys B.V. | Wateringen
7.4.6. Ethernet
Ethernet is set to DHCP by default. If an Ethernet cable is connected, an IP address is automatically
assigned to the Octalarm-Touch.
Using a static IP
If you do not plan to set a static IP address, you can skip this section.
To use a static IP address, you can set DHCP to manual in the ‘Ethernet’ screen. If you then enter an IP
address, the Octalarm-Touch will only use that IP address. If this does not allow the Octalarm-Touch to
connect correctly, it is important to check this IP
address, or you may have to use DHCP.
To set a static IP address, complete the following
steps:
• Go to ‘Settings’.
• In navigation, scroll to ‘Ethernet’.
• Press ‘Change’.
• Set DHCP to ‘Manual’ and enter the data.
These settings depend on your provider. For this information, please
refer to your system administrator and/or provider. You can use the
following form for this.
• Press ‘Save’.
Ethernet settings
Ethernet settings IP-addresa /
Gateway
DNS1
DNS2
Advanced
Enabled Duplex speed Auto Negotiation|
Half Duplex 10Mbps | Full Duplex 10Mbps |
Half Duplex 100Mbps | Full Duplex 100Mbps |
Full Duplex 1000Mbps |*
* delete as appropriate
7.4.7. Pager
Pager is an old technique, available in three variants:
• Tone-only
• Numeric messages
• Text messages
The Octalarm-Touch supports the text messages variant and uses a SOAP link for this. This SOAP link
works by sending messages to the pager via the Internet. The paging function will not work without an
internet connection.
Enabling/disabling paging
• Go to ‘Settings’.
• In navigation, scroll to ‘Pager’.
• Press ‘Change’.
• Check or uncheck ‘Component enabled’.
• Press ‘Save’.
7.4.8. Web portal
By default, the web portal is enabled. This allows the device to receive updates automatically. We strongly
advise you to leave the web portal enabled.
If the web portal is disabled, we cannot guarantee that you have up-to-date software, and the device
functions may be restricted as a result. In addition, the SIP/VoIP and Email portion of Octalarm Connect
may not work correctly.
Enebling/Disabling web portal
• Go to ‘Settings’.
• In navigation, scroll to ‘Web portal’.
• Press ‘Change’.
• Check or uncheck ‘Component enabled’.
• Press ‘Save’.

Page 20Manual Octalarm-Touch | Back to index
Adesys B.V. | Wateringen
8. Log
Call list message
Repeat message
Alarm message
Notifications
Accepted (orange)
Rectified (green)
Active (red)
Alarm status
Date | time
notification
The log lists all activities in chronological order. This creates a complete log, which is necessary for
monitoring after malfunctions. The log contains several messages.
Alarm status change
• Active.
• Hersteld.
• Geaccepteerd.
The types of alarms
• Input 1-8
• Network failure.
• Battery errors.
Alarm message
The alarm message tells you which interface attempted to reach which contact and at what time. The
interfacesyoumayndinthelogare:
• PSTN
• GSM
• SMS
• VoIP
• Pager
• Email
Call list failed
If an alarm procedure has been run the maximum
number of attempts without acceptance, the call out
to the relevant call list has failed and the Octalarm-
Touch will repeat the alarm after the set waiting
time, as outlined in chapter “6.1.1. Alarm settings (left
side)”.
Other manuals for Octalarm-Touch
3
Table of contents
Other Adesys Security System manuals
