Adronic V55N User manual
Adronic V55N
For A Better Inspection Tool
User Manual
Please read the user manual carefully
before using this system.
For A Better Inspection Tool
1
1
2
3
4
4
6
12
13
13
14
1
Content
1. Introduction
2. Main Device and Accessory
3. Scope Function
4. Monitor Key Instruction
5. Operation Instruction
5-1 Video Mode
5-2 Play Mode
6. Application
7. Specification
8. Attention
9. FAQ
1
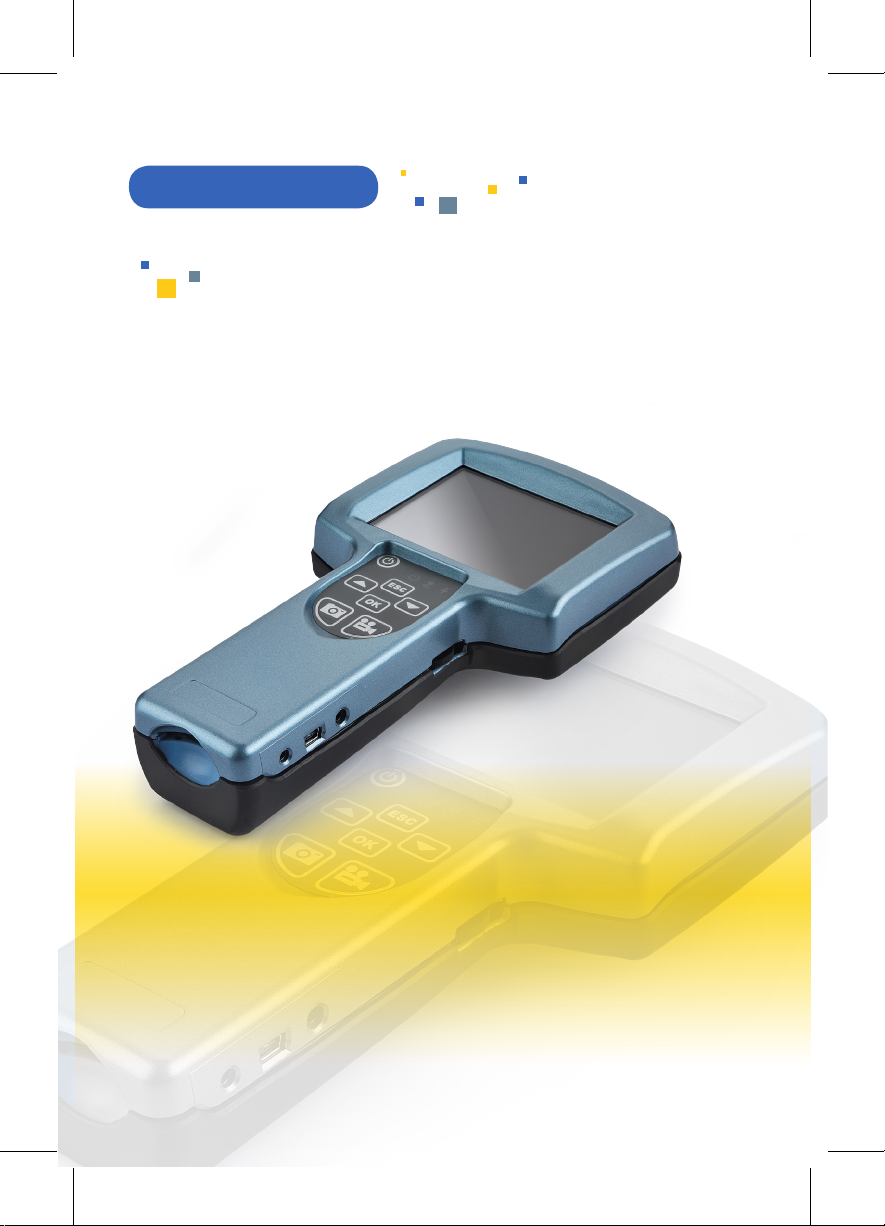
adroVision V55N
Manual
Content
1. Introduction
Adronic V55N borescope is mainly used for inspection, repairing and maintenance.
Within 3.5
”
digital LCD monitor, this unit could connect with a variety of adroVision
inspecting probe to display the high quality image. The screen is clear and stable, also
could manually adjust the image size and illumination. Adronic V55N enable to support
Snapshot, Audio and Video recording to enhance the detection performance.
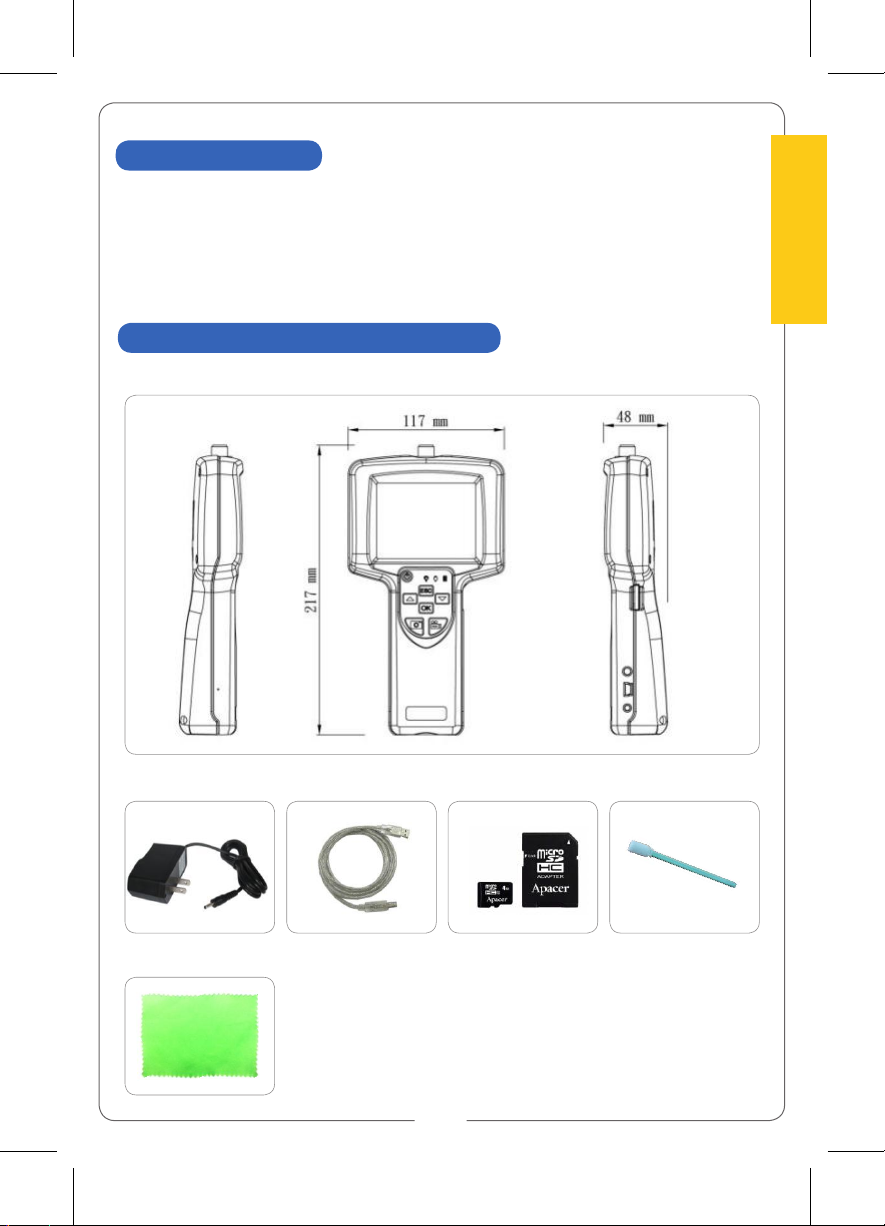
2. Main Device and Accessories
1. Adronic V55N
2. Power Charger 3. USB Cable 4. 4GB SD Card 5. Q-Tip
6. Cleaning Cloth
2
For A Better Inspection Tool
3
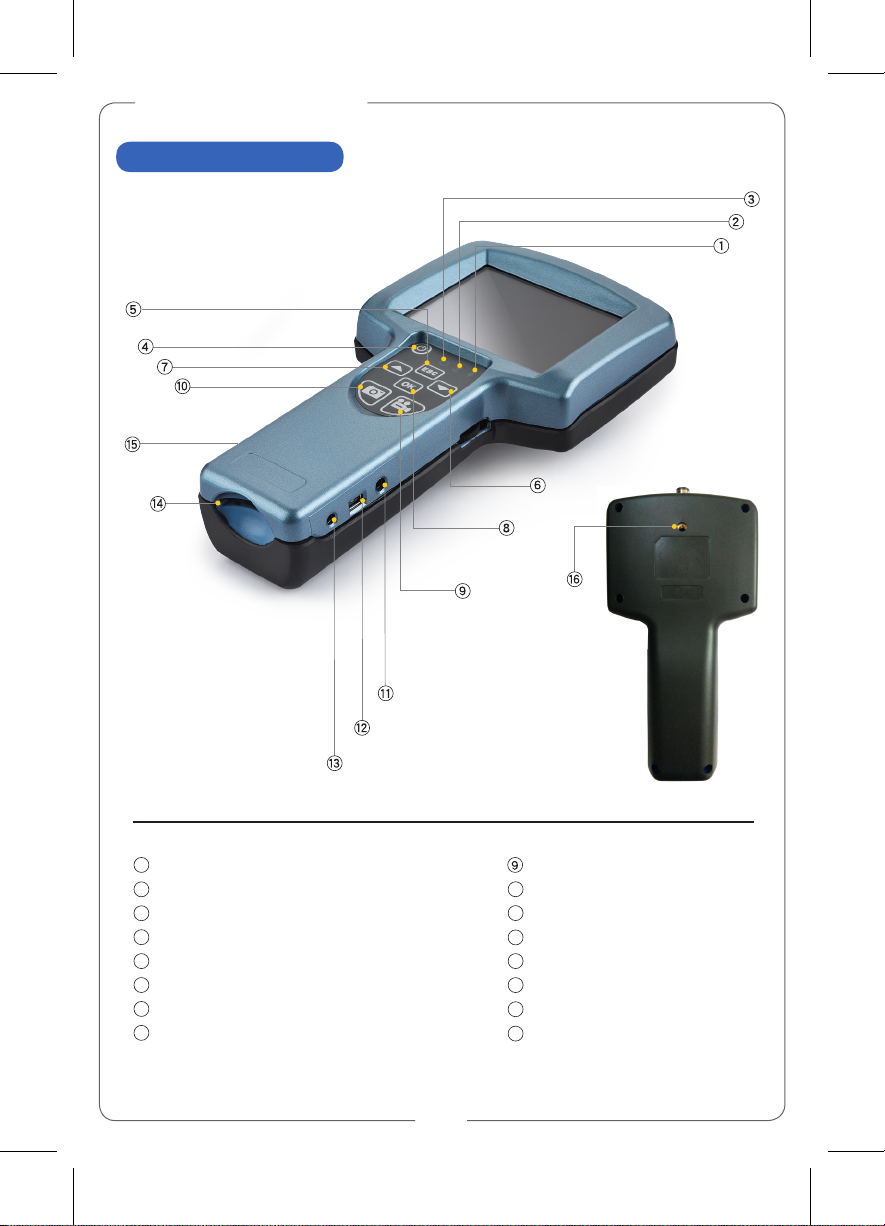
3. Scope Function
Indication Light:Charging
Indication Light:DCIN
Indication Light:Power/SD Card Detection Light
Power On/Off
ESC Key
Downward Key
Upward Key
OK Key
1
2
3
4
5
6
7
8
10
11
12
13
14
15
16
3. Scope Function
Video Recording Key
Snapshot Key
TV-OUT
USB
DCIN
SD CARD Slot
RESET Key
1/4”-20 pitch machine screw stud
for supporting camera stand

2
3
adroVision V55N
Manual
4. Monitor Key Instruction
Button Video Mode Play Mode Setup Mode
Zoom in
(Magnification cycle
from small to large)
X1
、
X2
、
X4
、
X6
、
X8
Play/ Pause Video
Zoom in
Move selection to
the upper one
Zoom out
(Magnification cycle
from large to small)
Stop Video
Zoom out
Move selection to
the lower one
Enter Setup menu Enter Setup menu Execute the
selected function
Check the photo or
Video saved in SD card
(Enter Play Mode)
Back to Video Mode Exit the menu
Take photo Check backward
photo or Video
Left key
(Display model
version for 2 sec.)
Start / Stop Video
recording
Check forward photo
or Video Right key
Video Recording Key
Snapshot Key
TV-OUT
USB
DCIN
SD CARD Slot
RESET Key
1/4”-20 pitch machine screw stud
for supporting camera stand

4
For A Better Inspection Tool
5
5. Operating Instruction
5 - 1 Video Mode
(Preview Mode)
•
Video Menu:
Press key to enter
;
Press to exit ;
Press / key to select item
.
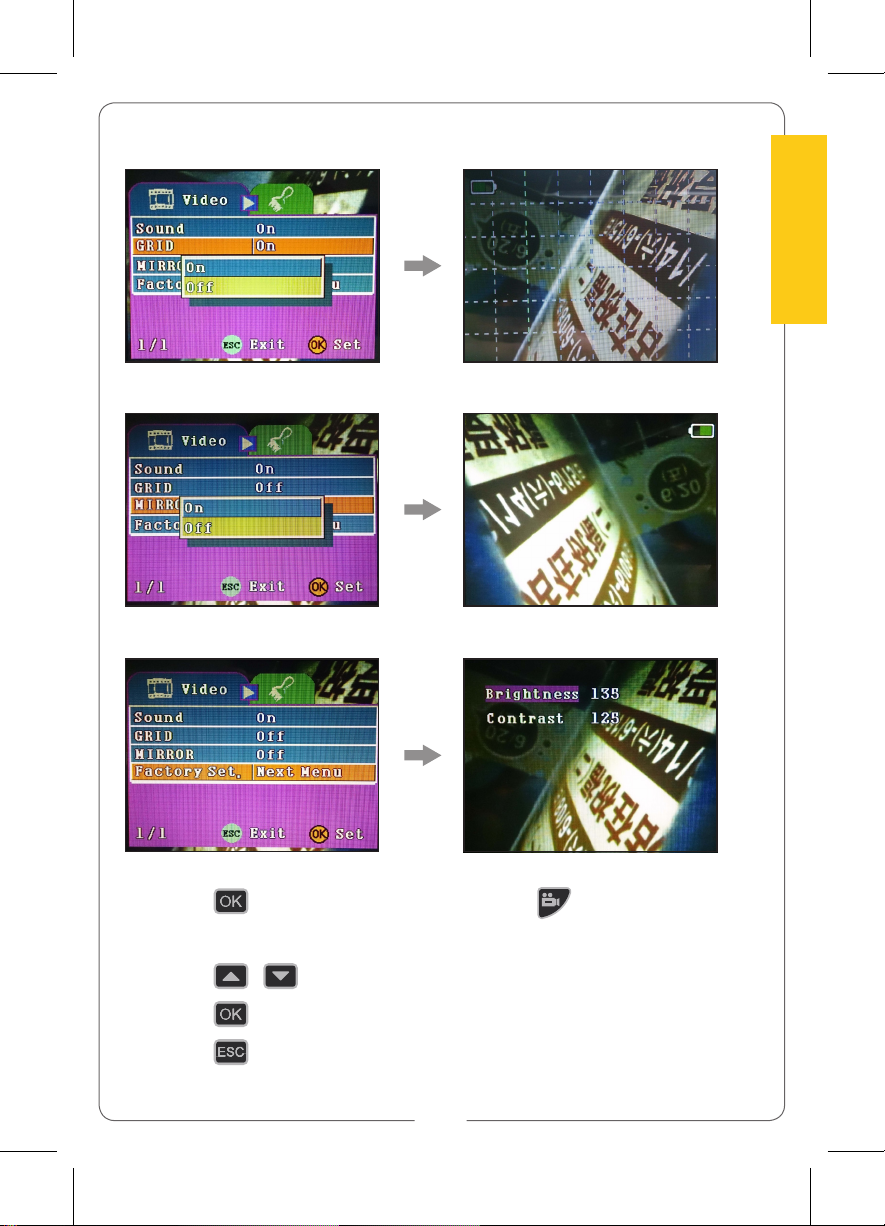
Selecting Item Function Remark
Sound 1.On 2. Off
Grid 1.On 2. Off
Mirror 1.On 2. Off
Factory Set 1.Brightness 2. Contrast Fine adjust image color
(Video Mode) Sound
4
5
adroVision V55N
Manual
1) Press key to
execute setting
, then press key
to select
“Brightness”
or
“Contrast”
.
2) Press / key to
adjust the value of parameter
.
3) Press key to
conrm setting
.
4) Press key to
exit setting
.
(Video Mode) Grid
(Video Mode) Mirror
(Video Mode) Factory Set

6
For A Better Inspection Tool
7
5. Operating Instruction
5 - 2 Play Mode
Under
“
Video Mode
”→
Press key to enter
“File List Preview”
→
Press / key to
select the file →
Press key to
check the file
.
1) Press key:
Zoom in.
2) Press key:
Zoom out.
3) Press key:
Browse backward photo or Video.
4) Press key:
Browse forward photo or Video.
(
Photo File *.jpg
)
6
7
adroVision V55N
Manual
1) Press key:
Play video
.
2) Press key again
: Pause video
.
3) Press key:
Stop video
.
4) Press key:
Speed up playback
.
5) Press key:
Rewind function.
6) Press
key:
Forward function.
•Play Menu:
Press key
→
Enter
“File List Preview”
→
Under
“
Preview Mode
”
to
select any photo or Video
→
Press key twice
→
Enter
“Play Menu”
.
(
Video File *.avi
)
Selecting Item Function Remark
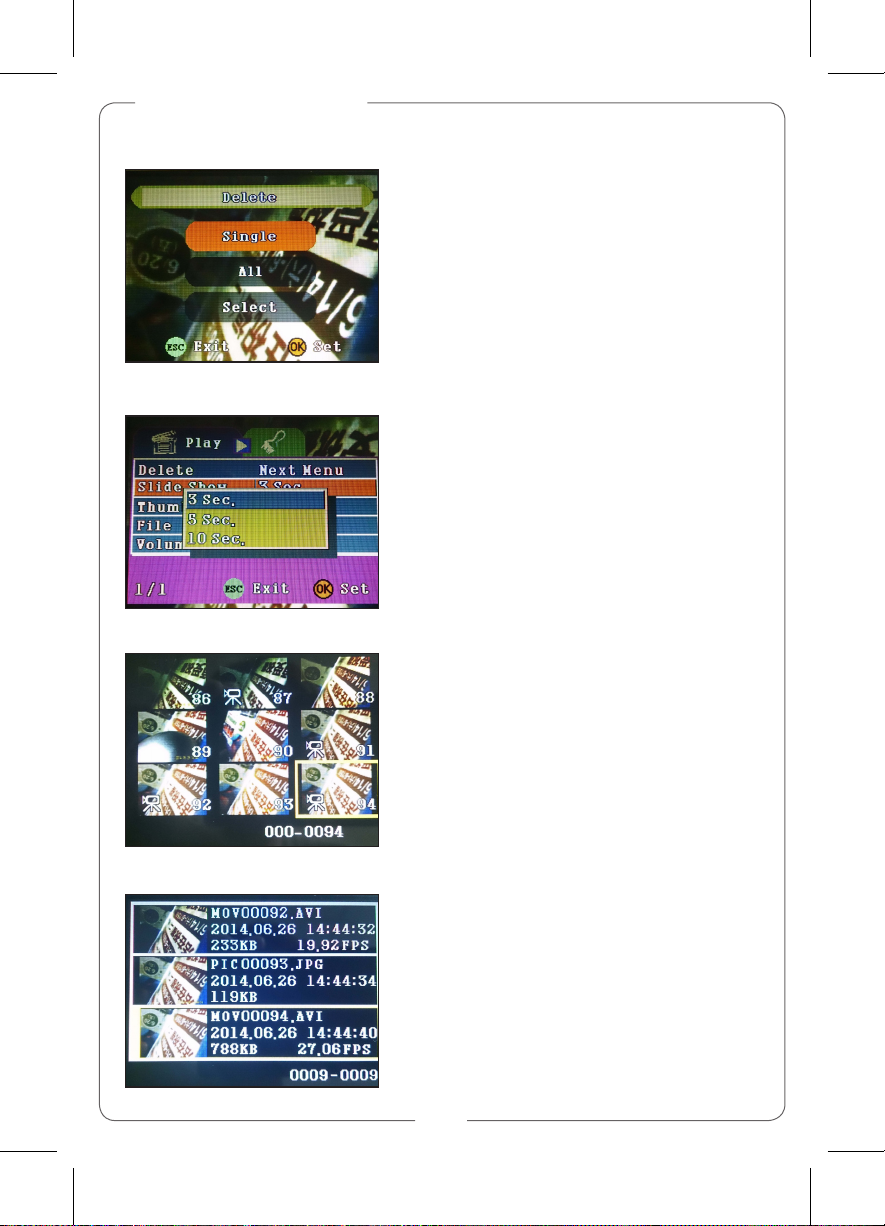
Delete 1.Single 2. All 3. Select
Slide Show 1.3 Sec. 2. 5 Sec. 3. 10 Sec.
This function could be
executed when the file
number is more than 2.
Thumbnail 1.Execute 2. Cancel
File List 1.Execute 2. Cancel
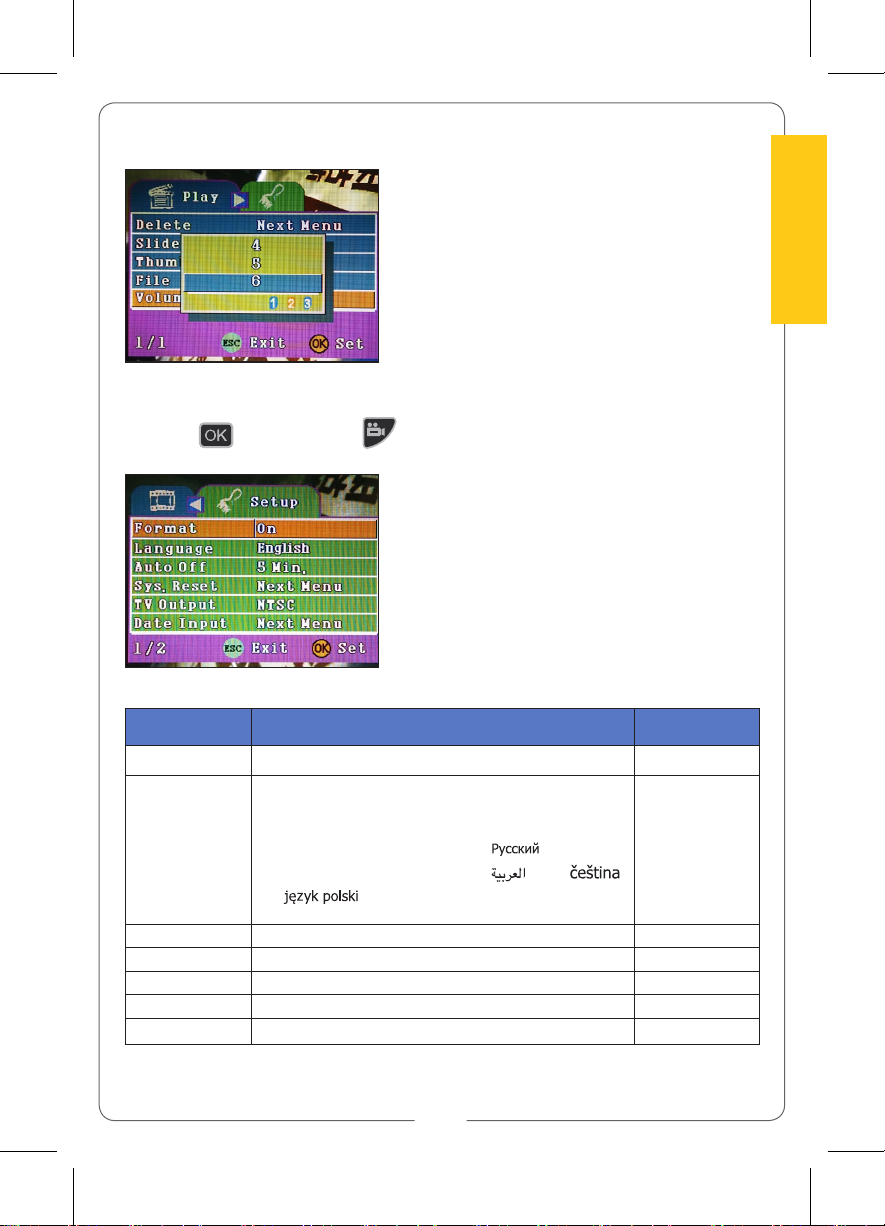
Volume 1~8 Default: 8
Under
“
Video Mode
”→
Press key to enter
“File List Preview”
→
Press / key to
select the file →
Press key to
check the file
.
8
For A Better Inspection Tool
9
(Play Mode) Delete
(Play Mode) Slide Show
(Play Mode) Thumbnail
(Play Mode) File List Image Details
8
9
adroVision V55N
Manual
(Play Mode) Volume
•Setup Menu:
Press key then press
to enter
“Setup Menu”
.
Selecting Item Function Default
Format 1.Cancel 2. Execute Menu
Language
1. English, 2. Français, 3. Deutsch, 4. Italiano,
5. Españo, 6. Português, 7.
繁體中文
,
8.
简体中文
, 9.
日本語
, 10. ,
11.
한국어
, 12. Nederlands, 13. , 14. ,
15. , 16. Türkçe, 17. Hrvatski
English
Auto Off 1.5 Min 2. 10 Min 3. 60 Min 4. Off 5 Min.
Sys. Reset 1.Cancel 2. Execute Menu
TV Output 1.NTSC 2.PAL NTSC
Date Input 1.Off 2. Set Menu
USB 1.PC-Cam 2. Disk Driver Disk Driver

10
For A Better Inspection Tool
11
(Setup Menu) Format
(Setup Menu) Language
(Setup Menu) Auto Off
(Setup Menu) Sys. Reset

10
11
adroVision V55N
Manual
(Setup Menu) TV Output
(Setup Menu) Date Input
(Setup Menu) USB
1) Press / key to select
“Date Format”
2) Press / to select the adjusted item, then
press / to set the
Date/Hour/Minute/Second
.
3) Press key to
confirm setting and exit
.
•MSD Setting
1) Enter
“
Setup Menu
”
, and select
“USB”
, then select
“Disk Drive”
.
2) Insert micro-USB (Installing the USB driver in advance).

12
For A Better Inspection Tool
13
OD1.9-10mm
Fiber Optical
Rigid Scope
OD3.9-16mm
Standard Probe
OD3.9-6.5mm 90˚
Rigid Probe
OD3.9-16mm
Articulation Probe
Pen Type
OD20/25mm
Fiber Glass Scope
OD40/50mm
Fiber Glass Scope
6. Application
Adronic V55N Application

12
13
adroVision V55N
Manual
Model Name
V55N
Display
3.5
”
digital LCD display
Resolution
Full HQ 720 x 640 pixels
Still Image Storage
Format
JPEG
Video Recording
Format
MPEG4/AVI
Operation Language
17 languages are available
(1 English 2 French 3 German 4 Italian 5 Spanish 6. Portuguese 7.
Traditional Chinese 8. Simplified Chinese 9 Japanese 10. Russian
11 Korean 12. Dutch 13. Arabic 14 Czech language 15. Polish 16.
Turkish 17. Croatian)
USB Port
1.1/2.0
Saving Device
Include 4GB SD card (Support SD card up to 32GB)
Working Temperature
-20
°
C to 60
°
C
Power Charger
100-240V AC in/ 5.5V DC out
Battery
Built-in rechargeable Li-ion battery
7. Specification
8. Attention
•Do not take the SD card out while taking photos or videos. That would cause data
lost or machine damage. A 80X or higher speed SD card is recommend for better
image performance. The system can support SD/SDHC cards up to 32GB.
•Do not use the machine under an environment near inflammable or hazardous
substances.
•Do not use corrosive liquid to clean the machine cover.
•Do not disassemble the machine by self, it may cause electric shock or damage to
the machine.
•Do not touch the insertion tube lens since high temperature could be produced
after operating for a period of time.
•Beware of coiling the insertion tube for storage. Do not coil or bend it too hard
over 150 degree.
•Please use the accessories as the product attached. Otherwise this may result in
considerable damage to the machine.
•Do not expose the product to direct sunlight.
•Please store the product in a dry, well-ventilated place.
14
For A Better Inspection Tool
9. FAQ
Power on failure
Could not take photo and video recording
Recharge the battery by power charger.
No inspection image
Check the probe connection.
Be sure to plug tube well and restart the unit.
System crash
Please take a needle-like object made with
insulating material to insert into the reset hole
to reset the system.
Could not take photo and video
recording
SD card is not placed accurately.
SD card malfunctioned.
Model Name:
Customer Name:
Telephone Number:
Address:
E-mail:
Purchase Date: / / (DD/MM/YYYY)
Dealer's Name:
Dealer's Telephone Number:
Dealer's Address:
Customer Information

14
Customer Information

Table of contents


