Managing IP Phones Adding New Phones
6AOSUG0002-1A Copyright © 2013 ADTRAN, Inc. 5
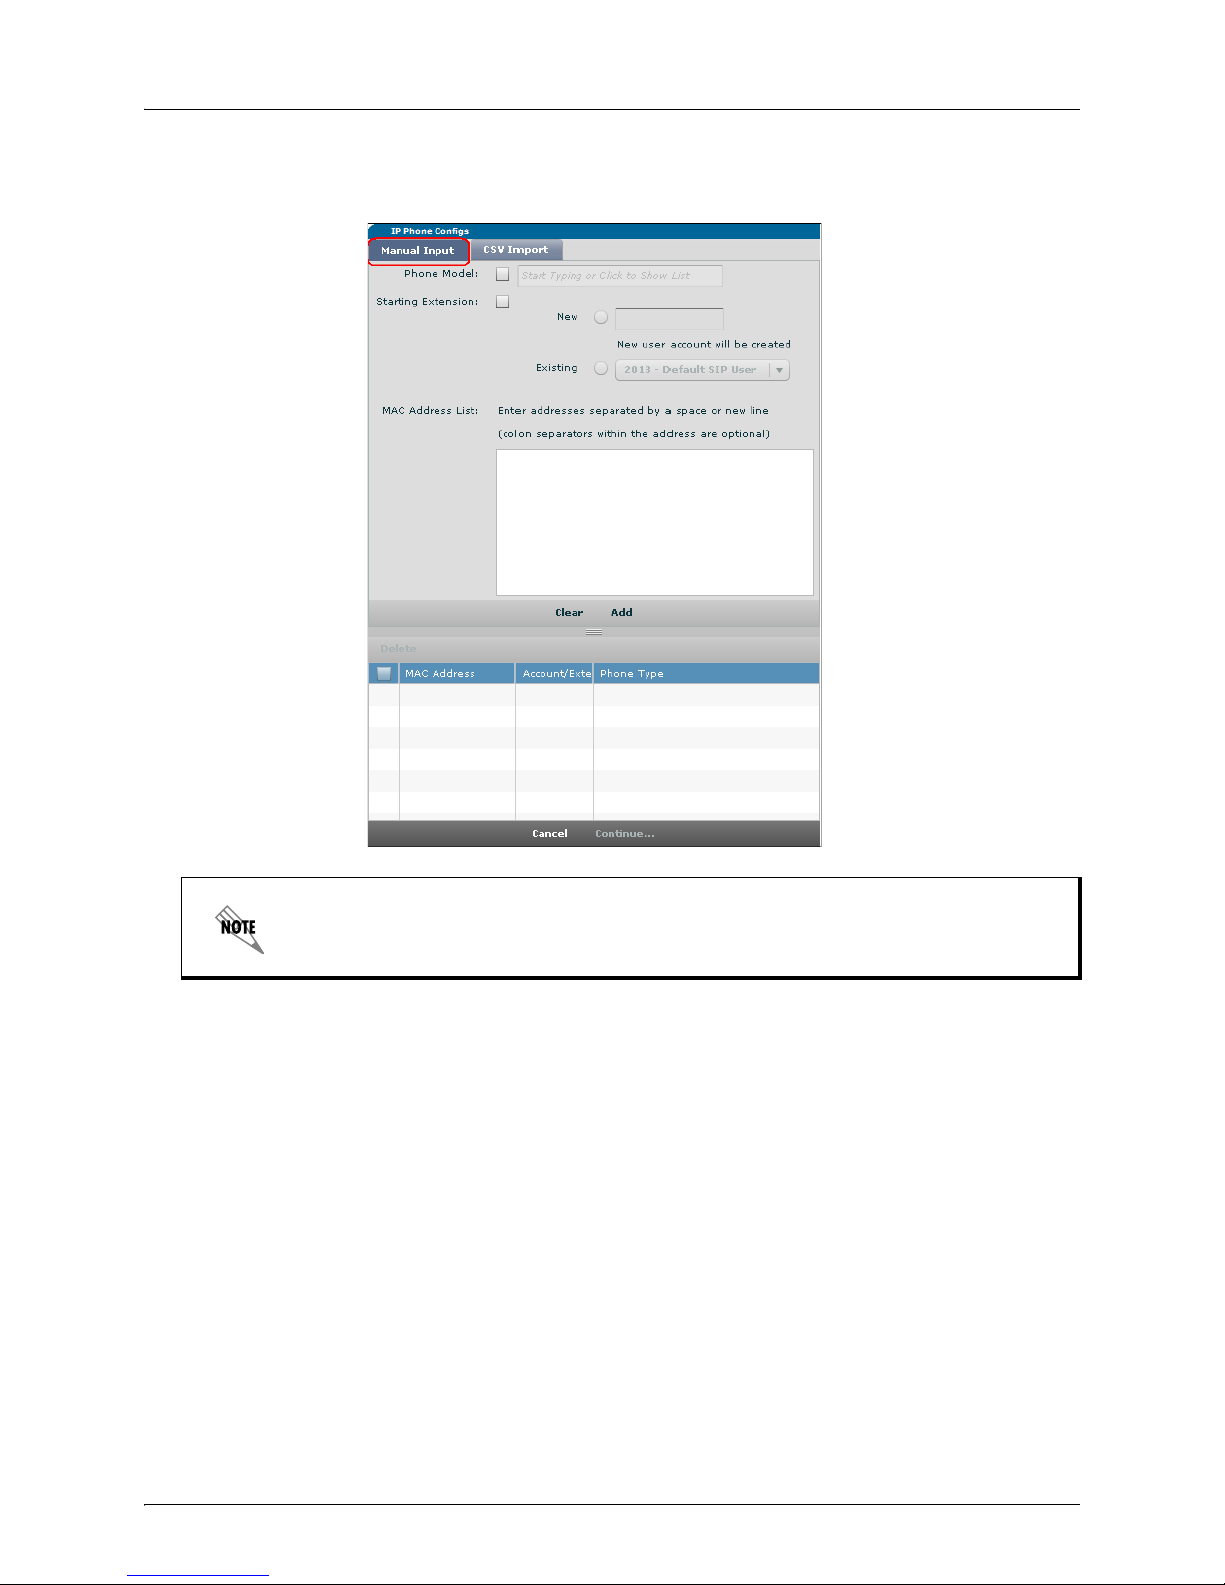
2. Select each field and enter the corresponding phone/user information. See Table 2 for a description of
the phone/user information.
3. Select the Next button at the bottom of the menu to continue with the wizard.
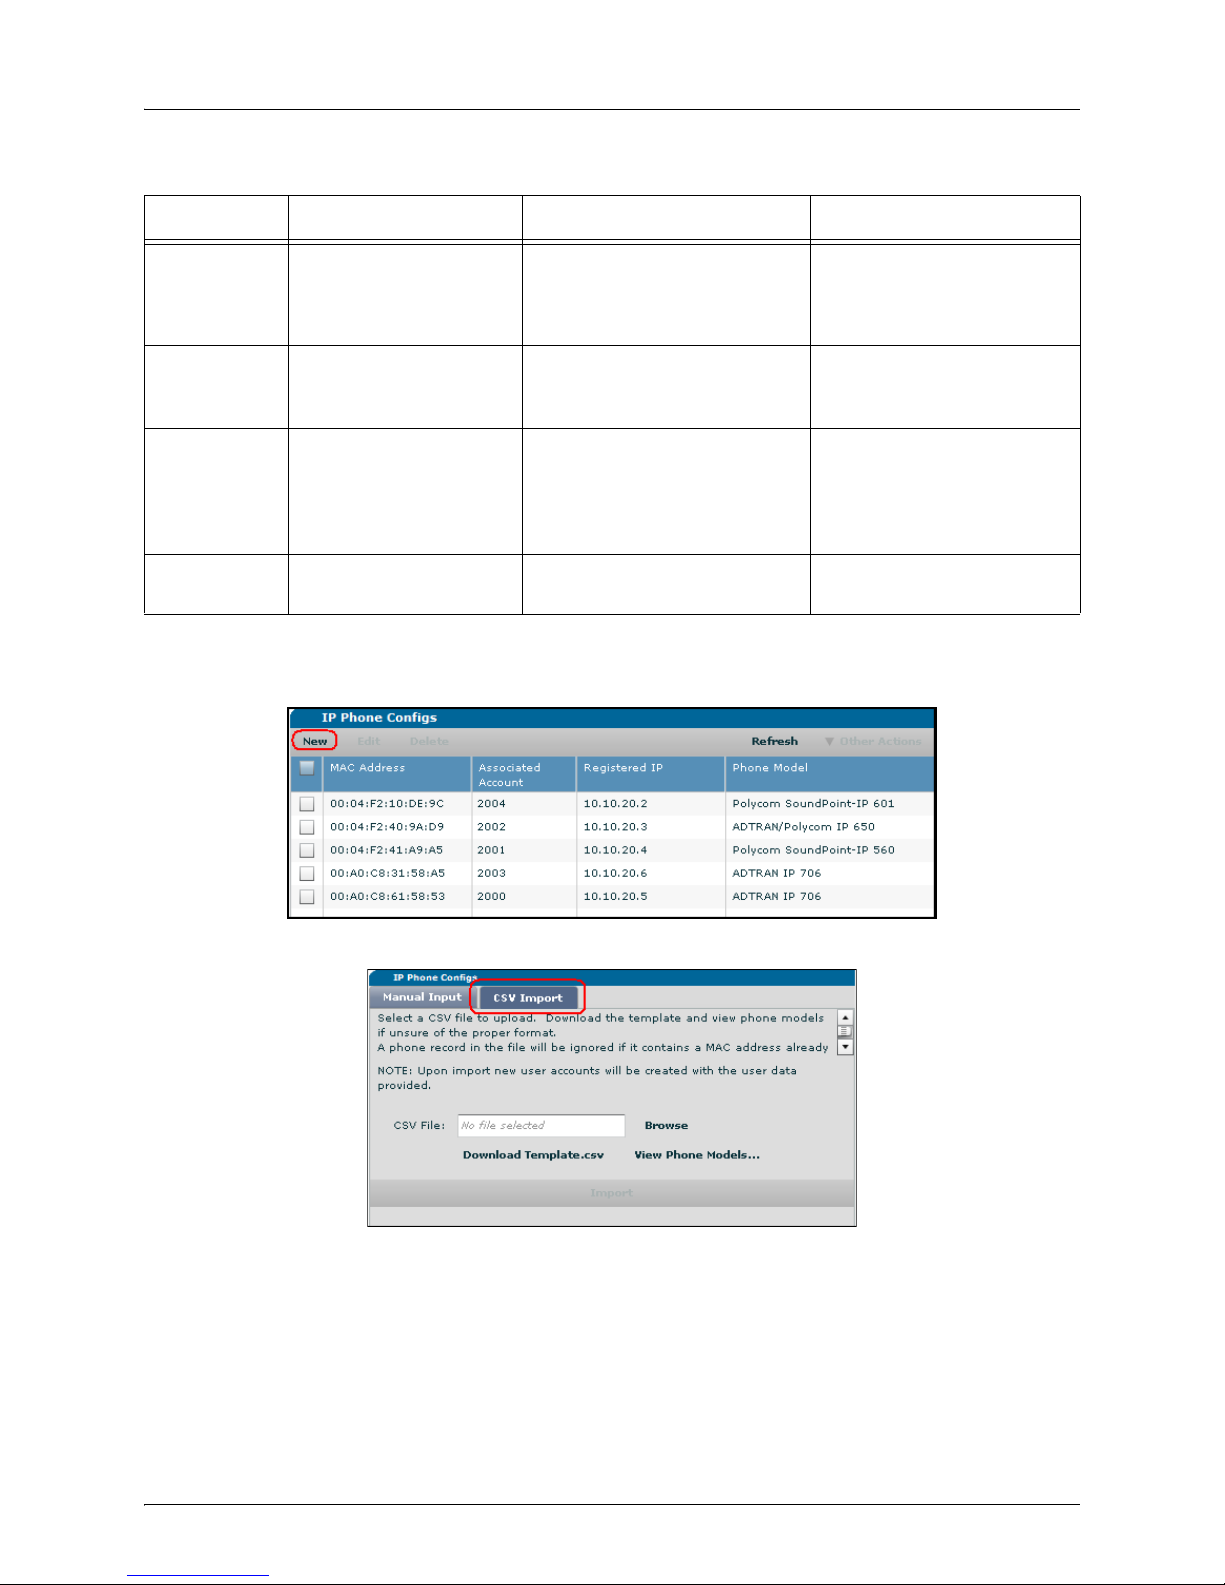
CSV Import (IP Phone Configs Menu)
Creating phone configurations with a CSV template saves time by allowing you to upload phone
configuration information for multiple users at once. Download the Tem p l ate.csv file from the CSV
Import menu to use as a template for your file. The following table describes the fields of the CSV file.
Table 2. CSV File Field Descriptions
Field Description Function Format
MAC Address
(Available on
the phone or
its packaging)
A phone’s unique MAC
address
Allows the phone with this MAC
address to register with the
system. A CSV file without the
MAC Address and Phone Model
columns will import only the user
account information and will not
display an entry in the IP Phone
Config table.
Hexadecimal digits only;
should be 12 digits in length;
must be uniquely assigned.
NOTE: To import user
information without specifying
a MAC address, you must
delete the MAC Address and
Phone Model columns from
the CSV file.
Extension A new, unique phone
extension for this entry
Creates a new voice user with
this value; allows a phone to
register with the system using
this value
Numeric digits
Phone Model
(Available on
the phone or
its packaging)
The type of phone
associated with this entry
Tells the system how many line
keys the phone has that are
usable
Select View Phone Models on
the CSV Import tab to see the
available models. Models must
be entered exactly as shown in
the list.
First Name First name of the person
who will use this phone
Helps to label the phone and
provides caller ID information
Only printable ASCII
characters
Last Name Last name of the person
who will use this phone
Helps to label the phone and
provides caller ID information
Only printable ASCII
characters
SIP
Authentication
Password
Password used for the IP
phone to register with the
system
Provides the system with a way
for validating the IP phone
Alphanumeric characters, from
1 to 16 characters in length
DID Direct inward dial (DID) for
the system to direct to this
extension
Allows DIDs to be mapped to an
extension
Numeric digits
Email Address Email address to
associate with this
extension
Used for voice-to-email
capabilities
A valid email address