manuals.online logo
Brands
  1. Home
  2. •
  3. Brands
  4. •
  5. Cisco
  6. •
  7. IP Phone
  8. •
  9. Cisco 6941 - Unified IP Phone Slimline VoIP Guide

Cisco 6941 - Unified IP Phone Slimline VoIP Guide

Guide to using your CISCO IP 6941 phone at Imperial College
Issued on 30.06.2015 Page 1 of 7
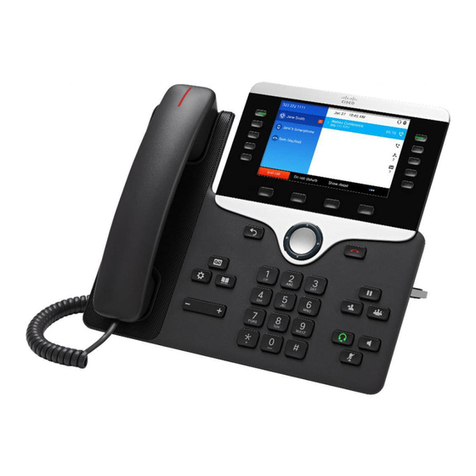
Cisco IP Phone 6941 Cisco IP 6941 Phone Screen
1.
Header
–
Displays date, time and extension
number
2.
Programmable feature button
-
Shows feature
button programming depending on your
confi
guration
3.
Primary extension details and other phone
information
–
Displays the extension label and
other phone information such as placed calls,
missed calls, placed calls, and phone menu
listings
4.
Programmable feature button
–
same as 2
5.
Softkey labels
–
Dis
plays softkeys for available
features or actions.
Guide to using your CISCO IP 6941 phone at Imperial College
Issued on 30.06.2015 Page 2 of 7
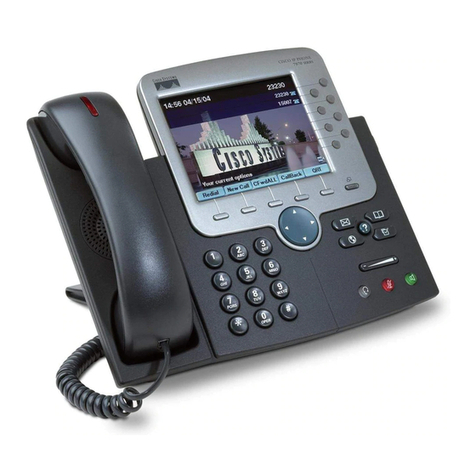
1. Handset light strip –Indicates incoming
call (flashing red) or new voice mail message
(steady red).
2. Phone Screen –Shows information about
your phone
3. Programmable feature buttons –
Depending on how your system administrator
sets up the phone, programmable feature
buttons provide access to:
Phone lines
Speed-dial numbers
Call features
Buttons illuminate to indicate status:
Green, steady –Active call
Green, flashing –Held call
Amber, flashing –Incoming call
Red, steady –Shared line in use
Red, flashing –Shared line on hold
4. Softkey buttons –Enables softkey options
on your phone
5. Transfer button –Transfers a call
6. Conference button –Creates a conference
call
7. Hold button –Places an active call on hold
8. Navigation bar and Select button –
Navigation bar allows you to scroll through menus
and highlight items. When phone is on hook,
displays calls from your Placed Call listing (up
arrow) or speed dials (down arrow).
The Select button (button with square) allows
you to select a highlighted item.
9. Headset button –Toggles the headset on or
off. When headset is on, the button is lit.
10. Speakerphone button –Toggles the two way
speakerphone on or off. When speakerphone is
on, button is lit.
11. Keypad –Allows you to dial numbers, enter
letters and select menu items (by entering the
item number).
12. Mute button –Toggles the microphone on or
off. When microphone is muted, button is lit.
13. Volume button –Controls the handset,
headset, and speakerphone volume (off hook)
and ringer volume (on hook)
14. Messages button –Auto-dials your voice
messaging system
15. Applications button –Opens/ closes the
Application menu. Use it to access call history,
user preferences, phone settings and phone
model information.
16. Contacts button –Open/ closes the Directories
menu. Uses it to access personal and corporate
directories.
17. Handset/ Receiver –Phone handset/ receiver
To transfer a call
Announce to the caller you are going to transfer their call
1. Press the Transfer button . The call will go on hold.
2. Dial the extension you wish to transfer to
3. Announce the call. (To return to the caller, if there is no answer, or
the extension you require is busy. Press the End Call softkey and
then press Resume softkey).
4. Press the Transfer button or the Transfer softkey
5. Replace the receiver
To make an inquiry call
Whilst you are having a telephone conversation
1. Press the Transfer button . The person you were talking to
will be put on hold.
2.
Dial the required extension number and speak to your colleague
3.
To toggle between the calls press the Swap softkey. Your
colleague will go on hold and vice versa each time you press Swap.
Guide to using your CISCO IP 6941 phone at Imperial College
Issued on 30.06.2015 Page 3 of 7
4.
To return to the caller once your colleague has answered your
inquiry, or if there is no answer, or the extension you require is
busy. If your colleague does not hang up, press the End Call
softkey and then press the Resume softkey.
To put a call on hold
Announce to the caller you are going to them on hold
1. Press Hold button
2.
To retrieve the call press the Resume softkey
To Pick Up a call for a colleagues
extension
1.
Lift the receiver
2.
Press the PickUp softkey
Please note: Your extensions must be in a Pick Up Group to use this feature - To create a Pick Up Group or to change the
member extensions, please contact your telecoms rep.
To Divert a call Press the Divert softkey to send an active, ringing or held call to your
voicemail or to a predetermined extension (set up by your system
administrator.
Redial [Redial] Press the Redial softkey to redial the last telephone number you dialed.
How to use/ pick up a Monitor/ Pick On a Cisco IP 6941 Phone you can have the spare Programmable
Up button feature buttons (see 3 on the diagram above) programmed up as a
Monitor/ Pick Up button which illuminates (and rings if requested).
To request a Monitor/ Pick Up button please contact your Telecoms
Rep. who will need to place an order for a software change.
To answer a Monitor/ Pick Up call
When the Programmable feature button is flashing amber (and ringing if
set up to ring) 1.
Lift the receiver
2. Press the feature button which represents your colleague
To transfer a Monitor/ Pick Up call
Announce to the caller you are going to transfer their call
1. Press the Transfer button. The call will go on hold.
2. Press the feature button which represents your
colleague. If the button is lit up red it means your colleague is on
the phone, so if you transfer the call it will go to their voicemail if
they have voicemail.
3. Announce the call. (To return to the caller, if there is no answer, or
the extension you require is busy. Press End Call softkey and then
press Resume softkey).
4. Press the Transfer button
5. Replace the receiver
Guide to using your CISCO IP 6941 phone at Imperial College
Issued on 30.06.2015 Page 4 of 7
Directories Service currently not available
Call History Call History allows you to view information about the last 150 calls on
your phone. A call icon is displayed to indicate the type of call:
•Received
•Placed
•Missed
View Call History
1. Press the Applications button
2. Select Call History. (Use the Navigation bar and button to scroll and
select.)
3. Press the Exit softkey to exit
Filter Call History
1. Press the Applications button
2. Select Call History. (Use the Navigation bar and button to scroll and
select.)
3. To sort by missed calls, press the Missed softkey
4. To view all calls in the Call History List, press the All Calls softkey
5. Press the Exit softkey to exit
Dial From Call History
1. Press the Applications button
2. Select Call History. (Use the Navigation bar and button to scroll and
select.)
3. Navigate to relevant call using Navigation bar
4. Press the Select button (centre of Navigation bar with square on it)
or press the softkey Call
Please note: For Missed Calls and Received Calls you must prefix the external
call entry you chose to dial (by pressing EditDial) with a 9 or 7 otherwise the
first digit the system will dial is 0 which will take you to Voice Activated
Assistant (VAA) and then the Imperial College operator. Also, it is not possible
to ring telephone numbers which start 44/ 54 as these are incoming calls
across campuses.
Clear Call History
1. Press the Applications button
2. Select Call History. (Use the Navigation bar and button to scroll and
select.)
3. Press the More softkey
4. Press the Clear softkey
Guide to using your CISCO IP 6941 phone at Imperial College
Issued on 30.06.2015 Page 5 of 7
Delete Call Record From Call History
1. Press the Applications button
2. Select Call History. (Use the Navigation bar and button to scroll and select.)
3. Press the More softkey twice
4. Press the Del Call softkey
To Make a Conference Call
1. Lift receiver/ press the Speaker button if you want the call to
be on two way loud speaker.
2. Dial the first conference delegate. If it is an external call remember
to prefix your call with a ‘9’.
3. Press Conference button and the first call will go on hold.
4. Dial the second delegate and let them answer.
5. Press or the Conf softkey and all calls will be connected
6. Repeat steps 3 to 6 until you have all the delegates in the call
Please note:
•The destination to which you can conference in is limited by the class
of service the extension has.
•The max number is 8
Messages If you do not have Unified Messaging when you press , nothing
will happen. To request Unified Messaging please contact your
Telecoms Rep.
To access Unified Messenger
1. Press
2. The system will then say “You are connected to Microsoft
Exchange, “Name” (if you have already set up your voicemail box )
please enter your pin then press the # key”
3. Enter your pin and press the # key
4. The system will then say “You have X new voice message and X
new email message. Main menu to listen to your voicemail
messages say voicemail ...” you just then follow the prompts.
How to change your ring tone
1. Press Applications button
2. Select Preferences. (Use the Navigation bar and button to scroll
and select.)
3. Select Ringtone
4. Select a ringtone
5. Press the Play softkey to hear a sample of the ringer tune
6. Press the Set softkey to select the ringtone
7. Press the Apply softkey to confirm your selection or press the
Cancel softkey to go back to the ringtone screen
Guide to using your CISCO IP 6941 phone at Imperial College
Issued on 30.06.2015 Page 6 of 7
8. Press the softkey to return to the Preferences screen
How to change you the volume of
the handset, headset or ringer To adjust the handset/ headset volume
1. Lift the receiver/ press the so the button is lit up
2. Use the Volume + and - button until the volume is at
an acceptable level
3. Hang up receiver/ / press the so the button is not lit up
To adjust the ringer volume
Use the black up and down buttons nearest to where you put the
handset receiver until the volume is at an acceptable level
How to change the contrast of the screen
1. Press Applications button
2. Select Preferences. (Use the Navigation bar and button to scroll and
select.)
3. Select Contrast
4. Set the contrast to the level you prefer. (Use the Navigation bar’s
up and down buttons to adjust the contrast.)
5. Press the Save softkey
Do Not Disturb [DND]
To Activate the Do Not Disturb (i.e. stop the phone ringing)
1. Press DND
Screen will change and display DND is on
To Deactivate the Do Not Disturb (i.e. allow the phone to ring)
1. Press DND
Screen will change and display DND is off briefly before returning to the
default screen
For the College
Dial 0 (Externally (020)7 589 5111)
Switchboard
All internal calls for the Imperial College switchboard (by dialing 0) will be
answered by the Interactive Voice Response (IVR). To get to the operator when
the IVR answers, press 0 again or say Operator.
Guide to using your CISCO IP 6941 phone at Imperial College
Issued on 30.06.2015 Page 7 of 7
To log a fault
Dial 49049 (Externally (020)7 59 49049)
Please have the following details ready:
•Extension which has fault
•Socket Reference
•Location of the faulty Extension (i.e. room number, building
and campus )
•Alternative Contact number
To place a telecom works/ mobile/
Please contact your telecom rep.
Blackberry/ Billing change order

Other manuals for 6941 - Unified IP Phone Slimline VoIP

5

Other Cisco IP Phone manuals

Cisco SPA525G - Small Business Pro IP Phone VoIP User manual

Cisco

Cisco SPA525G - Small Business Pro IP Phone VoIP User manual

Cisco 7841 Reference guide

Cisco

Cisco 7841 Reference guide

Cisco SPA50 Series User manual

Cisco

Cisco SPA50 Series User manual

Cisco 7941G - Unified IP Phone VoIP User manual

Cisco

Cisco 7941G - Unified IP Phone VoIP User manual

Cisco 7945G - Unified IP Phone VoIP Instruction Manual

Cisco

Cisco 7945G - Unified IP Phone VoIP Instruction Manual

Cisco SPA525G - Small Business Pro IP Phone VoIP User manual

Cisco

Cisco SPA525G - Small Business Pro IP Phone VoIP User manual

Cisco 7985G - IP Phone NTSC Video User manual

Cisco

Cisco 7985G - IP Phone NTSC Video User manual

Cisco 7970G - IP Phone VoIP User manual

Cisco

Cisco 7970G - IP Phone VoIP User manual

Cisco SPA302D User manual

Cisco

Cisco SPA302D User manual

Cisco 7921G - Unified Wireless IP Phone VoIP Instruction Manual

Cisco

Cisco 7921G - Unified Wireless IP Phone VoIP Instruction Manual

Cisco 7906G - Unified IP Phone VoIP User manual

Cisco

Cisco 7906G - Unified IP Phone VoIP User manual

Cisco 7921G - Unified Wireless IP Phone VoIP User manual

Cisco

Cisco 7921G - Unified Wireless IP Phone VoIP User manual

Cisco UNIFIED 6911 Reference guide

Cisco

Cisco UNIFIED 6911 Reference guide

Cisco Cisco 7960 User manual

Cisco

Cisco Cisco 7960 User manual

Cisco IP Conference Station 7935 Parts list manual

Cisco

Cisco IP Conference Station 7935 Parts list manual

Cisco Cisco 7960 User manual

Cisco

Cisco Cisco 7960 User manual

Cisco 7925G - Unified Wireless IP Phone VoIP Quick reference guide

Cisco

Cisco 7925G - Unified Wireless IP Phone VoIP Quick reference guide

Cisco 7811 User manual

Cisco

Cisco 7811 User manual

Cisco DX650 Instruction Manual

Cisco

Cisco DX650 Instruction Manual

Cisco DATAVOX 7941 Reference guide

Cisco

Cisco DATAVOX 7941 Reference guide

Cisco SPA50X User manual

Cisco

Cisco SPA50X User manual

Cisco 7970 Series User instructions

Cisco

Cisco 7970 Series User instructions

Cisco SPA525G - Small Business Pro IP Phone VoIP User manual

Cisco

Cisco SPA525G - Small Business Pro IP Phone VoIP User manual

Cisco 7962 User manual

Cisco

Cisco 7962 User manual

Popular IP Phone manuals by other brands

Avaya one-X 9670G user guide

Avaya

Avaya one-X 9670G user guide

Polycom VVX 250 Quick tips

Polycom

Polycom VVX 250 Quick tips

Optus Cisco 8800 Series user guide

Optus

Optus Cisco 8800 Series user guide

Samsung SMT-i6011 Quick reference guide

Samsung

Samsung SMT-i6011 Quick reference guide

Polycom Horizon VVX-450 user guide

Polycom

Polycom Horizon VVX-450 user guide

digi-tech 7700S user guide

digi-tech

digi-tech 7700S user guide

Grandstream Networks GXV3175 user manual

Grandstream Networks

Grandstream Networks GXV3175 user manual

101VOICE IP862G Quick user guide

101VOICE

101VOICE IP862G Quick user guide

Samsung SMT-6011 user guide

Samsung

Samsung SMT-6011 user guide

Escene SayHi 410 Series user manual

Escene

Escene SayHi 410 Series user manual

Polycom SoundPoint IP 450 Quick reference guide

Polycom

Polycom SoundPoint IP 450 Quick reference guide

Warner Telecom Group Aspire S Quick reference guide

Warner Telecom Group

Warner Telecom Group Aspire S Quick reference guide

Yealink MP56 user guide

Yealink

Yealink MP56 user guide

Iwatsu ICON Series IX-5910 owner's manual

Iwatsu

Iwatsu ICON Series IX-5910 owner's manual

Mitel MiVoice 5360 user guide

Mitel

Mitel MiVoice 5360 user guide

ADTRAN 7000 Series user guide

ADTRAN

ADTRAN 7000 Series user guide

Dynamix 510 user manual

Dynamix

Dynamix 510 user manual

Siemens HIPATH 2000 user guide

Siemens

Siemens HIPATH 2000 user guide

manuals.online logo
manuals.online logoBrands
  • About & Mission
  • Contact us
  • Privacy Policy
  • Terms and Conditions

Copyright 2025 Manuals.Online. All Rights Reserved.