manuals.online logo
Brands
  1. Home
  2. •
  3. Brands
  4. •
  5. ADTRAN
  6. •
  7. Network Router
  8. •
  9. ADTRAN 1700601G2 User manual

ADTRAN 1700601G2 User manual

Quick Start Guide, 61700601G2-13D, November 2009 1
NETVANTA 3100 SERIES ROUTER
P/N 1700601G2, 1700611G2, 1700612G2
4 Copyright © 2009 ADTRAN, Inc. All Rights Reserved.
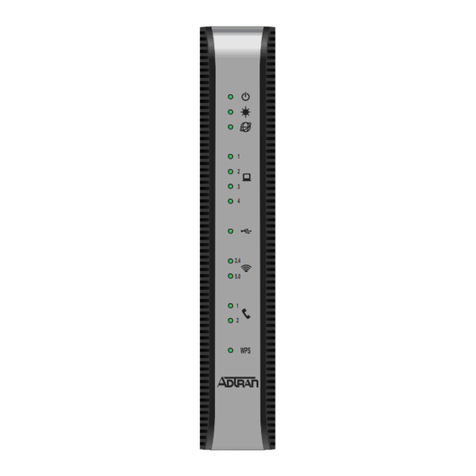
GETTING STARTED
Two configuration methods are available for your NetVanta router:
• Web-based graphical user interface (GUI)
• AOS command line interface (CLI)
The GUI lets you configure the main unit settings, and provides online guidance, explanations for
each setting, and configuration wizards to help you get started. However, using the AOS CLI may
be necessary for more advanced configurations.
ACCESS THE GUI
You may access the GUI from any Web browser on your network by following these steps:
1. Connect the router to your PC, using an Ethernet cable connected to one of the four ports on
the back of the unit (Ethernet 1,2,3, or 4).
2. Connect the router to your service provider connection, using the provided cable connected
to the ETH 0/1 port on the router (for the NetVanta 3120). If you have a NetVanta 3130, plug
your ADSL line into the port labeled ADSL on the back of the unit.
3. After the router is connected to the PC, make sure the router is powered. Remember to plug
the unit in and to turn the unit on using the toggle switch at the rear of the unit.
4. During bootup, your PC will obtain an IP address from the NetVanta 3100 Series unit’s
DHCP server. By default, both the DHCP and HTTP servers are enabled.
5. Enter the unit’s IP address in your browser address line. The default IP address is
10.10.10.1.
6. You will then be prompted for the username and password (the default settings are admin
and password).
7. The initial GUI screen appears. You can access initial setup information by selecting Setup
Wizard from the menu on the left.
For security purposes, you should set up an admin password
immediately. Use the Passwords menu of the GUI to change this
password.
By default, the NetVanta 3130 comes with an ADSL and an
asynchronous transfer mode (ATM) port already configured and
enabled. The service provider should provide a PVC (VPI/VCI) number,
which will be used to configure the ATM PVC.
CONFIGURE YOUR APPLICATION
The applications you will need to configure vary by product and by network. Review the list of
defaults for your unit (included in the next section) before deciding what applications to configure.
Some common applications that should be configured on startup are addressed in the articles
listed below. You can access these articles online at http://kb.adtran.com.
Additional detailed documentation for configuring your ADTRAN unit is provided on the AOS
Documentation CD included in your shipment. For more detail on hardware setup, refer to the
appropriate NIM quick start guides and the appropriate hardware installation guide. For more
detail on configuring your system, refer to the AOS Command Reference Guide, configuration
guides, and technical support notes available on the AOS Documentation CD or online at
http://kb.adtran.com.
NETVANTA 3100 SERIES DEFAULTS
Configuring Internet Access (Many to
one NAT) with the Firewall Wizard in
AOS (video article 2185)
Configuring Port Forwarding in AOS
(video article 2291)
Configuring QoS for VOIP in AOS
(video article 3091)
Configuring ADSL Internet Access in AOS
(article 1965)
Configuring QoS in AOS
(article 1617)
Configuring DHCP Server in AOS
(article 2149)
Configuring a VPN using Main Mode in
AOS (article 1925)
Configuring a VPN using Aggressive Mode in
AOS (article 1926)
Important: For additional details on product features, specifications,
installation, and safety, refer to the appropriate hardware installation
guide on the AOS Documentation CD shipped with the base unit and
available online at http://kb.adtran.com.
Feature Default Value
IP Address 10.10.10.1
Username admin
Password password
HTTP Server Enabled
Event History On
IP Routing Enabled
DHCP Enabled
VLAN Interface Enabled (vlan 1) with IP address 10.10.10.1
Firewall Enabled
NAT Overload to eth 0/1 address (3120)
Overload to ppp 1 address (3130)
2 Copyright © 2009 ADTRAN, Inc. All Rights Reserved. Quick Start Guide, 61700601G2-13D, November 2009 3
CONFIGURE THE ATM PVC (NETVANTA 3130 ONLY)
1. Select the Getting Started link under the System menu. This brings up a side bar menu.
2. Select Step 1 - Configure the Public Interface at the top of the side bar menu to open the
ATM PVC menu.
3. Enter the PVC number and select an Interface Mode. Usually this is PPP or PPPoE;
however, if IP routing is chosen, you will need to enter an IP address.
4. Select Apply. If PPP or PPPoE is selected as the Interface Mode, you will be taken to the
PPP page after selecting Apply. Here you will need to select the type of authentication
needed, authentication passwords, and the Address Type. In most cases, you will want the
Address Type to be Negotiated. Select Apply when all the information is complete.
ACCESS THE CLI
If needed, you can access the AOS CLI via a Telnet session.
1. Telnet to the unit’s IP address. The default IP address is 10.10.10.1.
2. You will then be prompted for the user name and password (the default settings are admin
and password).
3. Enter enable at the >prompt.
4. Enter the enable password when prompted. The default password is password.
FACTORY DEFAULT SWITCH
• If the factory default switch (shown in the illustration above) is pressed during bootup (while
the STAT LED is flashing green), the unit will stay in bootstrap mode (the STAT LED will turn
solid amber when the unit is in bootstrap mode). Since the unit has no serial port, Telnet has
been built into the boot code. The default IP address is 10.10.10.1.
• If the factory default switch is pressed and held for 5 seconds after boot, the switch ports
1 through 4 on the NetVanta 3100 Series routers will default to 10.10.10.1 and all firewall
access policies will be removed from that interface.
• If the factory default switch is pressed and held for approximately 70 seconds, a default
configuration will overwrite your existing configuration and reboot the unit. When the default
1234
ADSL
10
Default
Switch
configuration is being applied the STAT, WAN, INET, and VPN LEDs will cycle. At this point
the default switch can be released.
To factory default the unit, the default switch must be pressed WHILE the
STAT light on the front of the unit is solid green. Do not press the default
switch BEFORE the STAT light is solid green, as this will cause boot to
be missed.
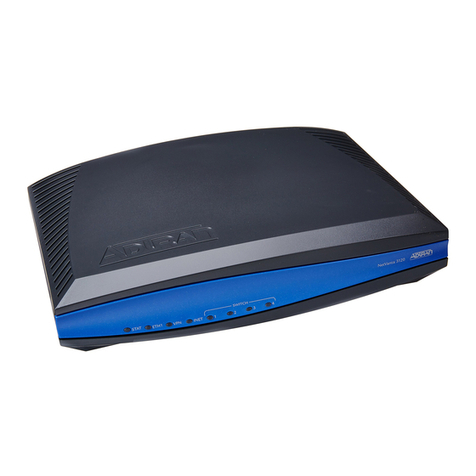
FRONT PANEL LEDS
LED Color Indication
STATUS
(STAT)
Green (flashing) The unit is powering up. On power-up, the STAT LED flashes
rapidly for five seconds.
Green (solid) The power is on and self-test passed.
Red (solid) The power is on, but the self-test failed or the boot mode (if
applicable) code could not be booted.
Amber (solid) The unit is in bootstrap mode.
ETH1 Off The port is administratively disabled or does not have link.
(3120 only) Green (solid) The port is enabled and the link is up.
Amber (flashing) The port has activity (transmit or receive).
WAN Off The interface is administratively down.
(3130 only) Green (solid) The link is up and everything is operational.
Red (solid) An alarm condition is occurring on the WAN interface, or
there is a self-test failure.
Amber (solid) The unit is in test.
VPN Off No encrypted traffic.
On Encrypted traffic present.
INET Green (solid) The unit has a fixed IP address, or has obtained an IP
address through DHCP.
Green (flashing) Traffic is present on the ADSL WAN interface (3130 only).
Red (solid) The unit failed to obtain an IP address through IPCP or
DHCP (3130 only).
Red (flashing) The DHCP client is rebooting (3120 only).
Amber (flashing) No IP address has been obtained through DHCP (3120
only).
SWITCH (1 Off The port is administratively disabled or does not have link.
through 4) Green (solid) The port is enabled and the link is up.
Amber (flashing) The port has activity (transmit or receive).
Quick Start Guide, 61700601G2-13D, November 2009 1
NETVANTA 3100 SERIES ROUTER
P/N 1700601G2, 1700611G2, 1700612G2
4 Copyright © 2009 ADTRAN, Inc. All Rights Reserved.
GETTING STARTED
Two configuration methods are available for your NetVanta router:
• Web-based graphical user interface (GUI)
• AOS command line interface (CLI)
The GUI lets you configure the main unit settings, and provides online guidance, explanations for
each setting, and configuration wizards to help you get started. However, using the AOS CLI may
be necessary for more advanced configurations.
ACCESS THE GUI
You may access the GUI from any Web browser on your network by following these steps:
1. Connect the router to your PC, using an Ethernet cable connected to one of the four ports on
the back of the unit (Ethernet 1,2,3, or 4).
2. Connect the router to your service provider connection, using the provided cable connected
to the ETH 0/1 port on the router (for the NetVanta 3120). If you have a NetVanta 3130, plug
your ADSL line into the port labeled ADSL on the back of the unit.
3. After the router is connected to the PC, make sure the router is powered. Remember to plug
the unit in and to turn the unit on using the toggle switch at the rear of the unit.
4. During bootup, your PC will obtain an IP address from the NetVanta 3100 Series unit’s
DHCP server. By default, both the DHCP and HTTP servers are enabled.
5. Enter the unit’s IP address in your browser address line. The default IP address is
10.10.10.1.
6. You will then be prompted for the username and password (the default settings are admin
and password).
7. The initial GUI screen appears. You can access initial setup information by selecting Setup
Wizard from the menu on the left.
For security purposes, you should set up an admin password
immediately. Use the Passwords menu of the GUI to change this
password.
By default, the NetVanta 3130 comes with an ADSL and an
asynchronous transfer mode (ATM) port already configured and
enabled. The service provider should provide a PVC (VPI/VCI) number,
which will be used to configure the ATM PVC.
CONFIGURE YOUR APPLICATION
The applications you will need to configure vary by product and by network. Review the list of
defaults for your unit (included in the next section) before deciding what applications to configure.
Some common applications that should be configured on startup are addressed in the articles
listed below. You can access these articles online at http://kb.adtran.com.
Additional detailed documentation for configuring your ADTRAN unit is provided on the AOS
Documentation CD included in your shipment. For more detail on hardware setup, refer to the
appropriate NIM quick start guides and the appropriate hardware installation guide. For more
detail on configuring your system, refer to the AOS Command Reference Guide, configuration
guides, and technical support notes available on the AOS Documentation CD or online at
http://kb.adtran.com.
NETVANTA 3100 SERIES DEFAULTS
Configuring Internet Access (Many to
one NAT) with the Firewall Wizard in
AOS (video article 2185)
Configuring Port Forwarding in AOS
(video article 2291)
Configuring QoS for VOIP in AOS
(video article 3091)
Configuring ADSL Internet Access in AOS
(article 1965)
Configuring QoS in AOS
(article 1617)
Configuring DHCP Server in AOS
(article 2149)
Configuring a VPN using Main Mode in
AOS (article 1925)
Configuring a VPN using Aggressive Mode in
AOS (article 1926)
Important: For additional details on product features, specifications,
installation, and safety, refer to the appropriate hardware installation
guide on the AOS Documentation CD shipped with the base unit and
available online at http://kb.adtran.com.
Feature Default Value
IP Address 10.10.10.1
Username admin
Password password
HTTP Server Enabled
Event History On
IP Routing Enabled
DHCP Enabled
VLAN Interface Enabled (vlan 1) with IP address 10.10.10.1
Firewall Enabled
NAT Overload to eth 0/1 address (3120)
Overload to ppp 1 address (3130)

This manual suits for next models

3

Other ADTRAN Network Router manuals

ADTRAN Total Access 544R User guide

ADTRAN

ADTRAN Total Access 544R User guide

ADTRAN NetVanta 340 User manual

ADTRAN

ADTRAN NetVanta 340 User manual

ADTRAN ISU 128 User manual

ADTRAN

ADTRAN ISU 128 User manual

ADTRAN 424RG User manual

ADTRAN

ADTRAN 424RG User manual

ADTRAN Total Access 5000 Quick reference guide

ADTRAN

ADTRAN Total Access 5000 Quick reference guide

ADTRAN Express L768 User manual

ADTRAN

ADTRAN Express L768 User manual

ADTRAN NetVanta 3200 series User manual

ADTRAN

ADTRAN NetVanta 3200 series User manual

ADTRAN ATLAS 550 User manual

ADTRAN

ADTRAN ATLAS 550 User manual

ADTRAN TOTAL ACCESS 600R User guide

ADTRAN

ADTRAN TOTAL ACCESS 600R User guide

ADTRAN 617600028F1 User manual

ADTRAN

ADTRAN 617600028F1 User manual

ADTRAN NetVanta 4305 Manual

ADTRAN

ADTRAN NetVanta 4305 Manual

ADTRAN Total Access 1200F User manual

ADTRAN

ADTRAN Total Access 1200F User manual

ADTRAN NetVanta 5305 Manual

ADTRAN

ADTRAN NetVanta 5305 Manual

ADTRAN Total Access 1250 User manual

ADTRAN

ADTRAN Total Access 1250 User manual

ADTRAN Total Access 904 Manual

ADTRAN

ADTRAN Total Access 904 Manual

ADTRAN Tracer TRACER 2 x E1 User manual

ADTRAN

ADTRAN Tracer TRACER 2 x E1 User manual

ADTRAN NetVanta 3430 User manual

ADTRAN

ADTRAN NetVanta 3430 User manual

ADTRAN 1200821F1 Manual

ADTRAN

ADTRAN 1200821F1 Manual

ADTRAN NetVanta 5305 Manual

ADTRAN

ADTRAN NetVanta 5305 Manual

ADTRAN NetVanta 3448 User manual

ADTRAN

ADTRAN NetVanta 3448 User manual

ADTRAN NetVanta 3448 User manual

ADTRAN

ADTRAN NetVanta 3448 User manual

ADTRAN NetVanta 340 User manual

ADTRAN

ADTRAN NetVanta 340 User manual

ADTRAN NetVanta 3305 User manual

ADTRAN

ADTRAN NetVanta 3305 User manual

ADTRAN TSU NetVanta User manual

ADTRAN

ADTRAN TSU NetVanta User manual

Popular Network Router manuals by other brands

TP-Link M5250 Quick installation guide

TP-Link

TP-Link M5250 Quick installation guide

Usr G800 user manual

Usr

Usr G800 user manual

Huawei E5785-320a quick start

Huawei

Huawei E5785-320a quick start

D-Link DES-3010F user manual

D-Link

D-Link DES-3010F user manual

thomann Stairville DDC-6 user manual

thomann

thomann Stairville DDC-6 user manual

TP-Link EC231-G1u user guide

TP-Link

TP-Link EC231-G1u user guide

D-Link AC750 user manual

D-Link

D-Link AC750 user manual

Cisco CVR328W quick start guide

Cisco

Cisco CVR328W quick start guide

Cisco 2500 Series Installation and configuration guide

Cisco

Cisco 2500 Series Installation and configuration guide

Comtrend Corporation ES-7205 user guide

Comtrend Corporation

Comtrend Corporation ES-7205 user guide

GRASS VALLEY L1102101 Installation and operation manual

GRASS VALLEY

GRASS VALLEY L1102101 Installation and operation manual

Motorola MG8702 quick start

Motorola

Motorola MG8702 quick start

Logan LWR3A243L quick guide

Logan

Logan LWR3A243L quick guide

Billion BiPAC 710C2 quick start guide

Billion

Billion BiPAC 710C2 quick start guide

Avaya 8180 Configuring

Avaya

Avaya 8180 Configuring

MikroTik Chateau Series quick guide

MikroTik

MikroTik Chateau Series quick guide

AIS HG180 installation guide

AIS

AIS HG180 installation guide

Atlantis Land 10/100Mbps user guide

Atlantis Land

Atlantis Land 10/100Mbps user guide

manuals.online logo
manuals.online logoBrands
  • About & Mission
  • Contact us
  • Privacy Policy
  • Terms and Conditions

Copyright 2025 Manuals.Online. All Rights Reserved.