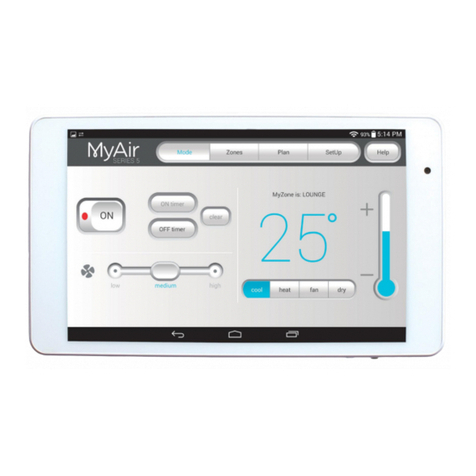
ADVANTAGE AIR MyAir User manual

Smart Home Systems
User Manual
V1.1
P
l
a
c
e

`
Installation Guide V1.1 2
P
l
a
c
e
P
l
a
c
e
This manual covers all of the MyPlace product line. You can jump to
a relevant product using the tabs on the right had side.
MyPlace consists of:
MyPlace User Manual
Smart Air Conditioning
Smart Home Lighting
Smart Air Conditioning
for systems with multiple
aircon units

`
Installation Guide V1.1 4
P
l
a
c
e
P
l
a
c
e
1 - MYPLACE TABLET
The MyPlace app runs on its own dedicated wall mounted touch screen. This touch
screen creates a hub for control of your MyPlace system.
The MyPlace touch screen runs Android, which means it can do so much more
than just control your MyPlace system. You can also install apps such as News apps,
Email & Weather from the Google Play Store.
Your MyPlace touch screen is permanently attached to your wall with the ability to
pivot between portrait & landscape modes so that you can enjoy all your apps in
the orientation that suits them best.
To exit the MyPlace app press the home button from any screen as pictured below.
If you are not familiar with the Android operating system, then an abundance of
information can be found on the internet.
12:45
System Plans
Help
Back
Start
2 15 AM
230 PM
2 45
:
Here’s the Plan...
Finish
6 15 AM
630 PM
6 45
:
Run Time Select Days
Sat
Tues Wed Thurs Fri
Daikin
AC: ON - Mode: Cool - Fan: Med
Zones On: Z1, Z2, Z4, Z6
Panasonic
AC: OFF
Mon
Sun
Enable Disable
delete
Save
Run Now
Plan 1
HOME

`
Installation Guide V1.1 5
P
l
a
c
e
P
l
a
c
e
2 - SMART DEVICE CONTROL
MyPlace allows you to control your MyPlace system from your Android or Apple
phone, after installing the MyPlace app on your phone.
Smart Phone control can be used inside your home via your personal WiFi network
or remotely using your phones internet connection.
Connecting Your smart device to MyPlace via your personal WiFi network
After your MyPlace system is installed:
1. Ensure you have an existing home WiFi network & you have your password on
hand.
TIP: Some routers have the network name (SSID) & password printed on a sticker
located on the bottom of the router.
2. Go to your MyPlace wall mounted touch screen & press the home button.
3. Press the app drawer button,
as shown in the image below.
5. If the WiFi switch is OFF as shown
below press the switch as indicated to
turn it ON. If your WiFi is already ON
then go to step 6.
4. Then press the settings button.
6. Now press the WiFi icon, as pictured
below.

`
Installation Guide V1.1 6
P
l
a
c
e
P
l
a
c
e
SMART DEVICE CONTROL
7. Find your home WiFi network in the
list then press it.
8. Enter your home WiFi network
password then press CONNECT.
9. Once you have connected successfully (may take up to 2 minutes) you will see
the word CONNECTED below your home WiFi network name.
10.Connect your smart device (your tablet or phone) to your home WiFi network.
You will need to enter your network password as you did above for the MyPlace
wall mounted touch screen.
11.Both your MyPlace wall mounted touch screen & the smart phone/tablet you
wish to use as a remote control should now be connected to your home WiFi
network.
12.Download the MyPlace app on your smart device, see subsequent sections for
detailed instruction on installing the Apple or Android app onto your device.
13.Once the above is complete, you will be able to control your system from the
MyPlace app on your smart device (phone/tablet) provided you have WiFi or
4G (or other mobile data) coverage.

`
Installation Guide V1.1 7
P
l
a
c
e
P
l
a
c
e
3 - APPLE DEVICES
Downloading The Apple App
The MyPlace apple app requires your device to be running Apple iOS 9 or greater,
please check to ensure you device meets this requirement before continuing
below.
1. If you do not have an Apple ID and password, then create one and verify your
email by checking and following the instructions in the email sent to you from
Apple.
a. See instructions here: http://support.apple.com/kb/ht2534
b. Be sure to set your country to Australia (or South Africa if applicable.)
2. Download the MyPlace App from the Apple App Store.
a. Using your iPhone/iPod/iPad - click on the App Store icon.
b. Click on the Search tab.
c. Type “MyPlace” into the search box.
d. Press Search.
e. Select the MyPlace App by Advantage Air (It’s Free).
f. To install, press the blue GET button, and then Green INSTALL button.
g. Enter your Apple ID password (it’s case sensitive).
Multiple MyPlace systems
If you are using an Apple device & have multiple MyPlace systems installed in your
home on the same WiFi network, there are a few extra steps required to congure
the MyPlace Apple app so you can control all of your systems from your iphone /
iPod or iPad.
1. On your iPhone/iPod/iPad open the Apple “SETTINGS” app.
2. Scroll down the list until you nd “MyPlace” then press it.
3. Press “Find Extra Systems” switch to ON.
Installation Troubleshooting
1. Do you have an older Apple device? MyPlace requires your device to be
running Apple iOS 9 or greater.
Tip: Check if you can upgrade your iOS.
2. If you are using an iPad, then in the App Store you will need to select the iPhone
apps button at the top of the search results screen.
If your device does not fall into the above categories, you should have no problem
downloading the App to your Apple device.

`
Installation Guide V1.1 8
P
l
a
c
e
P
l
a
c
e
4 - ANDROID DEVICES
The MyPlace Android app requires your device to be running Android OS v4.2
or greater, please check to ensure you device meets this requirement before
continuing below.
To start downloading items on the Google Play Store app, you need to add a
Google Account to your device.
Here’s how to add a Google Account to your device:
1. Open the “settings” app.
2. Under “Accounts”, press + Add account.
3. Select Google.
4. Choose Existing (if you want to add an account you already have) or New (if
you wish to create a new one).
5. Follow the instructions to add or create your google account.
Tip: You can use your existing google account or make a new one to use on the
MyPlace wall mounted touch screen.
Download the MyPlace App from the Google Play Store.
1. Open the Google Play Store app.
2. Search for “MyPlace”
3. Press the MyPlace app.
4. Press INSTALL (It’s Free).
5. Press Accept after reviewing the app’s permissions

`
Installation Guide V1.1 9
P
l
a
c
e
P
l
a
c
e
5 - REMOTE ACCESS
MyPlace has the ability to control your system from your Android or Apple smart
phone when you are outside of the home WiFi network using your phones internet
connection (eg 3G/4G).
Remote Access requires a reliable WiFi connection between your modem/router &
your wall mounted MyPlace tablet.
Enable/Disable Remote Access
Remote access is enabled by default;
These instructions show how to enable/disable remote access.
HINT: Disabling remote access also clears all paired smartphones/tablets.
The below instructions assume your MyPlace wall mounted touch screen is
connected to the home WiFi network & you can control your system from your
mobile device when connected to your home WiFi network.
1. Open the Myplace App on your wall
mounted touch screen and press
the Setup button.
3. To disable remote access, press the
Remote access button once. The
button will turn grey for disabled.
2. Press the Remote Access button.
4. To enable remote access press, the
enable button once. The button will
turn blue for enabled.

`
Installation Guide V1.1 10
P
l
a
c
e
P
l
a
c
e
REMOTE ACCESS
5. It can take up to 5 minutes before remote access is enabled. While your system
is enabling remote access you will notice the status will change numerous
times. Once remote access has been successfully enabled, the status will
change to AA26. If after 5 minutes your status is something other than AA26,
then please refer to troubleshooting guide below.
6. To pair your phone with your MyPlace touch screen open the MyPlace app
on your Android /Apple device while it is connected to the same home WiFi
network as your MyPlace tablet then wait 10 seconds.
7. Congratulations, when your phone has a internet connection you will now be
able to use the MyPlace app on your phone to control your MyPlace system.
Troubleshooting
The following info may be useful to the homeowners I.T. professional when
troubleshooting remote access in the MyPlace app.
STATUS DESCRIPTION ACTION
AA20 No internet access
Check the MyPlace wall mounted
touch screen is connected to the
home WiFi network & has access
to the internet.
AA21 Remote Connection Error Please try again in 10 minutes
AA22
The wall mounted touch
screen is no longer
connected to the internet
Check the MyPlace wall mounted
touch screen is connected to the
home WiFi network & has access
to the internet.
AA26 Remote Access should be
working
Your remote access should be
working, if you are having troubles
try connecting your phone via WiFi
for 10 seconds.

`
Installation Guide V1.1 11
P
l
a
c
e
P
l
a
c
e
6 - NETWORK TROUBLESHOOTING
Assistance for the Homeowner’s I.T. professional:
1. Verify that the smartphone/tablet device is connected to the home WiFi (not
using the phones internet connection (eg. 4G).) Also ensure, the phones WiFi
signal strength is strong.
2. Check that the MyPlace wall mounted touch screen is connected to the same
home WiFi network (SSID) as your smartphone or tablet. Also ensure, that its
WiFi signal strength is strong.
3. Ensure your MyPlace tablet is up to date with the latest app updates from the
Google Play Store, for complete instructions go to :
www.advantageair.com.au/update5
TIP: You do not need to have a home internet connection to use the MyPlace App
within your home – the App can use WiFi only to connect to your MyPlace System.
If you wish to use the app from outside your home (e.g. remotely) then an internet
connection is required on your phone or tablet.

`
Installation Guide V1.1 12
P
l
a
c
e
P
l
a
c
e
MyAir User Manual
Contents
1 - INTRODUCTION
13
2 - MODE SCREEN
14
3 - ZONES SCREEN
16
4 - MYZONE (OPTIONAL)
17
5 - MOTION ZONE (OPTIONAL)
18
6 - CONSTANT ZONES
19
5 - FRESH AIR (OPTIONAL)
20
6 - PLANS SCREEN
21
7 - PLANS EDIT SCREEN
22
8 - SETUP SCREEN
24
8 - TROUBLESHOOTING
25

`
Installation Guide V1.1 13
P
l
a
c
e
P
l
a
c
e
1 - INTRODUCTION
Welcome to your new MyAir smart air conditioning system.
The information provided in this user manual will help you to get the most from
your new air conditioning system.
Upon rst power up, the system will take a few minutes to initialise.
If you walk away from your screen it will go to sleep, to wake the screen simply
touch anywhere on the screen once.
This is your home screen, press the large MyPlace button to start the MyPlace app.

`
Installation Guide V1.1 14
P
l
a
c
e
P
l
a
c
e
The Mode Screen on the MyAir tab allows you to control your Air-conditioner’s
operation mode.
From the Mode Screen you can perform the following actions:
• Turn the air-con unit ON or OFF;
• Set an ON or OFF Timer;
• Select the unit FAN speed;
• Set the Target Temperature; and
• Select the air-con unit mode.
ON / OFF Button
This button toggles your air-con unit
from ON to OFF.
2 - MODE SCREEN

`
Installation Guide V1.1 15
P
l
a
c
e
P
l
a
c
e
MODE SCREEN
Simple Timer
The Simple Timer can be used to turn the air-
con unit ON or OFF after a set time.
Each press of the timer button increases the
time by 30mins (up to 12hours.)
Pressing the Trash icon clears the timer.
Note: This is a once-only timer that does not repeat each day. More advanced
timers can be setup in the Plans Screen.
Fan Speed
The air-con Fan speed can be set to 3
speeds, LOW, MEDIUM or HIGH
Target Temperature
The Target Temperature is the temperature
you would like to achieve. Press the + or -
symbols to adjust the number.
Handy Tip: Your air-con unit is most efcient when maintaining a Target
Temperature. So make ensure your Target is set to a Temperature that is
comfortable for you. Cooling or Heating a home past what is comfortable will
result in higher energy usage.
Operation Mode Selector
HEAT – Warm your home in winter
COOL – Cool your home in summer
FAN – Used to recirculate air within the
home, a great energy efcient option if you
just want to move some air around the home
as only your fan in the roof space will run &
not the outside unit.
DRY - This can be used to reduce the humidity in your home (if supported by
air-con unit brand / model.)

`
Installation Guide V1.1 16
P
l
a
c
e
P
l
a
c
e
3 - ZONES SCREEN
Press Zones button on the menu bar to bring up the Zones Screen.
Pressing a Zone name toggles that Zone between ON and OFF. Zones are ON
when they are the blue colour.
There are four different types of zones in MyAir depending on the option you
selected when purchasing your system.
Airow Zone
If there is no sensor installed in a particular zone then it will be shown as an
AIRFLOW zone. In this instance, you have the ability to control the air in 5%
increments. Use the - / + buttons when a zone is turned ON, to adjust the
amount of airow going to that zone.
Temperature Zone (Optional)
If your zone has a temperature sensor installed, MyPlace will allow you to choose
your desired temperature with the - / + buttons. MyPlace will aim to maintain the
desired temperature in that zone by automatically controlling airow when the
air conditioner is running.
MyZone™ (Optional)
If enabled (by your dealer) any zone with temperature control (or motion
sensor) can be selected as the MyZone. Press the thermometer to designate that
particular zone as the MyZone. The MyZone is explained on the following page.
Motion Zone (Optional)
If your zone has a motion sensor installed then this zone will have the same
functionality as a temperature zone (above) but a walking man symbol will
appear next to it. If you press the walking man symbol it will turn dark grey
indicating the motion sensor is activated for that zone and pressing it again will
deactivate it. Motion controlled Zones are explained on page 18.
MyZone
Motion Zone
Airow Zone
Temperature
Zone

`
Installation Guide V1.1 17
P
l
a
c
e
P
l
a
c
e
4 - MYZONE (OPTIONAL)
The MyZone feature makes that particular zone the “information center” for the
air conditioning unit. That means the set-point for that zone becomes the set-
point the air conditioning unit will work toward. The actual measured temperature
of that zone is the temperature sent to the unit for it to make its decisions about
whether to start/stop or speed up/down to effectively achieve the set-point while
maintaining constant airow in the MyZone.
The MyZone can be any temperature controlled zone that is currently turned ON,
to change the MyZone to another zone press the thermometer symbol next to the
zone you want to be the new MyZone.
This feature can be particularly important when you have an unusually high
requirement for air conditioning in a particular area. For example, a group of
people watching a movie in the MEDIA with all the electronic A/V equipment
turned on will have a larger requirement for air conditioning than in other rooms
in the house. Setting the MEDIA as MyZone will ensure that the system continues
running until the temperature set-point for that room is achieved.
Only one temperature controlled zone can be the MyZone at any one time, if you
are using multiple zones it is recommended that you make the largest zone the
MyZone & then move the MyZone around as you move around the home.
MyZone is an optional feature available on systems where MyZone has been
enabled; your dealer may enable this feature depending on the way you use your
system & the layout of the installation.
NOTE: MyZone is not available for systems with no temperature sensors installed.

`
Installation Guide V1.1 18
P
l
a
c
e
P
l
a
c
e
5 - MOTION ZONE (OPTIONAL)
Motion controlled Zones vary the temperature in unoccupied zones in order to
save energy on air conditioning empty spaces.
For example:
You are cooling your home with the master bedroom Zone target temp set at 24oC
with motion enabled. Once MyAir has detected that the bedroom has been empty
for more than 10 minutes it will increase the target temperature by 1oC. Then after
a further 10 minutes of being empty MyAir will increase the temperature again by
1oC, making the new target temperature 26°C. As soon as motion is detected in the
room the target temperature returns to normal.
In the case of heating your home the motion sensor works in reverse, by
decreasing the target temperature in the empty Zone.
HANDY HINT: Motion sensors are designed to save you energy, but to save even
more energy switch off the zones you are not using.

`
Installation Guide V1.1 19
P
l
a
c
e
P
l
a
c
e
6 - CONSTANT ZONES
Depending on your specic installation, your MyAir system may be set up with
electronic Constant Zones. These are pre-programmed zones that open up to
relieve excess air pressure in your air-conditioning system if insufcient zones are
open.
Constant Zones are noted with a small letter C to the right of the zone name. Your
installer may setup 1, 2 or 3 constants zones depending on the size of your system
& the design of the home.
Note: If you have the MyZone feature enabled the zone selected as the MyZone
will automatically take over as the rst constant, airow will be constant in the
MyZone even when the room has reached the target temperature.
Example: Below you can see two constant zones are set, LIVING & MEDIA
indicated by the C to the right of the zone name.
In this example these two zones may open to relieve excess air pressure if less than
two whole zones are open.

`
Installation Guide V1.1 20
P
l
a
c
e
P
l
a
c
e
5 - FRESH AIR (OPTIONAL)
If your system is tted with the optional fresh air feature, you will nd a button
at the bottom of your zones screen as pictured below. Turning ON fresh air will
enable your system to draw in air from outside the home.
This feature is particularly useful when the outside temperature is pleasant such as
in the evenings.
To use this functionality, we recommend that you set your mode to FAN & turn
your fresh air ON, this will draw fresh air in from outside & distribute it throughout
your home without running the outside unit; reducing your running costs.
Note: Using Fresh Air enabled when it is hot or cold outside, with the air-con set to
cooling or heating will signicantly increase electricity usage.
This optional feature requires additional hardware to be installed.
Other manuals for MyAir
1
This manual suits for next models
3
Table of contents
Other ADVANTAGE AIR Control System manuals
Popular Control System manuals by other brands

Aybey Elektronik
Aybey Elektronik SWLINE Series user manual
ORTAL
ORTAL Heat Control System Installation and operation manual
Daikin
Daikin D-BACS Design guide
Motorline professional
Motorline professional MC62 User's and installer's manual
BST
BST eltromat EKR 1500 Translation of the original operating manual
Crestron
Crestron 4 Series product manual


