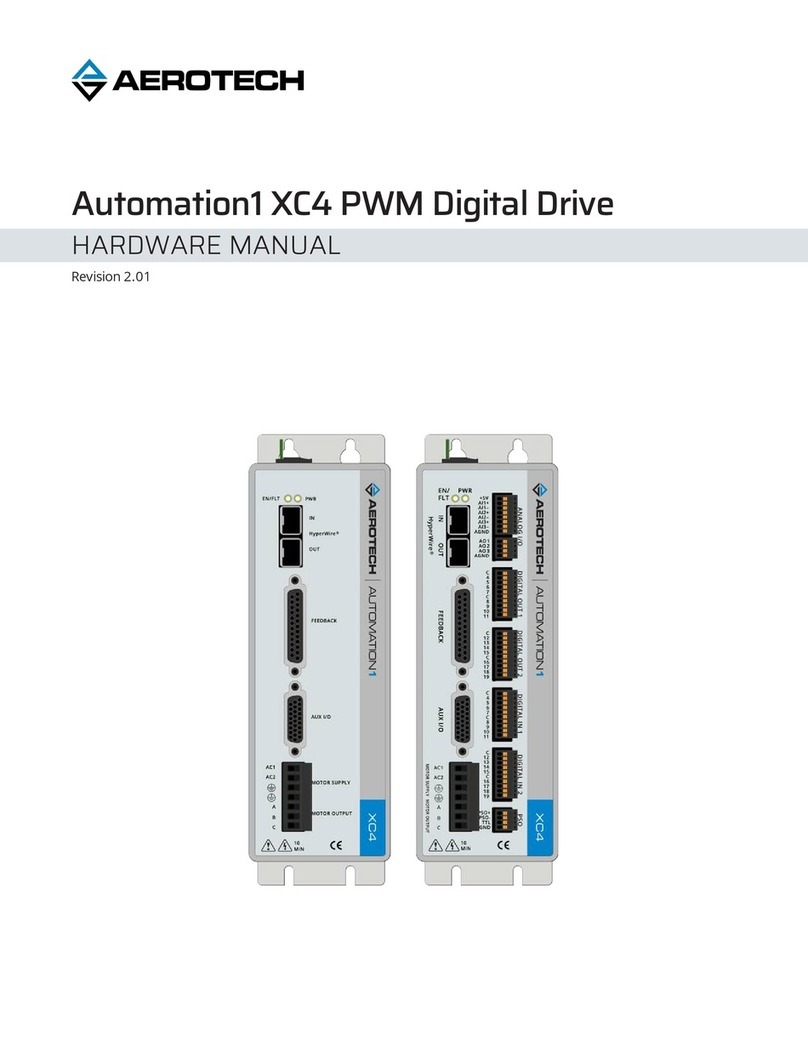
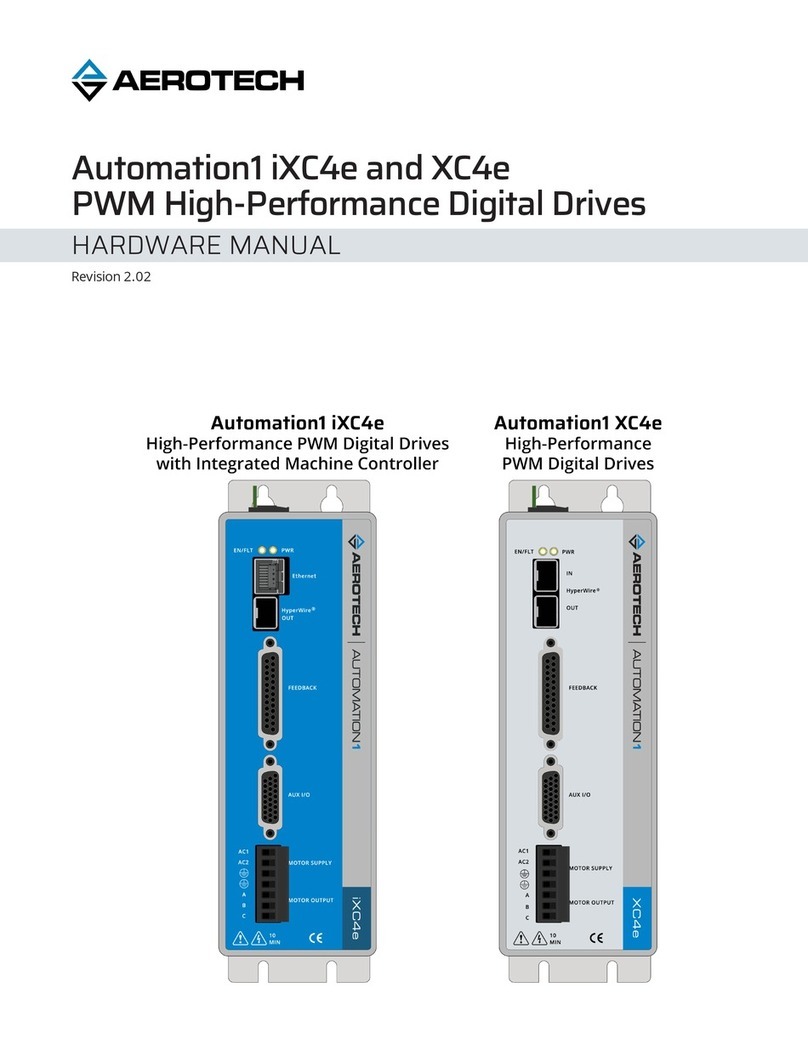
Advantech Automation1 iXC4 User manual

Revision 2.06
Automation1 iXC4 and XC4
PWMDigital Drives
HARDWAREMANUAL

GLOBALTECHNICALSUPPORT
Go to the Global Technical Support Portal for information and support about your
Aerotech, Inc. products. The website supplies software, product manuals, Help files,
training schedules, and PC-to-PC remote technical support. If necessary, you can
complete Product Return (RMA) forms and get information about repairs and spare
or replacement parts. To get help immediately, contact a service office or your sales
representative. Include your customer order number in your email or have it
available before you call.
This manual contains proprietary information and may not be reproduced,
disclosed, or used in whole or in part without the express written permission of
Aerotech, Inc. Product names mentioned herein are used for identification purposes
only and may be trademarks of their respective companies.
Copyright © 2018-2022, Aerotech, Inc., All rights reserved.

Table of Contents
Automation1 iXC4 and XC4 PWMDigital Drives 1
Table of Contents 3
List of Figures 5
List of Tables 7
EU Declaration of Conformity 9
Agency Approvals 10
Safety Procedures and Warnings 11
Handling and Storage 13
Installation Overview 14
Chapter 1: iXC4/XC4 Overview 17
1.1. Electrical Specifications 21
1.1.1. System Power Requirements 22
1.2. Mechanical Specifications 23
1.2.1. Mounting and Cooling 23
1.2.2. Dimensions 24
1.3. Environmental Specifications 26
1.4. Drive and Software Compatibility 26
Chapter 2: Installation and Configuration 27
2.1. Input Power Connections 27
2.1.1. Control Supply Connector 27
2.1.2. Motor Supply Connector 28
2.1.3. Transformer Options 29
2.1.4. Minimizing Noise for EMC/CECompliance 36
2.2. Motor Power Output Connector 37
2.2.1. Brushless Motor Connections 38
2.2.1.1. Brushless Motor Powered Motor and Feedback Phasing 39
2.2.1.2. Brushless Motor Unpowered Motor and Feedback Phasing 40
2.2.2. DCBrush Motor Connections 41
2.2.2.1. DC Brush Motor Phasing 41
2.2.3. Stepper Motor Connections 42
2.2.3.1. Stepper Motor Phasing 42
2.2.4. Three Phase Stepper Motor Connections 43
2.2.4.1. Stepper Motor Phasing 43
2.3. Feedback Connector 44
2.3.1. Primary Encoder Inputs 45
2.3.1.1. Square WaveEncoder (Primary) 46
2.3.1.2. Absolute Encoder (Primary) 47
2.3.1.3. Sine Wave Encoder (Primary) [-MX1 Option] 48
2.3.1.4. Encoder Phasing 50
2.3.2. Hall-Effect Inputs 51
2.3.3. Thermistor Input 52
2.3.4. Encoder Fault Input 53
2.3.5. End of Travel and Home Limit Inputs 54
2.3.5.1. End of Travel and Home Limit Phasing 56
2.3.6. Brake Outputs 57
2.4. Safe Torque Off Input (STO) 58
2.4.1. STOStandards 60
2.4.2. STO Functional Description 61
2.4.3. STO Startup Validation Testing 62
2.4.4. STO Diagnostics 63
2.5. Auxiliary I/O Connector 64
2.5.1. Auxiliary Encoder Interface 65
2.5.1.1. Square WaveEncoder (Auxiliary) 66
2.5.1.2. Absolute Encoder (Auxiliary) 67
2.5.2. Position Synchronized Output (PSO) 68
2.5.3. Digital Outputs 70
2.5.4. Digital Inputs 73
Hardware Manual iXC4/XC4
www.aerotech.com 3

2.5.5. High-Speed Inputs 75
2.5.6. Analog Output 0 76
2.5.7. Analog Input 0 (Differential) 77
2.6. Brake Power Supply Connector 78
2.7. HyperWire Interface 79
2.8. External Shunt Option [-SX1] 80
2.9. Sync Port 82
2.10. Industrial Ethernet (iXC4 Only) 82
2.11. System Interconnection 83
2.12. PC Configuration and Operation Information 86
Chapter 3: -EB1 Option Expansion Board 87
3.1. Digital Outputs [-EB1] 88
3.2. Digital Inputs [-EB1] 92
3.3. Analog Outputs [-EB1] 95
3.4. Analog Inputs [-EB1] 96
3.5. PSOInterface [-EB1] 97
Chapter 4: Cables and Accessories 99
4.1. Joystick Interface 100
4.2. Handwheel Interface 102
Chapter 5: Maintenance 103
5.1. Preventative Maintenance 104
5.2. Fuse Specifications 105
Appendix A: Warranty and Field Service 107
Appendix B: Revision History 109
Index 111
iXC4/XC4 Hardware Manual
4 www.aerotech.com

List of Figures
Figure 1-1: iXC4 Digital Drive-Based Controller Labeled 17
Figure 1-2: XC4 Digital Drive Labeled 18
Figure 1-3: Functional Diagram 20
Figure 1-4: Dimensions 24
Figure 1-5: Dimensions [-EB1] 25
Figure 2-1: Control Supply Connections 27
Figure 2-2: Motor Supply Connections 28
Figure 2-3: TV0.3-28-56-ST Transformer Control and Motor Power Wiring (40 VDC Bus) 30
Figure 2-4: TV0.3-28-56-ST Transformer Control and Motor Power Wiring (80 VDC Bus) 31
Figure 2-5: TV0.3-28-56-ST Transformer Control and Motor Power Wiring (160 VDC Bus) 32
Figure 2-6: TV0.3-28 Transformer Control and Motor Power Wiring (40 VDC Bus) 33
Figure 2-7: TV0.3-56 Transformer Control and Motor Power Wiring (80 VDC Bus) 34
Figure 2-8: TM3/TM5 Transformer Control and Motor Power Wiring 35
Figure 2-9: Brushless Motor Configuration 38
Figure 2-10: Positive Motor Direction 39
Figure 2-11: Encoder and Hall Signal Diagnostics 39
Figure 2-12: Brushless Motor Phasing Oscilloscope Example 40
Figure 2-13: Brushless Motor Phasing Goal 40
Figure 2-14: DC Brush Motor Configuration 41
Figure 2-15: Positive Motor Direction 41
Figure 2-16: Stepper Motor Configuration 42
Figure 2-17: Positive Motor Direction 42
Figure 2-18: Three Phase Stepper Motor Configuration 43
Figure 2-19: Positive Motor Direction 43
Figure 2-20: Square Wave Encoder Schematic (Feedback Connector) 46
Figure 2-21: Absolute Encoder Schematic (Feedback Connector) 47
Figure 2-22: Sine Wave Encoder Phasing Reference Diagram 48
Figure 2-23: Sine Wave Encoder Schematic (Feedback Connector) 49
Figure 2-24: Encoder Phasing Reference Diagram (Standard) 50
Figure 2-25: Position Feedback in the DiagnosticDisplay 50
Figure 2-26: Hall-Effect Inputs Schematic (Feedback Connector) 51
Figure 2-27: Thermistor Input Schematic (Feedback Connector) 52
Figure 2-28: Encoder Fault Input Schematic (Feedback Connector) 53
Figure 2-29: End of Travel and Home Limit Input Connections 55
Figure 2-30: End of Travel and Home Limit Input Schematic (Feedback Connector) 55
Figure 2-31: End of Travel and Home Limit Input Diagnostic Display 56
Figure 2-32: Brake Connected to the 25-Pin Feedback Connector (Typical) 57
Figure 2-33: Typical STO Configuration 59
Figure 2-34: STO Timing 63
Figure 2-35: Square Wave Encoder Interface (Aux I/OConnector) 66
Figure 2-36: Absolute Encoder Schematic (Auxiliary I/O Connector) 67
Figure 2-37: PSO Interface 69
Figure 2-38: Digital Output Schematic (Aux I/OConnector) 71
Figure 2-39: Digital Outputs Connected in Current Sourcing Mode 72
Figure 2-40: Digital Outputs Connected in Current Sinking Mode 72
Figure 2-41: Digital Inputs Schematic (Aux I/OConnector) 73
Figure 2-42: Digital Inputs Connected to Current Sourcing Devices 74
Figure 2-43: Digital Inputs Connected to Current Sinking Devices 74
Hardware Manual iXC4/XC4
www.aerotech.com 5

Figure 2-44: High-Speed Inputs 75
Figure 2-45: Analog Output 0 Schematic 76
Figure 2-46: Analog Input 0 Schematic 77
Figure 2-47: Drive-Based System Wiring Drawing (Best Practice) 83
Figure 2-48: PC-Based System Wiring Drawing (Best Practice) 83
Figure 2-49: Drive-Based Controller System Interconnection (Best Practice) 84
Figure 2-50: PC-Based Controller System Interconnection (Best Practice) 85
Figure 3-1: -EB1 I/O Option Board Connectors (iXC4 shown) 87
Figure 3-2: Digital Outputs Schematic [-EB1] 90
Figure 3-3: Digital Outputs Connected in Current Sourcing Mode [-EB1] 91
Figure 3-4: Digital Outputs Connected in Current Sinking Mode [-EB1] 91
Figure 3-5: Digital Inputs Schematic [-EB1] 93
Figure 3-6: Digital Inputs Connected to Current Sourcing (PNP) Devices [-EB1] 94
Figure 3-7: Digital Inputs Connected to Current Sinking (NPN) Devices [-EB1] 94
Figure 3-8: Analog Output Typical Connection [-EB1] 95
Figure 3-9: Analog Input Typical Connection [-EB1] 96
Figure 3-10: PSO Output Sources Current 98
Figure 3-11: PSOOutput Sinks Current 98
Figure 3-12: PSO TTLOutputs Schematic 98
Figure 4-1: Two Axis Joystick Interface (to the Aux I/O of two drives) 100
Figure 4-2: Two Axis Joystick Interface (to the I/Oboard) 101
Figure 4-3: Handwheel Interconnection to Aux I/O Connector 102
Figure 4-4: Handwheel Interconnection to the Aux I/O through a BBA32 Module 102
iXC4/XC4 Hardware Manual
6 www.aerotech.com

List of Tables
Table 1-1: Features and Options 19
Table 1-2: Electrical Specifications (Common) 21
Table 1-3: Electrical Specifications (by Ordering Option) 21
Table 1-4: Mounting Specifications 23
Table 1-5: Environmental Specifications 26
Table 1-6: Drive and Software Compatibility 26
Table 2-1: Control Supply Connector Pinout 27
Table 2-2: Control Supply Mating Connector Ratings 27
Table 2-3: Motor Supply Connector Pinout 28
Table 2-4: Motor Supply Mating Connector Ratings 28
Table 2-5: Nominal Motor Operating Voltages / Required ACVoltages 29
Table 2-6: TransformerOptions 29
Table 2-7: Motor Power Output Connector Pinout 37
Table 2-8: Motor Power Output Mating Connector Ratings 37
Table 2-9: Wire Colors for Aerotech-Supplied Brushless Motor Cables 38
Table 2-10: Hall Signal Diagnostics 39
Table 2-11: Wire Colors for Aerotech-Supplied DCBrush Motor Cables 41
Table 2-12: Wire Colors for Aerotech-Supplied Stepper Motor Cables 42
Table 2-13: Feedback Connector Pinout 44
Table 2-14: Feedback Mating Connector Ratings 44
Table 2-15: Multiplier Options 45
Table 2-16: Primary Encoder Pins on the Feedback Connector 45
Table 2-17: Square Wave Encoder Specifications 46
Table 2-18: Sine Wave Encoder Specifications 48
Table 2-19: Hall-Effect Feedback Pins on the Feedback Connector 51
Table 2-20: Thermistor Input Pin on the Feedback Connector 52
Table 2-21: Encoder Fault Input Pin on the Feedback Connector 53
Table 2-22: End of Travel and Home Limit Pins on the Feedback Connector 54
Table 2-23: Brake Output Pins on the Feedback Connector 57
Table 2-24: Brake Control Specifications 57
Table 2-25: STO Connector Pinout 58
Table 2-26: STOMating ConnectorRatings 58
Table 2-27: STOElectrical Specifications 59
Table 2-28: STOStandards 60
Table 2-29: STOStandards Data 60
Table 2-30: STOSignal Delay 62
Table 2-31: Motor Function Relative to STOInput State 62
Table 2-32: STOTiming 63
Table 2-33: Auxiliary I/O Connector Pinout 64
Table 2-34: Auxiliary I/OMating Connector Ratings 64
Table 2-35: Auxiliary Encoder Pins on the Auxiliary I/OConnector 65
Table 2-36: Square Wave Encoder Specifications 66
Table 2-37: PSO Specifications 68
Table 2-38: PSOPins on the Auxiliary I/OConnector 68
Table 2-39: Digital Output Specifications 70
Table 2-40: Digital Output Pins on the Auxiliary I/O Connector 70
Table 2-41: Digital Input Specifications 73
Table 2-42: Digital Input Pins on the Auxiliary I/O Connector 73
Hardware Manual iXC4/XC4
www.aerotech.com 7

Table 2-43: High-Speed Input Specifications 75
Table 2-44: High-Speed Input Pins on the Auxiliary I/O Connector 75
Table 2-45: Analog Output Specifications 76
Table 2-46: Analog Output Pins on the Auxiliary I/O Connector 76
Table 2-47: Analog Input Specifications 77
Table 2-48: Analog Input Pins on the Auxiliary I/O Connector 77
Table 2-49: Brake Power Supply Connector Pinout 78
Table 2-50: Brake Power Supply Mating Connector Ratings 78
Table 2-51: HyperWire Card Part Number 79
Table 2-52: HyperWire Cable Part Numbers 79
Table 2-53: -SX1Component Information 80
Table 2-54: Maximum Additional Storage Energy for a Standard iXC4/XC4 81
Table 2-55: Sync-Related Functions 82
Table 2-56: SyncPort Cables 82
Table 3-1: Digital Output Specifications [-EB1] 88
Table 3-2: Digital Output 1 Connector Pinout [-EB1] 89
Table 3-3: Digital Output 2 Connector Pinout [-EB1] 89
Table 3-4: Digital Output 1 and 2 Mating Connector Ratings [-EB1] 89
Table 3-5: Digital Input Specifications [-EB1] 92
Table 3-6: Digital Input 1 Connector Pinout [-EB1] 92
Table 3-7: Digital Input 2 Connector Pinout [-EB1] 93
Table 3-8: Digital Input 1 and 2 Mating Connector Ratings [-EB1] 93
Table 3-9: Analog Output Specifications [-EB1] 95
Table 3-10: Analog Output Connector Pinout [-EB1] 95
Table 3-11: Analog Output Mating Connector Ratings [-EB1] 95
Table 3-12: Differential Analog Input Specifications [-EB1] 96
Table 3-13: Analog Input Connector Pinout [-EB1] 96
Table 3-14: Analog Input Mating Connector Ratings [-EB1] 96
Table 3-15: PSO Specifications [-EB1] 97
Table 3-16: PSO Interface Connector Pinout [-EB1] 97
Table 3-17: PSO Interface Mating Connector Ratings [-EB1] 97
Table 4-1: Standard Interconnection Cables 99
Table 5-1: LEDDescription 103
Table 5-2: Troubleshooting 103
Table 5-3: Preventative Maintenance 104
Table 5-4: Control Board Fuse Specifications 105
iXC4/XC4 Hardware Manual
8 www.aerotech.com

EU Declaration of Conformity
Manufacturer Aerotech, Inc.
Address 101 Zeta Drive
Pittsburgh, PA 15238-2811
USA
Product iXC4/XC4
Model/Types All
This is to certify that the aforementioned product is in accordance with the applicable requirements
of the following directive(s):
2014/30/EU Electromagnetic Compatibility (EMC)
2014/35/EU Low Voltage Directive
2006/42/EC Machinery Directive
2011/65/EU RoHS 2 Directive
EU 2015/863 Amendment RoHS 3 Directive
and has been designed to be in conformity with the applicable requirements of the following
standard(s) when installed and used in accordance with the manufacturer’s supplied installation
instructions.
EN 61010-1:2010/AMD1:2016 Safety Requirements for Electrical Equipment
EN 61800-3:2004/A1:2011 EMCRequirements for Power Drives
IEC 61800-5-1:2016 Electrical Safety for Power Drive Systems
IEC 61800-5-2:2016 Functional Safety for Power Drive Systems
EN 55011:2000/A2:2003 Conducted and Radiated Emissions
EN 55022:1998 Conducted and Radiated Emissions
Authorized
Representative / Simon Smith, European Director
Aerotech Ltd
The Old Brick Kiln, Ramsdell, Tadley
Hampshire RG26 5PR
UK
Engineer Verifying
Compliance / Alex Weibel
Aerotech, Inc.
101 Zeta Drive
Pittsburgh, PA 15238-2811
USA
Date 7/25/2022
Hardware Manual iXC4/XC4
www.aerotech.com 9

Agency Approvals
Aerotech tested its XC4 drives and found that they obey the standards that follow:
Approval: CUS NRTL
Approving Agency: TUV SUD America Inc.
Certificate #: U10 068995 0033 Rev. 00
Standards: CSA C22.2 No. 61010-1:2012/A1:2018-11,
UL 61010-1:2012/R2019-07
Certificate #: N8AUS 068995 0032 Rev. 01
Standards: CE Attestation of Conformity,
Low Voltage Directive 2014/35/EU,
EN 61010-1:2010/AMD1:2019
IMPORTANT: The safety components (STO) certification is pending for the iXC4.
Approval: Safety Components (STO)
Approving Agency: TUVSUD
Certificate #: Z10 068995 0030 Rev. 00
Standards: EN ISO 13849-1:2015 (up to PL e),
IEC 61508-1:2010 (up to SIL3),
IEC 61508-2:2010 (up to SIL3),
IEC 61800-5-2:2016,
IEC 62061:2005 (up to SILCL3),
IEC 62061:2005/AMD1:2012 (up to SILCL3),
IEC 62061:2005/AMD2:2015 (up to SILCL3)
Visit https://www.tuev-sued.de/product-testing/certificates to view Aerotech's TÜV SÜD certificates.
Type the certificate number listed above in the search bar or type "Aerotech" for a list of all Aerotech
certificates.
iXC4/XC4 Hardware Manual
10 www.aerotech.com

Safety Procedures and Warnings
IMPORTANT: This manual tells you how to carefully and correctly use and operate the
drive.
lRead all parts of this manual before you install or operate the drive or before you do
maintenance to your system.
lTo prevent injury to you and damage to the equipment, obey the precautions in this
manual.
lAll specifications and illustrations are for reference only and were complete and
accurate as of the release of this manual. To find the newest information about this
product, refer to www.aerotech.com.
If you do not understand the information in this manual, contact Aerotech Global
Technical Support.
IMPORTANT: This product has been designed for light industrial manufacturing or
laboratory environments. If the product is used in a manner not specified by the
manufacturer:
lThe protection provided by the equipment could be impaired.
lThe life expectancy of the product could be decreased.
Safety notes and symbols are placed throughout this manual to warn you of the potential risks at the
moment of the safety note or if you fail to obey the safety note.
The voltage can cause shock, burn, or death.
You are at risk of physical injury.
You could damage the drive.
A surface can be hot enough to burn you.
Your actions, the temperature of the system, or the condition of the atmosphere
that surround the system could start a fire.
Components are sensitive to electrostatic discharge.
Unsecured cables could cause you to:
ltrip and fall
ldrag the product off of its mounting location
ldamage the cable connections.
A blue circle symbol is an action or tip that you should obey. Some examples
include:
lGeneral tip
lRead the manual/section
lWear protective safety equipment (eye protection, ear protection, gloves)
lIf applicable, do not lift unassisted
Hardware Manual iXC4/XC4
www.aerotech.com 11

DANGER: To decrease the risk of electrical shock, injury, death, and damage to the
equipment, obey the precautions that follow.
1. Before you do maintenance to the equipment, disconnect the electrical power.
2. Restrict access to the drive when it is connected to a power source.
3. Do not connect or disconnect electrical components, wires, and cables while this
product is connected to a power source.
4. Wait at least ten (10) minutes after removing the power supply before doing
maintenance or an inspection. Otherwise, there is the danger of electric shock.
5. Supply each operator with the necessary protection from live electrical circuits.
6. Make sure that all components are grounded correctly and that they obey the local
electrical safety requirements.
7. Install the necessary precautions to supply safety and protection to the operator.
DANGER: System travel can cause crush, shear, or pinch injuries. Restrict access to all
motor and stage parts while your system is connected to a power source.
WARNING: To prevent damage to the equipment and decrease the risk of electrical
shock and injury, obey the precautions that follow.
1. Make sure that all system cables are correctly attached and positioned.
2. Do not use the cables or the connectors to lift or move this product.
3. Use this product only in environments and operating conditions that are approved
in this manual.
4. Only trained operators should operate this equipment.
iXC4/XC4 Hardware Manual
12 www.aerotech.com

Handling and Storage
Unpacking the drive
IMPORTANT: All electronic equipment and instrumentation is wrapped in antistatic
material and packaged with desiccant. Ensure that the antistatic material is not
damaged during unpacking.
Inspect the shipping container for any evidence of shipping damage. If any damage exists, notify the
shipping carrier immediately.
Remove the packing list from the shipping container. Make sure that all the items specified on the
packing list are contained within the package.
The documentation for the drive is on the included installation device. The documents include
manuals, interconnection drawings, and other documentation pertaining to the system. Save this
information for future reference. Additional information about the system is provided on the Serial
and Power labels that are placed on the chassis.
The system serial number label contains important information such as the:
lCustomer order number (please provide this number when requesting product support)
lDrawing number
lSystem part number
Handling
IMPORTANT: It is the responsibility of the customer to safely and carefully lift and
move the drive.
lBe careful when you move or transport the drive.
lRefer to Section 1.2. Mechanical Specifications for dimensions and weight spe-
cifications.
lRetain the shipping materials for future use.
lTransport or store the drive in its protective packaging.
WARNING: Electrostatic Discharge (ESD) Sensitive Components!
You could damage the power supply or drives if you fail to observe the correct
ESDpractices.
Wear an ESDwrist strap when you handle, install, or do service to the system assembly.
Storage
Store the drive in the original shipping container. If the original packaging included ESDprotective
packaging, make sure to store the drive in it. The storage location must be dry, free of dust, free of
vibrations, and flat.
Refer to Section 1.3. Environmental Specifications.
Hardware Manual iXC4/XC4
www.aerotech.com 13

Installation Overview
The images that follow show the order in which to make connections and settings that are typical to
the iXC4/XC4. If a custom interconnect drawing was supplied with your system, that drawing is on
your Storage Device and shows as a line item on your Sales Order in the Integration section.
Figure 1: Installation Connection Overview for the iXC4
1Connect the motor to the amplifier Motor Output connector. Section 2.2.
Connect the motor to the amplifier Feedback connector. Section 2.3.
2Connect the PCto the USB or Ethernet port. N/A
3Connect the next drive in the system to the HyperWire Out port. Section 2.7.
4Connect additional I/O as required by your application
(if you purchased the I/O option).
Section 2.5./
Chapter 3
5Connect the Safe Torque Off (STO). Section 2.4.
6Connect the power supply to the Control Supply connector. Section 2.1.1.
7Connect the motor power to the Motor Supply connector. Section 2.1.2.
iXC4/XC4 Hardware Manual
14 www.aerotech.com

Figure 2: Installation Connection Overview for the XC4
1Connect the motor to the amplifier Motor Output connector. Section 2.2.
Connect the motor to the amplifier Feedback connector. Section 2.3.
2Connect a PCor drive-based controller HyperWire port to the HyperWire In
port. Section 2.7.
3Connect additional I/O as required by your application
(if you purchased the I/O option).
Section 2.5./
Chapter 3
4Connect the Safe Torque Off (STO). Section 2.4.
5Connect the power supply to the Control Supply connector. Section 2.1.1.
6Connect the motor power to the Motor Supply connector. Section 2.1.2.
Hardware Manual iXC4/XC4
www.aerotech.com 15

This page intentionally left blank.
iXC4/XC4 Hardware Manual
16 www.aerotech.com

Chapter 1: iXC4/XC4 Overview
The iXC4 is a high-performance digital drive-based controller. It runs the Automation1-iSMC
controller to generate commands for itself as well as for additional drives on the chain.
The XC4 is a high performance digital drive. The XC4 is based on the HyperWire communication
protocol and receives commands from a PC or drive-based controller.
Both drives provide deterministic behavior, auto-identification, and are fully software configurable. A
double precision floating point DSP controls the digital PID and current loops. Both drives offer
standard Safe Torque Off (STO) inputs and optional Position Synchronized Output (PSO) outputs.
And both drives are offered with an optional encoder interpolation feature (-MX1), an auxiliary
encoder input for dual loop control, dedicated analog and digital I/O (expandable with the -EB1
option), and separate power connections for motor and control supply voltages.
Figure 1-1: iXC4 Digital Drive-Based Controller Labeled
Hardware Manual iXC4/XC4
www.aerotech.com 17

Figure 1-2: XC4 Digital Drive Labeled
iXC4/XC4 Hardware Manual
18 www.aerotech.com

Table 1-1: Features and Options
Standard Features
l100-240 VAC control supply inputs (Section 2.1.1.)
l0-240 VAC motor supply inputs (producing 340 VDC) (Section 2.1.2.)
lLine driver square wave quadrature encoder input for position and velocity feedback (Section
2.3.1.)
lAbsolute Encoder support on the Feedback connector (Section 2.3.1.2.)
lOne fail-safe brake output (Section 2.3.6.)
lTwo STOsense inputs (Section 2.4.)
lLine driver square wave auxiliary quadrature encoder input or output for PSO(Section 2.5.1.)
lAbsolute Encoder support on the Auxiliary I/O connector (Section 2.5.1.2.)
lFour digital user outputs (Section 2.5.3.)
oSix digital user inputs
oFour Digital Inputs (Section 2.5.4.)
lTwo High-Speed Inputs (Section 2.5.5.)
lOne 16-bit analog output (±10 V) (Section 2.5.6.)
lOne 16-bit differential analog input (±10 V) (Section 2.5.7.)
lOne 10/100/1000 BASE-T Ethernet Port (iXC4 Only)
lOne USB2.0 Type CPort (iXC4 Only)
lTwo 10/100/1000 BASE-T Industrial Ethernet Ports (iXC4 Only)
Options
Peak Current (Section 1.1.)
-10 10 A Peak, 5 A Continuous Current
-20 20 A Peak, 10 A Continuous Current
-30 30 A Peak, 10 A Continuous Current
Expansion Board (Chapter 3)
-EB0 No expansion board
-EB1
I/Oexpansion board
lThree 16-bit analog outputs (±10 V)
lThree 16-bit differential analog inputs (±10 V)
l16 digital logic inputs (5 - 24 VDC), may be connected to current sourcing or
sinking devices
l16 digital logic outputs (5 - 24 VDC), user defined as current sourcing or sinking
lDigital logic laser firing (PSO) output
Multiplier (Section 2.3.1.3.)
-MX0 No encoder multiplier
-MX1 Interpolation circuit allowing for analog sine wave input on the primary encoder
channel with an interpolation factor of 16,384.
PSO (Section 2.5.2.)
-PSO1 One-axis PSO firing (includes One-axis Part-Speed PSO)
External Shunt (Section 2.8.)
-SX0 No connector for the External Shunt
-SX1 Connection provided for an external shunt resistor network
Version
-DEFAULT Firmware Matches Software Line
-LEGACY Legacy Firmware Version X.XX.XXX
Hardware Manual iXC4/XC4
www.aerotech.com 19

The block diagram that follows shows a summary of the connector signals.
Figure 1-3: Functional Diagram
iXC4/XC4 Hardware Manual
20 www.aerotech.com
This manual suits for next models
1
Table of contents
Other Advantech DC Drive manuals
Popular DC Drive manuals by other brands

Western Digital
Western Digital Ultrastar DC ME200 product manual
Isel
Isel LES4 Assembly instructions
Lenze
Lenze EtherNet/IP E84AYCEO Communications manual
iRZ
iRZ 500 Series installation manual
Danfoss
Danfoss VLT AQUA Drive FC 202 operating instructions
Applied Motion Products
Applied Motion Products BLuAC5 Hardware manual

ABB
ABB ACS580MV Commissioning manual
CHINSC ELECTRIC
CHINSC ELECTRIC SVF-G7 Series Operation manual

Rexnord
Rexnord Falk Quadrive A Mounting & installation

Rockwell Automation
Rockwell Automation PowerFlex 7000 instructions
Pepperl+Fuchs
Pepperl+Fuchs HiD2038 instruction manual

GFA
GFA ELEKTROMAT SI 25.15-30,00 installation instructions
